
LED TV
user manual
Still image warning
recommendations below:
menu to select the optimal screen size.
in process.
For India Only
Correct Disposal of This Product
(Waste Electrical & Electronic Equipment)
This marking on the product & accessories literature indicates that
the product and its electronic accessories (e.g. charger, headset,
USB cable) should not be disposed of with other household waste
at the end of their working life. To prevent possible harm to the
environment or human health from uncontrolled waste disposal,
please separate these items from other types of waste and recycle
them responsibly to promote the sustainable reuse of material
resources House hold users should contact either the retailer
where they purchased this product, or their local government
ofce, for details of where and how they can take these items for
environmentally safe recycling.
Business user should contact their supplier and check the terms
and conditions of the purchase contract. This product and its
electronic accessories should not be mixed other commercial
wastes for disposal.
available in all regions.
Contact SAMSUNG WORLDWIDE
Area
Customer Care Centre Web Site
www.samsung.com/sg/support
www.samsung.com/au/support
www.samsung.com/nz/support
1800 588 889 www.samsung.com/vn/support
www.samsung.com/th/support
www.samsung.com/th/support
1800-88-9999
www.samsung.com/my/support
www.samsung.com/id/support
www.samsung.com/ph/support
www.samsung.com/tw/support
www.samsung.com/in/support
www.samsung.com/in/support
www.samsung.com/in/support
+94115900000
www.samsung.com/in/support
16580
www.samsung.com/eg/support
www.samsung.com/iran/support
www.samsung.com/il/support
www.samsung.com/sa/home
www.samsung.com/sa_en
80 1000 12
www.samsung.com/ae/support
www.samsung.com/ae_ar/support
www.samsung.com/tr/support
www.samsung.com/levant/support
1299
80010080
080 100 22 55
options available on your TV. The Tools menus display a selected number
you are viewing. A Tools menu symbol (
screen indicates that a Tools menu is available.
Input
Application
Channel
MENU button on your remote. To view
a Tools menu, press the TOOLS button on your remote.
✎
categories. A Tools button symbol (
Picture Mode A
✎
Entertain
and Standard.
■
Dynamic
■
Standard
■
Movie
■
Entertain
✎
Backlight / Contrast / Brightness / Sharpness /
Color / Tint (G/R)
■
Backlight
■
Contrast
■
Brightness
■
Sharpness
Source List
1. SOURCE button.
2.
■
TV / AV / Component / HDMI1 / HDMI2/DVI
✎
In the Source List, connected inputs will be highlighted.
How to use Edit Name
Edit Name lets you associate a device name to an input source. To
access Edit Name, enter Support menu and select Edit Name
selection easier.
✎
HDMI IN 2(DVI)
✎
HDMI IN 2(DVI)
✎
HDMI IN 2(DVI)
Accessories
Input Cables (Sold Separately)
Component
TV Controller (Panel Key)
Turn on the TV using the button on the remote control or TV panel.
✎
The product colour and shape may vary depending on the model.
✎
✎
input source.
Plug & Play (Initial Setup)
✎
✎
✎
Installing batteries (Battery size: AAA)
✎
The Colour and shape may vary depending on the model.
an upgrade.
not display or a connection error may occur.
PC / DVI AUDIO IN input is not supported.
HDMI IN 2(DVI) port.
HDMI IN 2(DVI) port, the audio does not
the HDMI IN 1 port.
■
HDMI Black Level (Normal / Low)
✎
Available only in HDMI
■
Film Mode (Off / Auto1 / Auto2)
✎
■
Motion Lighting (Off / On)
the TV displays bright scenes.
Picture Off
Picture Reset
■
Picture Reset (Reset Picture Mode/Cancel)
Sound Mode A
■
Standard
■
Music
■
Movie
■
Clear Voice
Equalizer
■
Balance
L/R
■
100Hz / 300Hz / 1KHz / 3KHz / 10KHz
■
Reset
Audio Language
■
Primary Audio
■
Secondary Audio
✎
Audio Format
✎
Auto Volume
Automatically adjusts the volume level when you change video sources
or content so the level remains the same.
SPDIF Output
■
Audio Format
on the input source.
■
Audio Delay
Audio Delay, a
Plug & Play
Plug & Play
Language
Time
✎
The time you set will appear when you press the INFO button.
■
Clock
the TV.
✎
To set the clock, follow these steps:
Setup >Time > Clock.
ENTER
and select Auto or Manual, and then press ENTER
again.
If you selected Auto:
channel.
If you selected Manual:
The Clock Set
ENTER .
✎
Available only when Clock Mode is set to Manual.
■
Sleep Timer A
✎
To cancel the Sleep Timer, select Off.
Timer 1 / Timer 2 / Timer 3
✎
■
On Time / Off Time
On Time and Off Time
◄
/
►
▲
/
▼
buttons to
Activate.
■
Volume
■
Contents: To select what will be turned on when the timer setting
◄
/
►
ENTER
◄
/
►
buttons to
▲
/
▼
buttons to change the values
TV/USBTV or USB
AerialATV or DTV.
Channel
Music/Photo
✎
✎
The media may not be playing smoothly when using the device
■
RepeatOnce, Everyday, Mon~Fri, Mon~Sat, Sat~Sun or
Manual to
up the day you want to activate the timer.
Speaker Select
External Speaker.
✎
Speaker Select to External Speaker
Speaker Select to TV Speaker both the TV’s
through both.
✎
Speaker Select is set to External Speaker, the VOLUME and
MUTE buttons will not operate and the sound settings will be limited.
✎
Dolby Digital Comp
Audio Description
■
Audio Description
■
Volume: Adjusts the audio description volume.
TV Installtion Type
HDMI Audio Format
Sound Reset
■
Reset All
Auto Store
Manual Store
✎
According to channel source, Manual Store may be supported.
✎
Programme, Colour System, Sound System, Channel, Search, Store:
Mini Guide
Channel List
the All Channels, Added Channels, or Favourites screen, pressing the
ENTER button.
■
All Channels:
Added Channels list.
■
Added ChannelsAdded Channels. These are the
■
Favourites
■
Programmed
scheduled using Timer Viewing.
✎
button to select the channel. A
additional channels. Then, open the Tools menu and apply a
Display Modes (HDMI/DVI Input)
Vertical
-/+
-/-
-/-
68.681 100.000 -/-
59.940 -/-
-/-
-/-
40.000 +/+
50.000 +/+
49.500 +/+
60.004 65.000 -/-
-/-
+/+
108.000 +/+
45.000 60.000 +/+
59.810 -/+
60.020 108.000 +/+
+/+
85.500 +/+
106.500 -/+
60.000 60.000 108.000 +/+
65.290 59.954 146.250 -/+
60.000 148.500 +/+
■
Color: Adjusts the color saturation. The higher the Color setting,
■
Tint (G/R)
and vice versa.
✎
Backlight, Contrast, Brightness, and Sharpness.
Picture Options
■
Colour Tone (Cool / Standard / Warm)
✎
Warm is deactivated when the picture mode is set to Dynamic.
■
Size
16:9
Wide Zoom
Zoom
4:3
✎
covered by the warranty.
Screen Fit
✎
✎
have connected to an input on the TV.
Custom
✎
connected to an input on the TV.
■
Digital Clean View (Off / Low / Medium / High / Auto)
that may appear on the screen.
✎
is displayed.
The On Screen Menus
Changing the Input Source
Getting Started
Important Safety Instructions
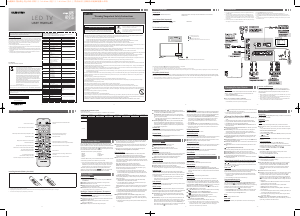
Remote Control
Connections
Sound Menu
Channel Menu
Picture Menu
- 6 -- 5 - - 8 -
- 4 -- 2 -- 1 -
✎
❑
Channel List Option Menu A
■
Add / Delete:
want.
✎
All deleted channels will be shown on the All Channels menu.
✎
A grey-coloured channel indicates the channel has been deleted.
✎
The Add
✎
Added Channels or Favourites menu in
the same manner.
■
Add to Favourite / Delete from Favourite:
■
Timer Viewing
automatically at the set time; even when you are watching
✎
✎
■
Edit Channel Name
channel name.
■
Edit Channel Number
to change the channel number.
■
Select All / Deselect All
channel list.
■
Auto Store
TV.
Programmed (in Channel List)
■
Change Info: Change a show you have reserved to watch.
■
Cancel Schedules: Cancel a show you have reserved to watch.
■
Information
■
Select All / Deselect All
in the channel list.
Channel Mode (Added Channels/Favorite Channels)
you press the
button.
Fine Tune
✎
channel banner.
✎
Programme Rating Lock
MENU
button
and select
Channel > Programme Rating Lock
and
then press
ENTERE to set Programme Rating Lock
✎
Program Rating Lock
✎
Change PIN
Area
Post code
broadcasts.
Setup Menu
Warning! Important Safety Instructions
(Please read the safety instructions below before installing and using the product.)
outlet and disconnect the antenna or cable system. This will prevent damage to the set due to lightning and power line surges.
not touch the power cord with wet hands.
contact an authorized dealer or service center.
the insulation to deteriorate.
damage to your set.
accessible at all times.
the product.
GUIDE
AD/SUBT.
Turns the TV on and off.
Displays and selects the available video
sources.
Cuts off the sound temporarily.
Changes channels.
Displays the main on-screen menu.
Displays information on the TV screen.
Exit the menu.
Use these buttons in a specic feature.
Use these buttons according to the direction
on screen.
Displays the EPG(Electronic Programme Guide).
Returns to the previous channel.
Press to directly access to channels.
Adjusts the volume.
E-MANUAL:Not available.
PIC SIZE:Selects the picture size.
AD/SUBT.:Displays the Accessibility shortcuts.
Displays the channel list on the screen.
Views the Media Play.
Quickly select frequently used functions.
Returns to the previous menu.
Selects the on-screen menu items and changes
the values seen on the menu.
Alternately select Teletext ON,Double,Mix or OFF.
Press: Move
Press & Hold: Select
: Changes channels.
: Adjusts the volume.
CAUTION
This symbol indicates that high voltage is present
RISK OF ELECTRIC SHOCK DO NOT OPEN
This symbol alerts you that important literature
concerning operation and maintenance has been
included with this product.
80g雙膠紙 / 雙面單色(黑色)印刷 / 展開尺寸 :592*420mm ;成型尺寸 : 148*210mm / 折法 :上下對折後再左右彈簧折(料號條碼需露出)(單張)

Praat mee over dit product
Laat hier weten wat jij vindt van de Samsung UA32N4003AK LED televisie. Als je een vraag hebt, lees dan eerst zorgvuldig de handleiding door. Een handleiding aanvragen kan via ons contactformulier.