Size: 19.685" x 17.5"
Customer Care Line:
USA 1-800-231-9786
Accessories/Parts (USA)
1-800-738-0245
For online customer service
and to register your product, go to
www.prodprotect.com/applica
Servicio para el cliente:
México 01-800 714-2503
Accesorios/Partes (EE.UU)
1-800-738-0245
Para servicio al cliente y para
registrar su garantía, visite
www.prodprotect.com/applica
Código de fecha / Date Code
Sello del Distribuidor:
Fecha de compra:
Modelo:
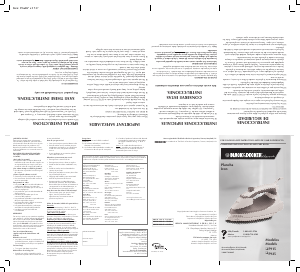
QUICKPRESS
™
IRON
PLANCHA QUICKPRESS
™
2011/7-8-26E/S
MODEL/MODELO
❍ AS75
Please Read and Save this Use and Care Book.
IMPORTANT SAFEGUARDS
When using your iron, basic safety precautions should always be
followed, including the following:
❍Read all instructions before using.
❍Use iron only for its intended use.
❍To protect against a risk of electric shock, do not immerse the
iron in water or other liquid.
❍The iron should always be turned off (0) (refer to HOW TO USE
section) before plugging into or unplugging from an outlet. Never
yank cord to disconnect from outlet; instead grasp plug and pull
to disconnect.
❍Do not allow cord to touch hot surfaces. Let iron cool completely
before putting away. Loop cord loosely around cord wrap when
storing.
❍Always disconnect iron from electrical outlet when filling with or
emptying of water and when not in use.
❍Do not operate iron with a damaged cord or if the iron has been
dropped or damaged. To avoid the risk of electric shock, do not
disassemble the iron, take it to a qualified serviceman for
examination and repair. Incorrect reassembly can cause a risk of
electric shock when the iron is used.
❍Close supervision is necessary for any appliance being used by
or near children. Do not leave iron unattended while connected
or on an ironing board.
❍Burns can occur from touching hot metal parts, hot water, or
steam. Use caution when you turn a steam iron upside down or
use the surge of steam—there may be hot water in the water
tank. Avoid rapid movement of iron to minimize hot water
spillage.
❍This appliance is not intended for use by persons (including
children) with reduced physical, sensory or mental capabilities, or
lack of experience and knowledge, unless they have been given
supervision or instruction concerning use of the appliance by a
person responsible for their safety.
❍Children should be supervised to ensure that they do not play with
the appliance.
❍The iron must be used and rested on a stable surface.
– When placing the iron on its stand, ensure that the surface on
which the stand is placed is stable.
– The iron is not to be used if it has been dropped, if there are
visible signs of damage or if it is leaking.
SPECIAL INSTRUCTIONS
❍To avoid a circuit overload, do not operate another high-wattage
appliance on the same circuit.
❍If an extension cord is absolutely necessary, a 15-ampere cord
should be used. Cords rated for less amperage may overheat.
Care should be taken to arrange the cord so that it cannot be
pulled or tripped over.
SAVE THESE INSTRUCTIONS.
This product is for household use only.
POLARIZED PLUG
This appliance has a polarized plug (one blade is wider than the other).
To reduce the risk of electric shock, this plug is intended to fit into a
polarized outlet only one way. If the plug does not fit fully into the outlet,
reverse the plug. If it still does not fit, contact a qualified electrician.
Do not attempt to modify the plug in any way.
TAMPER-RESISTANT SCREW
Warning: This appliance is equipped with a tamper-resistant screw to
prevent removal of the outer cover. To reduce the risk of fire or electric
shock, do not attempt to remove the outer cover. There are no user-
serviceable parts inside. Repair should be done only by authorized
service personnel.
Note: If the power supply cord is damaged, it should be replaced by
qualified personnel; in Latin America, by an authorized service center.
How to Use
This appliance is for household use only.
GETTING STARTED
• Remove any labels, stickers or tags attached to the body or soleplate of the iron.
• Please go to www.prodprotect.com/applica to register your warranty.
Note: Use ordinary tap water for ironing. Do not use water processed through a
home softening system.
Important: For optimum performance, let the iron stand until the
indicator light goes out (approximately 60 to 90 seconds) before beginning
to iron.
FILLING WATER TANK
1. Tilt the iron and using a clean measuring cup, pour water into opening until water
reaches the MAX level mark on the water tank. Do not overfill.
2. Plug in the iron. The power indicator light comes on.
Tip: If unsure of a garment’s fiber, test a small area (on an inside seam or hem)
before ironing.
STEAM IRONING
1. Move the variable steam selector to the desired steam level.
2. Turn the fabric select dial to appropriate setting (between 4 and 6) for your fabric.
See fabric guide on the heel rest and read garment’s label to help you determine
fabric type. The temperature ready light glows until it reaches the appropriate
temperature. It then cycles on and off during ironing.
3. When finished ironing, turn the fabric select dial to lowest heat setting, move the
selector to Min and unplug the iron.
DRY IRONING
1. Make sure selector is set to Min. You may want to empty the water (see
EMPTYING WATER TANK).
2. Turn the fabric select dial to the appropriate setting for your fabric. See fabric
guide on the heel rest and read garment’s label to help you determine fabric
type.
SURGE OF STEAM
• Horizontal
1. With the water tank filled to the MAX mark, turn the fabric select dial to at least
setting 4 and let iron stand on its heel rest about 60 seconds.
2. To remove tough wrinkles, pump the button a few times at 5-second intervals
for a concentrated surge of steam.
• Vertical
1. Hang the garment to be steamed on a clothes hanger. (Curtains or drapes can be
steamed once they are hung.)
2. Move the variable steam selector to max.
3. Hold the iron close to, but not touching, the fabric.
4. Pull the fabric tight in your free hand and pump the button as you move the
iron over the fabric.
SPRAY
You can use spray at any setting. Check that the water tank is filled with water.
Press the button. If spray is weak, pump the button a few times.
EMPTYING WATER TANK
1. Turn the fabric select dial to Min. Unplug the iron and allow it to cool.
2. Empty the water by holding the iron over a sink with the tip pointing down. Water
will empty out of water-fill opening.
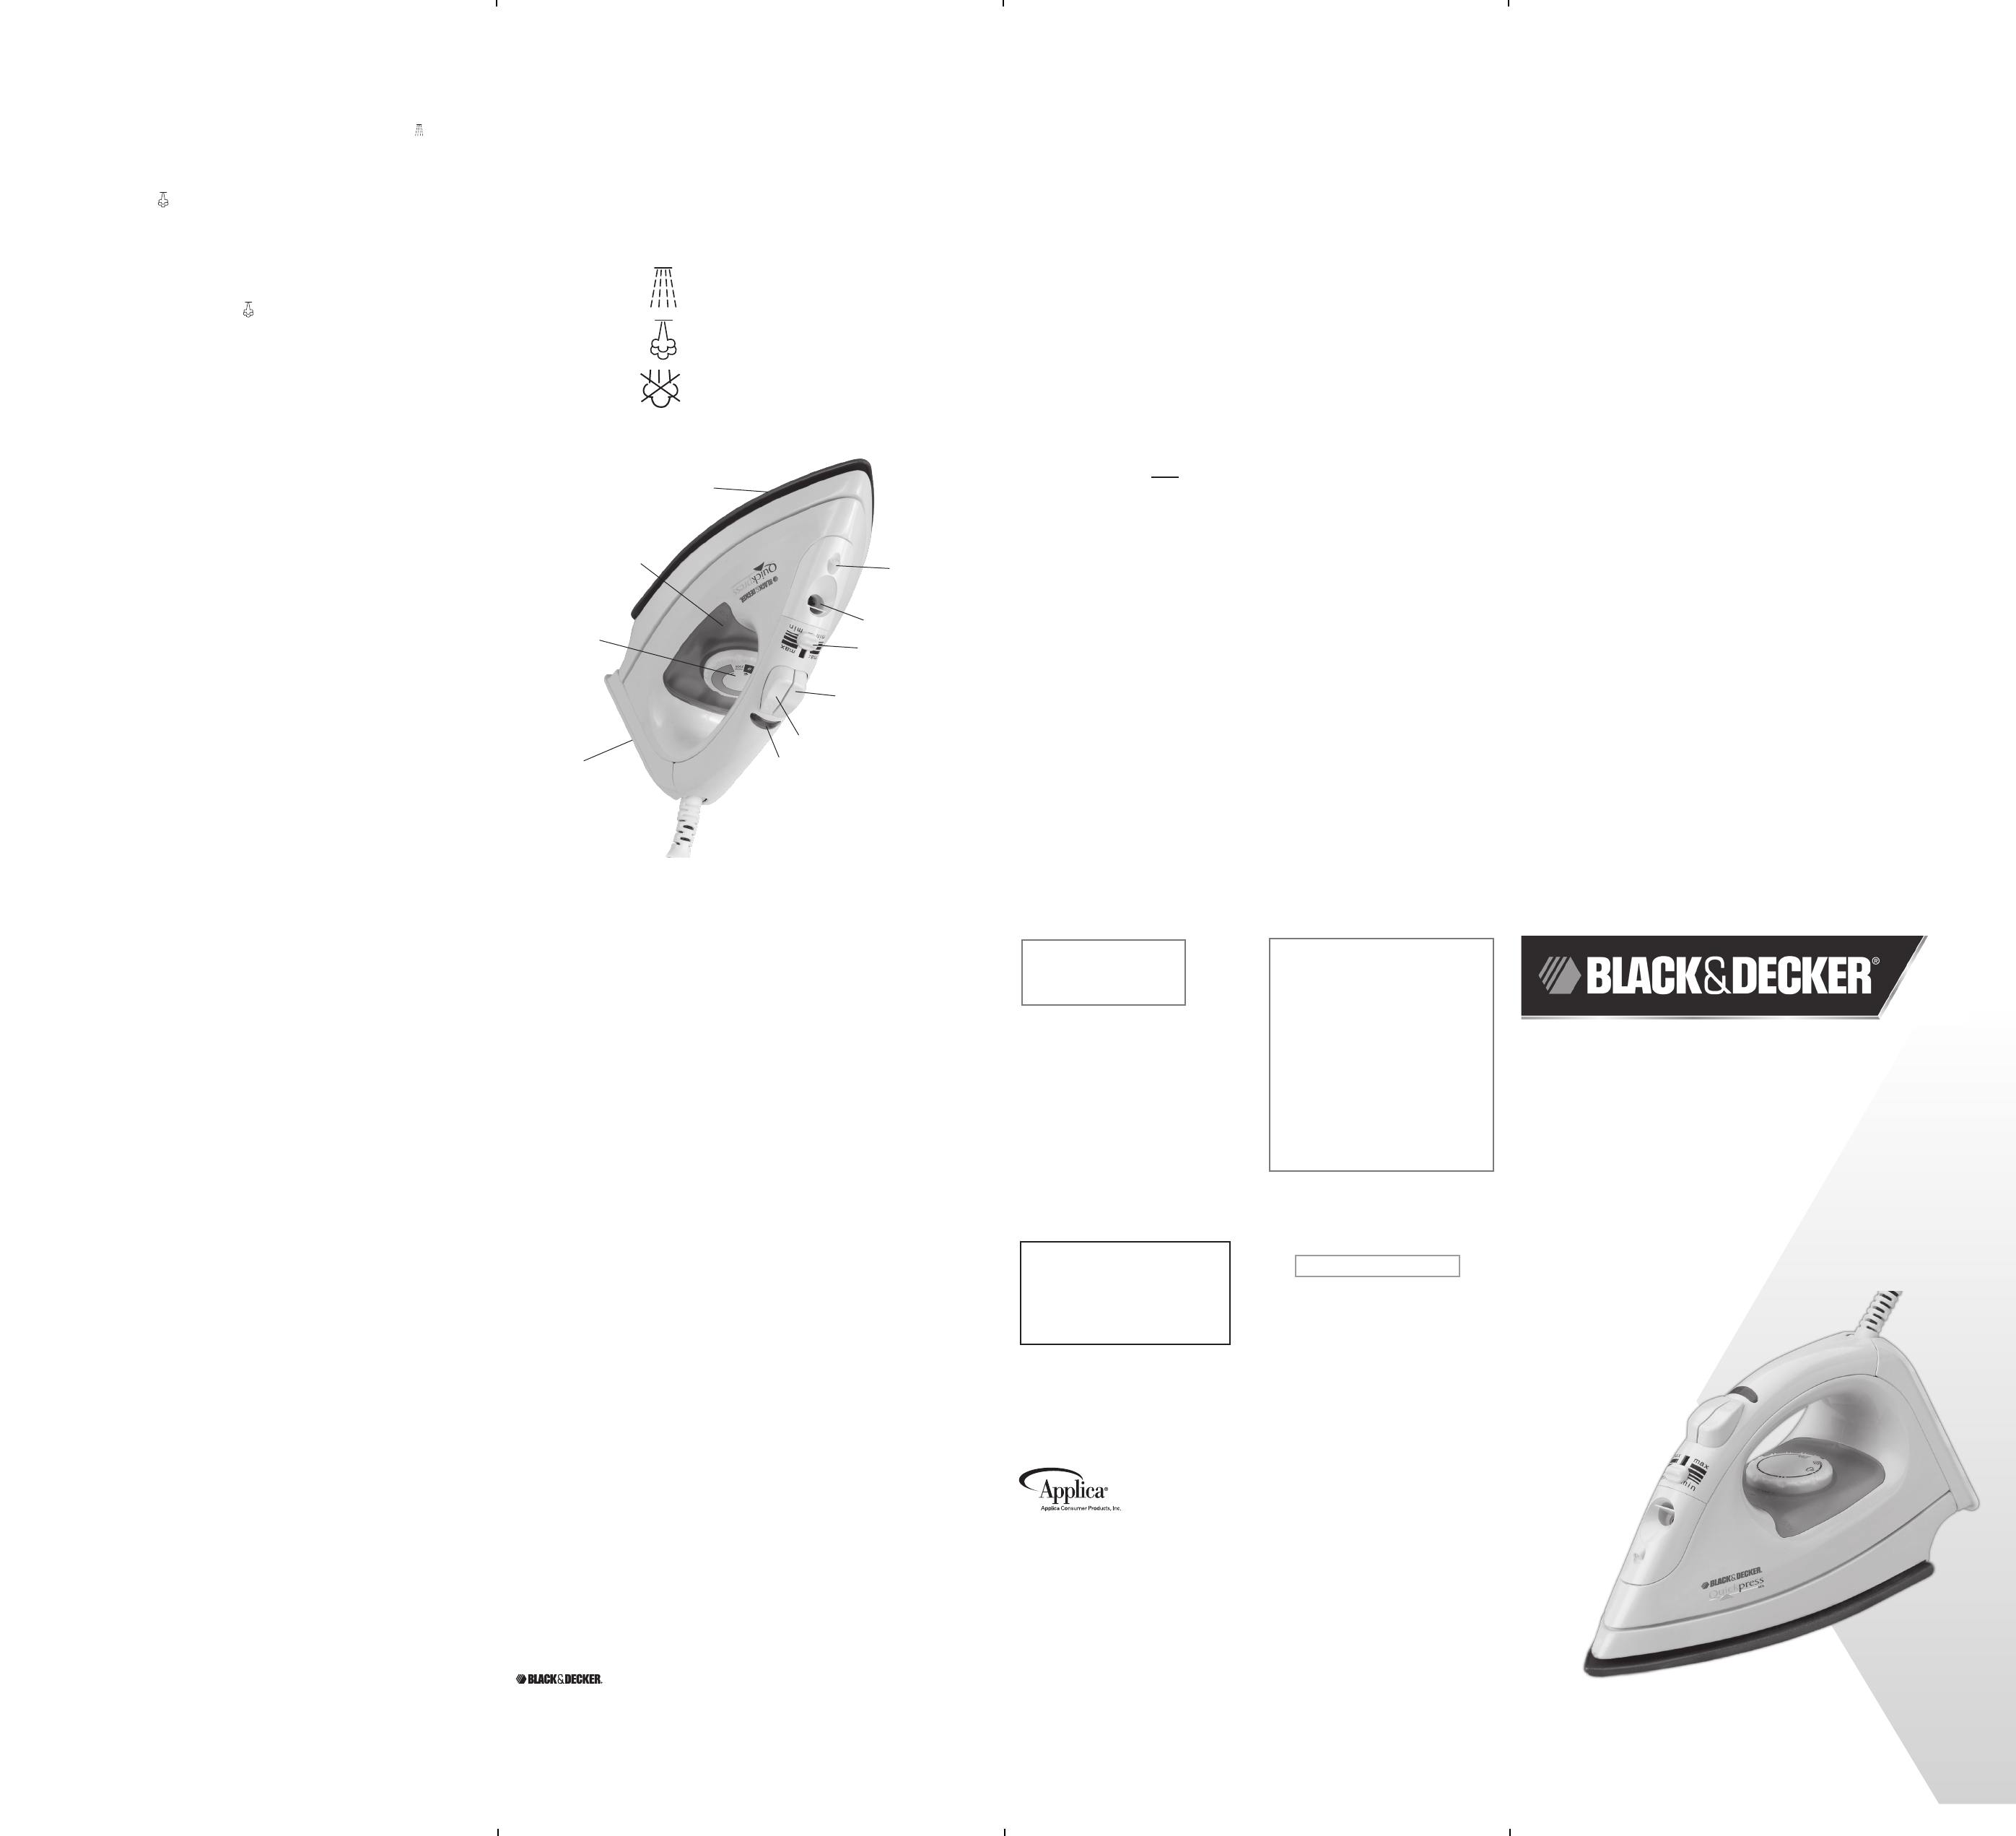
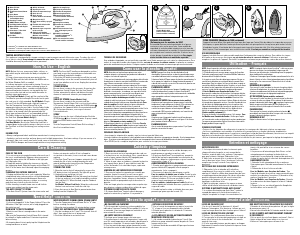
Product may vary slightly from what is illustrated.
1. Spray nozzle
2. Water-fill opening
3. Variable steam selector
4. Spray button
5. Steam button
6. Power on and temperature ready light
7. Heel rest with fabric guide
8. Fabric select dial
9. Water tank
10. Soleplate
NEED HELP?
For service, repair or any questions regarding your appliance, call the
appropriate 800 number on the cover of this book. Please DO NOT return
the product to the place of purchase. Also, please DO NOT mail product
back to manufacturer, nor bring it to a service center. You may also want to
consult the website listed on the cover of this manual.
TWO-YEAR LIMITED WARRANTY
(Applies only in the United States and Canada)
What does it cover?
• Any defect in material or workmanship provided; however, Applica’s
liability will not exceed the purchase price of product.
For how long?
• Two years from the date of original purchase with proof of such
purchase.
What will we do to help you?
• Provide you with a reasonably similar replacement product that is either
new or factory refurbished.
How do you get service?
• Save your receipt as proof of date of sale.
• Visit the online service website at www.prodprotect.com/applica, or call
toll-free 1-800-231-9786, for general warranty service.
• If you need parts or accessories, please call 1-800-738-0245.
What does your warranty not cover?
• Damage from commercial use
• Damage from misuse, abuse or neglect
• Products that have been modified in any way
• Products used or serviced outside the country of purchase
• Glass parts and other accessory items that are packed with the unit
• Shipping and handling costs associated with the replacement of the unit
• Consequential or incidental damages (Please note, however, that some
states do not allow the exclusion or limitation of consequential or
incidental damages, so this limitation may not apply to you.)
How does state law relate to this warranty?
• This warranty gives you specific legal rights. You may also have other
rights that vary from state to state or province to province.
is a registered trademark of The Black & Decker Corporation,
Towson, Maryland, USA
Made and Printed in People’s Republic of China
Care and Cleaning
This product contains no user serviceable parts. Refer service to qualified service
personnel.
CLEANING OUTSIDE SURFACES
1. Make sure iron is unplugged and has cooled completely. Wipe the soleplate and
outer surfaces with a soft cloth dampened with water and a mild household
detergent. Never use abrasives, heavy-duty cleansers, vinegar or scouring pads
that may scratch or discolor the iron.
2. After cleaning, iron with steam over an old cloth to remove any residue
from the steam vents.
STORING YOUR IRON
1. Unplug the iron and allow it to cool.
2. Check that the variable steam selector is set to min.
3. Wrap the cord loosely around the heel rest and tuck in the plug to secure it.
4. Store vertically on its heel rest to prevent water leaking from the soleplate.
When using your iron for the first time,
you may notice water residue inside the unit.
This is normal.
Cuando use su plancha por primera vez,
notará que hay agua adentro de la plancha.
Esto es normal.
1 200 W 120 V~ 60 Hz
Dry
Surge of steam
Spray
Symbols
© 2011 Applica Consumer Products, Inc.
Importado por / Imported by:
RAYOVAC ARGENTINA S.R.L.
Humboldt 2495 Piso# 3
(C1425FUG) C.A.B.A. Argentina.
C.U.I.T No. 30-70706168-1
Importado por / Imported by:
Rayovac de México SA de C.V
KM. 14.5 Carretera Puente de Vigas.
Col. Lechería, Tultitlán.
Estado de México.
C.P. 54940
México
Tel: (52) 5831-7070
Del interior marque sin costo
01 (800) 714 2503
Comercializado por:
Rayovac de México SA de C.V
KM. 14.5 Carretera Puente de Vigas.
Col. Lechería, Tultitlán.
Estado de México.
C.P. 54940
México
Tel: (52) 5831-7070
Servicio y Reparación
Art. 123 No. 95
Col. Centro, C.P. 06050
Deleg. Cuauhtemoc
Servicio al Consumidor,
Venta de Refacciones y Accesorios
01 800 714 2503

Praat mee over dit product
Laat hier weten wat jij vindt van de Black and Decker AS75 Strijkijzer. Als je een vraag hebt, lees dan eerst zorgvuldig de handleiding door. Een handleiding aanvragen kan via ons contactformulier.