Handleiding Cotech E0139ST2 Weerstation

Handleiding voor je Cotech E0139ST2 Weerstation nodig? Hieronder kun je de handleiding gratis bekijken en downloaden als PDF in het Nederlands en/of Engels. Dit product heeft 5 veelgestelde vragen, 0 comments en heeft 0 stemmen. Is dit niet de handleiding die je zoekt, neem dan contact met ons op.

Is je product kapot en biedt de handleiding geen oplossing meer? Dan kun je voor reparatie gratis terecht bij Repair Café.

Handleiding

Loading…

GREAT BRITAIN • CUSTOMER SERVICE tel. 020 8247 9300 e-mail [email protected] internet www.clasohlson.co.uk
postal 10 – 13 Market Place, Kingston Upon Thames, Surrey, KT1 1JZ
2
1
3
4
5
6
7
8
9
10
11
12
13
14
15
16
17
18
Ver. 20171207
Wireless Indoor/Outdoor
Thermometer
Art.no 36-6720 Model E0139ST2
36-6720-1 E0139ST2
Please read theentire instruction manual before using theproduct and then
save it for future reference. We reserve theright for any errors in text or images
and any necessary changes made to technicaldata. In theevent of technical
problems or other queries, please contact our Customer Services.
Safety
Thethermometer must not be dismantled or modified in anyway.
Thethermometer is only intended for indooruse. Donot expose it to
moisture.
Thethermometer is not intended to be used as areference thermometer
and Clas Ohlson will not be held liable for any damage which may result
from inaccurate readings.
Thebatteries should be removed from thethermometer if it is not to be
used for anextended period, otherwise they might leak and damage
thethermometer. Neverleave discharged batteries in thebattery
compartment.
Themax and min readings will be deleted whenever thebatteries are
removed.
Thethermometer must never be subjected to shocks or impacts.
NOTE:
Do not mix old and new batteries or batteries of differenttypes.
Do not mix alkaline, regular or rechargeable batteries.
Buttons and functions
Thermometer
Sensor
16. LED indicator (flashes when data is
being sent to thethermometer unit)
17. Hangingslot
18. Batterycover
Installation
Thermometer
1. Remove thebattery cover (14) to access thebattery compartment.
2. Insert 2×AAA/LR03 batteries (sold separately) observing thepolarity
markings in thebattery compartment.
3. Refit thebatterycover.
4. Choose where thethermometer is to be placed:
- Standing on aflat surface using thetable stand (15).
- Hanging on awall using thehanging slot (13).
Sensor
1. Slide thebattery cover (18) down to access thebattery compartment.
2. Insert 2×AAA/LR03 batteries (sold separately) observing thepolarity
markings in thebattery compartment.
3. Click thebattery cover back intoplace.
4. Hang thesensor on awall outside using thehanging slot (17).
Operating instructions
Temperature display
Thethermometer should receive data from thesensor and display
thetemperature within 3 minutes of thebatteries having been inserted in both
devices.
Refer to theTroubleshooting section if there is aproblem.
1. Press [ SET/ºF/ºC ] (12) to select ºC orºF.
2. Press [ MAX/MIN/+ ] (11) to display themax or min temperature. Thedisplay
will return to displaying thecurrent temperature after afew seconds.
3. Press and hold [ MIN/MAX/+ ] for afew seconds to reset themax/min
temperature readings.
Temperaturetrend
Thetemperature trend arrow (7) points in different directions depending
on whether thelatest temperature reading is higher or lower than previous
readings.
Arrow angled upwards = Temperature hasrisen.
Horizontal arrow = No temperature change.
Arrow angled downwards = Temperature has fallen.
Setting thetime
1. Hold down [ SET/ºF/ºC ] for 2 seconds until thehours begins toflash.
2. Press [ MIN/MAX/+ ] to select a12 hr or 24 hr display.
3. Press [ SET/ºF/ºC ] so that thehours begin flashing.
4. Press [ MIN/MAX/+ ] to select thecorrecthour.
5. Press [ SET/ºF/ºC ] so that theminutes begin flashing.
6. Press [ MIN/MAX/+ ] to select thecorrect minutes.
7. Press [ MIN/MAX/+ ] to complete setting thetime.
Care and maintenance
Clean theproduct using alightly moistenedcloth. Useonly mild cleaning
agents, neversolvents or corrosive chemicals.
Troubleshootingguide
Thethermometer
doesn’t display
anything.
Check thebatteries in thethermometer and
sensor.
Temperature from
outdoor sensor not
displayed.
Check that thedistance between thethermo-
meter and sensor does not exceed 30m.
Make sure that thedevices are located at least
2m from monitors and TVsets.
Avoid placing thedevices on or close to window
frames made ofmetal.
Avoid using electronic devices such as
loudspeakers which operate at thesame
frequency (433MHz), close to thedevices.
Check thebatteries in thethermometer and any
connected sensors.
Remove thebatteries, wait awhile and then
reinsertthem.
Displayed
temperature is
incorrect.
Remove thebatteries, wait awhile and then
reinsertthem.
Make sure that thedevices are not affected by
heat sources or air-conditioning units andsuch.
Responsible disposal
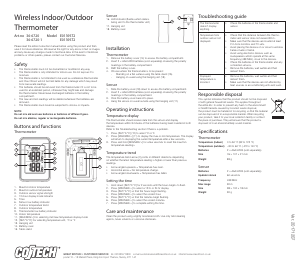
1. Max/min indoor temperature
2. Max/min outdoor temperature
3. Outdoor sensor signal strength
4. 12-hour display mode indicator
5. Time
6. Sensor low battery indicator
7. Outdoor temperature trend
8. Outdoor temperature
9. Thermometer low battery indicator
10. Indoor temperature
11. [ MAX/MIN/+ ] For selecting min/max temperature display mode
12. [ SET/ºF/ºC ] For selecting temperature unit, °C or °F
13. Hangingslot
14. Batterycover
15. Tablestand
This symbol indicates that this product should not be disposed
of with general householdwaste. Thisapplies throughout
theentire EU. Inorder to prevent any harm to theenvironment
or health hazards caused by incorrect waste disposal,
theproduct must be handed in for recycling so that thematerial
can be disposed of in aresponsible manner. Whenrecycling
your product, take it to your local collection facility or contact
theplace of purchase. Theywill ensure that theproduct is
disposed of in anenvironmentally sound manner.
Specifications
Thermometer
Temperature (indoor) 0 to 50 ºC (32 to 122 ºF)
Temperature (outdoor) −30 to 60 ºC (−22 to 140 ºF)
Batteries 2×AAA/LR03 (sold separately)
Size 76×107×21mm
Weight 83g
Sensor
Batteries 2×AAA/LR03 (sold separately)
Update interval 60seconds
Frequency 433MHz
Maxrange 30m
Size 38×100×18mm
Weight 30g
Download de handleiding in het Nederlands en/of Engels (PDF, 0.21 MB)
(Denk aan het milieu en print deze handleiding alleen als dat echt noodzakelijk is)

Loading…

Beoordeling

Laat ons weten wat je van de Cotech E0139ST2 Weerstation vindt door een beoordeling achter te laten. Wil je je ervaringen met dit product delen of een vraag stellen? Laat dan een bericht achter onderaan de pagina.
Bent u tevreden over de Cotech E0139ST2 Weerstation?
Ja Nee
Beoordeel dit product als eerste
0 stemmen

Praat mee over dit product

Laat hier weten wat jij vindt van de Cotech E0139ST2 Weerstation. Als je een vraag hebt, lees dan eerst zorgvuldig de handleiding door. Een handleiding aanvragen kan via ons contactformulier.

Meer over deze handleiding

We begrijpen dat het prettig is om een papieren handleiding te hebben voor je Cotech E0139ST2 Weerstation. Je kunt de handleiding bij ons altijd downloaden en daarna zelf printen. Indien je graag een originele handleiding wilt hebben, raden we je aan contact op te nemen met Cotech. Zij kunnen wellicht nog voorzien in een originele handleiding. Zoek je de handleiding van Cotech E0139ST2 Weerstation in een andere taal? Kies op de homepage je taal naar keuze en zoek daarna op het modelnummer om te zien of we deze beschikbaar hebben.

Specificaties

Merk Cotech
Model E0139ST2
Categorie Weerstations
Bestandstype PDF
Bestandsgrootte 0.21 MB

Alle handleidingen voor Cotech Weerstations
Meer handleidingen voor Weerstations

Veelgestelde vragen over Cotech E0139ST2 Weerstation

Ons supportteam zoekt dagelijks naar nuttige productinformatie en antwoorden op veelgestelde vragen. Als er onverhoopt toch een onjuistheid tussen onze veelgestelde vragen staat, laat het ons dan weten via het contactformulier.

Mijn weerstation gaf aan dat het zou regenen, maar dit gebeurde niet, hoe kan dat? Geverifieerd

De voorspelling van het weerstation is gebaseerd op luchtdruk. Grofweg betekent een lage luchtdruk dat er slecht weer komt en een hoge luchtdruk dat er goed weer komt. Het kan gebeuren dat het weer zich anders ontwikkelt dan het luchtdrukverloop doet vermoeden.

Ik vind dit nuttig (1403) Lees meer

Wat is de beste plek om een weerstation en de sensoren te plaatsen? Geverifieerd

Het weerstation zelf staat binnen en dient uit de buurt gehouden worden warmtebronnen zoals een keuken, raam of elektrische apparatuur. Een losse temperatuursensor voor buiten dient in de schaduw en ten minste 1,25m van de grond geplaatst the worden. Een regensensor moet op een open plaats staan, waar regen er altijd in kan. Ook de windsensor moet op een open plek staan, waar er geen obstakels zijn die de wind beïnvloeden.

Ik vind dit nuttig (334) Lees meer

Mijn weerstation heeft een regenmeter, kan deze ook de hoeveelheid gevallen sneeuw meten? Geverifieerd

Sommige regenmeters zijn voorzien van een verwarmingselement, waardoor de sneeuw smelt en gemeten kan worden. Zonder verwarmingselement loopt de regenmeter vast en kan er dus geen meting gedaan worden.

Ik vind dit nuttig (234) Lees meer

Kan ik een verwisselbare batterij een lange tijd in een apparaat laten? Geverifieerd

Verwisselbare batterijen kunnen een lange periode in een apparaat blijven indien dit apparaat gebruikt wordt. Als een apparaat voor een lange periode wordt opgeslagen is het aan te raden de batterijen er uit te halen om oxidatie te voorkomen.

Ik vind dit nuttig (234) Lees meer

Er is een batterij in mijn apparaat gaan oxideren, kan ik het nog veilig gebruiken? Geverifieerd

Ja, het apparaat kan nog veilig gebruikt worden. Verwijder eerst de geoxideerde batterij. Doet dit niet met blote handen. Reinig daarna het batterijcompartiment met een wattenstaafje gedipt in azijn of citroensap. Laat het drogen en doe nieuwe batterijen in het apparaat.

Ik vind dit nuttig (233) Lees meer
Handleiding Cotech E0139ST2 Weerstation

Gerelateerde producten

Gerelateerde categorieën