ENGLISH
Thank you for choosing this versatile and high quality
Hendi Cream Whipper. With this universal kitchen tool
you can create a multitude of light desserts, creams,
sweet and sour mousses as well as sauces. Some
kinds of liquid ingredients, such as juices, coffee,
chocolate-syrup, vanilla cream, yoghurt, etc. can be
used in Hendi Cream Whipper, but only if they contain
no insoluble substances!
For guaranteed quality, please use Hendi cream
chargers only.
Please read the instructions thoroughly before using
the rst time!
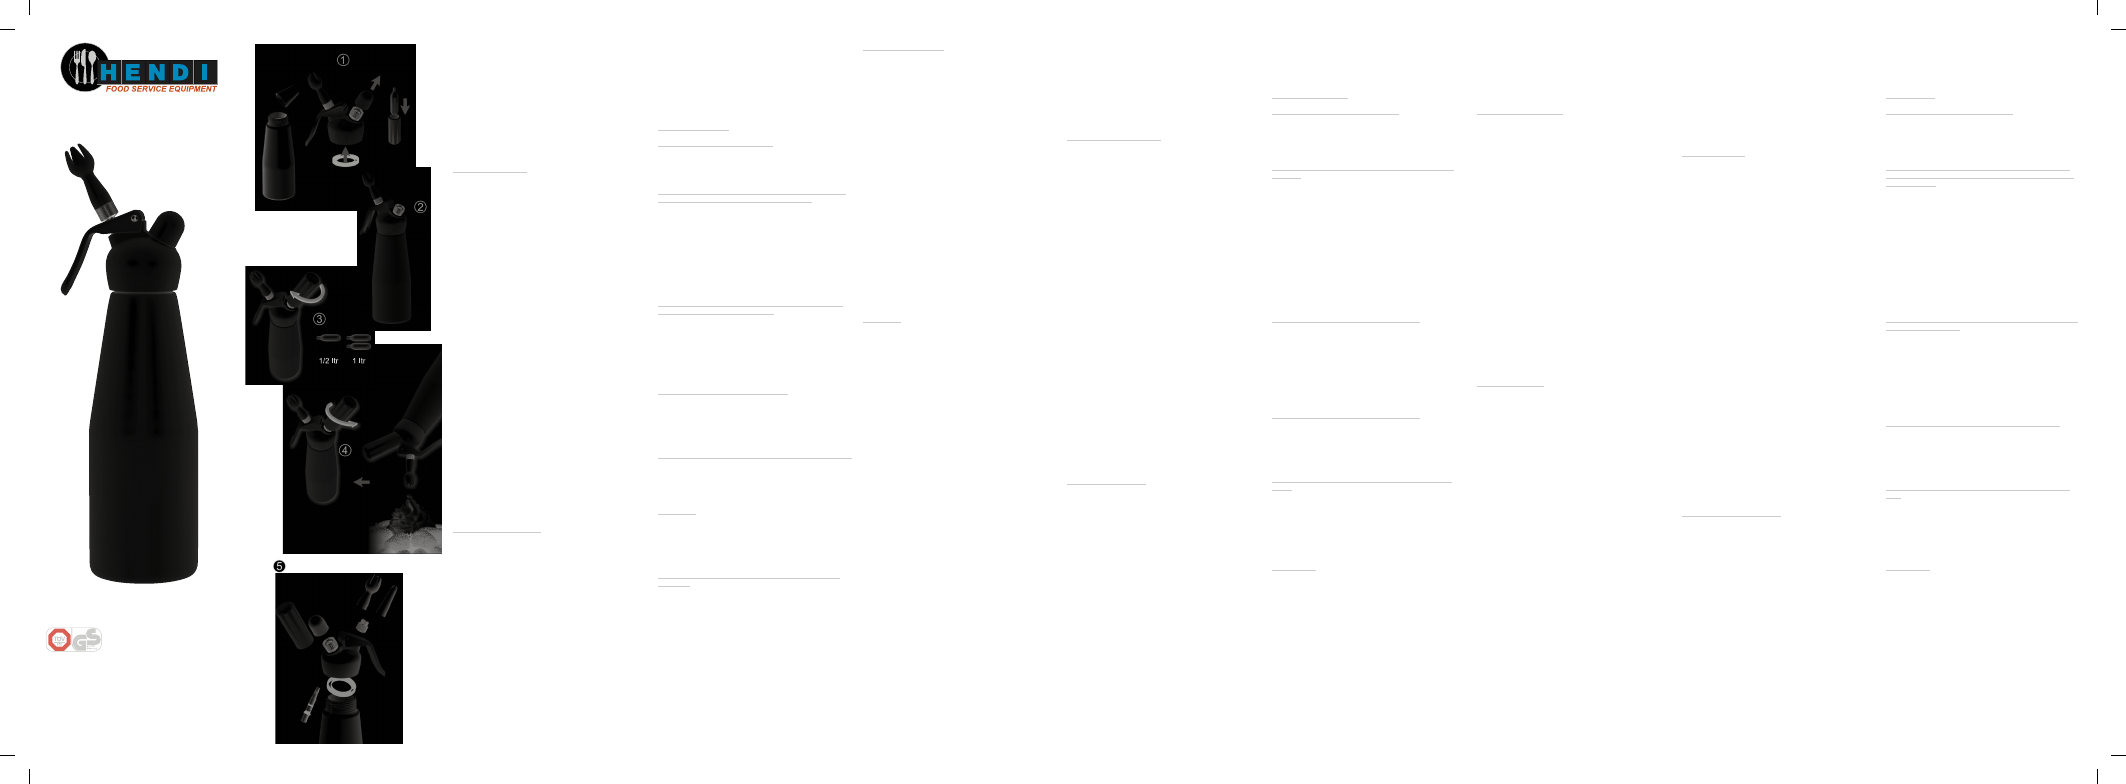
User Instructions
(see illustrations on the fold-out pages of the cover)
1. When using your whipper for the rst time, or if you
have not used it for a while, rinse the bottle rst with
lukewarm water, then with cold water before lling it
with cream.
2. Fill with well chilled fresh cream or well mixed and
strained liquid ingredients (g. 1). Never exceed the
maximum lling quantity engraved on the bottom of
the bottle (maximum one pint/0.5 liter for 0.5 L bottle or
maximum one quart/1 liter for 1.0 L bottle).
If you want to sweeten your cream, we recommend
using sugar syrup. If using sugar or cream stiffener,
stir and dissolve it rst completely into a little cream to
avoid the formation of lumps.
3. Ensure that the head gasket is positioned correctly
and rmly in the head (g. 1). Then place the head on
the bottle and screw closed as follows: Turn the head
clockwise until you feel resistance, then turn a further
quarter of a turn. Do not cross-thread! (g. 2)
4. Insert the silver-coloured Hendi cream charger (8 gr.
N2O) into the charger holder as illustrated (g. 1).
5. Screw the charger holder and charger on to the inlet
valve until gas is released into the bottle with a hissing
sound (g. 3). Use 1 charger per lling (2 chargers
with 1 quart/liter bottle). Shake the whipper briskly 4~5
times in a vertical direction. When using well cooled
light cream or other mixtures, shake up to ten times.
Unscrew the charger holder and charger (g. 4).
The slight hissing sound while unscrewing is normal.
Remove and discard the used charger. Hendi chargers
are made from high grade steel and can be recycled.
6. To dispense the content, hold the whipper vertically
(decorating nozzle pointing downward) about 1 cm
above the surface. Then press the lever lightly (g. 4).
If whipped cream is not rm enough, shake once more.
When using later, do not shake again.
Keep lled cream whipper in the refrigerator but never
in the deep-freezing compartment or in the freezer.
Before placing the whipper in the refrigerator, remove
the decorating nozzle from the nozzle adaptor, rinse
with lukewarm water and replace. The content will stay
fresh for several days in the refrigerator.
Important Directions
Mind the following important points:
1. To get a better result, please cool the whipper well
under cold water or in the refrigerator before lling.
2. Only use soluble ingredients. For sweetening, it is
best to use sugar syrup or liquid sweeteners. Granu-
lated sugar or salt should rst be dissolved in cool
water or cream. Use powderized or liquid spices only.
Insoluble substances such as seeds, pulp, etc. prevent
the closure of the dispensing piston or might impair the
proper functioning of the whipper. If you use blended
mixtures, please use a ne strainer to remove seeds
or pulp.
3. The Hendi Cream Whipper is well suited for the
preparation of cold mousses, (hot) sauces or Espumas.
4. Excessive shaking may stiffen pure cream to a
degree that it looses its soft texture, therefore please
do not over shake! Do not shake every time before dis-
pensing. Please shake recipes consisting of mixtures
of cream and other liquids well and more frequently.
5. When dispensing, always hold the whipper upside
down (decorating nozzle pointing downward), other-
wise gas will escape and some cream may remain
inside the whipper.
6. For best result, serve immediately upon dispensing.
7. For spare parts, please contact your dealer or Hendi
directly.
8. Use only genuine Hendi Cream Whipper spare
parts. Never combine parts with other Hendi products
or other manufacturers’ products. Hendi components
are identied by Hendi marks on the head, charger
holder, and the bottom of the bottle.
9. For repairs always return the entire unit (head plus
bottle).
Troubleshooting
The charger is not pierced open:
An unsuitable charger has been used or charger was
inserted incorrectly. Use the exclusively disposable
Hendi cream charger and place it in the charger holder
as shown in Fig. 1.
You have not pressed the lever, nevertheless, cream
ows from the nozzle and can’t be stopped:
a) Additives such as powdered sugar, cream stiffener,
pulp, etc. have not been completely dissolved, blocking
the piston. Turn the whipper into upright position
(nozzle up), place it on the countertop and wait until
content has settled on the bottom. Cover the nozzle
well with a heavy towel and carefully press the lever to
release gas until hissing sound stops, then unscrew the
head, clean the dispensing piston, strain contents and
rell the whipper.
b) The dispensing piston is damaged. Send the appli-
ance to Hendi or a service center.
When the charger is being screwed in, gas escapes
between the bottle and the head:
a) The head gasket is missing. Insert a head gasket in
the head.
b) The head gasket is damaged. Insert a new gasket.
c) The head is not screwed on rmly enough. Screw
the head onto the bottle rmly in accordance with User
Instructions.
d) The upper edge of the bottle is damaged. Send the
appliance to Hendi or a service center.
Cream is still liquid after preparation:
a) The whipper was not shaken rmly or often enough.
Shake again rmly.
b) The whipper was not turned upside down when
pressing the lever. Always turn the whipper upside
down before pressing the lever (decorating nozzle
pointing vertically downward!)
Cream is too rm and “spits” sideways from the nozzle:
The whipper has been shaken too much. Do not over
shake nor shake before each dispensing.
IMPORTANT: Do not attempt to modify the whipper.
If you cannot solve a problem with the help of these
instructions, please contact Hendi or a service center.
Cleaning
Before opening, allow remaining pressure to escape by
pressing the lever until no cream or gas is discharged
through the nozzle. An insignicant amount of cream
may remain in the bottle – a teaspoon of liquid cream
at the most.
Follow steps 1, 2 and 3 to clean your Hendi Cream
Whipper:
1. Unscrew the head then remove the head gasket
and decorating nozzle. Hold end of the piston inside
the head while unscrewing the nozzle adaptor with the
other hand.
2. Thoroughly clean each individual component with a
mild detergent and a brush.
3. Allow the parts to dry and reassemble them later.
4. When cleaning, only remove parts as shown in g. 5.
5. Do not use any sharp objects or abrasive materials
when cleaning the bottle.
6. Do not put any Hendi Cream Whippper parts into
the dishwasher. Do not clean/soak any Hendi Cream
Whipper plastic head in water above 40 ºC/104ºF! If
you have purchased a Cream Whipper with a stainless
steel bottle, you may put the bottle into the dishwasher,
but not the plastic head!
Safety Instructions
1. Please keep this instruction booklet for later
reference to avoid any improper handling or operating.
This whipper is designed exclusively for the purposes
specied in this manual.
2. The whipper and the charger are pressure contain-
ers which require increased attention and care.
3. For the chargers, pertinent safety instructions are
given on its package.
4. Keep Hendi Cream Whipper and chargers out of the
reach of children.
5. For safety reasons, do not bend over the whip-
per nor lean over the whipper when screwing in the
charger!
Remark that the cream maker head has to be rmly
screwed on before the cream maker can be taken into
operation with the charger.
6. Hendi head screws easily onto the bottle in an
up-right position. Do not cross-thread.
7. All Hendi parts can be assembled easily; therefore
never use force.
8. Never use the whipper if damaged. Hendi Cream
Whipper which has been dropped should be checked
by Hendi before resuming use.
9. Press the lever until the hissing sound stops
before opening Hendi Cream Whipper when gas has
completely escaped.
10. Do not expose Hendi Cream Whipper to heat
(stove, sunlight, oven, microwave, etc.).
11. Please be advised that tampering with the whipper
and/or its components voids any and all warranties of
the manufacture/supplier.
Warranty
Defective whipper (faulty materials or bad workman-
ship) will be repaired without charge (freight prepaid!)
within six months of date of purchase per valid invoice.
This warranty does not cover any liability for malfunc-
tion caused by improper use, use of damaged/wear
parts, or any consequential damage. In order to assure
the proper functioning of your cream whipper, only
use original Hendi parts. In particular, we shall not
satisfy any warranty or liability claims for malfunction,
damage, and consequential damage resulting from
any failure of complying with and/or failure to read this
manual and the safety instructions contained therein.
For further information: visit us at www.hendi.eu
DEUTSCH
Vielen Dank, dass Sie sich für ein Hendi Sahnegerät
entschieden haben. Mit diesem vielfältigen Küchenge-
rät können Sie in Sekundenschnelle leichte Desserts,
Cremes, Moussekreationen bzw. süße und saure
Sahne und Soßen aufschäumen. Für garantierte
Qualität sollten Sie Hendi Sahnekapseln verwenden.
Vor der ersten Anwendung beachten Sie bitte die
nachstehende Hinweise.
Gebrauchsanweisung
(beachten Sie bitte die Abbildung auf der Umschlagseite)
1. Wird das Gerät erstmals verwendet, oder war es
längere Zeit nicht in Gebrauch, Flasche zuerst mit
warmem, danach mit kaltem Wasser ausspülen.
2. Gut gekühlte, frische Sahne (Abb. 1) bzw. sonstige
Zutaten je nach Rezept einfüllen. Füllen Sie nie mehr
als die zulässige Menge (max. 0,5 l oder 1 l, je nach
Modell) in das Gerät.
Zum Süßen eignen sich Puderzucker oder üssige
Süßstoffe am besten. Um Klumpenbildung zu vermei-
den, bitte Zutaten vor dem Einfüllen gut verrühren.
3. Flaschendichtung in den Gerätekopf geben (Abb.
1) und diesen danach gerade und fest auf die Flasche
aufschrauben. Der Gerätekopf ist richtig aufgeschraubt,
wenn kein Flaschengewinde sichtbar ist. Setzen Sie
den Kopf niemals schief auf die Flasche! (Abb. 2)
4. Hendi Sahnekapseln (N2O), in den Kapselhalter
einlegen (Abb. 1).
5. Kapsel mit Kapselhalter zügig aufschrauben (Abb.
3), bis der Kapselinhalt hörbar einströmt. Pro Füllung 1
Kapsel verwenden (2 Kapseln bei 1l -Flasche). Gerät
4 – 5x kräftig senkrecht schütteln. Bei gut gekühlter
haltbarer oder Light-Sahne oder anderen Gemischen
bis zu 10 x schütteln. Danach Kapselhalter abschrau-
ben. Ein leises Zischen beim Abschrauben ist normal.
Leere Kapsel entfernen und als Altmetall entsorgen
(Abb. 4).
6. Zur Entnahme, das Gerät senkrecht (Garniertülle
nach unten gerichtet), ca. 1 cm über Garniergut, halten
und den Hebel leicht andrücken (Abb. 4). Sollte die
Schlagsahne (Mousse, Schaum) nicht fest genug sein,
nochmals kurz schütteln.
Heben Sie Ihr Hendi Sahnegerät immer im Kühl-
schrank auf (Idealtemperatur 4 -5°C, daher nie im Tief-
kühlfach oder in der Tiefkühltruhe!). Aufbewahrung im
gefüllten Zustand: Schrauben Sie die Garniertülle vom
Adapter und spülen Sie diese gut aus, danach wieder
aufschrauben. Stellen Sie das Hendi Sahnegerät nach
Gebrauch wieder in den Kühlschrank. So bleibt der
Inhalt mehrere Tage haltbar.
Wichtige Hinweise
1. Gerät vor dem Füllen entweder unter ießendem
kalten Wasser oder im Kühlschrank abkühlen lassen.
2. Nur gut lösliche Zutaten einfüllen. Zum Süßen
eignen sich Puderzucker oder üssige Süßstoffe am
besten. Kristallzucker oder Salz vorher in etwas
Wasser oder Milch auösen. Gewürze in Pulver-
oder üssiger Form verwenden. Nicht lösliche
Stoffe wie Körner u.s.w. machen das Schließen des
Entnahmeventils bzw. das Funktionieren des Hendi
Gerätes unmöglich. Wenn Sie einen Mixer verwenden,
benutzen Sie bitte anschließend ein feines Sieb um
Fruchtstücke oder Samenkörner etc. zu entfernen.
3. das Hendi Sahnegerät ist geeignet für die Zuberei-
tung von Sahne, Mousses, (heiße) Soßen, Cremes,
Schäume, etc.
4. Pure Sahne wird durch häuges Schütteln zu steif,
daher nur 4 -5 mal schütteln und nicht vor jeder Ent-
nahme schütteln. Rezepte mit Mischungen aus Sahne
und anderen Flüssigkeiten können jedoch öfter und bei
jeder Entnahme geschüttelt werden.
5. Gerät immer senkrecht mit dem Kopf nach unten
verwenden, da sonst Druck entweicht und eine völlige
Entleerung des Gerätes nicht mehr möglich ist.
6. Durch das bessere Aufschlagen als bei herkömmli-
chen Methoden sollte Sahne, Schaum, Mousse etc.
möglichst kurz vor dem Verzehr dem Gerät entnommen
werden.
7. Für Ersatzteile kontaktieren Sie bitte Ihren Händler
oder Hendi direkt.
8. Verwenden Sie ausschließlich Hendi Originalteile!
Kombinieren Sie niemals Fremdfabrikate mit den Hendi
Geräteteilen. Hendi Teile erkennen Sie an entspre-
chenden Kennzeichnungen an Kopf, Kapselhalter und
dem Flaschenboden.
9. Zur Reparatur senden Sie bitte immer das ganze
Gerät (Kopf und Flasche) ein.
Problemlösungen
Die Kapsel wird nicht aufgestochen:
Eine unpassende Kapsel wurde verwendet oder der
Kapselhalter wurde nicht korrekt aufgeschraubt. Benüt-
zen Sie nur Hendi Cream - Sahnekapseln und setzten
Sie die Kapsel wie in Abb. 1 in den Kapselhalter ein.
Obwohl Sie den Hebel nicht gedrückt haben kommt
Schlagsahne aus der Tülle und kann nicht gestoppt
werden:
a) Zutaten wie Puderzucker, Sahnesteif, Fruchteisch
usw. haben sich nicht vollständig aufgelöst und blockie-
ren das Entnahmeventil. Benutzen Sie nur Zutaten
die sich vollständig aufgelöst haben und verrühren Sie
alles gut bevor Sie es in das Gerät einfüllen. Stellen
Sie das Gerät auf eine ebene feste Fläche (Tülle senk-
recht nach oben) stülpen Sie ein festes Tuch über den
Gerätekopf und drücken Sie vorsichtig den Hebel bis
das Gas komplett entwichen ist und das Zischgeräusch
stoppt. Dann schrauben Sie den Kopf ab und reinigen
Sie das Entnahmeventil. Sieben Sie den Flaschenin-
halt mit einem feinen Sieb und nehmen Sie das Gerät
wieder in Betrieb.
b) Das Entnahmeventil ist beschädigt. Senden Sie das
ganze Gerät zum Händler oder Hendi Service Center.
Wenn die Sahnekapsel eingeschraubt wird, entweicht
Gas zwischen dem Kopf und der Flasche:
a) Die Kopfdichtung fehlt. Setzen Sie die Kopfdichtung
fest in den Gerätekopf ein.
b) Die Kopfdichtung ist beschädigt. Beschaffen Sie
eine neue Kopfdichtung gemäß Ersatzteilliste.
c) Der Gerätekopf wurde nicht fest genug aufge-
schraubt. Schrauben Sie den Kopf gemäß Gebrauchs-
anleitung fest.
d) Der Rand des Flaschenhalses ist beschädigt.
Senden Sie das komplette Gerät zum Händler oder
Hendi Service Center.
Der Inhalt ist bei der Entnahme zu üssig.
a) Das Gerät wurde nicht fest genug geschüttelt.
Nochmals kräftig schütteln.
b) Das Gerät wurde beim Drücken des Hebels nicht
immer umgedreht. Halten Sie das Gerät beim Hebeln
immer auf den Kopf, mit der Tülle senkrecht nach
unten.
Die Sahne ist zu steif und “spritzt” seitlich aus der
Tülle.
Das Gerät wurde zu stark geschüttelt. Schütteln Sie
das Gerät nicht zu stark und schütteln Sie es nicht bei
jeder Entnahme.
WICHTIG: ändern Sie bitte nichts an dem Gerät. Falls
Sie ein Problem nicht mit Hilfe dieser Anleitung lösen
können, kontaktieren Sie bitte ein Service Center, Ihren
Händler oder Hendi.
Reinigung
Vor dem Öffnen den restlichen Druck völlig entweichen
lassen, indem Sie den Hebel betätigen.
Für die normale Reinigung Ihres Hendi Sahnegerätes
folgen Sie bitte die Punkte 1, 2 und 3:
1. Gerätekopf abschrauben, Dichtung herausnehmen
und Garniertülle abschrauben. Während Sie das
Endstück des Entnahmeventils an der Kopnnenseite
halten, schrauben Sie bitte den Garniertüllenadapter
ab und ziehen dann das Entnahmeventil aus dem
Gerätekopf heraus.
2. Alle Bestandteile mit einem milden Waschmittel
gründlich abbürsten und mit Wasser gut spülen.
3. Bestandteile an der Luft trocknen lassen und Gerät
in geöffnetem Zustand (Kopf nicht aufgeschraubt)
aufbewahren.
4. Bei der Reinigung nur jene Teile demontieren, die in
Abb. 5 dargestellt sind.
5. Verwenden Sie bei der Reinigung des
Flaschenkörpers(innen und außen) keine scharfen
Gegenstände.
6. Empfelen wir die Geräteteile die nicht aus Edelstahl
sind, nicht in den Geschirrspuüler zu geben. Reinigen
Sie den Kunststoff nicht mit Wasser, das über 40 ºC
heiß ist. Falls Sie ein Hendi Sahnegerät mit Edelstahl-
asche gekauft haben, können Si die Flasche (nicht
den Kopf) in den Geschirrspüler geben.
Sicherheitshinweise
1. Gebrauchsanleitung bitte aufbewahren. Hendi
Geräte dienen ausschließlich zum Aufschlagen von
Sahne, Mousses, Soßen, Cremes, Schäume, etc.
2. Die Geräte sowie die Kapseln sind Druckbehälter,
die daher besonders vorsichtig gehandhabt werden
sollten.
3. Bitte beachten Sie die Sicherheitshinweise für
Kapseln auf den Kapselschachteln.
4. Bitte bewahren Sie Geräte und Kapseln für Kinder
unerreichbar auf.
5. Aus Sicherheitsgründen bitten wir Sie, sich, während
des Eindrückens der Kapsel, nicht über das Gerät zu
beugen.
6. Der Gerätekopf ist in gerader, aufrechter Position,
leicht auf die Flasche aufzuschrauben. Bitte den Kopf
keinesfalls schief aufschrauben.
7. Da alle Teile des Hendi Gerätes leicht montierbar
sind, vermeiden Sie bitte jegliche Gewaltanwendung.
8. Achten Sie darauf, dass das Gerät nie im beschädig-
ten Zustand verwendet wird. Heruntergefallene Geräte
sollten vor Wiederverwendung, zur Sicherheitsüberprü-
fung an Hendi eingeschickt werden.
9. Das Gerät darf erst geöffnet werden, wenn der
Druck vollständig entwichen ist. Solange auf den Hebel
drücken, bis das Zischen aufhört.
10. Gerät vor Hitze schützen (Herdplatte, Sonnenein-
strahlung, Backofen, Mikrowelle usw.)
11. Jeder eigenmächtige Reparaturversuch oder
unsachgemäße Manipulation, wie z.B. das Verwenden
von gerätefremden Teilen, hat das Erlöschen der
Garantie sowie Haftungsausschluss zur Folge.
Gewährleistung
Jeder Schaden am Gerät (Materialfehler oder mangel-
hafte Verarbeitung), der innerhalb von 6 Monaten nach
Datum des gültigen Kaufbeleges auftritt, wird von uns
kostenlos behoben. Für Mängel, durch unsachgemä-
ßen Gebrauch, Verwendung von beschädigten Teilen
oder für jegliche Folgeschäden, besteht kein Garantie-
oder Haftungsanspruch! Voraussetzung für eine
einwandfreie Funktion des Gerätes ist die Verwendung
von original Hendi Geräteteilen. Gebrauchsanweisung
bitte unbedingt lesen! Weitere Informationen: www.
hendi.eu
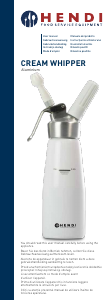
Charger Holder
Cap
Tulip Nozzle
Straight Nozzle
Nozzle Connector
Piston
Gasket
Head
Bottle
FRANÇAIS
Nous vous félicitons d’avoir choisi ce siphon à mousse
Hendi Whipper qui a une nition de qualité et pratique.
Cet appareil de cuisine polyvalent vous permet de pré-
parer rapidement des desserts, des crèmes, diverses
créations culinaires ainsi que des mousses et de
sauces salées ou sucrées. An de garantir la qualité de
notre produit, nous vous prions d’utiliser seulement les
cartouches Hendi.
Avant d’utiliser l’appareil de qualité Hendi, nous vous
conseillons de lire le mode d’emploi très attentivement.
Mode d’emploi
(Voir les illustrations sur les pages repliées de la couverture)
1. En cas de première utilisation de l’appareil ou s’il
n’a pas été utilisé pendant un certain temps, rincez la
bouteille à l’eau tiède.
2. Remplissez la bouteille Hendi de crème réfrigérée
ou d’autres ingrédients selon la recette. Ne dépassez
pas la quantité maximale de la bouteille (0.5 l ou 1.0 l).
Pour éviter la formation des grumeaux, remuez
les ingrédients.
3. Veillez à ce que le joint soit bien inséré dans la tête
(illustration 1). La tête est bien vissée si l’on ne voit
plus rien du let. Ne jamais placer la tête de travers!
(illustration 2)
4. Placez la cartouche Hendi (N2O) dans le porte-car-
touche (illustration 1).
5. Vissez le porte-cartouche contenant la cartouche
(illustration 3) jusqu’à ce que vous entendiez le bruit
produit par le dégagement du contenu de la cartouche.
N’utiliser qu’une cartouche par remplissage Hendi!
Secouez 4 ou 5 fois énergiquement l ’émulsionneur
verticalement. Si vous utilisez de la crème fraîche vraie
ou de longue conservation et bien froide, vous devez
secouer l’appareil jusqu’à 10 fois. Dévissez ensuite
le porte-cartouche (illustration 4). Un léger sifement
lors du dévissage n’a rien d’anormal. Ressortir les
cartouches et les jeter dans un container de recyclage
de matières premières.
6. Tenir l’émulsionneur de manière absolument verti-
cale (le bec de décoration doit être dirigé vers le bas) à
environ 1 cm au-dessus du mets à garnir et presser
légèrement le levier (illustration 4). Au cas où la crème
ou la mousse n’aurait pas atteint la consistance voulue,
secouez de nouveau brièvement l’appareil. Ne secouez
plus l’appareil lors des utilisations ultérieures.
Conservez l’appareil rempli dans le réfrigérateur
(jamais dans le congélateur ni dans le compartiment
congélation). Entreposage de l’émulsionneur plein:
Retirez la partie supérieure de la garniture de douille,
rincez-la brièvement à l’eau courante et replacez-la sur
l’appareil. Après l’emploi, placez l’émulsionneur dans
le réfrigérateur. De cette façon, le contenu restera frais
durant plusieurs jours.
Précisions importantes
Prêtez attention aux points importants suivants:
1. Avant de remplir l’appareil rafraîchir avec de l’eau
froide ou placer l’appareil dans le réfrigérateur.
2. N’utiliser que des ingrédients se dissolvant facile-
ment. Le sucre en poudre ou les édulcorants liquides
conviennent le mieux à l’édulcoration. Le sucre cristal-
lin ou le sel doit être dissous auparavant dans un peu
d’eau ou un peu de lait. N’utilisez que des condiments
en poudre. Les ingrédients non solubles comme des
graines etc. empêchent la fermeture de la soupape de
sortie et gênent le fonctionnement de l’émulsionneur
Hendi. Si vous utilisez les mélanges, veuillez utiliser un
tamis n pour retirer les graines ou la pulpe.
3. Le siphon à crème chantilly Hendi est bien adapté
pour la préparation des mousses à froid, des sauces (à
chaud) ou des espumas.
4. La crème pure se durcit si on la secoue trop: ne
secouer l’émulsionneur que 4-5 fois. Ne secouez plus
l’appareil lors des utilisations ultérieures.
5. Si l’appareil n’est pas placé verticalement avec la
tête vers le bas, la pression peut se dégager et rendre
impossible une vidange complète.
6. N’extraire les crèmes, mousses et sauces qu’au
dernier moment avant la consommation.
7. Pour les pièces détachées, veuillez contacter votre
revendeur ou Hendi directement.
8. N’utilisez que des pièces originales! Hendi Whipper.
Ne mélangez jamais les pièces de Hendi Whipper avec
d’autres pièces Hendi ou de produits de fabrication
étrangère aux pièces d’appareil Hendi.
9. Pour les réparations, retournez toujours l’unité
entière (tête plus bouteille).
Dépannage
Le chargeur n’est pas percé-ouvert:
Un chargeur non convenable a été utilisé ou bien un
chargeur a été inséré incorrectement. Utilisez exclusi-
vement les chargeurs de crèmes Hendi jetables et
placez-les dans le support de chargeur comme indiqué
sur la Fig. 1.
Vous n’avez pas appuyé sur le levier de distribution,
mais néanmoins, la crème coule à partir du bec et ne
peut s’arrêter:
a) Les additifs tels les sucres an poudre, épaississeurs
de crème, pulpe etc. n’ont pas été complètement
dissous, bloquant le piston. Utilisez seulement les
ingrédients qui se dissolvent complètement. Bien
mélanger avant de verser dans la bouteille. Tournez le
Fouetteur en position droite (bec vers le haut), couvrez
bien le bec à l’aide d’une lourde serviette et appuyez
fermement sur le levier. Ou bien si cela n’a pas d’effet,
pressez la valve vers le bas avec le bout de votre doigt,
pour libérer le gaz jusqu’à ce que le bruit de sifement
s’arrête, puis retirez le chapeau de bec et dévissez
la tête, nettoyez ensuite la valve de distribution et les
contenus.
b) La valve de distribution est endommagée. Contactez
votre fournisseur.
Lorsque le chargeur est vissé, du gaz s’échappe entre
la bouteille et la tête:
a) Il manque le corps principal. Insérez le corps
principal dans la tête.
b) Le corps principal est endommagé. Insérez un
nouveau corps.
c) La tête n’est pas vissée assez fermement. Vissez la
tête sur la bouteille en conformité avec les instructions
d’utilisation.
d) Le coin haut de la bouteille est endommagé.
Envoyez votre appareil à un centre de réparation ou à
Hendi.
La crème est encore liquide après la préparation:
a) Le fouetteur n’a pas été secoué fermement ou assez
souvent. Secouez à nouveau fermement.
b) Le fouetteur n’a pas été retourné lorsque le levier de
distribution a été pressé. Retournez toujours la bou-
teille avant d’appuyer sur le levier de distribution (bec
décorateur pointant verticalement vers le bas!)
La crème est trop ferme et “crache” sur les côtés du
bec:
L’appareil a été trop secoué. Ne secouez pas trop ou
secouez avant chaque utilisation.
IMPORTANT: N’essayez pas de modier le fouetteur.
Si vous ne pouvez pas résoudre un problème à l’aide
de ces instructions, veuillez contacter Hendi ou un
centre de réparation.
Nettoyage
Avant l’ouverture de l’émulsionneur, évacuer la
pression résiduelle en pressant sur le levier.
Suivez les étapes 1, 2 et 3 pour nettoyer:
1. Dévissez la tête de l’appareil, retirez la douille de
garniture, de même que le joint placé sur la bague
intérieure.
2. Nettoyez soigneusement toutes les composantes
avec un produit à vaisselle doux et rincez à l’eau
potable.
3. Laissez sécher les diverses composantes à l’air et
rangez l’émulsionneur sous forme démontée.
4. Pour le nettoyage, ne démonter que les pièces
indiquées sur l’illustration 5.
5. Ne pas nettoyer la bouteille (dedans et dehors) avec
des objets abrasifs.
6. Cet appareil n’est pas convient pour lave-vaiselle.
N’utilisez pas d’eau au dessus de 40 ºC pour laver le
plastique. Si vous avez acheté un siphon à mousse
avec une bouteille d’acier inoxydable, vous pouvez
laver la bouteille dans le lave-vaisselle, mais pas la
588079 (0.5L)
588369 (0.5L)
588086 (1.0L)
User Manual
Hendi BV
Steenoven 21
3911 TX Rhenen
The Netherlands
www.hendi.eu


Praat mee over dit product
Laat hier weten wat jij vindt van de Hendi 588369 Slagroomspuit. Als je een vraag hebt, lees dan eerst zorgvuldig de handleiding door. Een handleiding aanvragen kan via ons contactformulier.