Handleiding Roper Rhodes Greenwich

Handleiding voor je Roper Rhodes Greenwich nodig? Hieronder kun je de handleiding gratis bekijken en downloaden als PDF in het Nederlands en/of Engels. Dit product heeft 1 veelgestelde vraag, 0 comments en heeft 0 stemmen. Is dit niet de handleiding die je zoekt, neem dan contact met ons op.

Is je product kapot en biedt de handleiding geen oplossing meer? Dan kun je voor reparatie gratis terecht bij Repair Café.

Handleiding

Loading…

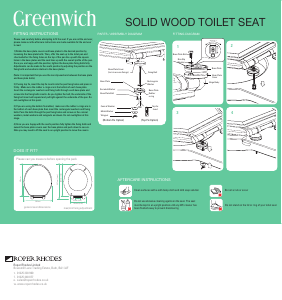
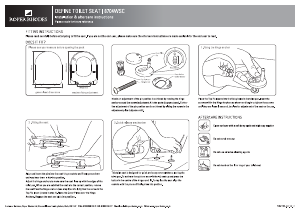
DOES IT FIT?
415mm
447mm (max)
405mm (min)
95mm (min)
185mm (max)
380mm
max/min fixing adjustment
general seat dimensions
Please can you measure before opening the pack
Roper Rhodes Limited
Brassmill Lane Trading Estate, Bath, BA1 3JF
01225 303 900
01225 448 877
www.roperrhodes.co.uk
t.
f.
e.
w.
SOLID WOOD TOILET SEAT
Do not scrub or scour
Do not stand on the lid or ring of your toilet seat
Clean surfaces with a soft damp cloth and mild soap solution
AFTERCARE INSTRUCTIONS
FITTING INSTRUCTIONS
Greenwich
PARTS / ASSEMBLY DIAGRAM
FITTING DIAGRAM
BLEACH
CLEANER
CREAM
CLEANER
Do not use abrasive cleaning agents on the seat. The seat
must be kept in an upright position until any WC cleaner has
been flushed away to prevent discolouring
Top Fix
Insert
Wingnut
Metal Washer
Conical Washer
Base Plate
Rectangular
Washer
Base Plate Cover
(turn to access fixings)
Fixing Bolt
OR
Serrated Washer
Base Plate Bolt
Base Plate
Rubber
o-ring
(Top Fix Option)
(Bottom Fix Option)
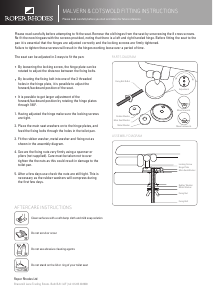
Please read carefully before attempting to fit the seat. If you are not the end user,
please make sure the aftercare instructions are made available for the end user
to read.
1) Rotate the base plate covers and base plates to the desired position by
loosening the base plate bolts. Then, offer the seat up to the toilet pan and
check whether the fixing holes on the top of the pan line up with the square
holes in the base plates and the seat lines up with the overall profile of the pan.
Once you are happy with the position, tighten the base plate fixing bolts fully.
Adjustments can be made to the seat’s position by adjusting the position on the
fixing bolts and washers relative to the base plates.
(Note: it is important that you use the non slip washers between the base plate
and base plate bolts).
2) If using top fix, insert the top fix inserts into the pan fixing holes and press in
firmly. Make sure the rubber o-rings are in the bottom of each base plate.
Insert the rectangular washers and fixing bolts through each base plate and
screw into the fixing bolts inserts. As you tighten the bolt, the underside of the
fixing bolt insert will expand and pull tight against the underside of the pan. Do
not overtighten at this point.
3) If you are using the bottom fix method, make sure the rubber o-rings are in
the bottom of each base plate then insert the rectangular washers and fixing
bolts. Pass the bolts through the pan fixing holes and screw on the conical
washers, metal washers and wingnuts as shown. Do not overtighten at this
stage.
4) Once you are happy with the seat’s position fully tighten the fixing bolts and
swivel the base plate covers over the base plates and push down to secure.
Note you may need to lift the seat to an upright position to move the covers.
Base Plate
Cover
Base Plate
Non Slip
Washer
Base Plate Bolt
Hinge Body
1
B
Adjustment A
Base Plate
C
2
3
4
Download de handleiding in het Nederlands en/of Engels (PDF, 0.76 MB)
(Denk aan het milieu en print deze handleiding alleen als dat echt noodzakelijk is)

Loading…

Beoordeling

Laat ons weten wat je van de Roper Rhodes Greenwich vindt door een beoordeling achter te laten. Wil je je ervaringen met dit product delen of een vraag stellen? Laat dan een bericht achter onderaan de pagina.
Bent u tevreden over de Roper Rhodes Greenwich ?
Ja Nee
Beoordeel dit product als eerste
0 stemmen

Praat mee over dit product

Laat hier weten wat jij vindt van de Roper Rhodes Greenwich . Als je een vraag hebt, lees dan eerst zorgvuldig de handleiding door. Een handleiding aanvragen kan via ons contactformulier.

Meer over deze handleiding

We begrijpen dat het prettig is om een papieren handleiding te hebben voor je Roper Rhodes Greenwich . Je kunt de handleiding bij ons altijd downloaden en daarna zelf printen. Indien je graag een originele handleiding wilt hebben, raden we je aan contact op te nemen met Roper Rhodes. Zij kunnen wellicht nog voorzien in een originele handleiding. Zoek je de handleiding van Roper Rhodes Greenwich in een andere taal? Kies op de homepage je taal naar keuze en zoek daarna op het modelnummer om te zien of we deze beschikbaar hebben.

Specificaties

Merk Roper Rhodes
Model Greenwich
Categorie WC-brillen
Bestandstype PDF
Bestandsgrootte 0.76 MB

Alle handleidingen voor Roper Rhodes WC-brillen
Meer handleidingen voor WC-brillen

Veelgestelde vragen over Roper Rhodes Greenwich

Ons supportteam zoekt dagelijks naar nuttige productinformatie en antwoorden op veelgestelde vragen. Als er onverhoopt toch een onjuistheid tussen onze veelgestelde vragen staat, laat het ons dan weten via het contactformulier.

Wat is het verschil tussen een houten en een kunststof WC-bril? Geverifieerd

Houten WC-brillen zijn zwaarder en voelen steviger. Ze verwarmen ook sneller door lichaamstemperatuur. Kunststof WC-brillen gaan langer mee en bieden meer mogelijkheden in vorm en design.

Ik vind dit nuttig (100) Lees meer
Handleiding Roper Rhodes Greenwich