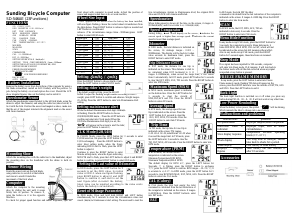
Sunding Bicycle Computer
SD-573C
FUNCTIONS
-SPD CURRENT SPEED
-TOT-ODO TOTAL ODOMETER
-TRP DIST TRIP DISTANCE
-MAXSPD MAXIMUM SPEED
-AVG SPD AVERAGE SPEED
-CLOCK(12H/24H)
-TRP TIME TRIP TIME
-STPWTCH STOPWATCH
-SCAN
-COMPAPATOR
-CALORIE
-FATBURN
-SETTING SPEED SCALE(KM /M)
-SETTING TYRE CIRCUMFERENCE
-SETTING THE INITIAL VALUE OF ODOMETER / ODO
-SETTING THE RIDER’S WEIGHT
-MAINTENANCE ALERT
-AUTO ON/OFF
-P HEART RATE(CURRENT HEART RATE)
-MAX HEART RATE
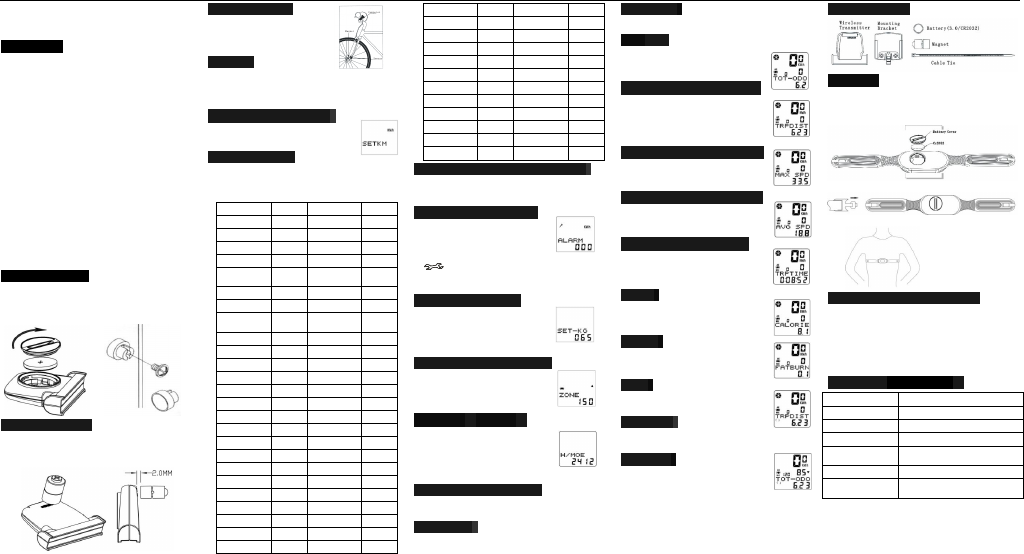
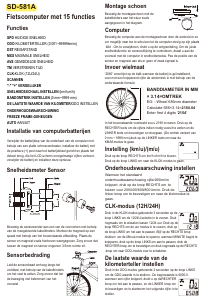
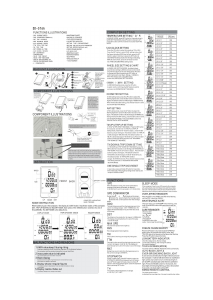
Battery Installation
Remove the battery cover from the bottom of the computer by using a flat blade
screwdriver, install an AG13 battery with the positive (+) pole facing the battery cover
and replace the cover. Should the LCD show irregular figures, take out the battery and
re-install it.
Speedometer Sensor
Attach the speedometer sensor bracket to the left fork blade, using the shims to adjust
the diameter, and using the cable ties (show below) to tie it with the fork. position the
sensor and magnet as show; make sure that the arc of the magnet intersects the
alignment mark on the sensor with 2mm clearance.
MountingBracket
Attach the mounting shoe with the cable
ties to the handlebar, adjust the mounting
shoe on the handlebar with the shims to
hold its position.
Computer
Attach the computer to the mounting shoe by sliding the unit until it snaps firmly into
its postion. To remove it, press the button on it in the opposite direction.
To check for proper speed function and sensor alignment, spin the front wheel with
computer in speed mode. Adjust the position of sensor and magnet when there is no or
weak reaction.
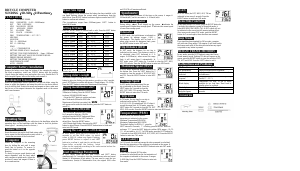
Setting(km/h)/(m/h)
Press the RIGHT button to choose km/h or m/h. Press the LEFT
button to enter into
WHEEL SIZE INPUT MODE
Wheel Size Input
2155’ appears on the screen when the battery has been installed.Press the RIGHT
button, one figure will flashes, choose the correct wheel circumference from the table
below. Press the RIGHT button to advance digits as needed and the LEFT button to
confirm and advance to the next digit. (The circumference ranges :0mm ~
9999mm),press the LEFT button to ODOMETER SETTING MODE.
Setting The Initial Value Of Odometer
In ODO mode, press the LEFT button for 2 seconds to set the ODO value, its default
value is 0000.0. when one figure is flashing, press the RIGHT button to adjust it and
the LEFT button to confirm it, and start to set the next figure. Press the LEFT button
to enter into MAINTERNANCE ALERT SETTING MODE.
Setting Maintenance Alert ]
In Maintenance Alert mode, the default Maintenance Alert
value is 000(KM/M), Press the RIGHT button, the first digit
will flash .Re-press the RIGHT button to change the value,
and the LEFT button to advance to the next digit the value
ranges 000~800(KM/M).
Functions specifications when the ODO reaches the setted Maintenance Alert value,
the will appear on the screen to alert the rider, Press the LEFT button for 5
seconds, it will disappear, and the value for Trip Distance、Maxmum Speed、Average
Speed and Riding Time will be cleared. Press the LEFT button to entre into the
RIDER’S WEIGHT SETTING MODE.
Setting Rider’s Weight
In the Rider’s Weight Setting mode,press the RIGHT
button to reset measuring unit,and press the LEFT button to
enter into the next mode.The default weight is 65kg, press
the RIGHT button to adjust the flashing weight number
according to rider’s weight, press the LEFT button to
confirm and advance. Weight ranges : 20~150kg. Press the
LEFT button to enter into HEART RATE THRESHOLD SETTING MODE.
Setting Heart Rate Threshold
Heart rate lower limit is 80 beats / min, press the RIGHT
button to change the value,and press the LEFT button to
confirm and advance to the next digit.Enter into the
maximum limit setting after setting the lower limit.The
maximum limit is 180 beats / min.Press the LEFT button to
enter into CLOCK MODE.
CLK Mode(12H/24H)
In CLOCK Mode, press the LEFT button for 3seconds to
enter into 12/24H selection. Re-press the LEFT button for
12/24 exchanging. Press the RIGHT button to enter into
Hour setting mode, when the figure indicating HOUR starts
to flash, press the LEFT button to adjust it. Continue to press
the RIGHT button to enter into Minute setting mode, when
the figure indicating MINUTE starts to flash, press the LEFT button to adjust it and
the RIGHT button to confirm, re-press the RIGHT button to enter into ODO MODE.
Reset Of Mileage Parameter
In ODO mode, Press LEFT button for 3 seconds to entre DATA SETIING MODE.
The user needs to reset the tyre circumference, (km/m) & Maintenance Alert, the
original ODO value and CLOCK will remain unaffected.
Speedometer
When one is riding,speed is shown on the screen all the time, it ranges 0-
99.9km/h(m/h), and it is accurate to +/- 0.1km/h (m/h).
Comparator
During riding , ▲and ▼will dispaly on the screen ,▲indicates the current speed is
higher than average speed. ▼indicates the current speed is lower than average speed.
TOT-ODO
In ODO mode , the total distance is indicated
on the screen, its mileage ranges : 0.001~99999km(m).The
display will be back to 0 when value exceeds its maximum
limit. Press the RIGHT button to enter into DST MODE.
Trip Distance (TRP DIST)
In DST mode, the distance for one trip is indicated on the
screen. This distance is start to be calculated when DST
becleared to 0. It 7ranges: 0~9999km(m), when the distance
exceeds the range limit, it will restart from 0 automatically. In
DST mode, press LEFT button for 5 seconds to clear the DST,
MXS, AVS, TM records. Press the RIGHT button to enter into
MAX SPD MODE.
Maximum Speed (MAX SPD)
In MAX SPD mode, maximum speed is indicated on the
bottom line. Press the LEFT button for 5 seconds to clear the
records of MAX SPD,DST, AVG SPD and TRP TIME. Press the
RIGHT button to enter into AVG SPD MODE.
Average Speed(AVG SPD)
In AVG SPEED mode, the average speed for one trip is indicated
on the screen. Press the LEFT button for 5 seconds to clear the
AVG SPD, DST, MAX SPD, TRP TIME records. Press the
RIGHT button to enter Into TRP TIME MODE.
Trip Time(TRP TIME)
In TRP TIME mode, the trip time for one trip is indicated on the
screen. TM ranges :0 :00 :00~9 :59 :59,restartfrom0 :00 :00
when it exceed the range limit. In TM mode, press the LEFT
button for 5 seconds to clear the TM, DST, MXS, AVS records.
Press the RIGHT button to enter CALORIE MODE.
Calorie
In CALORIE mode, the total heat energy the rider consumed
calculated from the last restoration of the computer is indicated
on the screen. It ranges: 0~99999Kcal. Press the RIGHT button
to enter into FATBURN MODE.
Fatburn
In FATBURN mode, the total FATBURN the rider consumed is
calculated from the last restoration of the computer is indicated
on the screen. It ranges: 0~9999.9kg. Press the RIGHT button to
enter into SCAN MODE.
Scan
In SCAN mode, the DST, MXS, AVS, TM are indicated in turn
every 4 seconds. Press the RIGHT button to enter into CLOCK
MODE..
Sleep Mode
If no signal has been inputted for 300 seconds, computer will enter into Sleep mode,
CLK remains. It will turn back to the former mode with all the data remain unaffected
when any signal is inputted or any button is pressed.
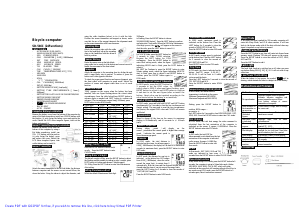
Heart Rate
* P Curret heart rate Beats / min
* MAX Maximum heart rate Beats / min
Accessories
Chest Belt
Remove the battery cover from the chest belt, install an CR2032 battery with the
positive (+) pole facing the battery cover and replace the cover.
Move to the left to unlock the cover and right to tight it.
* Attaching the chest belt
* Attach the belt with the battery cover facing the body.
Functional Description And Notes
* Wireless transmission heartbeat frequency is 110KHz
* Attach the belt with the lable on the belt can be seen outside and placed rightly.If the
lable looks upside down, it is placed incorrectly.
* The belt must be placed near the heart, close to the body. Any cloth or other
materials which will isolate conduction of body and belt are not allowed .
* In dry and cold environment, bad contraction may exist for the first few minutes
when putting on the belt, in this case please just wait for a few minutes; users can also
put a few drops of clean water or conductive gel to wet the inside of the conductive
material, which can help to realize better and faster heartbeat transmission.
Malfunctions And Problems
Improper magnet/sensor alignment
Inaccurate value is indicated
Improper input, such as wheel circumference.
Temperature exceeds operating limits (0℃~55℃)
Be exposed in sunlight for too long time, should
take it back to shade for a period.
Poor battery or dead battery
Display irregular figures
Take the battery out and reinstall it after 10
seconds.

Praat mee over dit product
Laat hier weten wat jij vindt van de Sunding SD-573C Fietscomputer. Als je een vraag hebt, lees dan eerst zorgvuldig de handleiding door. Een handleiding aanvragen kan via ons contactformulier.