
Please Read and Save this Use and Care Book.
IMPORTANT SAFEGUARDS
When using electrical appliances, basic safety
precautions should always be followed, including the
following:
❍
Read all instructions.
❍
Do not touch hot surfaces. Use handles or knobs.
❍
To protect against fire, electric shock and injury to
persons do not immerse cord, plugs or appliance in
water or other liquid.
❍
Close supervision is necessary when any appliance is
used by or near children.
❍
Unplug from outlet when not in use and before
cleaning. Allow to cool before putting on or taking off
parts, and before cleaning the appliance.
❍
Do not operate any appliance with a damaged cord or
plug, or after the appliance malfunctions or has been
damaged in any manner. Return appliance to the
nearest authorized service facility for examination,
repair or adjustment.
❍
The use of accessory attachments not recommended
by the appliance manufacturer may result in fire,
electric shock or injury to persons.
❍
Do not use outdoors.
❍
Do not let cord hang over edge of table or counter, or
touch hot surfaces.
❍
Do not place on or near a hot gas or electric burner,
or in a heated oven.
❍
To disconnect, turn any control to OFF (0), then
remove plug from wall outlet.
❍
Do not use this appliance for other than intended use.
❍
Keep lid on the carafe when in use.
❍
Scalding may occur if the lid is removed during the
brewing cycles.
❍
Do not set a hot carafe on a wet or cold surface.
❍
Do not use a cracked carafe or a carafe having a loose
or weakened handle.
❍
Do not clean carafe with cleansers, steel wool pads or
other abrasive material
SAVE THESE
INSTRUCTIONS.
This product is for household use only.
POLARIZED PLUG (120V Models Only)
This appliance has a polarized plug (one blade is wider than the other). To
reduce the risk of electric shock, this plug is intended to fit into a polarized
outlet only one way. If the plug does not fit fully into the outlet, reverse the
plug. If it still does not fit, contact a qualified electrician. Do not attempt to
modify the plug in
TAMPER-RESISTANT SCREW
Warning: This appliance is equipped with a tamper-resistant screw
to prevent removal of the outer cover. To reduce the risk of fire or
electric shock, do not attempt to remove the outer cover. There are
no user-serviceable parts inside. Repair should be done only by
authorized service personnel.
ELECTRICAL CORD
a) A short power-supply cord (or detachable power-supply cord) is to
be provided to reduce the risk resulting from becoming entangled
in or tripping over a longer cord.
b) Longer detachable power-supply cords or extension cords are
available and may be used if care is exercised in their use.
c) If a long detachable power-supply cord or extension cord is used,
1) The marked electrical rating of the detachable power-supply
cord or extension cord should be at least as great as the
electrical rating of the appliance,
2) If the appliance is of the grounded type, the extension cord
should be a grounding-type 3-wire cord, and
3) The longer cord should be arranged so that it will not drape
over the countertop or tabletop where it can be pulled on by
children or tripped over.
Note: If the power supply cord is damaged, it should be replaced by
qualified personnel, in Latin America by an authorized service center.
How to Use
This product is for household use only.
GETTING STARTED
• Wash removable parts as instructed in CARE AND CLEANING.
• Pour fresh cold water up to 12 MAX mark.
• Place permanent nylon filter or 8-12 cup cone-style paper filter into filter
basket.
• Place basket into filter basket holder.
• Plug cord into standard electrical outlet.
• Brew water through appliance without adding coffee grounds.
• Discard water, rinse permanent filter or discard paper filter, if used.
• Turn off appliance, unplug and allow to cool down.
SETTING THE CLOCK
1. Plug appliance into standard electrical outlet.
2. The digital clock displays 12:00 and (:) flashes.
3. To set the time: Press HOUR (HR) button until correct time appears on
display. Display indicates P.M.
4. Press MIN button to select minutes.
Note: If unit is unplugged or power is interrupted even momentarily, the time
will need to be reset.
BREWING COFFEE
1. Open cover. Fill water reservoir with cold tap water. Do not exceed 12-cup
MAX level on the water reservoir.
Important: If too much water is added it will leak from the back of the
coffeemaker.
2. Place permanent filter or 8-12 cup cone-style paper filter into filter basket.
Add ground coffee (we suggest 1 heaping tablespoon per cup). Place filter
basket in place.
3. Make sure carafe lid is properly attached to empty carafe.
Note: Coffee may run over if lid is not in place on carafe.
4. Place empty carafe on carafe plate.
5. Plug cord into an outlet.
6. Press brew strength button to select strong brew strength; its light
illuminates.
Note: Your coffeemaker is set to brew at regular brew strength.
7. Press brew strength button again to select regular brew strength. The
brew strength light goes off.
8. Press I/0 button; its light illuminates and brewing begins. Coffeemaker will
keep coffee hot for 1-4 hours and then it automatically shuts off.
9. When coffee grounds are cool, carefully remove and discard used grounds
and filter.
10. To turn off coffeemaker at any time press I/0 button.
11. Unplug appliance when not in use.
12. Press tab on carafe lid to pour coffee.
BREWING 1 T0 4 CUPS
This feature slows down the brewing to extract the best flavor when brewing
a small amount of coffee.
1. Add the appropriate amount of water for the number of cups to be brewed
(1 – 4).
2. Fill the permanent filter or paper filter with desired amount of coffee
grounds.
3. Press the 1 – 4 button. Its light illuminates.
Note: Brew strength cannot be selected in this mode. Coffee will be brewed at
regular strength.
SNEAK-A-CUP® FEATURE
Remove the carafe and brewing is paused. The carafe must be placed back
on the carafe plate in 30 seconds to prevent overflow. Brewing begins again.
SETTING AUTO BREW TIME
1. Press and hold PROG/AUTO button. Digital display shows displays 12:00
or previous preset auto brew time.
2. Quickly press HOUR button then MIN button to select the time you would
like automatic brewing to begin (for example, 7:15 A.M. Make sure the
“P.M.” is on display.)
3. Press PROG/AUTO button to activate auto brew function. The word AUTO
will display. The PROG/AUTO light illuminates.
4. To check preset auto time, press PROG/AUTO button and hold it. The clock
time displays again after 5 seconds.
5. To change the preset auto time, press PROG/AUTO button hold and change
to preset time.
6. To cancel Auto Brew function, press I/O button at any time.
KEEPING COFFEE HOT - AUTO OFF
Once the coffee has brewed, the coffeemaker will keep the “Keep Hot” carafe
plate hot between 1-4 hours, then it shuts off automatically.
Care and Cleaning
This product contains no user serviceable parts. Refer service to qualified
service personnel.
CLEANING
Important : Make sure your coffeemaker is unplugged and cool.
1. Remove filter basket. Discard used paper filter and coffee grounds.
2. Wash filter basket, permanent filter, carafe and carafe lid in dishwasher
(top-rack) or by hand in hot, soapy water.
3. Wipe outside of coffeemaker, control panel and carafe plate with a soft,
damp cloth.
Note: Do not use abrasive cleansers or scouring pads. Never immerse the
coffeemaker in water.
5. To clean the inside of the cover, open the cover and leave in the open
position; wipe with a damp cloth.
AUTO CLEAN® SYSTEM
We recommend cleaning your coffeemaker once a month.
1. Combine 6 cups of white vinegar and 4 cups of cold water in carafe.
2. Pour into water reservoir.
3. Place an 8 to 12 cup cone style paper filter in the removable filter basket.
Insert filter basket into filter basket holder and close lid.
4. Make sure carafe lid is in place and place empty carafe on the carafe plate.
5. Plug power cord into an outlet.
6. Press AUTO CLEAN to activate cleaning cycle; the AUTO CLEAN light
flashes. Part of the mixture will brew through. Remaining mixture will be
held in coffeemaker for 30 minutes before completing its brew through.
Note: The entire cleaning cycle will take 45-60 minutes to complete.
6. When the coffeemaker completes the AUTO CLEAN cycle, it beeps 3 times
and shuts off automatically.
7. Brew fresh water through appliance following instructions in GETTING
STARTED before brewing coffee again.
USA/Canada 1-800-231-9786
Accessories/Parts 1-800-738-0245
Register your product at www.prodprotect.com/applica
Product may vary slightly from what is illustrated.
© 2011 Applica Consumer Products, Inc.
2011/2-3-28E/F
MODEL
CM1300SC
is a registered trademark of The Black & Decker Corporation, Towson,
Maryland, USA
Marque de commerce déposée de la société The Black & Decker
Corporation, Towson, Maryland, É.-U.
Made and Printed in People’s Republic of China
Fabriqué et Imprimé en République populaire de Chine
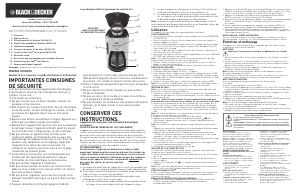
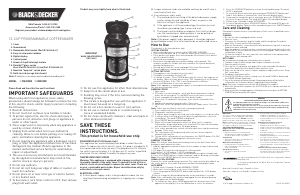
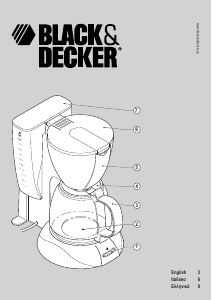
12-CUP PROGRAMMABLE COFFEEMAKER
1.Cover
2. Showerhead
† 3. Permanent filter (Part # CM1300-01)
† 4. Removable filter basket (Part # CM1300-02)
5. Control panel
† 6. Carafe lid (Part # CM1300-03)
† 7. Perfect Pour® carafe (Part # CM1300-04)
8. “Keep Hot” carafe plate
9. Water reservoir with level markings
10. Sneak-A-Cup® feature (not shown)
11. Cord storage (inside unit)
Note: † indicates consumer replaceable/removable parts
IMPORTANT
WASH CARAFE BEFORE
FIRST USE!
WARNING
RISK OF FIRE OR ELECTRIC SHOCK. DO NOT OPEN.
The lightning symbol refers to “dangerous voltage”; the exclamation symbol refers
to maintenance instructions. See below.
Warning: To reduce the risk of fire or electric shock, do not remove the cover of the
coffeemaker. There are no user-serviceable parts inside. Repair should be done by
authorized service personnel only.
NEED HELP?
For service, repair or any questions regarding
your appliance, call the appropriate 800 number
in front of this sheet. Please DO NOT return the
product to the place of purchase. Also, please DO
NOT mail product back to manufacturer, nor bring
it to a service center. You may also want to consult
the website listed on the cover of this manual.
TWO-YEAR LIMITED WARRANTY
(Applies only in the United States and Canada)
What does it cover?
• Any defect in material or workmanship
provided; however, Applica’s liability will not
exceed the purchase price of product.
For how long?
• Two years from the date of original purchase
with proof of such purchase.
What will we do to help you?
• Provide you with a reasonably similar
replacement product that is either new or
factory refurbished.
How do you get service?
• Save your receipt as proof of date
of sale.
• Visit the online service website at www.
prodprotect.com/applica, or call toll-free
1-800-231-9786, for general warranty service.
• If you need parts or accessories, please call
1-800-738-0245.
What does your warranty not cover?
• Damage from commercial use
• Damage from misuse, abuse or neglect
• Products that have been modified in any way
• Products used or serviced outside the country
of purchase
• Glass parts and other accessory items that are
packed with the unit
• Shipping and handling costs associated with
the replacement of the unit
• Consequential or incidental damages (Please
note, however, that some states do not allow
the exclusion or limitation of consequential or
incidental damages, so this limitation may not
apply to you.)
How does state law relate to this warranty?
• This warranty gives you specific legal rights.
You may also have other rights that vary from
state to state or province to province.



Praat mee over dit product
Laat hier weten wat jij vindt van de Black and Decker CM1300SC Koffiezetapparaat. Als je een vraag hebt, lees dan eerst zorgvuldig de handleiding door. Een handleiding aanvragen kan via ons contactformulier.