• Remove any labels, stickers or tags attached to the body or soleplate of the iron.
• Remove and save literature.
• Please go to www.prodprotect.com/applica to register your warranty.
Note: Use ordinary tap water for ironing. Do not use water processed through a home softening
system.
Important: For optimum performance, let the iron stand for 90 seconds before begin-
ning to iron.
FILLING WATER TANK
1. With iron on flat surface with soleplate down, open water-fill cover
(A).
2. Tilt the iron and using a clean measuring cup, pour water into
opened chamber until water reaches the MAX level mark on the side
of the water tank. Do not overfill.
3. Close the water-fill cover.
4. Plug in the iron. The power indicator light illuminates.
Note: If you need to add water while ironing, unplug the iron and fol-
low above steps.
Tip: If unsure of a garment’s fiber, test a small area (on an inside
seam or hem) before ironing.
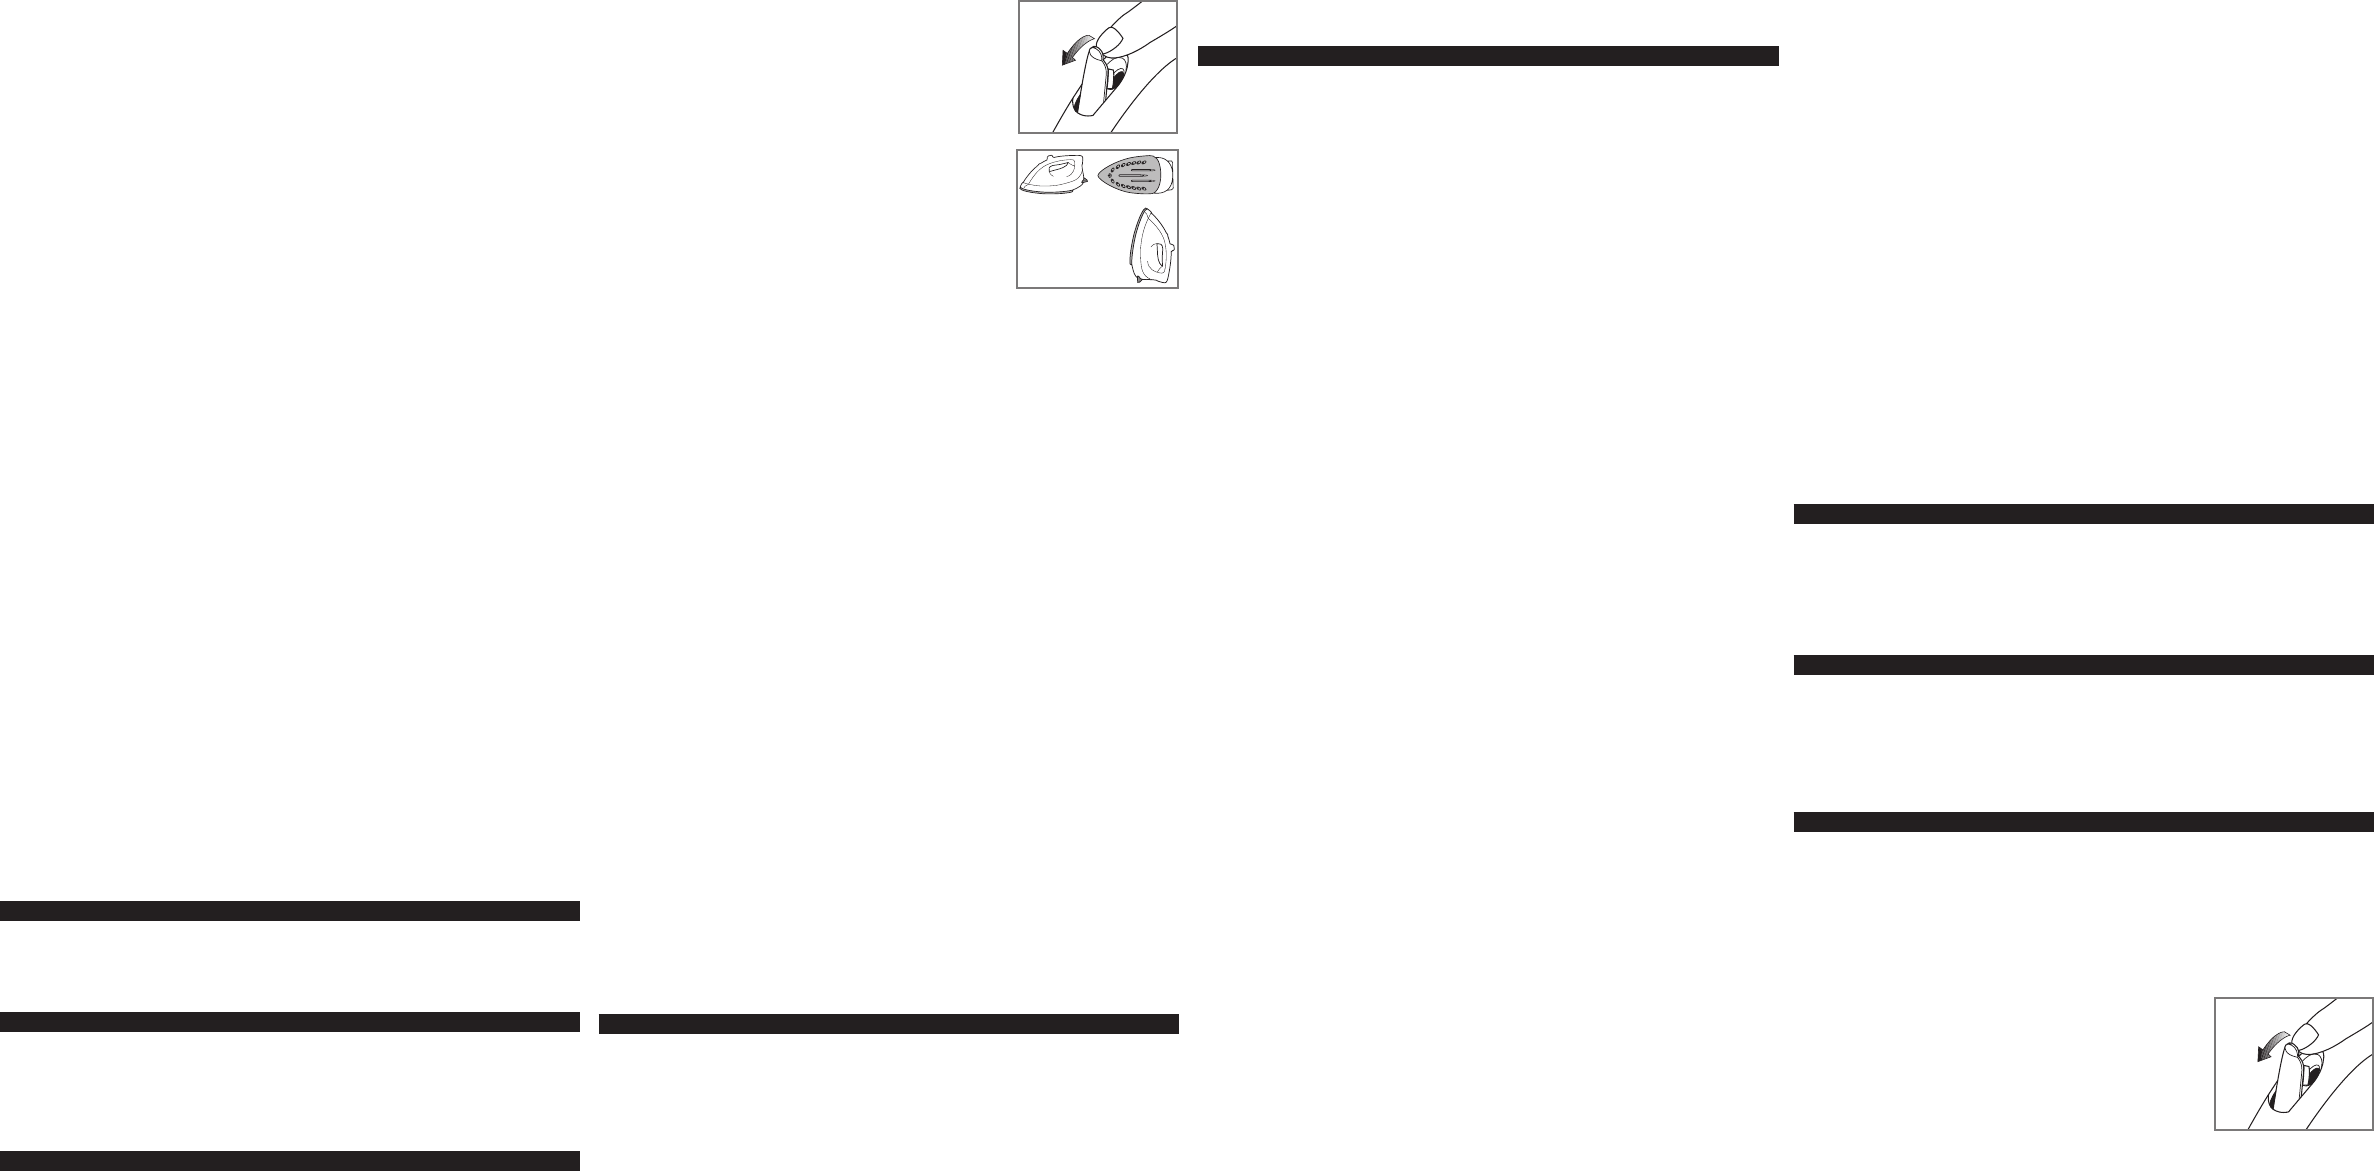
3-WAY AUTOMATIC SHUTOFF
The automatic shutoff feature in your iron works as follows:
• Once the iron reaches appropriate temperature, it will turn off after 30
seconds of inactivity if left on its soleplate or tipped over
on its side. If left vertically on its heel rest, it will shut off after
8 minutes (B).
• The power indicator light starts blinking to let you know that the iron has stopped heating.
• As soon as you pick up the iron, it will start heating again. Wait for iron to reheat completely before
resuming operation.
SMART STEAM
TM
TECHNOLOGY
The Smart Steam
TM
system automatically produces steam when you turn the fabric select dial
between settings 4 and 6.
SURGE OF STEAM
Horizontal
Tip: Use to remove stubborn creases.
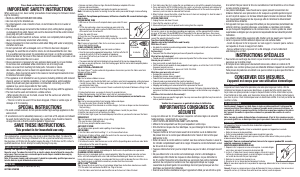
1. With the water tank filled to the MAX mark, set fabric select dial to appropriate setting (between
4 and 6) for your fabric. See fabric guide under the heel rest and read garment’s label to help
you determine fabric type.
2. Be sure there is water in the reservoir. Steam is automatically turned off between settings 0 and
3.
3. For best performance, use surge of steam at 5-second intervals.
4. When finished ironing, turn the fabric select dial to 0 and unplug the iron.
Important: Always stand the iron on its heel rest when powered, on but not in use.
Vertical
Tip: Use for removing wrinkles from hanging clothes and drapes.
1. Be sure the water tank is filled to the MAX mark.
2. Hang the garment to be steamed on a clothes hanger. (Curtains or drapes can be steamed once
they are hung.)
3. Set the fabric select dial to appropriate setting (between 4 and 6) for your fabric.
4. Hold the iron close to, but not touching, the fabric.
5. Pull the fabric tight in your free hand and pump the button as you move the iron over the fabric.
USING SPRAY
Tip: Use to dampen tough wrinkles at any setting.
1. Be sure the iron is filled with water.
2. On first use, pump the button several times.
ANTI DRIP SYSTEM
The anti drip system prevents water spotting at low temperatures.
DRY IRONING
1. Turn the fabric select dial to setting 1, 2, or 3 to iron without steam.
2. To dry iron at higher settings, empty the water from the reservoir to prevent steaming.
EMPTYING WATER TANK (OPTIONAL)
1. Unplug the iron and let it cool.
2. To release the water, hold the iron over a sink with the tip pointing down and to one side. Water
will empty out of the water-fill opening.
This product contains no user serviceable parts. Refer service to qualified service personnel.
CLEANING OUTSIDE SURFACES
Make sure iron is unplugged and has cooled completely. Wipe the soleplate and outer surfaces
with a soft cloth dampened with water. Add mild household detergent. Never use abrasives,
heavy-duty cleansers, vinegar or scouring pads that may scratch or discolor the iron. After clean-
ing, steam iron over an old cloth to remove any residue from the steam vents.
AUTO CLEAN
TM
SYSTEM
Tip:To keep the steam vents free of any buildup, follow these instructions about once a month:
1. Fill the water tank well below the MAX line. Plug in the iron.
2. Turn the fabric select dial to 6 and stand the iron on its heel rest. Allow it to heat.
Please Read and Save this Use and Care Book.
IMPORTANT SAFETY INSTRUCTIONS
When using your iron, basic safety precautions should always be followed, includ-
ing the following:
• READ ALL INSTRUCTIONS BEFORE USING.
• Use iron only for its intended use.
• To protect against a risk of electric shock, do not immerse the iron in water or
other liquids.
• The iron should always be turned to the minimum (min) setting before plugging
or unplugging from outlet. Never yank cord to disconnect from the outlet; instead
grasp plug and pull to disconnect.
• Do not allow cord to touch hot surfaces. Let iron cool completely before putting
away. Loop cord loosely around iron when storing.
• Always disconnect iron from electrical outlet when filling with water or emptying,
and when not in use.
• Do not operate iron with a damaged cord, or if the iron has been dropped or
damaged. To avoid the risk of electric shock, do not disassemble the iron; take
it to a qualified service person for examination and repair, or call the appropriate
toll-free number on the cover of this manual. Incorrect reassembly can cause a risk
of electric shock when the iron is used.
• Close supervision is necessary for any appliance being used by or near children.
Do not leave iron unattended while connected or on an ironing board.
• Burns can occur from touching hot metal parts, hot water or steam.
Use caution when you turn a steam iron upside down or use the surge
of steam—there may be hot water in the reservoir. Avoid rapid movement of iron
to minimize hot water spillage.
• This appliance is not intended for use by persons (including children) with reduced
physical, sensory or mental capabilities, or lack of experience and knowledge,
unless they have been given supervision or instruction concerning use of the
appliance by a person responsible for their safety.
• Children should be supervised to ensure that they do not play with the appliance.
• The iron must be used and rested on a stable surface.
- When placing the iron on its stand, ensure that the surface on which the
stand is placed is stable.
- The iron is not to be used if it has been dropped, if there is visible signs of
damage or if it is leaking.
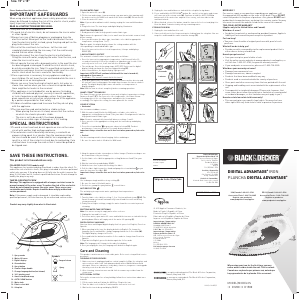
SPECIAL INSTRUCTIONS
• To avoid a circuit overload, do not operate another high-wattage appliance on the
same circuit.
• If an extension cord is absolutely necessary, a cord rate at 15-ampere cord should
be used. Cords rated for less amperage may overheat. Care should be taken to
arrange the cord so that it cannot be pulled or tripped over.
SAVE THESE INSTRUCTIONS.
This product is for household use only.
This appliance has a polarized plug (one blade is wider than the other). To reduce the
risk of electric shock, this plug is intended to fit into a polarized outlet only one way. If
the plug does not fit fully into the outlet, reverse the plug. If it still does not fit, contact a
qualified electrician. Do not attempt to modify the plug in any way.
Warning: This appliance is equipped with a tamper-resistant screw to prevent removal of
the outer cover. To reduce the risk of fire or electric shock, do not attempt to remove the
outer cover. There are no user-serviceable parts inside. Repair should be done only by
authorized service personnel.
Note: If the power supply cord is damaged, it should be replaced by qualified personnel or
in Latin America by an authorized service center.
This appliance is intended for household use only.
GETTING STARTED
3. Turn fabric select dial to 0, unplug the iron and hold over a sink with the soleplate facing down.
4. Press and hold the AUTO CLEAN
TM
button. Be careful, as hot water and steam will come out of
the steam vents. Continue to hold the AUTO CLEAN
TM
button until all the water has emptied. If
necessary, rock iron side-to-side and front-to-back.
5. When finished, release the button, stand the iron on its heel rest and plug it in. Heat for about 2
minutes to dry out any remaining water.
STORING YOUR IRON
1. Unplug the iron and allow it to cool.
2. Check that the selector is set to 0.
3. Store vertically on its heel to prevent water leaking from the soleplate.
For service, repair or any questions regarding your appliance, call the appropriate 800 number
on cover of this book. Please DO NOT return the product to the place of purchase. Also, please
DO NOT mail product back to manufacturer, nor bring it to a service center. You may also want to
consult the website listed on this sheet.
Two-Year Limited Warranty
(Applies only in the United States and Canada)
What does it cover?
• Any defect in material or workmanship provided; however, Applica’s liability will not exceed the
purchase price of product.
For how long?
• Two years from the date of original purchase with proof of such purchase.
What will we do to help you?
• Provide you with a reasonably similar replacement product that is either new or factory refurbished.
How do you get service?
• Save your receipt as proof of date of sale.
• Visit the online service website at www.prodprotect.com/applica, or call toll-free 1-800-231-9786,
for general warranty service.
• If you need parts or accessories, please call 1-800-738-0245.
What does your warranty not cover?
• Damage from commercial use
• Damage from misuse, abuse or neglect
• Products that have been modified in any way
• Products used or serviced outside the country of purchase
• Glass parts and other accessory items that are packed with the unit
• Shipping and handling costs associated with the replacement of the unit
• Consequential or incidental damages (Please note, however, that some states do not allow the
exclusion or limitation of consequential or incidental damages, so this limitation may not apply to
you.)
How does state law relate to this warranty?
• This warranty gives you specific legal rights. You may also have other rights that vary from state to
state or province to province.
Veuillez lire et conserver ce guide d’entretien et d’utilisation.
IMPORTANTES CONSIGNES DE
SÉCURITÉ
Lorsqu’on utilise un fer, il faut toujours respecter certaines règles de sécurité
fondamentales, notamment les suivantes :
• LIRE TOUTES LES DIRECTIVES AVANT L’UTILISATION.
• Utiliser le fer uniquement aux fins pour lesquelles il a été conçu.
• Afin d’éviter les risques de choc électrique, ne pas immerger le fer dans l’eau ou
tout autre liquide.
• Toujours mettre le fer hors tension avant de le brancher ou de le débrancher.
Ne jamais tirer sur le cordon pour débrancher le fer. Saisir et tirer la fiche pour
débrancher le fer.
• Éviter de laisser le cordon entrer en contact avec des surfaces chaudes. Laisser le
fer refroidir complètement avant de le ranger. Enrouler le cordon lâchement autour
du fer avant de le ranger.
• Toujours débrancher le fer pour le remplir d’eau ou pour le vider, et lorsqu’il ne sert
pas.
• Ne pas utiliser le fer si le cordon est endommagé, si le fer a été échappé ou
endommagé. Afin d’éviter les risques de choc électrique, ne pas démonter le
fer. En confier l’inspection et la réparation au personnel d’un centre d’entretien
autorisé. Ou composer le numéro sans frais approprié indiqué sur la page
couverture du présent guide. Un assemblage incorrect peut provoquer un choc
électrique au moment de l’utilisation.
• Exercer une étroite surveillance lorsque l’appareil est utilisé par un enfant ou près
d’un enfant. Ne pas laisser le fer sans surveillance s’il est branché ou s’il se trouve
sur une planche à repasser.
• Les pièces métalliques, l’eau chaude ou la vapeur peuvent occasionner des
brûlures. Retourner avec précaution un fer à vapeur ou prendre garde lorsqu’on
se sert du jet de vapeur, car de l’eau brûlante peut s’écouler du réservoir. Éviter
tout mouvement brusque lors du repassage afin de minimiser le déversement
accidentel d’eau brûlante.
• Cet appareil n’est pas conçu pour être utilisé par des personnes (notamment des
enfants) dont les capacités physiques, sensorielles ou mentales sont réduites
ou qui manquent d’expérience ou de connaissances, à moins qu’elles ne soient
supervisées ou dirigées par une personne responsable de leur sécurité pendant
l’utilisation.
• Les enfants doivent être supervisés afin d’éviter qu’ils ne jouent avec l’appareil.
• Le fer à repasser doit être utilisé et déposé sur une surface stable.
- Avant de déposer le fer à repasser sur son support, s’assurer que la surface
sur laquelle se trouve le support est stable.
- Ne pas utiliser le fer à repasser s’il a été échappé, s’il est visiblement
endommagé ou s’il fuit.
INSTRUCTIONS SPÉCIALES
• Pour éviter une surcharge du circuit, ne pas brancher un autre appareil haute
puissance sur le même circuit.
• Si l’emploi d’une rallonge est absolument nécessaire, utiliser un cordon de 15
ampères. Les cordons prévus pour une intensité inférieure risquent de surchauffer.
Faire preuve de prudence en veillant à ce que le cordon ne puisse pas être tiré ou
faire trébucher.
CONSERVER CES MESURES.
L’appareil est conçu pour une utilisation domestique
L’appareil est muni d’une fiche polarisée (une lame plus large que l’autre). Afin de
minimiser les risques de secousses électriques, ce genre de fiche n’entre que d’une
façon dans une prise polarisée. Lorsqu’on ne peut insérer la fiche à fond dans la prise,
il faut tenter de le faire après avoir inversé les lames de côté. Si la fiche n’entre toujours
pas dans la prise, il faut communiquer avec un électricien certifié. Il ne faut pas tenter de
modifier la fiche.
Avertissement : L’appareil est doté d’une vis indesserrable empêchant l’enlèvement du
couvercle extérieur. Pour réduire les risques d’incendie ou de secousses électriques, ne
pas tenter de retirer le couvercle extérieur. L’utilisateur ne peut pas remplacer les pièces
de l’appareil. En confier la réparation seulement au personnel des centres de service
autorisés.
Note : Lorsque le cordon d’alimentation est endommagé, il faut le faire remplacer par du
personnel qualifié ou, en Amérique latine, par le personnel d’un centre de service autorisé.
Cet appareil est réservé à une utilisation résidentielle uniquement.
POUR COMMENCER
• Retirer toutes les étiquettes et tous les autocollants apposés sur l’appareil ou la semelle.
• Retirer et conserver la documentation.
• Visiter le www.prodprotect.com/applica pour enregistrer la garantie.
Nota : Utiliser de l’eau du robinet pour repasser. Ne pas utiliser d’eau traitée par un système
d’adoucissement domestique.
Important : Pour un rendement optimal, laisser le fer reposer pendant 90 secondes
avant de commencer à repasser.
REMPLISSAGE DU RÉSERVOIR À EAU
1. Déposer le fer à repasser sur une surface plane, la semelle dirigée
vers le bas, puis ouvrir le couvercle du réservoir (A).
2. Le fer et, à l’aide d’une tasse à mesurer propre, verser de l’eau dans
l’orifice de remplissage jusqu’à ce qu’elle atteigne la marque MAX
sur le côté du réservoir. Ne pas trop remplir.
3. Refermer le couvercle du réservoir à eau.
4. Brancher le fer. Le témoin de fonctionnement s’allume.
Note: Si vous devez ajouter de l’eau pendant le repassage, débrancher le fer et suivre les étapes
ci-dessus.
Conseil: Si vous ne connaissez pas le type de fibres dont le tissu se compose, faire un essai sur
une petite surface (à l’intérieur d’un ourlet ou d’une couture) avant de repasser.
A
B
8 minutes
30 seconds
A


Praat mee over dit product
Laat hier weten wat jij vindt van de Black and Decker IR1070SC Strijkijzer. Als je een vraag hebt, lees dan eerst zorgvuldig de handleiding door. Een handleiding aanvragen kan via ons contactformulier.
beantwoord | Ik vind dit nuttig (0) (Vertaald door Google)
beantwoord | Ik vind dit nuttig (0) (Vertaald door Google)