
12
ENGLISH
(Original instructions)
13
ENGLISH
(Original instructions)
u Unplug the charger before cleaning it. Your charger does
not require any maintenance apart from regular cleaning.
u Regularly clean the ventilation slots in your tool/appliance
and charger using a soft brush or dry cloth.
u Regularly clean the motor housing using a damp cloth. Do
not use any abrasive or solvent-based cleaner.
u Regularly clean the cutting line and spool using a soft
brush or dry cloth.
u Regularly use a blunt scraper to remove grass and dirt
from the underneath of the guard.
Troubleshooting
Problem
Solution
Appliance runs slowly. Remove battery from trimmer.
Check that the spool housing can rotate
freely. Carefully clean it if necessary.
Check that the cutting line does not pro-
trude more than approximately 122mm
from the spool. If it does, cut it off so that
it just reaches the line trimming blade
Automatic line feed does not
feed line.
More line is fed when the line shortens
to approximately 76mm. To determine if
the line is not feeding, let line wear past
this point.
Keep the tabs depressed and remove the
spoolcap with the spool from the spool
housing in the trimmer head.
Ensure that the line is not crisscrossed
on the spool as detailed in (Fig.T). If it
is unwind the cutting line and rewind
it neatly.
Inspect tracks at the bottom of spool for
damage. If damaged, replace spool.
Pull the cutting line until it protrudes
approximately 122mm from the spool. If
insufcient cutting line is left on the spool,
install a new spool of cutting line.
Align the tabs on the spool cap with the
cut outs in the housing.
Push the spool cap onto the housing until
it snaps securely into place.
If the cutting line protrudes beyond the
trimming blade, cut it off so that it just
reaches the blade. If the automatic line
feed still does not work or the spool is
jammed, try the following suggestions:
Carefully clean the spool and housing.
Make sure you are using correct line size
and diameter (2.00 mm) - smaller and
larger line sizes will affect the functional-
ity of the auto feed system.
Remove the spool and check if the lever
in the spool housing can move freely.
Remove the spool and unwind the cutting
line, then wind it on neatly again. Replace
the spool into the housing.
Overfeeding Ensure you are cutting with the tip of the
line 177mm from the spool. Use the edge
guide if needed to ensure proper space
is maintained.
Ensure you are not exceeding a 10º an-
gle as shown in (Fig.M). Avoid contact of
the line with hard surfaces such as brick,
concrete, wood etc. This will prevent
excessive wear and/or overfeed of line.
Cut with the tip of the line
Line unravels when cap or
spool is removed
Make sure to park the lines in holding
slots (Figure R) before removing.
Protecting the environment
Z
Separate collection. Products and batteries
marked with this symbol must not be disposed of
with normal household waste.
Products and batteries contain materials that can be recov-
ered or recycled, reducing demand for raw materials. Please
recycle electrical products and batteries according to local
provisions. Further information is available at
www.2helpU.com
Technical data
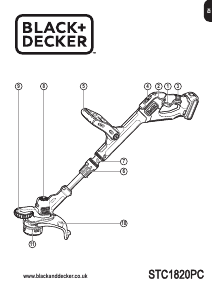
STC1820PC
H2
Input Voltage
V
DC
18V
No-Load Speed
min
-1
5500/7400
Weight
kg
2.55Kg
Battery
BL2018
Voltage
V
DC
18V
Capacity
Ah
2.0
Type
Li-Ion
Charger
905902**(typ.1)
Input Voltage
V
DC
230
Output Voltage
V
DC
18
Current
mA
Input:
400
Hand/arm weighted vibration value according to
EN 50636-2-91:
= < 2,5 m/s
2
, uncertainty (K) = 1.5 m/s
2
.
L
PA
(sound pressure) 79 dB(A)
uncertainty (K) = 3 dB(A)



Praat mee over dit product
Laat hier weten wat jij vindt van de Black and Decker STC1820PC Grastrimmer. Als je een vraag hebt, lees dan eerst zorgvuldig de handleiding door. Een handleiding aanvragen kan via ons contactformulier.
beantwoord | Ik vind dit nuttig (1) (Vertaald door Google)
beantwoord | Ik vind dit nuttig (0) (Vertaald door Google)
beantwoord | Ik vind dit nuttig (0) (Vertaald door Google)
beantwoord | Ik vind dit nuttig (0) (Vertaald door Google)