
Size: 21.75" x 17"
How to Use
This product is for household use only.
1. Unpack the appliance and remove any labels.
2. Plug the power cord into a standard wall outlet.
3. Adjust the toast shade selector to the desired setting (1 to 7) (A). For first use, set the dial to a
middle setting of 4; adjust as desired to suit your taste.
4. Place bread slices or other foods in the slots and press down the toast control lever until it
locks into the down position (B).
Tip: Toast thin slices on low settings.
CAUTION: Do not touch the unit as it gets hot.
• The bread slices are automatically centered and the toasting begins.
• When toasting is done, the toast control lever goes up and the unit shuts off.
Important: You must press down the toast control lever before selecting a function. If not, the
function will not be activated.
CANCEL FUNCTION
Use it to interrupt toasting at any time.
•To activate the function, press down the toast control lever.
• The Cancel button automatically lights whenever you press down the toast control lever and
remains lit until toasting cycle is finished, or you press the button (B).
Important: If you select the wrong button, you must press Cancel and then select the button you want.
SPECIAL TOASTING FUNCTIONS
Bagels
1. Use the bagel function to toast bagels and English muffins, crispy on the inside, soft and warm on the outside.
2. Place cut bagel or English muffin inside the slots with cut side toward the center of the toaster.
3. Press down the toast control lever until it locks into the down position. The Cancel button lights until toasting is
done or you press the button.
4. Press the Bagel button. The button lights when selected until toasting is done or you press the Cancel button.
When toasting is done, the toast control lever goes up and the unit shuts off.
Important: You must press down the toast control lever before selecting a function. If not, the function will not be
activated.
Frozen Foods
1. Place food in the slots and press down the toast control lever until it locks into the down position. The Cancel
button lights until toasting is done or you press the button.
2. Press the Frozen button. The button lights until toasting is done or you press the Cancel button. When toasting
is done, the toast control lever goes up and the unit shuts off.
Important: You must press down the toast control lever before selecting a function. If not, the function will not be
activated.
Reheating
This function reheats without browning. To use, press toast control lever down until it locks in the down position
then press the Reheat button. The button lights until food is warm or you press the Cancel button.
Care and Cleaning
This product contains no user serviceable parts. Refer service to qualified service personnel.
CLEANING
Always unplug the cord from the electrical outlet and allow the toaster to cool before cleaning. Do not immerse the
toaster in water.
Crumb Tray
1. Grasp the handle at the back of the toaster and pull out the crumb tray (C).
2. Dispose of crumbs and wash the tray in warm, sudsy water. The tray is not dishwasher safe.
You can remove stubborn spots with a nylon mesh pad.
3. Be sure to dry thoroughly before slipping the tray back into the toaster.
Cleaning Outside Surfaces
Important: The unit gets hot. Allow the toaster to cool completely before cleaning.
•Wipe the exterior with a damp cloth or sponge and dry with a paper towel.
• Do not use strong cleaners or abrasives that may scratch surfaces and never spray cleaners
directly onto the toaster.
STORAGE
Use the cord wrap on the bottom of the toaster to minimize clutter on you counter and for easy
storage (D).
Como usar
Este aparato es solamente para uso doméstico.
1. Desempaque el aparato y retire toda calcomanía.
2. Enchufe el cable a una toma de corriente ordinaria.
3. Ajuste el selector de grado de tostado al nivel deseado (entre 1 y 7) (A). Si es la primera vez
que utiliza este aparato, ajuste el control a la posición media, (4) y luego al gusto.
4. Coloque las rebanadas de pan/alimentos en las ranuras y presione para abajo la palanca de
control de tostado hasta encajar en la posición inferior (B).
Consejo: Las rebanadas delgadas se deben de tostar a un nivel de temperatura bajo.
Precaución: No toque el aparato a medida que éste se calienta.
• El tostador acomoda las rebanadas de pan automáticamente antes de iniciar el ciclo de
tostado.
• Una vez finalizado el ciclo de tostado, la palanca de control de tostado se eleva y el aparato
se apaga.
Importante: Uno debe presionar la palanca de control de tostado antes de elegir una función, de
lo contrario, la función deseada no es activada.
Interrupción del ciclo de tostado
Uno pude interrumpir el ciclo de tostado en el momento deseado.
• Para activar este modo de funcionamiento, presione la palanca del control de tostado.
• El botón de anulación (CANCEL) se ilumina automáticamente siempre que uno presiona para abajo la palanca del
control de tostado y permanece así hasta finalizar el ciclo de tostado o hasta que uno presiona el mismo botón
nuevamente (B).
Importante: Si uno presiona el botón equivocado, se debe de presionar el botón de anulación (CANCEL) y se debe
elegir la función deseada nuevamente.
Las diferentes funciones de tostado
Bagels
1. Esta función le permite tostar los bagels y los muffins ingleses dorados por adentro; suaves y tibios por fuera.
2. Corte los bagels o los muffins ingleses por mitad e introdúzcalos en el tostador con los centros hacia adentro del
tostador.
3. Presione para abajo la palanca de control de tostado hasta encajar en la posición inferior. El botón de anulación
(CANCEL) se ilumina hasta finalizar el ciclo de tostado o hasta que uno presiona este mismo botón nuevamente.
4. Presione el botón para tostar bagels. Este botón se ilumina y permanece iluminado hasta finalizar el ciclo
de tostado o hasta que uno presiona el botón de anulación (CANCEL). Una vez finalizado el ciclo de tostado, la
palanca del control de tostado se eleva y el aparato se apaga.
Importante: Uno debe presionar la palanca de control de tostado antes de elegir una función, de lo contrario,
la función deseada no es activada.
Alimentos congelados
1. Coloque los alimentos en las ranuras y presione para abajo la palanca del control de tostado hasta encajar en la
posición inferior. El botón de anulación (CANCEL) se ilumina hasta finalizar el ciclo de tostado o hasta que uno
presiona este mismo botón nuevamente.
2. Presione el botón para los alimentos congelados (FROZEN). Este botón se ilumina y permanece iluminado hasta
finalizar el ciclo de tostado o hasta que uno presiona el botón de anulación (CANCEL). Una vez finalizado el ciclo
de tostado, la palanca del control de tostado se eleva y el aparato se apaga.
Importante: Uno debe presionar la palanca de control de tostado antes de elegir una función, de lo contrario, la
función deseada no es activada.
Para recalentar
Esta función recalienta los alimentos sin dorarlos. Presione para abajo la palanca de control de tostado hasta encajar
en la posición inferior y luego presione el botón de recalentar (REHEAT). Este botón se ilumina y permanece
iluminado hasta recalentar los alimentos o hasta que uno presiona el botón de anulación (CANCEL).
Cuidado y limpieza
El aparato no contiene piezas reparables por el consumidor. Para servicio, acuda a personal de asistencia calificado.
Limpieza
Siempre desconecte el aparato de la toma de corriente y permita que se enfríe antes de limpiarlo. No sumerja el
tostador en agua.
Bandeja de residuos
1. Sujete el asa situada en la parte trasera del tostador y hale la bandeja de residuos hacia
afuera (C).
2. Deseche las migajas y lave la bandeja con agua tibia, jabonada. No lave esta bandeja en la
máquina lavaplatos. Uno puede eliminar las manchas persistentes con una almohadilla de
malla de nailon.
3. Asegúrese de secar bien la bandeja antes de instalarla nuevamente en el aparato.
Limpieza de las superficies exteriores
Importante: Este aparato se calienta. Permita que el tostador se enfríe bien antes de limpiarlo.
• Limpie el exterior con una esponja o con un paño húmedo y séquelo con una toalla de papel.
• No utilice limpiadores fuertes ni abrasivos que puedan rallar las superficies y jamás rocíe limpiadores directamente
al tostador.
Almacenaje
Aproveche el enrollado del cable debajo del tostador para descongestionar el mostrador
y asi mismo poder almacenar el aparato fácilmente (D).
Utilisation
L'appareil est conçu pour une utilisation domestique seulement.
1. Déballer l'appareil et enlever tout autocollant.
2. Brancher le cordon dans une prise murale standard.
3. Régler le sélecteur du degré de grillage au réglage voulu (de 1 à 7) (A). À la première
utilisation, le régler à la position centrale de 4; régler au goût par la suite.
4. Déposer les tranches ou les aliments dans les fentes et abaisser le levier de commande jusqu’à
l’émission d’un déclic (B).
Conseil pratique : Faire griller les tranches minces aux réglages inférieurs.
Mise en garde : Ne pas toucher à l’appareil car il devient brûlant.
• Les tranches de pain sont automatiquement centrées et le cycle de grillage commence.
•À la fin du cycle de grillage, le levier de commande remonte et l'appareil s'arrête.
Important : Il faut abaisser le levier de commande avant de choisir une fonction. Sinon, la
fonction ne sera pas activée.
Fonction d’annulation
Sert à interrompre le grillage en tout temps.
• Pour activer la fonction, il suffit d’abaisser le levier de commande du grillage.
• Le bouton d’annulation s’allume automatiquement chaque fois que le levier de commande
du grillage est abaissé et il reste allumé jusqu’à la fin du cycle de grillage ou jusqu’à ce qu’on
enfonce le bouton (B).
Important : Lorsqu’on enfonche le mauvais bouton, il faut alors enfoncer le bouton d’annulation puis choisir le bouton
voulu.
Fonctions spéciales de grillage
Baguels
1. Utiliser le bouton pour baguels (BAGEL) pour griller l'intérieur des baguels et des muffins anglais tout en laissant
l'extérieur chaud et moelleux.
2. Placer la face coupée du baguel ou du muffin anglais vers l'intérieur du grille-pain.
3. Abaisser le levier de commande jusqu’à ce qu’il s’enclenche en place. Le bouton d'annulation s'allume et il reste
allumé jusqu'à la fin du cycle de grillage ou jusqu'à ce qu'on enfonce le bouton d'annulation.
4. Enfoncer le bouton pour baguels. Le bouton s'allume et il reste allumé jusqu'à la fin du cycle de grillage ou jusqu'à
ce qu'on enfonce le bouton d'annulation. À la fin du cycle de grillage, le levier de commande remonte et l'appareil
s'arrête.
Important : Il faut abaisser le levier de commande avant de choisir une fonction. Sinon, la fonction ne sera pas
activée.
Aliments surgelés
1. Placer l’aliment dans les fentes et abaisser le levier de commande jusqu’à ce qu’il s’enclenche en place. Le bouton
d'annulation s'allume et il reste allumé jusqu'à la fin du cycle de grillage ou jusqu'à ce qu'on enfonce le bouton
d'annulation.
2. Enfoncer le bouton pour aliments surgelés. Le bouton s'allume et il reste allumé jusqu'à la fin du cycle de grillage
ou jusqu'à ce qu'on enfonce le bouton d'annulation. À la fin du cycle de grillage, le levier de commande remonte
et l'appareil s'arrête.
Important : Il faut abaisser le levier de commande avant de choisir une fonction. Sinon, la fonction ne sera pas
activée.
Réchauffage
Sert à réchauffer sans dorer. Pour activer la fonction, il suffit d’abaisser le levier de commande du grillage jusqu’à ce
qu’il s’enclenche en place, puis enfoncer le bouton de réchauffage. Le bouton s'allume et il reste allumé jusqu'à la fin
du cycle de réchauffage ou jusqu'à ce qu'on enfonce le bouton d'annulation.
Entretien et nettoyage
L’utilisateur ne peut entretenir aucune composante du produit. En confier l’entretien à du personnel qualifié.
Nettoyage
Toujours débrancher l’appareil et le laisser refroidir avant de le nettoyer. Ne pas l’immerger.
Plateau à miettes
1. Saisir la poignée derrière l’appareil et retirer le plateau à miettes (C).
2. Jeter les miettes et laver le plateau dans de l’eau chaude savonneuse. Le plateau ne va pas au
lave-vaisselle. On peut enlever les taches tenaces à l’aide d’un tampon à récurer en nylon.
3. Bien assécher le plateau avant de le remettre dans l’appareil.
Nettoyage de la paroi extérieure
Important : L’appareil devient brûlant. Le laisser refroidir complètement avant de le nettoyer.
• Essuyer la paroi extérieure à l’aide d’un chiffon ou d’une éponge humide, puis assécher à
l’aide d’un essuie-tout.
• Ne pas utiliser de produits nettoyants forts ni abrasifs car ceux-ci peuvent égratigner la surface et ne jamais
vaporiser de produits nettoyants directement sur l’appareil.
Rangement
Utiliser l’enrouleur de cordon dans le bas de l’appareil pour minimiser l’encombrement du
comptoir et pour en faciliter le rangement (D).
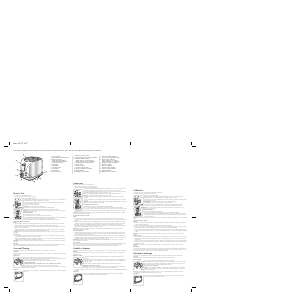
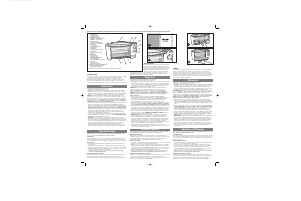
1. Toast control lever
2. Wide slots with self-adjusting guides
†3.Slide-out crumb tray
Model T1900 (PN# T1900-01)
Model T1900B (PN# T1900B-01)
4. Cord wrap (under unit)
5. Bagel button
6. Reheat button
7. Toast shade selector
8. Frozen button
9. Cancel button
† Consumer replaceable
1. Palanca de control de tostado
2. Ranuras amplias con guías de ajuste automático
†3.Bandeja de residuos corrediza
Modelo T1900 (No. de pieza T1900-01)
Modelo T1900B (No. de pieza T1900B-01)
4. Enrollado del cable (debajo del aparato)
5. Botón de bagels
6. Botón de recalentar
7. Selector de grado de tostado
8. Botón para los alimentos congelados
9. Botón de anulación
† Reemplazable por el consumidor
1. Levier de commande du grillage
2. Fentes larges avec guides autoréglables
†3.Plateau à miettes coulissant
Modèle T1900 (pièce n° T1900-01)
Modèle T1900B (pièce n° T1900B-01)
4. Enrouleur de cordon (sous l’appareil)
5. Bouton pour baguels
6. Bouton de réchauffage
7. Sélecteur du degré de grillage
8. Bouton pour aliments surgelés
9. Bouton d'annulation
† Remplaçable par le consommateur
Product may vary slightly from what is illustrated. / Este producto puede variar ligeramente del que aparece ilustrado. / Le produit peut différer légèrement de celui illustré.
A
B
C
D
C
D
C
D
A
B
A
B




Praat mee over dit product
Laat hier weten wat jij vindt van de Black and Decker T1900 Broodrooster. Als je een vraag hebt, lees dan eerst zorgvuldig de handleiding door. Een handleiding aanvragen kan via ons contactformulier.