Note: Keep oven unplugged when not in use.
Note: Allow at least 1.5” (3.81 cm) between top of food and top heating elements in the oven.
BAKE FUNCTION
Preset temperature: 350°F
Preset Time: 30 minutes
Recommended Rack position: lower slot
This function is ideal for baking casseroles, fresh or frozen pies and roasting meats and poultry.
1. Place rack in lower slot.
2. Turn Function Selector Knob to BAKE
.
3. Once indicator light blinks, YOU HAVE 2 MINUTES TO PROCEED.
4. Preset temperature flashes on digital display. To change temperature press
(▲)
or
(▼)
(TEMPERATURE
) button.
5. To see or change time press
(▲)
or
(▼)
(TIMER ) button.
6. Press START/STOP
button to begin cooking.
7. Oven begins preheating; the display will blink until the selected temperature is reached; the
oven will beep 3 times, and then the timer will begin.
8. At end of cooking cycle, unit beeps and oven turns off.
CONVECTION FUNCTION
This function uses an internal fan to distribute the heat evenly. Follow the BAKE
instructions
above, but turn Function selector knob to CONVECTION BAKE
at Step 2.
Note: Some foods will bake faster than expected; watch cooking time.
BROIL FUNCTION
Preset temperature: 450˚ F
Preset Time: 20 minutes
Recommended Rack position: upper slot
1. Turn Function Selector Knob to BROIL
.
2. The digital display shows the preset temperature 450˚ F. To change temperature press
(▲)
or
(▼)
(TEMPERATURE ).
3. To change time press
(▲)
or
(▼)
(TIMER ) button.
4. Place food on broil rack inserted into bake/broil pan. Insert into oven in upper rack slot.
5. Allow at least 1.5” (3.81 cm) between top of food and top heating elements.
6. Close oven door.
7. Press START/STOP
button to begin cooking.
8. At end of cooking cycle, unit beeps and oven turns off.
Note: In Broil mode, only the upper heating elements will turn on.
TOASTING BREAD
AND BAGELS
Preset : 4 – Medium Shade
Recommended Rack position: lower slot
The oven is preset for temperature and time for medium toast (4 setting). It is recommended to
use this for your first cycle, then adjust lighter or darker to your preference.
Note: The BAGEL
function toasts the cut side and gently warms the outside. In BAGEL
mode, only the upper heating elements will be active. Place bagels cut-side facing up.
1. Preheating is not necessary.
2. Place slices of bread or bagel halves (cut side up) on slide rack.
3. Close oven door.
4. Turn Function Selector Knob to TOAST
or BAGEL button.
5. The indicator light blinks and the digital display shows “4”.
6. To change the shade level press
(▲)
or
(▼)
(TEMPERATURE / TOAST ) buttons.
7. Press START/STOP
button to begin toasting.
8. At end of toasting cycle the appliance beeps and the oven turns off.
Tip for multiple toasting cycles:For best results when making consecutive batches of toast,
allow a short cool-down period between toasting cycles.
REHEAT FUNCTION
Preset temperature: 325˚ F
1. Turn Function Selector Knob to REHEAT
.
2. The digital display shows the preset temperature 325˚ F. To change temperature press
(▲)
or
(▼)
(TEMPERATURE ).
3. To change time press
(▲)
or
(▼)
(TIMER ) button.
4. Close oven door.
5. Press START/STOP
button to begin cooking.
6. At end of cooking cycle, unit beeps and oven turns off.
KEEP-WARM FUNCTION
Preset temperature: 175˚ F
Use the Keep-Warm function to keep foods warm for a period of time after cooking is completed.
1. Turn Function Selector Knob to KEEP WARM
.
2. The digital display shows the preset temperature 175˚ F. To change temperature press
(▲)
or
(▼)
(TEMPERATURE ).
3. To change time press
(▲)
or
(▼)
(TIMER ) button.
4. Close oven door.
5. Press START/STOP
button to begin cooking.
6. At end of cooking cycle, unit beeps and oven turns off.
ROTISSERIE FUNCTION
Setting food on the rotisserie rack
1. Insert pointed end of the rotisserie spit through one of the forks with pointed ends of the fork
facing towards the center of the spit. Slide the fork towards the square end of the spit. Tighten
the wing nut.
2. Insert spit through center of food until the fork is securely embedded in food.
3. Slide second fork onto pointed end of spit with pointed ends facing the food. Continue until forks
are securely embedded into the food. Tighten the wing nut.
4. Check that the food is centered on spit by placing pointed end of spit into the drive socket on
the right-hand side of the oven wall. Rest the square end of the spit in the support on the left-
hand side of the oven well.
5. Important: Insert bake pan, lined with foil, to the lowest rack position, to catch drippings below
the rotisserie spit.
USING THE ROTISSERIE FUNCTION
1. Turn the Cooking Function control knob to ROTISSERIE
2. Set the Temperature control to the desired cooking temperature
3. When roasting is complete, remove the rotisserie spit by placing the hooks of the rotisserie
handle under the grooves of either side of the spit. Lift the left side first by lifting upwards. Then
pull the right end of the spit of the drive socket. Carefully remove the roast from the oven.
4. Open the wing nuts and remove the skewers, and remove the meat from the spit.
NOTE: Always use extreme care when removing the rotisserie spit or the slide rack/drip tray from
the oven. Always use the rotisserie handle with oven gloves.
Note: In Rotisserie mode, only the upper heating elements will be active.
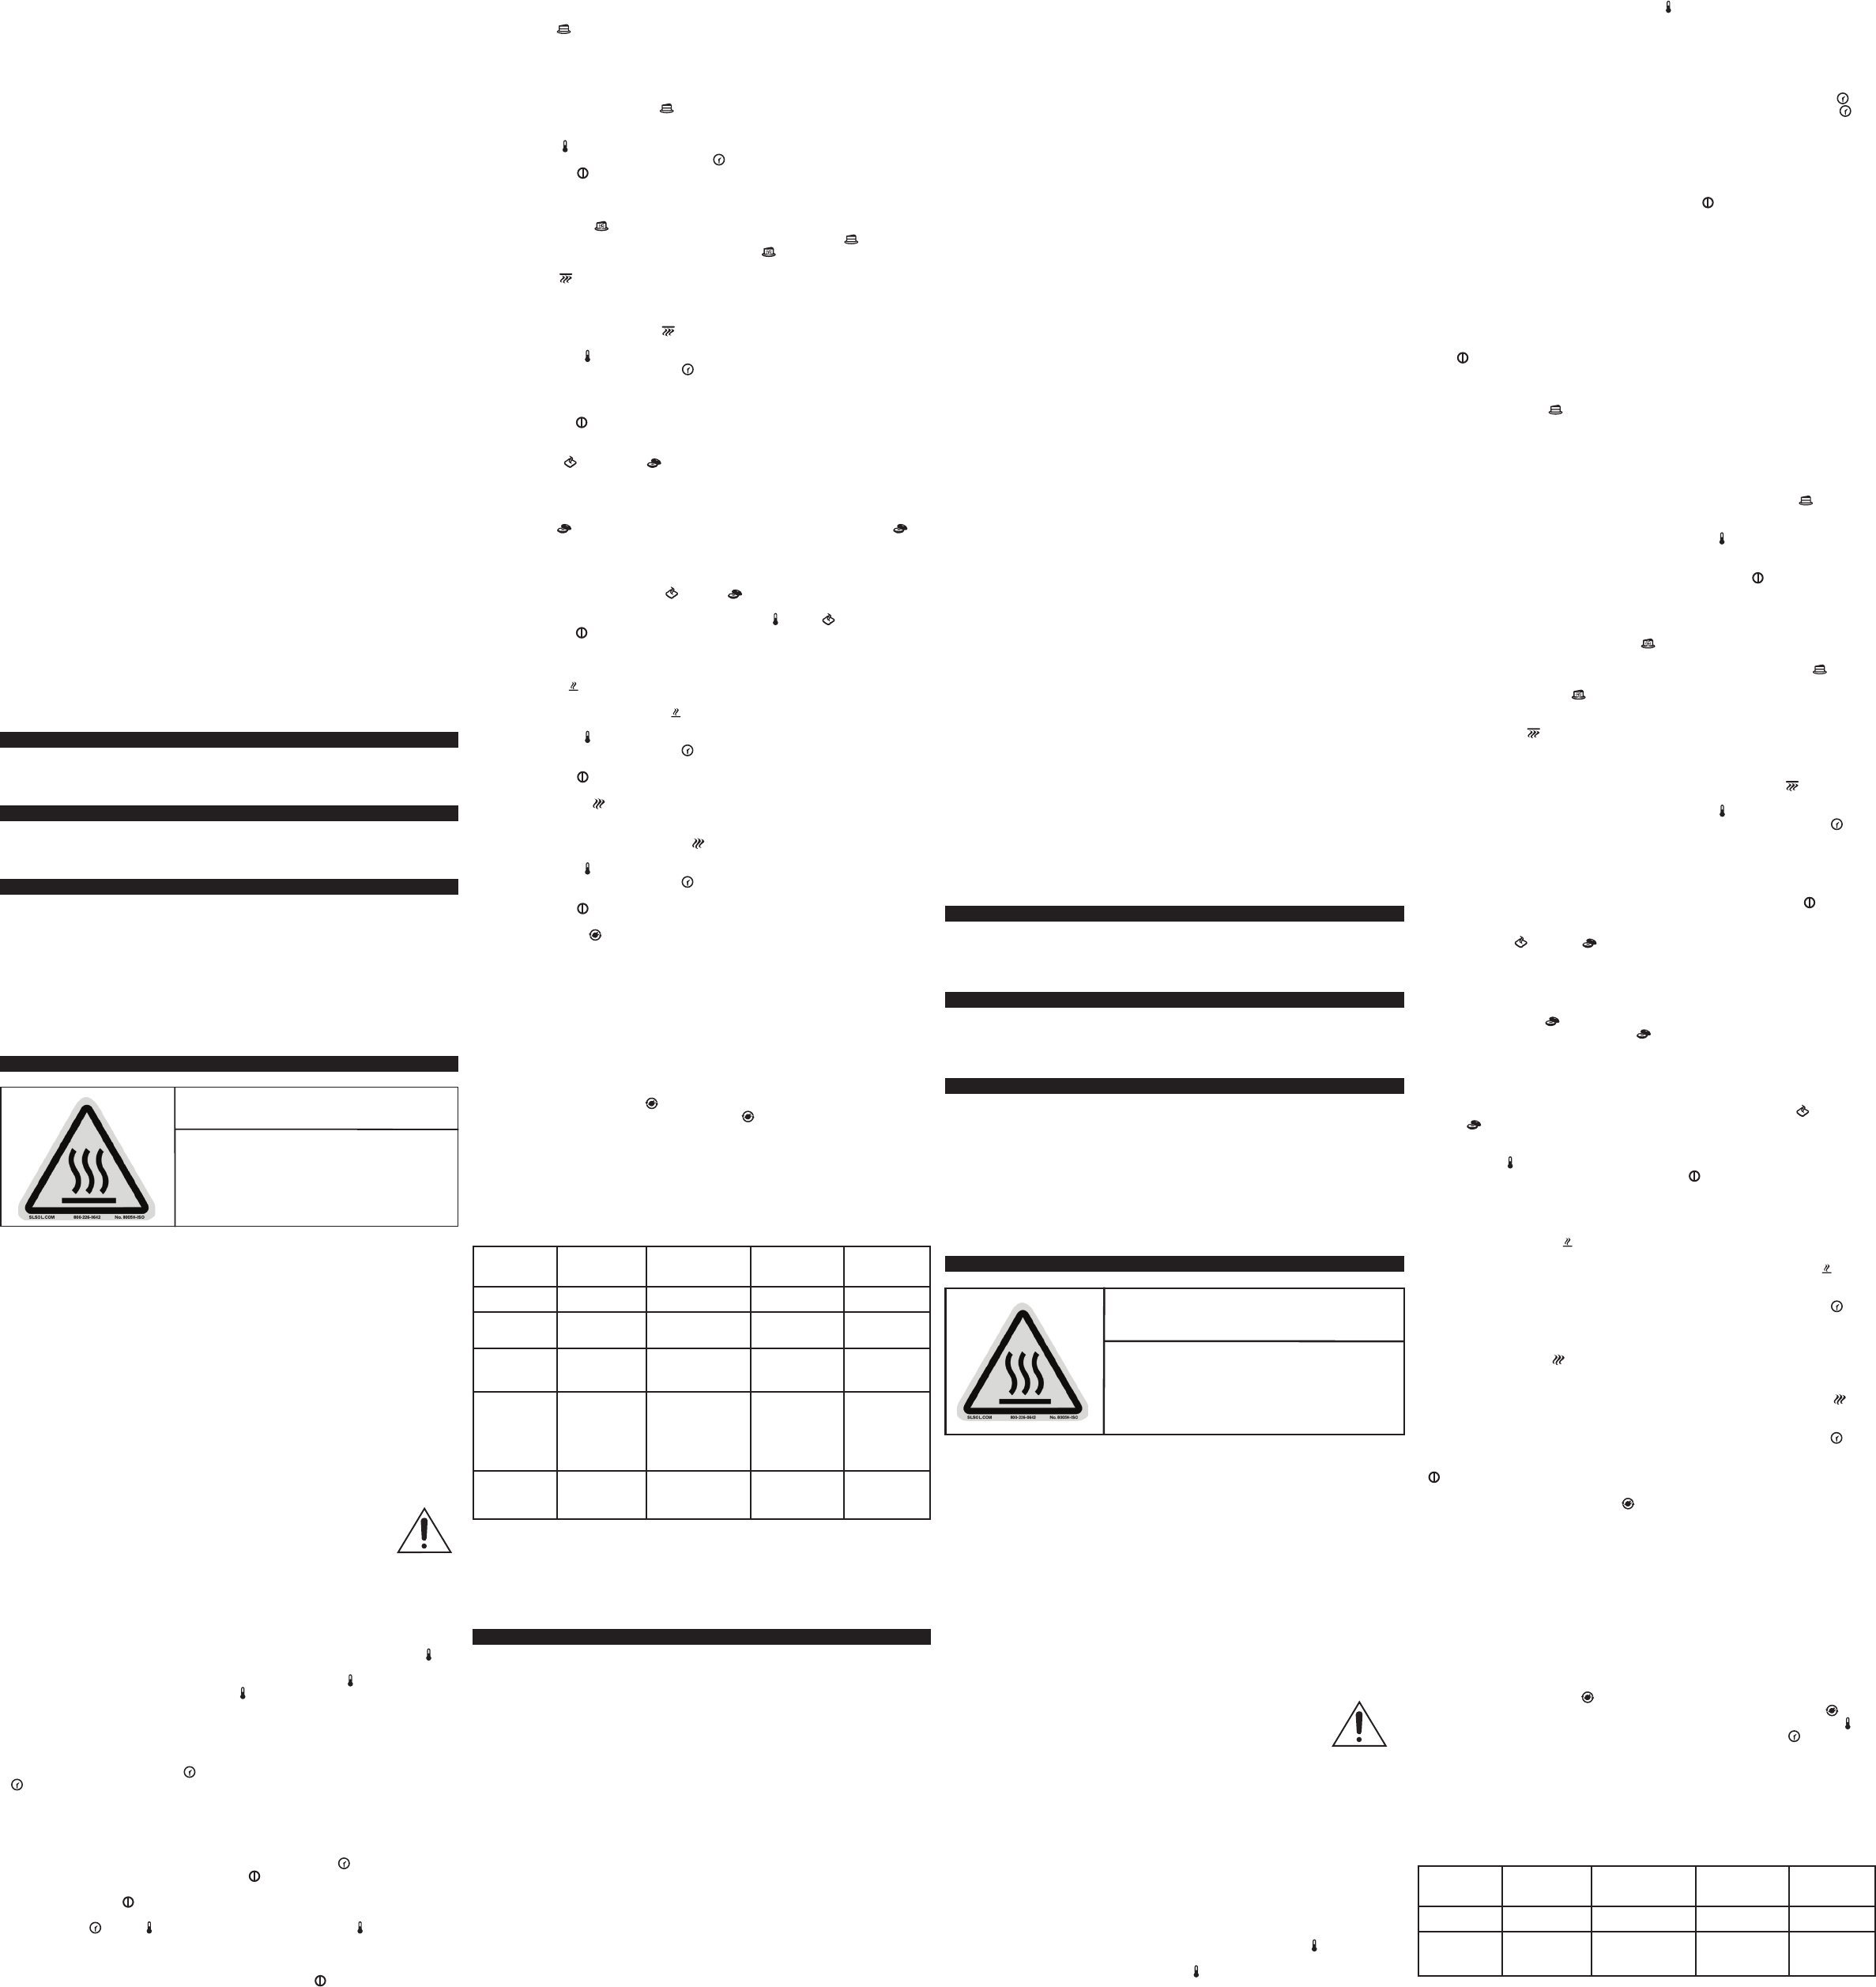
ROTISSERIE COOKING GUIDE
FOOD
MAXIMUM
WEIGHT TO BE
COOKED
COOKING
TEMPERATURE
APPROXIMATE
COOKING
TIME
INTERNAL
TEMPERATURE
Chicken 3
½
lbs. 350˚ F 1
½
hours 180˚ F
Eye Round
Roast
3 to 5 lbs. 325˚ F 1
½
to 2 hours 160˚ F
Round
Roast
3 to 5 lbs. 325˚F 1
½
to 2 hours
160˚F for
medium
Pork Loin
with or
without
bone
2
½
to 4 lbs. 325˚F 1
½
to 2 hours 160˚F
Baby Back
Spare Ribs
2 to 3 lbs. 325˚F 1
½
to 2 hours 160˚F
Quick tips for rotisserie cooking:
• Recommended MAXIMUM size of foods cooked on the rotisserie: 3½ lb chicken, 4 lb roast.
• Use kitchen twine to truss chicken wings and legs to the chicken.
• Tying roasts such as beef and pork at 1 ½-inch intervals and wrapping the twine around the length
gives a neat compact shape to roasts done on the rotisserie.
• Begin with a cold oven.
• Once spit is in place check that food is centered by letting the rotisserie make one full turn before
cooking begins.
NEED HELP?
For service, repair or any questions regarding your appliance, call the appropriate 800 number
on cover of this book. Please DO NOT return the product to the place of purchase. Also, please
DO NOT mail product back to manufacturer, nor bring it to a service center. You may also want to
consult the website listed on the cover of this manual.
Two-Year Limited Warranty
(Applies only in the United States and Canada)
What does it cover?
• Any defect in material or workmanship provided; however, Applica’s liability will not exceed the
purchase price of product.
For how long?
• Two years from the date of original purchase with proof of such purchase.
What will we do to help you?
• Provide you with a reasonably similar replacement product that is either new or factory refurbished.
How do you get service?
• Save your receipt as proof of date of sale.
• Visit the online service website at www.prodprotect.com/applica, or call toll-free 1-800-231-9786,
for general warranty service.
• If you need parts or accessories, please call 1-800-738-0245.
What does your warranty not cover?
• Damage from commercial use
• Damage from misuse, abuse or neglect
• Products that have been modified in any way
• Products used or serviced outside the country of purchase
• Glass parts and other accessory items that are packed with the unit
• Shipping and handling costs associated with the replacement of the unit
• Consequential or incidental damages (Please note, however, that some states do not allow the
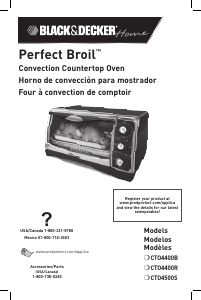
Please Read and Save this Use and Care Book.
IMPORTANT SAFETY INSTRUCTIONS
When using electrical appliances, basic safety precautions should always be fol-
lowed including the following:
•Read all instructions.
•Do not touch hot surfaces. Use handles or knobs.
•To protect against electrical shock do not immerse cord, plugs or appliance in
water or other liquid.
•Close supervision is necessary when any appliance is used by or near children.
•Unplug from outlet when not in use and before cleaning. Allow to cool before
putting on or taking off parts.
•Do not operate any appliance with a damaged cord or plug, or after the appliance
malfunctions or has been damaged in any manner. return appliance to the nearest
authorized service facility for examination, repair or adjustment.
•The use of accessory attachments not recommended by the appliance
manufacturer may cause injuries.
•Do not use outdoors.
•Do not let cord hang over edge of table or counter, or touch hot surfaces.
•Do not place on or near a hot gas or electric burner, or in a heated oven.
•Extreme caution must be used when moving an appliance containing hot oil or
other hot liquids.
•Always attach plug to appliance first, then plug cord into the wall outlet. To
disconnect, turn both the Bake/Broil knob and the Toast/Timer knob to OFF, then
remove plug from wall outlet.
•Do not use appliance for other than intended use.
•Use extreme caution when removing tray or disposing of hot grease.
•Do not clean with metal scouring pads. Pieces can break off the pad and touch
electrical parts, creating a risk of electric shock.
•Oversized foods or metal utensils must not be inserted in a toaster oven, as they
may create a fire or risk of electric shock.
•A fire may occur if the toaster oven is covered or touching flammable material
including curtains, draperies, walls and the like, when in operation. Do not store
any item on top of the appliance while in operation.
•Extreme caution must be exercised when using containers constructed of other
than metal or glass.
•Do not store any materials, other than the manufacturer’s recommended
accessories, in this oven when not in use.
•Do not place any of the following materials in the oven: paper, cardboard, plastic
and the like.
• Do not cover crumb tray or any part of the oven with metal foil. This will cause
overheating of the oven.
SAVE THESE INSTRUCTIONS.
This product is for household use only.
GROUNDED PLUG
As a safety feature, this product is equipped with a grounded plug, which will only fit into
a three-prong outlet. do not attempt to defeat this safety feature. Improper connection
of the grounding conductor may result in the risk of electric shock. Consult a qualified
electrician if you are in doubt as to whether the outlet is properly grounded.
TAMPER-RESISTANT SCREW
Warning: this appliance is equipped with a tamper-resistant screw to prevent removal of
the outer cover. to reduce the risk of fire or electric shock, do not attempt to remove the
outer cover. There are no user-serviceable parts inside. Repair should be done only by
authorized service personnel.
ELECTRICAL CORD
a) A short power cord (or detachable power cord) is to be provided to reduce the risk resulting from
becoming entangled in or tripping over a longer cord.
b) Longer detachable power cords or extension cords are available and may be used if care is exercised in
their use.
c) If a long detachable power cord or extension cord is used,
1) The marked electrical rating of the detachable power cord or extension cord should be at
least as great as the electrical rating of the appliance,
2) If the appliance is of the grounded type, the extension cord should be a grounding-type
3-wire cord, and
3) The longer cord should be arranged so that it will not drape over the countertop or tabletop
where it can be pulled on by children or tripped over.
Note: If the power supply is damaged, it should be replaced by qualified personnel.
HOW TO USE
This product is for household use only.
Caution: Do not leave oven unattended when in operation. Food ignition may occur. If
this happens, unplug unit but DO NOT open door. To reduce the risk of fire, keep oven
interior completely clean and free of food residues, oil, grease and any other combustible
materials.
Caution: A fire may occur if the toaster oven is covered or touching flammable materials
including curtains, draperies, walls and the like when in operation or after, when still hot.
Do not place any of the following materials in the oven, on top of the oven, or in contact
with the oven sides or bottom surfaces: paper, cardboard, plastic or the like.
GETTING STARTED
• Removeallpackingmaterialandanystickers.
• WashallremovablepartsasinstructedinCAREANDCLEANING.
• Selectalocationwherethisunitistobeused,allowingenoughspacefrombackoftheunitand
the wall to allow heat to flow without damage to cabinets and walls.
• Plugunitintoelectricaloutlet.
HELPFUL INFORMATION ABOUT YOUR OVEN
• This oven gets hot. When in use, always use oven mitts or potholders when touching any outer or
inner surface of the oven.
• During first few minutes of use you may notice smoke and a slight odor. This is normal and should
cause no concern.
• There is a 2 minute delay allowed between selecting functions and setting
temperature and time. If not done within this time the oven goes into sleep mode and
selections must be made again. Press any button to wake unit up.
• Once the selected temperature has been reached both the time and temperature can
be changed at anytime during the cooking.
• The oven is preset for temperature and time for medium toast (4 setting). Use this for
your first cycle then adjust lighter or darker to suite your taste.
• What is convection? Convection uses an internal fan that provides continuous circulation of hot air
around the cooking food; the food is more evenly cooked and in some cases, is cooked faster.
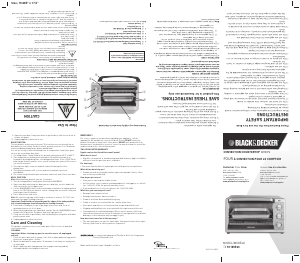
SLIDE RACK POSITIONS
There are 2 possible positions for the slide racks. There is an upper (Broil only) and a lower slot.
USING YOUR OVEN
1. To switch between °F to °C, when selecting temperatures, press and hold the two TEMP
buttons at the same time for 3 seconds.
2. To see preset temp after selecting a function: press the TEMPERATURE
(▲)
or
(▼)
. To
change temp press
(▲)
or
(▼)
(TEMPERATURE ) button.
Note:
• Tap button for temperature to change in 5 degree increments
• Press and hold to change faster.
• The minimum temperature is 150 °F.
• The maximum temperature is 450 °F.
3. To see preset time: press the TIMER
(▲)
or
(▼)
. To change time press
(▲)
or
(▼)
(TIMER
) button.
Note:
• Tap button up or down for time to change in 1 minute increments
• Press and hold to change faster
• The minimum time is 1 minute
• The maximum time is 2 hours
4. To cook longer than 2 hours, select STAY ON by pressing
(▼)
(TIMER ) button passed (0)
until the digital display shows the STAY ON symbol
is displayed on the right-hand side of the
digital display.
5. Press the START/STOP
button to start cooking. The oven starts pre-heating and the display
will blink until the selected temperature is reached. The oven will beep 3 times.
6. To see the TIME
or TEMP while cooking, press
(▲)
or
(▼)
or (TEMP ) buttons
7. At end of cooking cycle oven turns off and there are 2 beeps.
8. If using STAY ON turn the oven OFF when the cooking cycle is completed.
9. Time and temperature can be changed throughout the cooking phase.
10. End the cooking cycle at any time by pressing the START/STOP
button.
exclusion or limitation of consequential or incidental damages, so this limitation may not apply to
you.)
How does state law relate to this warranty?
• This warranty gives you specific legal rights. You may also have other rights that vary from state to
state or province to province.
Por favor lea y conserve este manual de instrucciones.
INSTRUCCIONES IMPORTANTES DE
SEGURIDAD
Cuando se usan aparatos eléctricos, siempre se deben respetar las siguientes
medidas básicas de seguridad:
•Lea todas las instrucciones.
•No toque las superficies calientes. Use las asas o las perillas.
•A fin de protegerse contra una descarga eléctrica, no sumerja el cable, los
enchufes ni el aparato en agua ni en ningún otro líquido.
•Todo aparato eléctrico usado en la presencia de los niños o por ellos mismos
requiere la supervisión de un adulto.
•Desenchufe el aparato del tomacorriente cuando no esté en uso y antes de
limpiarlo. Espere que el aparato se enfríe antes de instalarle o retirarle piezas.
•No use ningún aparato eléctrico que tenga el cable o el enchufe dañado, o que
presente un problema de funcionamiento. Acuda al centro de servicio autorizado
más cercano para que lo examinen, reparen o ajusten.
•El uso de accesorios no recomendados por el fabricante del aparato puede
ocasionar lesiones.
•No use este aparato a la intemperie.
•No permita que el cable cuelgue del borde de la mesa o del mostrador ni que entre
en contacto con superficies calientes.
•No coloque el aparato sobre ni cerca de las hornillas de gas o eléctricas ni adentro
de un horno caliente.
•Tome extrema precaución al mover de un lugar a otro un aparato que contenga
aceite u otros líquidos calientes.
•Para desconectar, ajuste ambos el control selector de la función de hornear/asar y
de la función de tostar/reloj automático a la posición de apagado (0) y luego retire
el enchufe del tomacorriente.
•Use este aparato solamente con el fin previsto.
•Tome extrema precaución al retirar la bandeja o al desechar la grasa caliente.
•No use almohadillas de fibras metálicas para limpiar el aparato. Las fibras
metálicas podrían desprenderse y entrar en contacto con las piezas eléctricas del
aparato, resultando en el riesgo de una descarga eléctrica.
•A fin de evitar el riesgo de incendio o descarga eléctrica, nunca introduzca
alimentos demasiado grandes, utensilios ni envolturas de metal adentro del horno.
•Existe el riesgo de incendio si el aparato permanece cubierto mientras se
encuentra funcionando o si éste llegase a entrar en contacto con cualquier material
inflamable, incluyendo las cortinas y las paredes. No coloque nada sobre el
aparato mientras éste se encuentre funcionando.
•Se debe ejercer extrema precaución al usar recipientes que no sean ni de metal ni
de vidrio.
•Cuando este aparato esté en uso, no lo utilice para almacenar ningún material,
aparte de los accesorios recomendados por el fabricante.
•No introduzca los siguientes materiales en el horno: papel, cartón, envolturas
plásticas ni materiales semejantes.
•A fin de evitar que el aparato se sobrecaliente, no cubra la bandeja de
residuos como
ninguna otra superficie del aparato con papel de aluminio.
CONSERVE ESTAS INSTRUCCIONES.
Este aparato eléctrico es para uso doméstico solamente.
ENCHUFE DE TIERRA
Como medida de seguridad, este producto cuenta con un enchufe de tierra que tiene
tres contactos. No trate de alterar esta medida de seguridad. La conexión inapropiada
del conductor de tierra puede resultar en un riesgo de descarga eléctrica. Si tiene alguna
duda, consulte con un electricista calificado para asegurarse de que el tomacorriente sea
uno de tierra.
TORNILLO DE SEGURIDAD
Advertencia: Este aparato cuenta con un tornillo de seguridad para evitar que se pueda
retirar la cubierta exterior del mismo. A fin de reducir el riesgo de incendio o de descarga
eléctrica, por favor no trate de retirar la cubierta exterior. Este producto no contiene
piezas reparables por el consumidor. Toda reparación se debe llevar a cabo solamente por
personal de servicio autorizado.
CABLE ELÉCTRICO
a) El producto debe ser proporcionado con un cable eléctrico corto (o uno separable), a fin de reducir el
riesgo de tropezar o de enredarse en un cable más largo.
b) Existen cables eléctricos más largos y separables o cables de extensión que
se pueden utilizar si se toma el cuidado debido.
c) Si se utiliza un cable separable o de extensión,
1) El regimen nominal del cable separable o del cable de extensión debe ser, como mínimo,
igual al del regimen nominal del aparato.
2) Si el aparato es de conexión a tierra, el cable de extensión debe ser un cable de tres
alambres de conexión a tierra, y
3) Uno debe de acomodar el cable más largo de manera que no cuelgue del mostrador o de la
mesa, para evitar que un niño tire del mismo o que alguien se tropiece.
Nota: Si el cable de alimentación se ha dañado, debe ser sustituido por personal calificado.
COMO USAR
Este producto es para uso doméstico solamente.
Precaución: Nunca deje el horno desatendido mientras esté funcionando. Esto prodria
ocasionar un incendio mientras se cocinan los alimentos. Si esto ocurriera, desenchufe el
horno pero NO abra la puerta. Para reducir el riesgo de incendio, mantenga el interior del
horno completamente limpio y libre de aceite, grasa, residuos de alimentos o de cualquier
otro material combustible.
Precaución: Existe el riesgo de incendio si el horno permanence cubierto mientras esté
funcionando o si éste llegase a entrar en contacto con cualquier material inflamable,
incluyendo las cortinas y las paredes, mientras funciona o si está caliente. No introduzca
los siguientes materials en el horno: papel, cartón, envolturas plásticas o materials
similares.
PRIMEROS PASOS
• Retire todo material de empaque y cualquier etiqueta adhesiva.
• Lave todas las piezas removibles según se indica en las instrucciones de la sección de CUIDADO Y
LIMPIEZA.
• Escoja un lugar apropiado para el aparato. Asegúrese de que haya suficiente espacio entre la parte
de atrás del horno y la pared para evitar que la distribuición de calor cause daño a los gabinetes o
mostradores.
• Enchufe el aparato a un tomacorriente.
INFORMACIÓN ÚTIL ACERCA DE SU HORNO
• Este horno se calienta cuando está funcionando. Asegúrese de usar siempre
guantes de cocina o agarraderas de ollas al tocar toda superficie interior o exterior.
• El aparato podría emitir humo y un ligero olor durante los primeros minutos de uso.
Esto es normal y no debe ser motivo de preocupación.
• El aparato permite un retraso de 2 minutos para seleccionar las funciones
y ajustar la temperatura y el tiempo de cocción, de lo contrario, el horno se
mantiene en modo pausado y uno debe hacer las selecciones de nuevo. Presione cualquier botón
para activar el horno otra vez.
• Cuando se alcanza la temperatura seleccionada, tanto el tiempo como la temperatura pueden ser
ajustados en cualquier momento durante el ciclo de cocción.
• El horno viene programado con tiempo y temperatura para un grado de tostado de término medio
(nivel 4). Utilice este nivel para el primer ciclo de tostado y luego ajuste el tostado al gusto.
• ¿Qué es convección? El sistema por convección utiliza un ventilador interno qu proporciona aire
caliente circulando continuamente en torno a los alimentos; lo cual hace que los alimentos se
cocinen más uniforme y en ciertos casos, más rápido.
POSICIONES PARA LAS PARRILLAS CORREDIZAS
Su horno cuenta con dos posiciones para las parrillas corredizas. Cuenta con una ranura superior
(use solamente para asar) y una ranura inferior.
CÓMO USAR SU HORNO
1. Para cambiar la temperatura de °F a °C, cuando esté seleccionado la temperatura, presione y
sostenga al mismo tiempo los dos botones de temperatura (TEMPERATURE
) por 3 segundos.
2. Para verificar la temperatura programada después de seleccionar una función, presione el
botón
(▲)
o
(▼)
de temperatura (TEMPERATURE ). Para cambiar la temperatura, presione el
botón
(▲)
o
(▼)
de temperatura (TEMPERATURE ).
Nota:
• Presione ligeramente el botón
(▲)
o
(▼)
para cambiar la temperatura en incrementos de 5
grados.
• Presione y sostenga el botón para cambiar la temperatura rápidamente.
• La temperatura mínima es de 150 °F.
• La temperatura máxima es de 450 °F.
3. Para verificar el tiempo programado, presione el botón
(▲)
o
(▼)
del minutero (TIMER ).
Para cambiar el tiempo de cocción, presione el botón
(▲)
o
(▼)
del minutero (TIMER ).
Nota:
• Presione el botón
(▲)
o
(▼)
para cambiar el tiempo en incrementos de 1 minuto.
• Presione y sostenga el botón para cambiar el tiempo rápidamente.
• El tiempo minimo es de 1 minuto.
• El tiempo maximo es de 2 horas.
4. Para cocinar los alimentos por más de 2 horas, seleccione la función de funcionamiento
continuo (STAY ON), presionando el botón
(▼)
pasado del hasta que la pantalla digital
muestre el símbolo de funcionamiento continuo en el lado derecho de la pantalla.
5. Presione el botón de encendido/apagado para empezar a cocinar. El horno comienza a
precalentarse y la pantalla digital parpadea hasta que el horno alcance la temperatura
seleccionada. El horno emitirá 3 sonidos.
6. Para verificar el tiempo o la temperatura durante el ciclo de cocción, presione los botones del
reloj minutero
(▲)
o
(▼)
o presione los botones de temperatura.
7. Una vez que termine el ciclo de cocción, el horno emite 2 sonidos y se apaga.
8. Si ha estado usando la función de funcionamiento continuo (STAY ON), apague el horno.
9. Si desea cambiar el tiempo y la temperatura, lo puede hacer en cualquier momento durante el
ciclo de cocción.
10. Para parar el ciclo de cocción simplemente persione el botón de encendido/apagado (START/
STOP
).
Nota: Mantenga el horno desenchufado cuando no este en uso.
Nota: Asegúrese de que haya por lo menos 1.5” (3.81 cm) entre la superficie de los alimentos y
los elementos de calor superiores.
FUNCIÓN PARA HORNEAR
Temperatura programada: 350˚F
Tiempo programado: 30 minutos
Posición recomendada para la parrilla: ranura inferior
Esta función es ideal para cocinar cacerolas, pasteles frescos o congelados, y para asar carnes o
aves.
1. Coloque la parrilla en la ranura inferior.
2. Gire el control selector de la función de cocción a la posición de hornear (BAKE
).
3. La luz indicadora parpadea y USTED TIENE 2 SEGUNDOS PARA PROCEDER.
4. La temperatura programada aparece en la pantalla digital. Para cambiar la temperatura,
presione el botón
(▲)
o
(▼)
de temperatura (TEMPERATURE ).
5. Para verificar o cambiar el tiempo de cocción, presione el botón
(▲)
o
(▼)
del minutero
(TIMER).
6. Para cocinar, presione el botón de encendido/apagado (START/STOP
).
7. El horno comienza a calentarse, la pantalla digital parpadea hasta que la temperatura
seleccionada sea alcanzada; el horno emitirá un sonido por 3 veces, y entonces el temporizador
se iniciará.
8. Una vez que termine el ciclo de cocción, el horno emite un sonido y se apaga.
FUNCIÓN PARA HORNEAR POR CONVECCIÓN
Esta función utiliza un ventilador interno para distribuir el calor uniformemente. Para usar esta
función, siga las instrucciones indicadas en la sección de FUNCIÓN PARA HORNEAR
, except
en el paso 2, gire el control selector de la función de cocción a la posición de hornear por
convección (CONVECTION BAKE
).
Nota: Asegúrese de supervisar el tiempo de cocción ya que ciertos alimentos se cocinarán más
rápido de lo anticipado.
FUNCIÓN PARA ASAR
Temperatura programada: 450°F
Tiempo programado: 20 minutos
Posición recomendada para la parrilla: ranura superior
1. Gire el control selector de la función de cocción a la posición de asar (BROIL
).
2. La pantalla digital muestra la temperatura programada de 450˚ F. Para cambiar la temperatura,
presione el botón
(▲)
o
(▼)
de temperatura (TEMPERATURE ).
3. Para cambiar el tiempo de cocción, presione el botón
(▲)
o
(▼)
del minutero (TIMER ).
4. Coloque los alimentos sobre la parrilla de asar e inserte esta en la bandeja para hornear.
Introduzca en el horno en la ranura bandeja superior.
5. Asegúrese de que haya por lo menos 1.5” (3.81 cm) entre la superficie de los alimentos y los
elementos de calor superiores.
6. Cierre la puerta del horno.
7. Para empezar a cocinar, presione el botón de encendido/apagado (START/STOP
).
8. Al finalizar el ciclo de cocción, el horno emite un sonido y se apaga.
Nota: En este modo de cocción, solo funcionan los elementos de calor superiores.
PARA TOSTAR PAN
Y BAGELS
Nivel programado: 4 (grado de tostado medio)
Posición recomendada para la parrilla: ranura inferior
La temperatura y el tiempo del horno vienen programados para un grado de tostado mediano
(número 4). Se recomienda usar este nivel para el primer ciclo de tostado y luego ajustar el
control a su gusto.
Nota: La función de BAGEL
tuesta el lado cortado del bagel mientras que lo calienta
ligeramente por fuera. En este modo de BAGEL
, solo funcionan los elementos de calor
superiores. Coloque los bagels con el lado cortado hacia arriba.
1. No es necesario precalentar el horno.
2. Coloque las rebanadas de pan o las mitades de bagels (lado cortado hacia arriba) en la parrilla
corrediza.
3. Cierre la puerta del horno.
4. Gire el control selector de la función de cocción a la posición de tostar (TOAST
) o bagel
(BAGEL
).
5. La luz indicadora de funcionamiento parpadea y el número 4 aparece en la pantalla digital.
6. Para cambiar el grado de tostado, presione el botón
(▲)
o
(▼)
de temperatura
(TEMPERATURE
).
7. Presione el botón de encendido/apagado (START/STOP
) para iniciar el ciclo de
tostado.
8. Al finalizar el ciclo de tostado, el horno emite un sonido y se apaga.
Consejo para ciclos múltiples de tostado: Para obtener los mejores resultados al hacer tandas
consecutivas de tostadas, permita que el horno se enfrie brevemente entre cada ciclo de tostado.
FUNCIÓN PARA RECALENTAR
Temperatura programada: 325˚ F
1. Gire el control selector de la función de cocción a la posición de recalentar (REHEAT
).
2. La temperatura programada de 325˚ F aparece en la pantalla digital. Para cambiar la
temperatura, presione el botón
(▲)
o
(▼)
de temperatura (symbol).
3. Para cambiar el tiempo de cocción, presione el botón
(▲)
o
(▼)
del minutero (TIMER ).
4. Cierre la puerta del horno.
5. Para empezar a cocinar, presione el botón de encendido/apagado (START/STOP).
6. Al finalizar el ciclo de cocción, el horno emite un sonido y se apaga.
FUNCIÓN PARA CALENTAR
Temperatura programada: 175˚ F
Utilice esta función para mantener caliente por un tiempo las comidas ya cocinadas.
1. Gire el control selector de la función de cocción a la posición de calentar (KEEP WARM
).
2. La temperatura programada de 175˚ F aparece en la pantalla digital. Para cambiar la
temperatura, presione el botón
(▲)
o
(▼)
de temperatura (symbol).
3. Para cambiar el tiempo de cocción, presione el botón
(▲)
o
(▼)
del minutero (TIMER ).
4. Cierre la puerta del horno.
5. Para empezar a calentar los alimentos, presione el botón de encendido/apagado (START/STOP
).
6. Al finalizar el ciclo de calentamiento, el horno emite un sonido y se apaga.
FUNCIÓN PARA COCINAR EN EL ASADOR
Cómo colocar los alimentos en la barra del asador
1. Inserte el extremo puntiagudo de la barra del asador a través de uno de los tenedores de
soporte, con los extremos puntiagudos del tenedor orientados hacia el centro de la barra del
asador. Deslice el tenedor hacia el extremo cuadrado de la barra. Apriete el tornillo mariposa.
2. Inserte la barra del asador en el centro del alimento a cocinar hasta que quede bien segura
dentro del alimento.
3. Deslice el segundo tenedor sobre el extremo puntiagudo de la barra del asador con los
extremos puntiagudos orientados hacia el alimento. Continúe hasta que los tenedores queden
bien seguros dentro del alimento. Apriete el tornillo mariposa.
4. Verifique que el alimento esté centrado en la barra del asador, colocando el extremo puntiagudo
de la barra en el agujero localizado en la pared derecha del horno. Descanse el extremo
cuadrado de la barra sobre el soporte en la pared izquierda del horno.
5. Importante: Inserte la bandeja para hornear, cubierta con papel de aluminio, en la ranura más
baja para que la grasa y los jugos caigan en la bandeja.
PARA CONCINAR EN EL ASADOR
1. Gire el control selector de la función de cocción a la posición de asador (ROTISSERIE ).
2. Para seleccionar la temperatura deseada, presione el botón
(▲)
or
(▼)
(TEMPERATURE ).
Para seleccionar el tiempo de cocción, presione el botón
(▲)
or
(▼)
(TIMER ).
3. Cuando el ciclo de asado haya terminado, retire la barra del asador. Posicione los ganchos del
mango del asador debajo de las muescas localizadas en ambos lados de la barra. Levante
el lado izquierdo de la barra primero. Luego tire del lado derecho de la barra para sacarla del
agujero en la pared derecha del horno. Cuidadosamente, retire el alimento del horno.
4. Afloje los tonillos mariposa y retire el alimento de la barra.
Nota: Siempre tenga mucho cuidado al retirar la barra del asador, la parrilla corrediza o la bandeja
para hornear. Siempre utilice el mango del asador con guantes protectores de cocina.
Nota: En este modo de cocción, solo funcionan los elementos de calor superiores.
GUÍA PARA COCINAR EN ASADOR
ALIMENTO
PESO MÁXIMO TEMPERATURA
TIEMPO
APROXIMADO
DE COCCIÓN
TEMPERA-
TURA
INTERNA
Pollo 3
½
lbs. 350˚ F 1 hora y ½ 180˚ F
Asado de
carne
de 3 a
5 lbs.
325˚ F
de 1½ a 2
horas
160˚ F
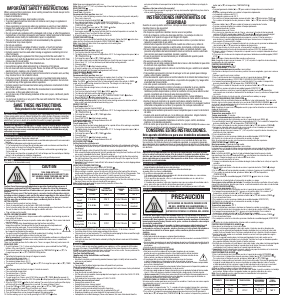
CAUTION
THIS OVEN GETS HOT.
WHEN IN USE, ALWAYS USE OVEN MITTS OR
POT HOLDERS WHEN TOUCHING ANY OUTER
OR INNER SURFACE OF THE OVEN.
PRECAUCIÓN
ESTE HORNO SE CALIENTA CUANDO ESTÁ
EN USO. SIEMPRE USE AGARRADERAS O
GUANTES DE COCINA CUANDO TOQUE TODA
SUPERFICIE INTERNA O EXTERNA DEL HORNO.

Praat mee over dit product
Laat hier weten wat jij vindt van de Black and Decker TO4211SKT Oven. Als je een vraag hebt, lees dan eerst zorgvuldig de handleiding door. Een handleiding aanvragen kan via ons contactformulier.
beantwoord | Ik vind dit nuttig (0) (Vertaald door Google)