Handleiding Canarm CP60HPWP Plafondventilator

Handleiding voor je Canarm CP60HPWP Plafondventilator nodig? Hieronder kun je de handleiding gratis bekijken en downloaden als PDF in het Nederlands en/of Engels. Dit product heeft 1 veelgestelde vraag, 0 comments en heeft 0 stemmen. Is dit niet de handleiding die je zoekt, neem dan contact met ons op.

Is je product kapot en biedt de handleiding geen oplossing meer? Dan kun je voor reparatie gratis terecht bij Repair Café.

Handleiding

Loading…

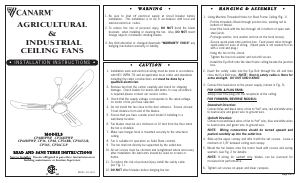
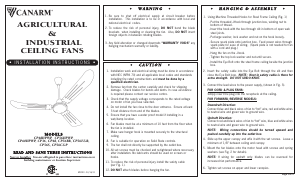
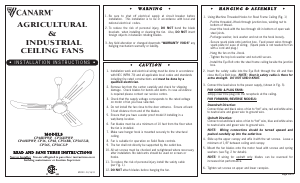
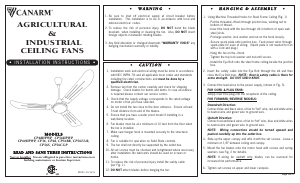
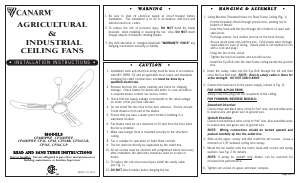
MODELS
MODELS
CP48HPWP, CP56HPWP,
CP60HPWP, CP36, CP48, CP56BR, CP56F&R,
CP56S, CP56C&P
READ AND SAVE THESE INSTRUCTIONS
Note to Installer: You are obligated to pass these instructions on to
building maintenance or location Supervisor.
AGRICULTURAL
&
INDUSTRIAL
CEILING FANS
M0090 - 03/16/11
I N S TA L L AT I O N I N S T R U C T I O N S
W A R N I N G
1. Be sure to shut off electrical supply at circuit breaker before
installation. This installation is to be in accordance with local and
national electrical codes.
2. To reduce the risk of personal injury, DO NOT bend the blade
brackets when installing or cleaning the fan. Also, DO NOT insert
foreign objects in between rotating blades.
3. Any field alteration or changed downrods “WARRANTY VOIDS” any
hanging mechanism warranty or liability.
C A U T I O N
1. Installation work and electrical wiring must be done in accordance
with NEC (NFPA 70) and all applicable local codes and standards
including fire rated constructions and must be done by a
qualified electrician.
2. Remove fan from the carton carefully and check for shipping
damage. Check blades for bends and dents. In case assistance
is required please contact our service centre.
3. Check that the supply voltage corresponds to the rated voltage
on motor of fan you have selected.
4. Do not install the fan close to the door entrance. Ensure at least
3 feet distance from end of the blades.
5. Ensure that you have a water proof model if installing in a
wet/damp location.
6. Fan blades must be at a minimum of 10 feet from the floor when
the fan is installed.
7. Make sure hanger hook is mounted securely to the structural
ceiling.
8. Fan is suitable for operation on Solid State controls.
9. The fan shall not directly be supported by the outlet box.
10. All set screws must be checked and re-tightened where necessary
after installation. No lubricants should be used on screws or
hooks.
11. To reduce the risk of personal injury install the safety cable
(per Fig. 1).
12. DO NOT attach blades before hanging the fan.
H A N G I N G & A S S E M B L Y
1. Using Machine Threaded Hooks for Steel Frame Ceiling (Fig. 1)
- Put the threaded J-Hook through junction box, winding nut to
bottom of thread.
- Insert the hook with the box through slit in bottom of open web
steel joists.
- Put large washer, lock washer and nut on the hook loosely.
- Secure spark plate onto junction box. Feed power wires through
spark plate for ease of wiring. (Spark plate is not needed for fan
with a cord and plug.)
- Hang the fan on the J-hook.
- Tighten the top lock washer and nut until secure.
- Install the Eye Bolt onto the steel frame ceiling beside the junction
box.
2. Insert the safety cable into the Eye Bolt through the slit and then
close the Eye Bolt loop. NOTE: Knot in safety cable is there for
extra strength. DO NOT UNDO KNOT.
3. Connect the lead wires to the power supply, (shown in Fig. 3).
FOR CORD & PLUG FANS:
Simply insert the plug into the receptacle at the ceiling.
FOR FORWARD/REVERSE MODELS:
Downdraft Direction:
Connect blue and black wires of fan to “hot” wire, red and white wires
to neutral wire and green wire to ground wire.
Updraft Direction:
Connect red and black wires of fan to “hot” wire, blue and white wires
to neutral wire and green wire to ground wire.
NOTE: Wiring connections should be turned upward and
pushed carefully up into the outlet box.
4. Slide up the upper canopy and affix it with the set screws. Leave a
minimum of 1/8” between ceiling and canopy.
5. Mount the fan blades onto the motor head with screws and spring
washers (see Fig. 2 for details).
NOTE: If wiring for updraft only: blades can be reversed for
increased fan performance.
6. Tighten set screws on upper and lower canopies.
Page 1 of 3
Download de handleiding in het Nederlands en/of Engels (PDF, 0.86 MB)
(Denk aan het milieu en print deze handleiding alleen als dat echt noodzakelijk is)

Loading…

Beoordeling

Laat ons weten wat je van de Canarm CP60HPWP Plafondventilator vindt door een beoordeling achter te laten. Wil je je ervaringen met dit product delen of een vraag stellen? Laat dan een bericht achter onderaan de pagina.
Bent u tevreden over de Canarm CP60HPWP Plafondventilator?
Ja Nee
Beoordeel dit product als eerste
0 stemmen

Praat mee over dit product

Laat hier weten wat jij vindt van de Canarm CP60HPWP Plafondventilator. Als je een vraag hebt, lees dan eerst zorgvuldig de handleiding door. Een handleiding aanvragen kan via ons contactformulier.

Meer over deze handleiding

We begrijpen dat het prettig is om een papieren handleiding te hebben voor je Canarm CP60HPWP Plafondventilator. Je kunt de handleiding bij ons altijd downloaden en daarna zelf printen. Indien je graag een originele handleiding wilt hebben, raden we je aan contact op te nemen met Canarm. Zij kunnen wellicht nog voorzien in een originele handleiding. Zoek je de handleiding van Canarm CP60HPWP Plafondventilator in een andere taal? Kies op de homepage je taal naar keuze en zoek daarna op het modelnummer om te zien of we deze beschikbaar hebben.

Specificaties

Merk Canarm
Model CP60HPWP
Categorie Plafondventilators
Bestandstype PDF
Bestandsgrootte 0.86 MB

Alle handleidingen voor Canarm Plafondventilators
Meer handleidingen voor Plafondventilators

Veelgestelde vragen over Canarm CP60HPWP Plafondventilator

Ons supportteam zoekt dagelijks naar nuttige productinformatie en antwoorden op veelgestelde vragen. Als er onverhoopt toch een onjuistheid tussen onze veelgestelde vragen staat, laat het ons dan weten via het contactformulier.

Maakt het uit in welke richting mijn plafondventilator draait? Geverifieerd

Ja, dit hangt af van het seizoen. In de warmere seizoenen moet de plafondventilator tegen de klok in draaien om koude lucht naar beneden te blazen. Deze lucht zorgt dat vocht verdampt en heeft hierdoor een verkoelend effect. In de koudere seizoenen moet de plafondventilator met de klok mee draaien om koude lucht naar boven te zuigen, wat de warme lucht omlaag drukt.

Ik vind dit nuttig (185) Lees meer
Handleiding Canarm CP60HPWP Plafondventilator

Gerelateerde producten

Gerelateerde categorieën