Handleiding Chinook Tornado 3 Tent

Handleiding voor je Chinook Tornado 3 Tent nodig? Hieronder kun je de handleiding gratis bekijken en downloaden als PDF in het Nederlands en/of Engels. Dit product heeft 7 veelgestelde vragen, 0 comments en heeft 0 stemmen. Is dit niet de handleiding die je zoekt, neem dan contact met ons op.

Is je product kapot en biedt de handleiding geen oplossing meer? Dan kun je voor reparatie gratis terecht bij Repair Café.

Handleiding

Loading…

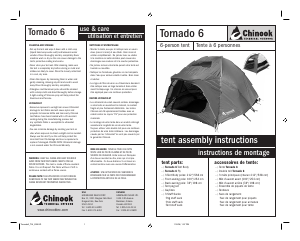
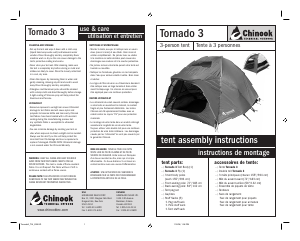
Tornado 3
tent assembly
instructions
Tornado 3
instructions de
montage
IMPORTANT INFORMATION
Thank you for purchasing your
new Chinook tent. We have
designed and manufactured
these tents to give years
of trouble free enjoyment
and use. To maximize the
enjoyment of your tent, please
read the following information
and assembly instructions
with care.
Become familiar with your
new Chinook tent at home
by assembling the tent
at home before your rst
camping trip. After a long day
of travel a campsite is not a
good place to learn how to
set up a new tent.
When selecting a campsite,
make sure that the area is
at, has good drainage and is
free of sharp objects that may
damage the tent.
Carefully push each pole
through the proper pole
sleeve. Never force the pole
as this may cause damage to
the sleeve or pole.
PLEASE USE
COMMON SENSE
Erect your tent upwind away
from campres.
Do not cook with open ames
inside the tent.
Do not store ammables or
refuel stoves or lanterns in
your tent.
FIRE WARNING
Your Chinook tent fabric is
treated with a re retardant
but is NOT FIREPROOF. If
exposed to open ames or
other ignition sources the tent
may ignite and burn.
Tent
1. Remove all parts from the tent bag. Spread the tent body with its oor on the
ground and with the web/grommet loops in each corner. Be sure to clear the
area of any sharp objects that may damage the tent fabric.
2. Assemble all of the shock-corded poles. Carefully join each section to avoid
damaging the rod ends.
3. Insert each tent body pole (155"/394 cm) into its corresponding web grommet
(matching colors). Two of the poles run from the front corners of the tent body
to the back corners, crossing in the center of the tent canopy. The third pole
runs from one side of the tent to the other underneath the other two poles.
4. Situated at each corner and at each side of the tent body are web stakeout
loops with grommets attached. Working with one pole at a time, insert the pole
tips into the grommet located closest to the tent.
5. Attach all clips onto the poles.
Fly
1. Spread the y over the tent canopy.
2. Insert the long front awning pole (72"/183 cm) into the front pole sleeve on
the y. The awning pole ends should be inserted into the grommets attached
to the side carabiner clips on the tent body located on the upper sides of the
front tent canopy.
3 Insert the back awning pole (56"/142 cm) into the back pole sleeve on the y.
The awning pole ends should be inserted into the grommet attached to the pole
clips on the back of the tent body.
4. Attach the Velcro tabs on the inner y to the tent poles.
5. Attach the y to the tent body using the quick-release buckle/strap system at
each corner.
6. Adjust quick-release buckle/strap system for a more taut y.
Pegging and Guylines
1. Starting with the tent corners, place a peg through each web loop located along
the oor of the tent body and peg out securely.
2. Located along the lower sides of the y are shock-corded loops, peg each loop
securely.
3. There are delta guyline points with a grommet located on the outer surface of
the y. Attach a guyline to each point and fasten to a peg or other secure object
making sure the guylines are taut.
4. By staking and guying your tent
a. the tent will be more stable in windy conditions
b. the y will shed rain better
c. air circulation to the inner tent will be increased
IMPORTANTE INFORMATION
Merci pour l’achat de votre
nouvelle tente Chinook. Nous
avons dessiné et fabriqué nos
tentes pour vour donner des
années de plaisir sans maux
de tête. Pour maximiser votre
plaisir, s.v.p. lire attentivement
les instructions de montage
et de soins à prendre pour
conserver votre tente en bonne
condition.
Familiariser vous avec votre
tente Chinook en la montant
au moins une fois dans la
cour arrière chez vous avant
votre excursion.
Quand vous choisissez votre
emplacement pour monter
votre tente, assurez vous
d’un endroit plat, bien drainé
et nettoyer de tous objets
pouvant endommager votre
tente.
Glisser soigneusement
chaque tige dans sa gaine
respective. Ne jamais forcer
les tiges car cela pourrait
causer des dommages à la
pole ou à la gaine.
VEUILLEZ UTILISER VOTRE
BON SENS
Monter votre tente eloignée du
feu de camp.
Ne jamais cuisiner à l’intérieur
de la tente.
Ne pas remiser de liquides
inammable dans votre tente.
INFLAMMABILITÉ
Votre tente Chinook a été traité
avec un enduit antiamme
mais n’est pas à l’épreuve du
feu. Une exposition directe à
une amme ou une source de
chaleur excessive peut causer
une incendie.
Tente
1. Sortir toutes les composantes du sac de rangement. Étaler le plancher de la
tente sur le sol. Assurez vous de bien nettoyer l’espace de tout objet pouvant
endommager le plancher de tente.
2. Assembler tous les mâts. Prendre soin de ne pas endommager les embouts.
3. Insérer les extremités de chaque mât principal (155"/394 cm) dans les
œillets des languettes à chaque coin de la tente. Les couleurs du mâts doivent
se correspondre avec les couleurs des œillets. Deux des mâts doivent être
placés dans l’oeillet du coin avant à celui arrière. La troisième tige doit être
placé d’un côté à l’autre côté de la tente passant en dessous des deux autres
tiges.
4. À chaque coin de la tente et de chaque côté il y a des attaches renforcies.
Installer un mât à la fois, insérer l’embout du mât dans l’attache la plus près
de la tente.
5. Attacher tous les crochets aux mâts.
Double Toit
1. Déployer le double toit en vous assurant que l’ouverture de la porte soit en
avant de la tente.
2. Insérer le mât du auvent avant (72"/183 cm) dans la pochette avant du
double toit. Les embouts doivent être insérés dans les œillets attachés aux
mousquetons situés aux côtés supérieures de la porte de la tente.
3. Insérer le mât du auvent arrière (56"/142 cm) dans la pochette arrière
du double toit. Les embouts doivent être insérés dans les œillets attachés
crochets situés à l’arrière de la tente.
4. Attacher les “Velcro” du double toit à l’armature de la tente.
5. Attacher le double toit à l’armature de la tente en utilisant les courroies
d’attaches rapides.
6. Ajuster les courroies d’attaches rapides pour un double toit bien tendu.
Piquets et Tendeurs
1. Commencer par les coins de la tente, placer un piquet dans chacune des
attaches renforcies tout autour de la tente et bien ancrer.
2. Situé tout autour du double toit il y a les cordes élastiques qu’il faut bien
ancrer à l’aide de piquets.
3. À la surface extérieur du double toit il y a des points d’attaches delta avec
oeillet. Attacher un tendeur à chacun de ses oeillets bien ancrer et bien tendre
le tendeur.
4. Par un bon ancrage de votre tente
a) Votre tente sera plus stable par temps venteux
b) Le double toit évacura mieux la pluie
c) L’aération de la tente sera augmentée
Tornado3_TAI_2006.ID 11/2/06, 1:07 PM2
Download de handleiding in het Nederlands en/of Engels (PDF, 0.57 MB)
(Denk aan het milieu en print deze handleiding alleen als dat echt noodzakelijk is)

Loading…

Beoordeling

Laat ons weten wat je van de Chinook Tornado 3 Tent vindt door een beoordeling achter te laten. Wil je je ervaringen met dit product delen of een vraag stellen? Laat dan een bericht achter onderaan de pagina.
Bent u tevreden over de Chinook Tornado 3 Tent?
Ja Nee
Beoordeel dit product als eerste
0 stemmen

Praat mee over dit product

Laat hier weten wat jij vindt van de Chinook Tornado 3 Tent. Als je een vraag hebt, lees dan eerst zorgvuldig de handleiding door. Een handleiding aanvragen kan via ons contactformulier.

Meer over deze handleiding

We begrijpen dat het prettig is om een papieren handleiding te hebben voor je Chinook Tornado 3 Tent. Je kunt de handleiding bij ons altijd downloaden en daarna zelf printen. Indien je graag een originele handleiding wilt hebben, raden we je aan contact op te nemen met Chinook. Zij kunnen wellicht nog voorzien in een originele handleiding. Zoek je de handleiding van Chinook Tornado 3 Tent in een andere taal? Kies op de homepage je taal naar keuze en zoek daarna op het modelnummer om te zien of we deze beschikbaar hebben.

Specificaties

Merk Chinook
Model Tornado 3
Categorie Tenten
Bestandstype PDF
Bestandsgrootte 0.57 MB

Alle handleidingen voor Chinook Tenten
Meer handleidingen voor Tenten

Veelgestelde vragen over Chinook Tornado 3 Tent

Ons supportteam zoekt dagelijks naar nuttige productinformatie en antwoorden op veelgestelde vragen. Als er onverhoopt toch een onjuistheid tussen onze veelgestelde vragen staat, laat het ons dan weten via het contactformulier.

Kan ik mijn tent ook nat opbergen? Geverifieerd

Alleen voor zeer korte periodes. Wanneer een tent een week of langer nat wordt opgeborgen, kan deze gaan schimmelen. Dit is zeer schadelijk voor de tent en eventueel uw gezondheid.

Ik vind dit nuttig (384) Lees meer

Hoe kan ik een tent impregneren? Geverifieerd

Zet de tent op, reinig het doek en laat het drogen. Breng het impregneermiddel aan op het doek met een plantenspuit of andere spray. Het is ook mogelijk een nieuwe verfroller of kwast te gebruiken. Het doek dient helemaal verzadigd te worden met het impregneermiddel. Behandel ook de binnenkant van het doek. Veeg de ramen en andere onderdelen dan het tentdoek goed schoon met een vochtige doek. Laat het impregneermiddel hier niet op drogen. Laat vervolgens het tentdoek goed drogen. Herhaal indien nodig de behandeling.

Ik vind dit nuttig (285) Lees meer

Kan ik een scheur of gat in mijn tentdoek zelf repareren? Geverifieerd

Voor synthetisch tentdoek zijn er speciale stukken zelfklevend reparatiedoek verkrijgbaar. Plak aan beide zijden van het doek een stuk zelfklevend tentdoek over het scheurtje of gaatje. Gebruik voor katoenen tentdoek of tentdoek van gemengd materiaal opstrijkbaar tentdoek. Hiervoor heb je een strijkijzer nodig.

Ik vind dit nuttig (218) Lees meer

De rits van mijn tent loopt stroef, wat kan ik doen? Geverifieerd

Gebruik bij stroeve ritsen een droge PTFE spray of siliconenspray. Spray niet op de stof en spuit de ritsen af en toe preventief in om problemen in de toekomst te voorkomen.

Ik vind dit nuttig (156) Lees meer

Er zitten waterdruppels aan de binnenkant van de tent, betekent dit dat de tent lekt? Geverifieerd

Nee, dit is waarschijnlijk conden. Zorg dat de tent goed geventileerd is om consens tot een minimum te beperken.

Ik vind dit nuttig (129) Lees meer

Welke soort tentharingen heb ik nodig? Geverifieerd

Op gras- en bosgrond gebruik je halfronde of kunststof tentharingen. Op steengronden gebruik je rotspennen. Op kleigrond gebruik je halfronde, kunststof of universele tentharingen. Op kiezelgrond gebruik je halfronde of universele tentharingen. Op fijne zandgronden zoals duinen gebruik je houten tentharingen.

Ik vind dit nuttig (105) Lees meer

Het impregneermiddel laat witte vlekken of een witte waas achter op het doek, wat kan ik hier aan doen? Geverifieerd

Indien er een witte waas achterblijft of u witte vlekken ziet op uw tentdoek na het impregneren heeft u op die plekken meer impregneermiddel aangebracht dan elders. Dit is niet erg en de vlekken en waas verdwijnen vaak vanzelf. Het is niet verstandig minder impregneermiddel te gebruiken om vlekken of een waas te voorkomen. Het doek moet goed nat zijn van het impregneermiddel om een goede impregnatie te garanderen.

Ik vind dit nuttig (97) Lees meer
Handleiding Chinook Tornado 3 Tent

Gerelateerde producten

Gerelateerde categorieën