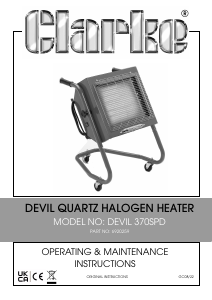
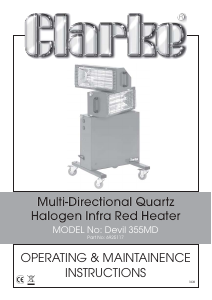
Handleiding Clarke Devil 155 Kachel

Handleiding voor je Clarke Devil 155 Kachel nodig? Hieronder kun je de handleiding gratis bekijken en downloaden als PDF in het Nederlands en/of Engels. Dit product heeft 2 veelgestelde vragen, 0 comments en heeft 0 stemmen. Is dit niet de handleiding die je zoekt, neem dan contact met ons op.

Is je product kapot en biedt de handleiding geen oplossing meer? Dan kun je voor reparatie gratis terecht bij Repair Café.

Handleiding

Loading…

ELECTRICAL CONNECTIONS
Connect the mains lead to a standard, 230 Volt (50Hz) electrical supply through an
approved 13 amp BS 1363 plug, or a suitably fused isolator switch.
WARNING! THIS APPLIANCE MUST BE EARTHED
IMPORTANT: The wires in the mains lead are coloured in accordance with the following
code:
Green & Yellow ................................ Earth
Blue .................................................... Neutral
Brown ................................................ Live
As the colours of the flexible lead of this appliance may not correspond with the coloured
markings identifying terminals in your plug, or your mains supply, proceed as follows:
Connect GREEN & YELLOW coloured cord to plug terminal marked with a
letter “E” or Earth symbol “ ” or coloured GREEN or GREEN & YELLOW.
Connect BROWN cord to terminal marked with a letter “L” or coloured RED.
Connect BLUE cord to terminal marked with a letter “N” or coloured BLACK.
Fuse Rating
The fuse in the plug must be replaced with one of the same rating (13 amps) and this
replacement must be ASTA approved to BS1362.
230 Volt Models
110 Volt Models
These models must be connected to a protected 110V supply, through a suitably approved
connector. On no account must a 230V, 13amp (BS1363) plug be used.
NOTE: If a portable 110V transformer is used, make sure it has a rated capacity sufficient
to take the load of the heater.
In the event that the heater is hard wired into the electrical system, it must be carried out
in accordance with IEE regulations.
CABLE EXTENSION
Always use an approved cable extension suitable for the power rating of this tool (see
specifications), the conductor size should also be at least the same size as that on the
machine, or larger. When using a cable reel, always unwind the cable completely.
WARNING!
IF YOU ARE IN ANY DOUBT ABOUT ELECTRICAL CONNECTIONS, CONSULT A
QUALIFIED ELECTRICIAN.
NEVER ATTEMPT ELECTRICAL REPAIRS YOURSELF.
ASSEMBLY
A. Devil 155
First, decide where the heater is to be located, ensuring it is at least 25cm (10”) from a
ceiling and 1 metre from the corner of a room. Also take into account any furniture,
draperies or any other flammable or heat sensitive materials or objects, ensuring they are
at least 2 metres from the heater. Finally ensure a suitable electrical supply is close to
hand (see Safety Precautions).
Mark out the mounting holes on the wall using the mounting bracket as a template. Drill and
plug the wall then screw on the bracket firmly. Mount the heater on the wall bracket and
connect the power cable to the supply (see Electrical Connections). Alternatively provision is
made to mount the bracket on to a support, such as a tripod etc (not supplied).
B. Devil 355P
To reduce the risk of transit damage, the support legs (2), castors
(4) and the halogen lamps (2) are not fitted.
Attach the four castors to the support legs using the bolts
supplied.
Attach the legs to the main body using securing bolts supplied.
Fitting Halogen lamps (see page 5).
Connect the mains cable to a suitable supply in accordance
with the Electrical Connection instructions given previously.
IMPORTANT!
When using the heater, the angle of tilt MUST NOT exceed 45 degrees, as this
could lead to the heater overheating. NEVER mount the heater pointing
vertically downwards
C. Devil 355SP
Attach the four castors to the frame, using the bolts
supplied.
Attach the frame to the heater body in the manner
shown in the drawing opposite, using the securing
knobs and the four plastic saddle supports located either
side of the frame tubing.
Fitting Halogen lamps (see page 5).
Connect the mains cable to a suitable supply in
accordance with the Electrical Connection instructions
given previously.
-3-
-4-
Tools Required: 1 x 13mm ring spanner and 1 x Pozidrive screwdriver (medium).
Download de handleiding in het Nederlands en/of Engels (PDF, 2.22 MB)
(Denk aan het milieu en print deze handleiding alleen als dat echt noodzakelijk is)

Loading…

Beoordeling

Laat ons weten wat je van de Clarke Devil 155 Kachel vindt door een beoordeling achter te laten. Wil je je ervaringen met dit product delen of een vraag stellen? Laat dan een bericht achter onderaan de pagina.
Bent u tevreden over de Clarke Devil 155 Kachel?
Ja Nee
Beoordeel dit product als eerste
0 stemmen

Praat mee over dit product

Laat hier weten wat jij vindt van de Clarke Devil 155 Kachel. Als je een vraag hebt, lees dan eerst zorgvuldig de handleiding door. Een handleiding aanvragen kan via ons contactformulier.

Meer over deze handleiding

We begrijpen dat het prettig is om een papieren handleiding te hebben voor je Clarke Devil 155 Kachel. Je kunt de handleiding bij ons altijd downloaden en daarna zelf printen. Indien je graag een originele handleiding wilt hebben, raden we je aan contact op te nemen met Clarke. Zij kunnen wellicht nog voorzien in een originele handleiding. Zoek je de handleiding van Clarke Devil 155 Kachel in een andere taal? Kies op de homepage je taal naar keuze en zoek daarna op het modelnummer om te zien of we deze beschikbaar hebben.

Specificaties

Merk Clarke
Model Devil 155
Categorie Kachels
Bestandstype PDF
Bestandsgrootte 2.22 MB

Alle handleidingen voor Clarke Kachels
Meer handleidingen voor Kachels

Veelgestelde vragen over Clarke Devil 155 Kachel

Ons supportteam zoekt dagelijks naar nuttige productinformatie en antwoorden op veelgestelde vragen. Als er onverhoopt toch een onjuistheid tussen onze veelgestelde vragen staat, laat het ons dan weten via het contactformulier.

Hoe beïnvloedt stof de efficiëntie van een verwarming? Geverifieerd

Stof kan zich ophopen op de verwarmingselementen en in de luchtfilters van een verwarming, waardoor de efficiëntie vermindert. Hierdoor kan de verwarming harder werken om dezelfde hoeveelheid warmte te produceren, wat leidt tot een hoger energieverbruik en hogere energierekeningen. Om de efficiëntie van uw verwarming te behouden, moet u deze regelmatig schoonmaken en indien nodig het luchtfilter vervangen.

Ik vind dit nuttig (107) Lees meer

Hoe bepaal ik de grootte van de verwarming die ik nodig heb voor een kamer? Geverifieerd

De grootte van de heater die je nodig hebt voor een ruimte hangt af van de grootte van de ruimte en de isolatie van de ruimte. Een algemene vuistregel is om 60 watt per vierkante meter ruimte te gebruiken. Als een kamer bijvoorbeeld 14 vierkante meter is, is een verwarming van 840 watt geschikt.

Ik vind dit nuttig (64) Lees meer
Handleiding Clarke Devil 155 Kachel

Gerelateerde producten

Gerelateerde categorieën