4
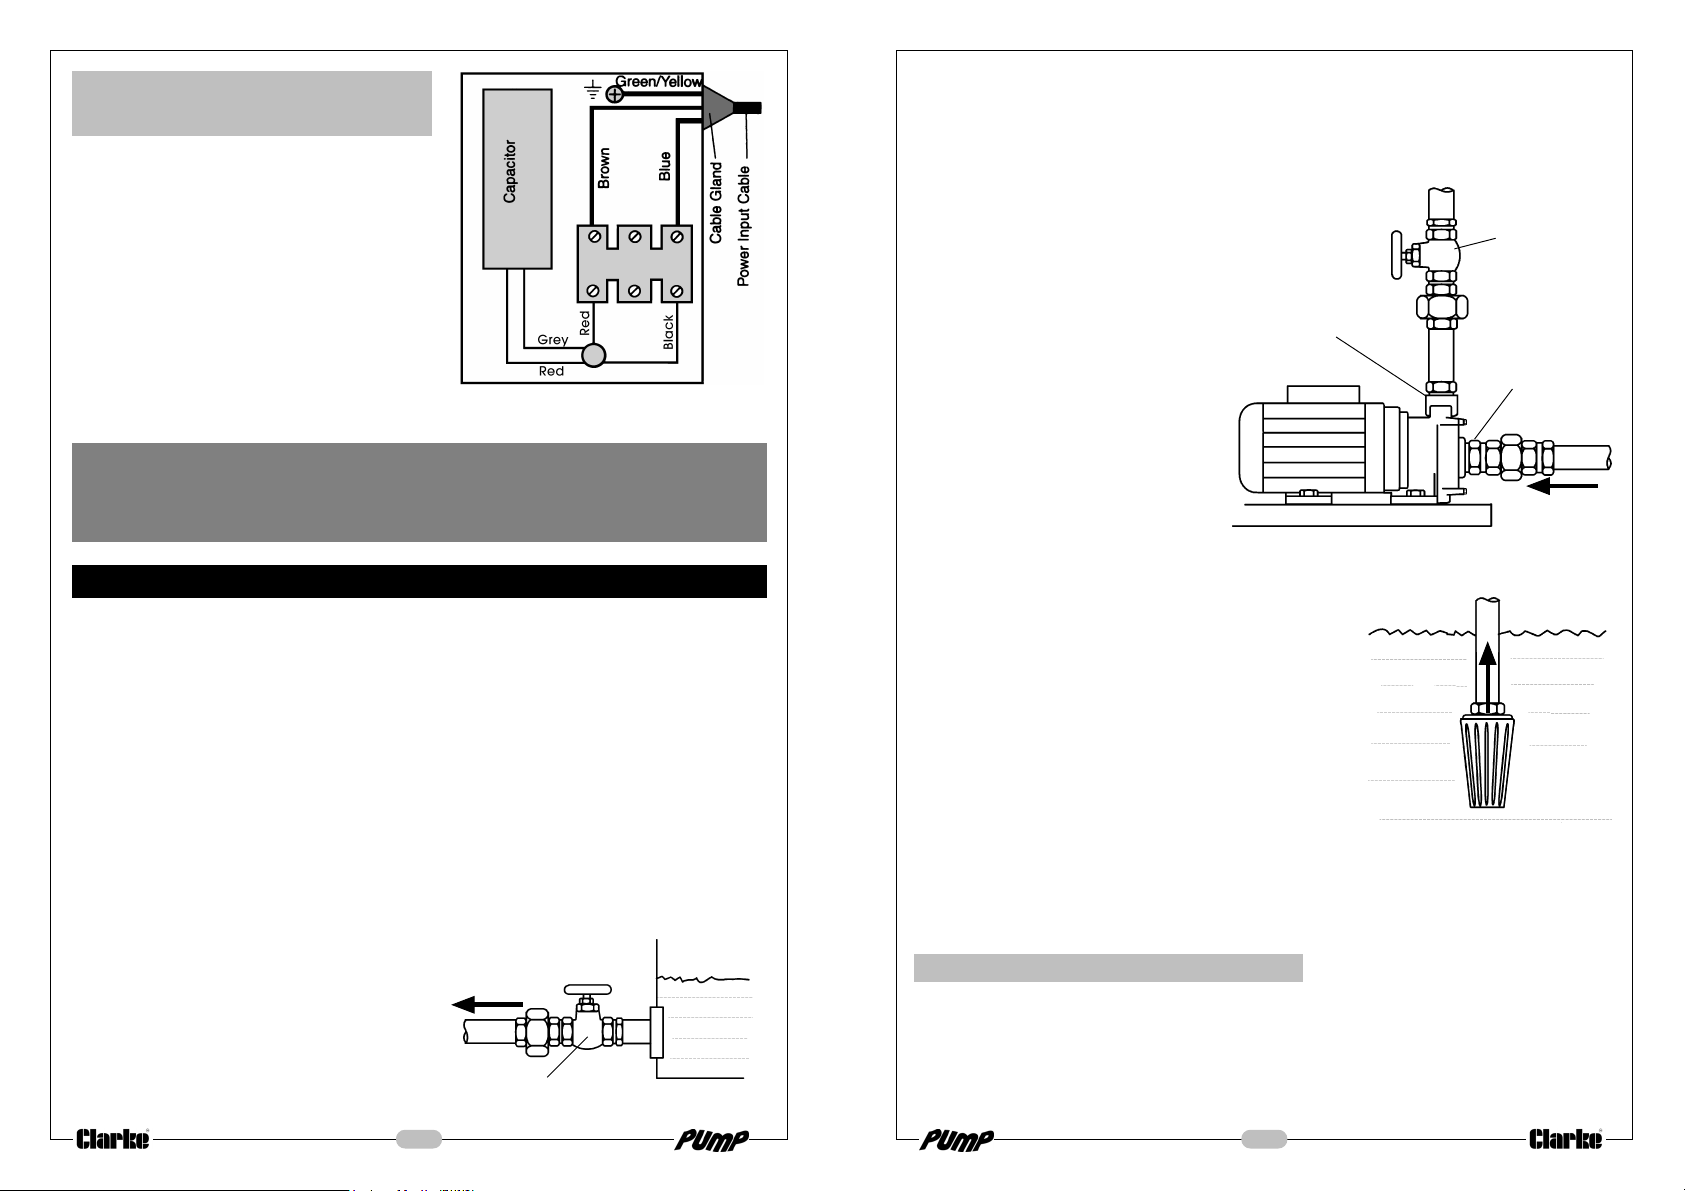
WIRING CONNECTIONS FOR
CEB101
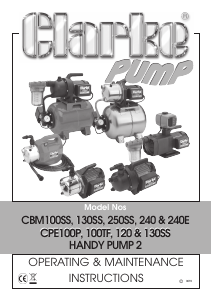
A - Gravity Feed
Isolating Valve
To Pump
intake can be by means of either:-
A. Gravity Feed
or
B. Suction Lift.
Water being taken in by the pump should, whenever possible, be fed by means
of gravity (Method A). However, if this is not possible then water may be drawn
from a lower level by means of suction (Method B).
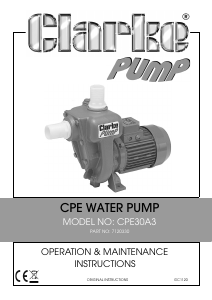
5
Inlet Port
Outlet Port
Outlet Restricter
Valve
B - Suction lift
V
From Supply
Filter Foot
Valve
Make electrical connections inside the
terminal cover in accordance with the
diagram opposite:
WARNING
Do not attempt electrical installation work if you are in any doubt as to
how it should be done properly. Consult a qualified electrician.
WATER CONNECTIONS
IMPORTANT: The pump must not be connected to the power supply until the
hose/pipe installation is completed.
If any part of the system is to be connected to the mains water supply, do ensure
that you comply with your local water authority regulations.
Because of the variety of possible installations, no plumbing accessories are supplied
as standard with your pump. However, accessories designed specifically for this
range of pumps are available from your CLARKE dealer and are listed on page 7.
The pump must always be installed and operated in a horizontal position i.e. with
the outlet port facing vertically upwards. The fixing holes in the base should be
used as necessary to secure the pump firmly in its operating position. Also, ensure
that there is adequate air circulation around the motor.
Avoid situations where there is the risk of
water coming into contact with the outside
of the pump. Neither the motor or the
terminal box are intended to be
waterproof.
These notes are for guidance on how to
achieve a proper working system.
The schematic diagrams illustrate possible
methods of pipework installation. Water
The suction lift i.e. the vertical
distance between the water level
and the pump should not exceed
distance specified for your pump
(see Specifications on page 7).
When using this method, a foot
valve, must be fitted to the lower
end of the suction hose, (as
illustrated below), so as to help
retain water in the suction system.
The delivery head i.e. the vertical
distance between the pump and
the point of discharge should be
at least 5 feet. If this cannot be
achieved naturally, then it can be
simulated by restricting the outlet
flow from the pump.
The illustration shows a gate valve (V) installed in-
line on the delivery side of the pump which can
be set as required to regulate the flow of water.
Do not place any such restriction on the suction
side of the pump unless it serves only to isolate a
gravity fed water supply.
To prevent unnecessary strain or possible distortion
to the pump, ensure that adequate support is
provided to the hoses and/or pipes. Remember
they will be considerably heavier when filled with
water.
Should sand, chemical or other contaminant come into contact with the pump,
flush through with cold clean water as soon as possible.
Protect the pump and pipework from freezing. The formation of ice may cause
serious damage.
PRIMING
When suction lift is used to draw water into the pump it is essential that all
connections and hoses are completely air tight, otherwise the system will not
work.
Before pumping will start it is necessary to completely fill the suction side with
water. This is known as priming the pump and is carried out as follows :-


Praat mee over dit product
Laat hier weten wat jij vindt van de Clarke TAM 100 Waterpomp. Als je een vraag hebt, lees dan eerst zorgvuldig de handleiding door. Een handleiding aanvragen kan via ons contactformulier.