Handleiding Clas Ohlson MP-8221 Rookmelder

Handleiding voor je Clas Ohlson MP-8221 Rookmelder nodig? Hieronder kun je de handleiding gratis bekijken en downloaden als PDF in het Nederlands en/of Engels. Dit product heeft 3 veelgestelde vragen, 0 comments en heeft 0 stemmen. Is dit niet de handleiding die je zoekt, neem dan contact met ons op.

Is je product kapot en biedt de handleiding geen oplossing meer? Dan kun je voor reparatie gratis terecht bij Repair Café.

Handleiding

Loading…

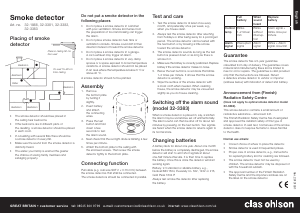
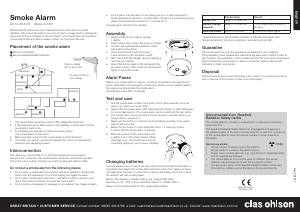
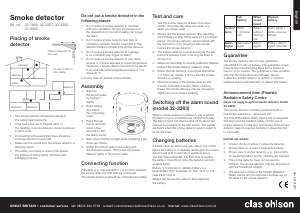
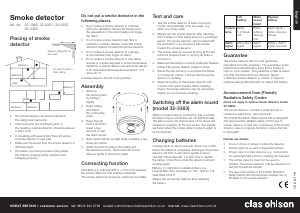
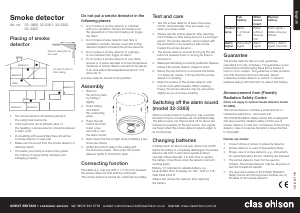
Avoid placement near kitchens or garages, where combustion
particles from cooking or exhaust fumes may trigger an alarm.
Also avoid placement in damp or humid areas, such as unnished
attics. Do note place close to ceiling fans or fresh air vents as
draughts can blow smoke away from the alarm.
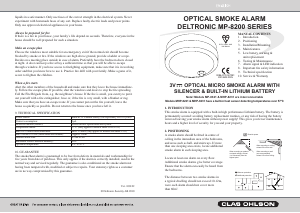
3. INSTALLATION/MOUNTING
Now t the mounting plate to the ceiling or wall using the screws
provided. Your smoke alarm will activate automatically whilst you
twist your smoke alarm into place.
Red LED is lit under the test button for a brief moment shortly after. If LED signal is obtained,
all functions are accurately tested and your smoke alarm is ready to protect. To remove your
smoke alarm for maintenance or when it is time to replace the unit, remove it from the mount-
ing plate by twisting it slightly counter-clockwise. Your smoke alarm will deactivate automati-
cally when removed for mounting bracket.
Note! Your smoke alarm will not operate without power supply, make sure to mount your
smoke alarm properly on the mounting bracket! Now test operation by pressing the test button
(please refer to the “TESTING & MAINTENANCE” section).
4. TESTING & MAINTENANCE
The LED will ash once every 10 seconds, indicating proper
operation. Every unit can be tested individually by pressing the
test button. The unit will emit a loud alarm, and all functions
are accurately tested.
Test the smoke alarm at least once every month, preferably once
every week, e.g. when you house clean. Always test the smoke
alarm after returning from holidays or after being away for a
longer period of time. The smoke alarm sounds as long as the test
button is pressed down or as long as there is smoke in the chamber.
WARNING: Do not test with ames, this may cause damage to the smoke alarm or result in
injury or death. We do not recommend test with smoke, this could be misleading unless proper
test equipment is used. The test button accurately tests all functions of the smoke alarm.
Vacuum your smoke alarm regularly with the soft brush attachment and wipe the unit with a
slightly damp cloth.
5. MAIN FEATURES
Alarm memory
A unit triggered by smoke has an alarm memory, indicated with a double blink; as well as a
short beep every 10 seconds during 12 hours. This signal can be manually silenced by pressing
the test button.
Silencer / Pause function (sensitivity reduction)
If there is a risk of nuisance alarms (before an alarm has occurred) push the test/silencer button
briey and the sensitivity will be reduced temporarily for 15 minutes (it will automatically
re-set to normal sensitivity after this period). This is indicated with two short fast beeps, and
the LED will blink every 3 seconds. The smoke alarm could also be re-set manually by a short
push of the test/silencer button, and the sensitivity immediately returns to normal (indicated
with 3 short beeps). Silence any nuisance alarms by pushing the test/silencer button after the
alarm has started. Note! If the smoke concentration is very high, the smoke alarm can only be
silenced by deactivating (dismounting) the unit.
Interconnection features (only applies to models MP/MHP-8231)
For larger dwellings several smoke alarms can be interconnected ensuring the earliest warn-
ing of re. When one alarm detects smoke, it will trigger all others to sound, giving your
family more time to escape. Connect provided cable connector to connection pin located in
the back of the smoke alarm and pull cable (e.g. EKU bell wire 2 x 0.7 mm²) between the
smoke alarms that are to be connected. The smoke alarms should be connected in paral-
lel. Follow the colour coding. Connect e.g. black to black and red to red. The smoke alarm
system can not be interconnected to other electrical installations.
6. LOW BATTERY WARNING & UNIT REPLACEMENT
This smoke alarm has a built-in non-replaceable Lithium battery with a life expectancy of over
10 years. Approximately 1 month before the battery is completely discharged, the smoke alarm
will start to emit short signals at about one-half minute intervals. It is then time to replace
the smoke alarm. The alarm works as normal during this time. Waste electrical products should
not be disposed of with household waste. Please recycle where facilities exist.
7. ALARM SIGNAL & LED INDICATION
Signal: Message: Action:
1 long beep every minute Low battery voltage Replace smoke alarm ASAP
1 short beep every 10 seconds Alarm memory, triggered alarm
(12 hours duration)
Reset by pressing test button
2 short beeps (after pressing
the test button)
Silencer activated. Operation OK - reduced sensitivity
3 short beeps (after pressing
the test button)
Silencer deactivated.
(Normal operation)
Operation OK - normal sensitivity
3 short beeps (repeated) Technical problem / operation fault Clean unit by vacuuming with the soft
brush attachment / return unit for servicing
Continuous pulsating signal Smoke detected - Alarm! Please refer to “If a re starts”
8. IMPORTANT FIRE SAFETY INFORMATION
This could be done to avoid re
Always keep matches out of children’s reach. Never leave lighted candles unattended. Never
empty ashtrays into a wastepaper basket or rubbish bag without rst seeing that everything
isproperly extinguished. Pour water into the ashtray before you empty it – or let it stand over-
night.
Before you go to bed, make sure that the re in the replace is properly extinguished
or that the rescreen is in place so that no sparks can y out. Handle and store inammable
Download de handleiding in het Nederlands en/of Engels (PDF, 0.58 MB)
(Denk aan het milieu en print deze handleiding alleen als dat echt noodzakelijk is)

Loading…

Beoordeling

Laat ons weten wat je van de Clas Ohlson MP-8221 Rookmelder vindt door een beoordeling achter te laten. Wil je je ervaringen met dit product delen of een vraag stellen? Laat dan een bericht achter onderaan de pagina.
Bent u tevreden over de Clas Ohlson MP-8221 Rookmelder?
Ja Nee
Beoordeel dit product als eerste
0 stemmen

Praat mee over dit product

Laat hier weten wat jij vindt van de Clas Ohlson MP-8221 Rookmelder. Als je een vraag hebt, lees dan eerst zorgvuldig de handleiding door. Een handleiding aanvragen kan via ons contactformulier.

Meer over deze handleiding

We begrijpen dat het prettig is om een papieren handleiding te hebben voor je Clas Ohlson MP-8221 Rookmelder. Je kunt de handleiding bij ons altijd downloaden en daarna zelf printen. Indien je graag een originele handleiding wilt hebben, raden we je aan contact op te nemen met Clas Ohlson. Zij kunnen wellicht nog voorzien in een originele handleiding. Zoek je de handleiding van Clas Ohlson MP-8221 Rookmelder in een andere taal? Kies op de homepage je taal naar keuze en zoek daarna op het modelnummer om te zien of we deze beschikbaar hebben.

Specificaties

Merk Clas Ohlson
Model MP-8221
Categorie Rookmelders
Bestandstype PDF
Bestandsgrootte 0.58 MB

Alle handleidingen voor Clas Ohlson Rookmelders
Meer handleidingen voor Rookmelders

Veelgestelde vragen over Clas Ohlson MP-8221 Rookmelder

Ons supportteam zoekt dagelijks naar nuttige productinformatie en antwoorden op veelgestelde vragen. Als er onverhoopt toch een onjuistheid tussen onze veelgestelde vragen staat, laat het ons dan weten via het contactformulier.

Waar moet ik mijn rookmelder ophangen? Geverifieerd

Dit verschilt per situatie, maar in een woning is het aan te raden op elke verdieping ten minste 1 rookmelder te plaatsen. Doe dit het liefst op gangen waar kamers op uit komen en niet direct naast een keuken of badkamer. Houd ook altijd tenminste 30 centimeter ruimte tussen een rookmelder en een lamp.

Ik vind dit nuttig (300) Lees meer

Kan ik kaarsen gebruiken als ik een rookmelder heb? Geverifieerd

Dit hangt voor een deel af van de gevoeligheid van de rookmelder. In veel gevallen kan een kaars gebruikt worden zolang deze niet in directe nabijheid van een rookmelder staan. Bij het uitblazen van de kaarsen kan wel rook vrijkomen die de rookmelder kunnen laten afgaan.

Ik vind dit nuttig (59) Lees meer

Is een rookmelder hetzelfde als een koolmonoxidemelder? Geverifieerd

Nee! Een rookmelder kan niet fungeren als koolmonoxidemelder en vice versa.

Ik vind dit nuttig (37) Lees meer
Handleiding Clas Ohlson MP-8221 Rookmelder

Gerelateerde producten

Gerelateerde categorieën