Handleiding Coleman Elite Weathermaster 6 Tent

Handleiding voor je Coleman Elite Weathermaster 6 Tent nodig? Hieronder kun je de handleiding gratis bekijken en downloaden als PDF in het Nederlands en/of Engels. Dit product heeft 7 veelgestelde vragen, 0 comments en heeft 0 stemmen. Is dit niet de handleiding die je zoekt, neem dan contact met ons op.

Is je product kapot en biedt de handleiding geen oplossing meer? Dan kun je voor reparatie gratis terecht bij Repair Café.

Handleiding

Loading…

Self-rolling Windows
CAUTION: “Springs” may have sharp edges. Handle with care to avoid
injury. Keep out of reach of children.
NOTE: Carefully unroll metal “springs” stored in bag with stakes. The color
marking on each “spring” should match the color of the fabric “flag” sewn
to the window or door sleeve opening. (Fig. 24)
1. Locate sleeve(s) in window panel, open hook &
loop fastener; then insert “spring(s)” with match-
ing color marking. (Fig.24 & 25)
NOTE: When inserting into the sleeve(s), the
color marking on the “spring(s)” should always
face the operator.
2. Close hook & loop fastener to secure.
3. Before unzipping and opening the window,
push in at top to engage “spring(s)” to activate
the self-rolling feature. (Fig. 26)
4. Unzip to allow the window panel to roll down
automatically; zip back to close window panel.
(Fig. 27 & 28)
NOTE: Repeat steps above for inserting the color
matching “spring(s)” into sleeve(s) for the rest of
the windows.
3. Insert tapered metal tip on Awning
Pole into grommet located on web
strap clipped to center Leg Pole.
(Fig. 19)
4. Go to opposite center Leg Pole on
other side of door and gradually
apply pressure to the pole forming
an arch. Insert metal tip into the
grommet.
5. Locate all hook & loop fasteners on underside
of Rainfly and wrap around Leg Poles and
Awning Pole locations. (Fig. 20)
Cooler Access
The smaller zippered opening at the side of tent is
designed for added ventilation and easy access to
your beverage cooler.
1. To use as a vent, unzip flap to expose screen.
2. To use as a cooler access, unzip other flap to
make an avenue to bring beverages into tent.
(Fig. 32)
STITCH LINE
Attaching Room Divider
1. Divider Panel can be installed through
center of the tent by inserting the
toggles through
top and bottom
fabric loops as
shown.
(Fig. 29 & 30)
To Store
1. All “springs” must be rolled up and placed in bag with stakes.
2. All poles and stakes must
be placed in the storage bag to prevent
damage to the fabric items placed in the carry case.
3. Make sure tent is clean and dry before placing in carry case.
4. Remove rainfly, spread out on floor of tent, then unzip door & vents
before taking tent down for storage.
5. Neatly fold tent to width of pole storage bag, place on tent, roll
tightly, and place in carry case.
5. Store in a clean, dry area.
Electrical Cord Access
1. Unzip the access panel in the lower
left corner of tent and bring in an
electrical cord.
NOTE: Use only UL approved cords
rated for outdoor usage. (Fig. 31)
Fig. 29
Fig. 32
Fig. 31
Fig. 22
Fig. 20
Fig. 23
Fig. 19
Grommet
End Leg
Pole
Location
7. Loop ends of guylines over stakes, stretch tight, then hammer into
ground at an angle as shown. (Fig. 23 & 23A)
Awning Pole
To Attach Rainfly
1. Drape Rainfly over tent. Make sure seams on Rainfly are facing down
and centered over poles of the tent. (Fig. 17)
NOTE: Hook and loop fasteners, located on seams of underside of
Rainfly, should be centered over Ridge Poles.
Fig. 17
Rainfly
Door
Sleeve
Fig. 18
2. Assemble thin, black, shock-corded
Awning Pole with metal tips; then
insert through sleeve in Rainfly above
door. (Fig. 18)
Awning
Pole
Sleeve
Fig. 30
Divider
Panel
Top
Fabric
Loops
Fig. 21
Center
Leg Pole
Location
23A
Guyline
Door
Window
Panel
Window Panel
Push in at top to
engage “spring(s)”
Color
Dot
Fig. 28
Fig. 24
Fig. 25
Sleeves
Sleeve
Fig. 27
Fig. 26
6. Insert metal hook on
elastic straps on
Rainfly into the hole
on each Leg Pole.
(Fig. 21 & 22)
Self-rolling Windows
(continued)
CAUTION: All “springs” must be removed from sleeves before tearing
down tent to avoid damage to the tent fabric or part. To avoid injury,
carefully roll up “springs”. Keep out of reach of children. Store rolled
“springs in bag with stakes.
Color
“Flag”
Tent Lighting System
Your tent comes pre-wired with the Coleman
®
Tent Lighting
System. See manual that came with the light and carefully read
all instructions before use then save for future reference.
Things You Should Know:
Under certain conditions (cold weather, high humidity, etc.) condensa-
tion will form on the inside of your tent. Condensation is caused by water
vapor from your breath, perspiration, or any wet clothing inside the tent.
It is NOT LEAKAGE through the tent fabric. It can be minimized by
removing wet clothing from your tent and by providing good ventila-
tion through the tent.
Tree limbs, tree sap, bird droppings, or moisture steadily dripping off
tree limbs can cause damage to the tent fabric and its coating resulting
in leaks or loss of flame-resistant properties.
Never store tent, even for a short period of time, without drying it
thoroughly and brushing off caked dirt. Do not pack stakes or poles
inside your tent. Use a separate storage bag.
Stakes should be removed by pulling on the stake itself. NEVER PULL ON
THE TENT TO REMOVE STAKES AS THIS COULD RESULT IN PROPERTY
DAMAGE OR PERSONAL INJURY.
Tent poles should not be left telescoped together during storage.
Do not leave your tent set-up for weeks at a time. Be aware that exposure
to ultraviolet rays from the sun can seriously damage material and/or
cause it to become discolored.
WARNING: Keep all flame and heat sources away
from this tent fabric.
This tent meets the flammability requirements of CPAI-84. The
fabric may burn if left in continuous contact with any flame source.
The application of any foreign substance to the tent fabric may
render the flame-resistant properties ineffective.
Color “Flag”
The Coleman Company, Inc. • 3600 N. Hydraulic • Wichita, Kansas 67219
1-800-835-3278 • www.coleman.com
MADE IN CHINA • PRINTED IN CHINA
© 2008 The Coleman Company, Inc.
Coleman
®
, , , and Weathermaster
®
are registered trademarks of
The Coleman Company, Inc.
4010003995 (20081030)
Download de handleiding in het Nederlands en/of Engels (PDF, 0.21 MB)
(Denk aan het milieu en print deze handleiding alleen als dat echt noodzakelijk is)

Loading…

Meer over deze handleiding

We begrijpen dat het prettig is om een papieren handleiding te hebben voor je Coleman Elite Weathermaster 6 Tent. Je kunt de handleiding bij ons altijd downloaden en daarna zelf printen. Indien je graag een originele handleiding wilt hebben, raden we je aan contact op te nemen met Coleman. Zij kunnen wellicht nog voorzien in een originele handleiding. Zoek je de handleiding van Coleman Elite Weathermaster 6 Tent in een andere taal? Kies op de homepage je taal naar keuze en zoek daarna op het modelnummer om te zien of we deze beschikbaar hebben.

Specificaties

Merk Coleman
Model Elite Weathermaster 6
Categorie Tenten
Bestandstype PDF
Bestandsgrootte 0.21 MB

Alle handleidingen voor Coleman Tenten
Meer handleidingen voor Tenten

Beoordeling

Laat ons weten wat je van de Coleman Elite Weathermaster 6 Tent vindt door een beoordeling achter te laten. Wil je je ervaringen met dit product delen of een vraag stellen? Laat dan een bericht achter onderaan de pagina.
Bent u tevreden over de Coleman Elite Weathermaster 6 Tent?
Ja Nee
Beoordeel dit product als eerste
0 stemmen

Praat mee over dit product

Laat hier weten wat jij vindt van de Coleman Elite Weathermaster 6 Tent. Als je een vraag hebt, lees dan eerst zorgvuldig de handleiding door. Een handleiding aanvragen kan via ons contactformulier.

Veelgestelde vragen over Coleman Elite Weathermaster 6 Tent

Ons supportteam zoekt dagelijks naar nuttige productinformatie en antwoorden op veelgestelde vragen. Als er onverhoopt toch een onjuistheid tussen onze veelgestelde vragen staat, laat het ons dan weten via het contactformulier.

Kan ik mijn tent ook nat opbergen? Geverifieerd

Alleen voor zeer korte periodes. Wanneer een tent een week of langer nat wordt opgeborgen, kan deze gaan schimmelen. Dit is zeer schadelijk voor de tent en eventueel uw gezondheid.

Ik vind dit nuttig (412) Lees meer

Hoe kan ik een tent impregneren? Geverifieerd

Zet de tent op, reinig het doek en laat het drogen. Breng het impregneermiddel aan op het doek met een plantenspuit of andere spray. Het is ook mogelijk een nieuwe verfroller of kwast te gebruiken. Het doek dient helemaal verzadigd te worden met het impregneermiddel. Behandel ook de binnenkant van het doek. Veeg de ramen en andere onderdelen dan het tentdoek goed schoon met een vochtige doek. Laat het impregneermiddel hier niet op drogen. Laat vervolgens het tentdoek goed drogen. Herhaal indien nodig de behandeling.

Ik vind dit nuttig (316) Lees meer

Kan ik een scheur of gat in mijn tentdoek zelf repareren? Geverifieerd

Voor synthetisch tentdoek zijn er speciale stukken zelfklevend reparatiedoek verkrijgbaar. Plak aan beide zijden van het doek een stuk zelfklevend tentdoek over het scheurtje of gaatje. Gebruik voor katoenen tentdoek of tentdoek van gemengd materiaal opstrijkbaar tentdoek. Hiervoor heb je een strijkijzer nodig.

Ik vind dit nuttig (233) Lees meer

De rits van mijn tent loopt stroef, wat kan ik doen? Geverifieerd

Gebruik bij stroeve ritsen een droge PTFE spray of siliconenspray. Spray niet op de stof en spuit de ritsen af en toe preventief in om problemen in de toekomst te voorkomen.

Ik vind dit nuttig (181) Lees meer

Er zitten waterdruppels aan de binnenkant van de tent, betekent dit dat de tent lekt? Geverifieerd

Nee, dit is waarschijnlijk conden. Zorg dat de tent goed geventileerd is om consens tot een minimum te beperken.

Ik vind dit nuttig (151) Lees meer

Welke soort tentharingen heb ik nodig? Geverifieerd

Op gras- en bosgrond gebruik je halfronde of kunststof tentharingen. Op steengronden gebruik je rotspennen. Op kleigrond gebruik je halfronde, kunststof of universele tentharingen. Op kiezelgrond gebruik je halfronde of universele tentharingen. Op fijne zandgronden zoals duinen gebruik je houten tentharingen.

Ik vind dit nuttig (121) Lees meer

Het impregneermiddel laat witte vlekken of een witte waas achter op het doek, wat kan ik hier aan doen? Geverifieerd

Indien er een witte waas achterblijft of u witte vlekken ziet op uw tentdoek na het impregneren heeft u op die plekken meer impregneermiddel aangebracht dan elders. Dit is niet erg en de vlekken en waas verdwijnen vaak vanzelf. Het is niet verstandig minder impregneermiddel te gebruiken om vlekken of een waas te voorkomen. Het doek moet goed nat zijn van het impregneermiddel om een goede impregnatie te garanderen.

Ik vind dit nuttig (110) Lees meer
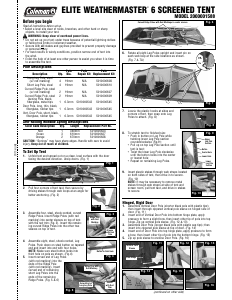
Handleiding Coleman Elite Weathermaster 6 Tent

Gerelateerde producten

Gerelateerde categorieën