
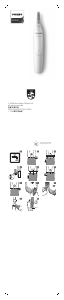
FACE FORWARD
™
Nose, Face & Brow Set
Instruction Booklet
For your safety and continued enjoyment of this product,
always read the instruction booklet carefully before using.
Model NPGBT01
IMPORTANT SAFETY
INSTRUCTIONS
READ ALL INSTRUCTIONS
BEFORE USING
FOR HOUSEHOLD
USE ONLY
WARNING –
1. Use close supervision when the appliance is
used by, on, or near children or individuals with
certain disabilities.
2. Use appliance only for its intended use as
described in this manual. Use only attachments
recommended by the manufacturer.
3. When cleaning, use cold or warm water. Do
not use hot water, seawater or cleaners as they
can cause damage to the waterproof seals.
4. Do not leave the entire unit submerged in
water for a long period of time.
5. Do not use the appliance with teeth missing
from the blades, as injury may result. Before
each use, make certain the blades are aligned
properly.
SAVE THESE
INSTRUCTIONS
TROUBLESHOOTING
There are several things to look for if your
trimmer fails to operate:
1. Be sure the trimmer is turned on.
2. Make sure that the battery is properly placed
in the battery compartment. Test the battery to
be sure it is working.
3. Check the blades to see if they are clogged
with hair clippings; if so, use a cleaning brush to
remove hair.
4. If the trimmer still fails to operate, send it to
the Conair Service Center (see Warranty).
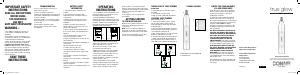
OPERATING
INSTRUCTIONS
1. To insert battery, twist the battery cover to
the left to unlock the battery cover. Remove
compartment cover by then pulling straight
down (Fig. 1).
2. Insert 1 AAA alkaline battery, positive terminal
downward. (If you are not going to use the device
for long periods of time or if the battery is dead,
remove the battery from the device. This will
increase the battery's life.)
3. After inserting the battery, align the arrow with
the “I” on battery cover then turn clockwise to
align with the “O” (Fig. 2).
T
Fig. 2 Fig. 1
4. Always purchase the correct size and grade of
battery most suitable for the intended use.
5. Clean the battery contacts and also those of
the device prior to battery installation.
6. Ensure the batteries are installed correctly
with regard to polarity (+ and -).
7. Store unused batteries in their original
packaging, away from metal objects that could
short-circuit them. Never short-circuit batteries.
8. This appliance is not a toy. Keep away
from children.
INSTRUCTIONS FOR USE
1. Twist the battery cover counterclockwise to
unlock battery cover.
2. Insert 1 AAA battery according to the polarity
marking, return the battery cover, turn to the
right and align with “I” and “O” marks to lock,
and then twist clockwise again. The unit will start
to work when the “I” marks are aligned.
3. After use, turn off the power by aligning the
“I” mark on the battery cover with the “O” mark
(Fig. 1).
GETTING STARTED
O SWITCH TRIMMER HEADS
1. Make sure the unit is turned off.
2. Turn the head clockwise until the “▼” mark
aligns with the “▲” mark, then lift the head
gently (Fig. 3).
3. Switch the attachment head and put new head
on, then turn counterclockwise and align ▼ with
“O” (Fig. 4).
Fig. 4 Fig. 3
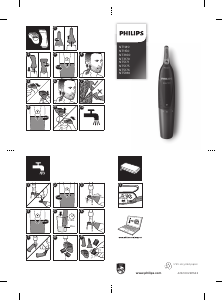
TO TRIM NOSE/EAR HAIR
Use the 3-bevel cutting head for nose and ears.
Gently insert the cutting head into the nostril or
ear and move it slightly back and forth to cut
the hair.
NOTE: To trim nose hair, insert trimmer no
deeper than ¼" at entry of nostrils and start
trimming the lower hairs until no longer visible.
To trim ear hair, guide the trimmer around the
outer surface of the ear.
WET/DRY FEATURE
This device is water resistant. It may be exposed
to splashing water in the shower, and can be
rinsed clean under the faucet, but should never
be completely submerged in water.
TAKING CARE OF YOUR
NOSE/EAR TRIMMER
BLADE CARE
1. Brush away any loose hair that collects in the
blades.
2. Store trimmer in a safe location.
3. Only use Conair
®
blades with this trimmer.
CLEANING YOUR NOSE/EAR
TRIMMER
Make sure trimmer is off.
1. To remove the trimmer head for cleaning, turn
the head clockwise until the “▼” mark aligns
with the “▲” mark, then lift the head gently (Fig.
5).
2. Rinse the head only under water. For proper
functioning of the unit, the handle cannot touch
or be immersed in water (Fig. 6).
3. After cleaning, make sure to shake the head
dry before reattaching it to the body.
4. To reattach the head onto the body, align the
“▼” mark on the head with the “▲” mark on
the body and then turn counterclockwise until
the “▼” aligns with the “O” mark on the body
(Fig. 7).
Fig. 7
Fig. 5
Fig. 6
TO TRIM FACE & BROWS
1. This trimming attachment comes with dual
trimming blades. The larger blade is ideal for
trimming eyebrows and can also be used to trim
unwanted body hair. The smaller blade is ideal
for detailing. The double-sided comb attachment
helps you achieve an even cut when you do not
want to completely remove the hair.
Both sides work well for eyebrow trimming, the
long tooth is best for body trimming and the short
tooth is best for detailing.
2. It also comes with a comb attachment that
helps you achieve an even cut when you do not
want to completely remove the hair. The comb
attachment has two sides: The long tooth is for
body hair, and the short tooth is for eyebrow
trimming. Aligning the indicator with the L mark
on the comb leaves hair longer, while aligning
with the S mark leaves hair shorter (see Fig. 8).
3. To use the comb attachment, be sure the
unit is turned off and slide the comb over the
trimming blades (Fig. 9). Make sure that the teeth
of the comb are facing in the same direction as
the trimming blade, and that the top of the comb
is even with the top of the trimmer.
4. If you want to completely remove hair, use the
trimmer without the comb attachment.
5. When finished trimming, turn the unit off by
turning the battery cover to the left, so “I” mark
on battery cover aligns with “O” mark and store
the trimmer with the comb attachment over the
trimming blades.
Fig. 9
Fig. 8
Long
Tooth
Short
Tooth
TAKING CARE OF YOUR FACE &
BROW TRIMMER
BLADE CARE
Because the trimmer blades are precision made
for a very special use, they should always be
handled with care. Each time you finish using the
trimmer, take the cleaning brush provided and
brush away any loose hair that has collected in
the blades, then rinse blades under water only,
allow to air-dry and store the trimmer until the
next use.
To promote the long life of the appliance, use
your trimmer only for the purpose intended by the
manufacturer.
CLEANING YOUR FACE &
BROW TRIMMER
Make sure trimmer is off.
1. Turn the head clockwise until the “▼” mark
aligns with the “▲” mark, then lift the head
gently (Fig. 5).
2. Rinse head under water (Fig. 10).
3. After cleaning, make sure to shake the head
dry before reattaching it to the body.
4. To reattach the head onto the body, align the
“▼” mark on the head with the “▲” mark on the
body and then turn counterclockwise until the
“▼” aligns with the “O” mark on the body
(Fig. 7).
Fig. 10
BATTERY SAFETY INFORMATION
1. This product requires 1 AAA battery.
2. Since batteries are sensitive to high
temperatures, keep them in a cool, dry place
when storing.
3. Battery contacts need to be clean, both on the
battery and in the appliance, before installation.
4. Battery should be removed from the appliance
when not being used for long periods of time
(e.g., months).
5. Never recharge non-rechargeable batteries.
6. Use only the power cord supplied with the
appliance.
7. Be careful and install (+) and (-) on battery to
the correct plus and minus on device.
8. Replace all old batteries at one time. Do not
mix old and new.
9. Remove discharged battery immediately to
avoid leakage.
10. Never put batteries into a fire.
11. Switch off device after use.
12. Keep batteries away from children, especially
the batteries that are small enough to ingest.
13. If a battery is ingested, seek immediate
medical help.
14. Never open, crush, puncture or disassemble
battery.
15. Dispose of batteries according to any state
and local regulations.
BATTERY DISPOSAL
The AAA battery is not recyclable and does not
contain hazardous materials. Battery can be
safely disposed of with normal household waste.
TRIMMER FEATURES
1.
3.
4.
2.
5.
1. Removable nose/ear trimming head
2. Power handle with LED light
3. Eyebrow trimming head
4. Eyebrow attachment comb
5. Protective cap
LIMITED TWO-YEAR WARRANTY
(U.S. AND CANADA ONLY)
Conair will repair or replace (at our option) your
unit free of charge for 24 months from the date
of purchase if the appliance is defective in
workmanship or materials.
To obtain service under this warranty, return the
defective product to the service center listed on
back, together with your purchase receipt. California
residents need only provide proof of purchase and
should call 1-800-3-CONAIR for shipping
instructions. In the absence of a purchase receipt,
the warranty period shall be 24 months from the
date of manufacture.
ANY IMPLIED WARRANTIES, OBLIGATIONS, OR
LIABILITIES, INCLUDING BUT NOT LIMITED TO
THE IMPLIED WARRANTY OF MERCHANTABILITY
AND FITNESS FOR A PARTICULAR PURPOSE,
SHALL BE LIMITED IN DURATION TO THE
24-MONTH DURATION OF THIS WRITTEN,
LIMITED WARRANTY. Some states do not allow
limitations on how long an implied warranty lasts,
so the above limitations may not apply to you.
IN NO EVENT SHALL CONAIR BE LIABLE FOR
ANY SPECIAL, INCIDENTAL, OR CONSEQUENTIAL
DAMAGES FOR BREACH OF THIS OR ANY
OTHER WARRANTY, EXPRESS OR IMPLIED,
WHATSOEVER. Some states do not allow the
exclusion or limitation of special, incidental, or
consequential damages, so the above limitation
may not apply to you.
This warranty gives you specific legal rights, and
you may also have other rights, which vary from
state to state.
Please register this product at
www.conair.com/registration
©2022 CONAIR LLC
Service Center
Conair LLC
Service Department
7475 North Glen Harbor Blvd.
Glendale, AZ 85307
21NP081577
IB-17494


Praat mee over dit product
Laat hier weten wat jij vindt van de Conair NPGBT01 Neushaartrimmer. Als je een vraag hebt, lees dan eerst zorgvuldig de handleiding door. Een handleiding aanvragen kan via ons contactformulier.