glue droplets. Wear safety glasses. Use extreme caution applying glue overhead.
Do not use this glue gun in areas where a risk of re or explosion is present. Do
not use this glue gun in the presence of ammable materials or explosive gasses.
Place the glue gun upright on its stand when not in use. Do not lay the glue gun
down on its side.
Avoid accidental discharge of hot glue. Do not touch the gun’s trigger except to
dispense glue. Do not touch the glue stick after inserting it in the gun, as pressure
can cause glue discharge.
Keep children and bystanders out of way. Accidental contact with glue gun, glue
sticks or heated glue, glue gun nozzle, glue gun cord or extension cord should be
avoided.
This glue gun is not to be used by children or persons with reduced physical, sensory
or mental ability, or that lack experience and knowledge, unless they have been
given supervision or instruction.
Keep work area clean. Clutter invites accidents. Work environment should be
clean, dry, well lit, and clear of any ammable materials. Do not use in wet or damp
conditions.
The glue gun is for indoor use only. Do not use outdoors. Do not expose the glue
gun to rain, liquids, or moisture. When not in use, store the glue gun indoors.
Use precautions to avoid electric shock. Do not use the glue gun near water or
other liquids. Keep the cord away from glue gun nozzle, heated glue, or any other
heat source, as these can burn the cord and expose electrical leads. Prevent body
contact with grounded surfaces like pipes and appliances.
Do not abuse the cord. Never carry the glue gun by the cord or yank on the cord
to remove the plug from the electrical outlet. Periodically inspect cord for exposed
leads or other damage. Do not use the glue gun with a damaged cord or plug.
If an extension cord is used, use one rated for 10 AMPs or more. Inspect extension
cord prior to use. Do not use a damaged extension cord.
Do not leave the glue gun unattended while plugged in.
Disconnect the glue gun from power when not in use.
Disconnect the glue gun from power before any servicing.
Do not pull glue sticks out of the gun that were previously inserted into the gun. Por-
tions of the glue stick may be hot, creating a burn hazard. Pulling on the glue stick
can result in damage to the feed mechanism. To change glue sticks, or to change
types of glue, cut off the portion of the old glue stick protruding from the gun and
ush remaining old glue from inside the glue gun. This can be done by reheating
the gun to melt the glue inside and ushing it by repeatedly squeezing the trigger.
Afterwards, a new kind of glue stick can be inserted at the back of the gun.
Do not use a damaged glue gun. Do not attempt repairs to the glue gun or to re-
place the cord. Any service should be provided by the manufacturer or a qualied
electrician. Do not modify the cord or plug in any way.
After use, disconnect the glue gun from power and allow it to cool completely on
its own prior to storage by placing it upright on its stand. Do not immerse the glue
gun in water or other liquids to speed the cooling process. Allow it to air cool only.
When not in use, the glue gun should be stored in a dry and secure location out of
the reach of children.
Do not attempt to remove unused glue from inside the gun after use.
Do not expose the glue gun to extreme changes in temperature, as damage to the
gun or injury may result.
This glue gun is designed for use with hot melt glue sticks designed to be melted
in a hot glue gun only. It is not for use with crayons, candles, waxes, or any other
materials. Use with other materials may result in injury or damage to the gun.
Keep the glue gun clean and free from adhesive and debris build-up. Excessive
debris stuck to the gun can cause poor performance or become a re hazard.
If hot glue escapes from the internal melt chamber and interferes with the feed
mechanism, unplug the glue gun and allow cooling. Afterwards, obstructing glue
can be removed.
Do not allow debris to enter the hole for inserting glue sticks. Flammable debris
inside the glue gun can cause re. Excessive dust and dirt can cause clogging.
This can cause permanent damage to the glue gun.
Do not use this glue gun for removal of lead-based paint.
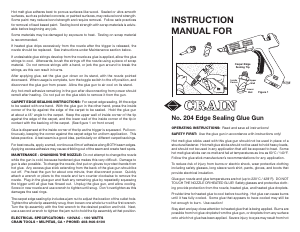
GENERAL USE INSTRUCTIONS: The gun comes with two nozzles: a carpet edge
sealing tip and a 1/8" nozzle for general detail work. Select the right nozzle for the job.
Plug the glue gun into an 110 volt 60 Hz AC outlet that is designed for use with the
plug. Turn on the glue gun by turning on the toggle switch.
Allow the glue gun to preheat for 3 - 5 minutes, then insert a glue stick into the back
of the glue gun. The glue gun is designed for use with four inch (100 mm) or ten
inch (250 mm) glue sticks that are 7/16" (11 mm) in diameter.
When the glue gun is fully heated, squeeze the trigger slowly with light pressure until
melted glue ows easily from the nozzle. No unusual amount of pressure should be
applied on the trigger. Release trigger to stop glue ow.
Most hot-melt glue cures and forms its bond quickly (within thirty seconds). Follow
the manufacturer’s recommendations. Working time can be increased by forming
the glue in large puddles, or decreased by forming thin lines.
In general, the larger the object to be glued, the more glue that should be applied.
In some cases, there may not be enough time to apply enough glue. Cutting the
object into pieces makes this easier.
In cold conditions, surfaces can be pre-heated using a heat gun to extend working
time. Do not overheat surfaces beyond normal room temperature. Follow the glue
manufacturer’s recommendations.
Melted glue should ow smoothly. Applying glue at too rapid a rate reduces working
time and can reduce bond strength. Follow glue manufacturer’s recommendations.



Praat mee over dit product
Laat hier weten wat jij vindt van de Crain 204 Lijmpistool. Als je een vraag hebt, lees dan eerst zorgvuldig de handleiding door. Een handleiding aanvragen kan via ons contactformulier.