
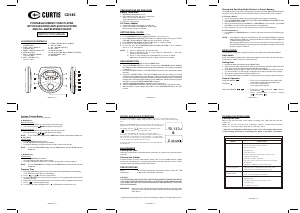
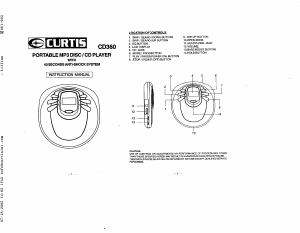
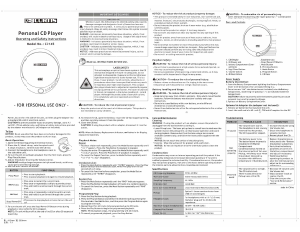
LOCATION OF CONTROLS
1. PLAY / PAUSE / MEM DN 7. PROG / BAND (DUAL CLOCK)
(POWER ON) 8. ASP BUTTON
2. STOP / OFF / MEM UP 9. CD / RADIO SWITCH
(POWER OFF) 10.DC JACK
3. MODE / MEM (CLOCK SET) 11. HOLD BUTTON
4. OPEN BUTTON 12. B.B.S. BUTTON (BASS BOOST BUTTON)
5. SKIP / SEARCH DOWN / 13.HEADPHONE JACK
TUN DN (MIN) 14. VOLUME
6. SKIP / SEARCH UP /
TUN UP (HR)
— ENGLISH P.2 —— ENGLISH P.1 —
— ENGLISH P.4 —
PREPARATIONS BEFORE USING
Battery Installation
1. Open Battery Compartment cover.
2. Insert 2 batteries (LR6, “AA” size, or equivalent)
in the correct polarity as indicated.
(Heavy duty batteries are recommended.)
3. Close the cover properly.
AC Power Adaptor
1. Plug the DC output of the adaptor to the DC Jack.
2. Connect the adaptor (4.5V/500mA) to a power outlet.
Make sure the voltage is compatible.
SETTING DUAL CLOCK
1. Set CD/RADIO SWITCH to CD position.
2. Press PROG/BAND (DUAL CLOCK) BUTTON to choose Clock "1"
3. Press MODE/MEM (CLOCK SET) BUTTON , the display will blink. Then press TUN UP
(HR) OR TUN DN (MIN) BUTTON until the desired time is shown.
4. Press MODE/MEM (CLOCK SET) BUTTON again to complete setting.
5. To set Clock "2", repeat above steps 2 to 4.
6. To check the time, press PROG/BAND (DUAL CLOCK) BUTTON to choose between
Clock "1" or "2" time display.
NOTE - i). Clock "1" displays the current home time.
ii). Clock "2" displays the time of a city/country in a different time zone other
than the home city/country.
iii). Clock "1" and "2" display the same MINUTE. For Clock "2",adjust
HOUR only otherwise the minute of Home Time will be changed.
RADIO RECEPTION
1. Insert the plug of your headphone into the PHONE JACK.
2. Set the CD/RADIO SWITCH to “Radio” and press the PROG/BAND (DUAL CLOCK)
BUTTON for the AM or FM radio band as shown on the LCD Panel. The frequency reading will
be displayed.
3. Press the TUN DN BUTTON or TUN UP BUTTON briefly to tune in the desired radio station
manually.
4. Keep the TUN DN BUTTON or TUN UP BUTTON depressed for more than 1 second will
activate the auto-tuning function of the digital tuner. When a radio station of sufficient strength
is found, auto-tuning will stop automatically and the radio station will be tuned in. The Frequency
Reading of the radio station will be displayed on the LCD Panel . When a FM stereo program
is being received, the STEREO INDICATOR will appear.
5. Adjust the VOLUME CONTROL to obtain the desired sound level.
6. Slide the BASS BOOST SWITCH to 'ON' for enhanced bass effect of the radio program.
7. When you wish to turn the Digital Tuner 'OFF', set the CD/RADIO SWITCH to the “CD”
position.
Storing and Recalling Radio Stations in Preset Memory
The digital tuner has a capacity of 10 random preset stations for both AM and FM bands which
allow you to store and recall your favourite AM or FM radio stations at the touch of a button.
A. To Store a Station
1. Tune in the station you want to store in preset memory by manual or auto tuning.
2. Press the MODE/MEM (CLOCK SET) BUTTON and the MEMORY INDICATOR will flash
in the LCD panel for 5 seconds.
3. Before the flashing stops, press MEM UP or MEM DOWN to select CH No., press MEM
BUTTON to store the current radio station into the Preset Memory.
4. Repeat steps 1 to 3 to store a radio station into the rest of the Preset Memories.
B. To Recall a Station
1. Press MEM UP or MEM DN Buttons to recall the radio stations stored in Preset Memory #1
to #10.
NOTES - The headphone cord works as a FM antenna. To insure maximum FM tuner sensitivity,
always keep the headphone cord fully extended. Do not wind or fold the headphone
cord while listening to the radio.
- When tuning in AM reception, be sure to place the unit in a horizontal position. For
maximum AM sensitivity, keep turning the unit slowly while keeping it horizontal until
the best reception is obtained.
DISC PLAYING
This CD player is designed to play the 8cm and 12cm compact disc without using adaptor.
Hold Switch
Set the Hold Switch to “ON” position, all the buttons will be locked. Before operation, be sure to
set the switch to “OFF” position, for normal operation.
Getting Start
1. Insert the headphone/earphone plug to PHONE JACK.
2. Set the function switch to CD position, push the open switch to right side, and then the door
open, put a disc into the CD compartment with label side upward.
3. Push the disc gently around the centre area until it clicks so that the disc fits into the pivot.
(To remove the disc : Pick up the disc, holding the edge, while pressing the pivot gently.)
4. Close the door and press the Play/Pause Button once.
5. The Display will show the total number of tracks of the disc, then begin to play the first track.
General Operation
Play/Pause Buttons — Press once to start playback in the original order.
Press again to stop the disc play temporarily.
Stop Button — Press once to stop playback.
Press again to turn off power
Skip / Search Buttons — Press once to skip to next track or back to
previous track .
— Press continuiously to search forward
or backward .
Various Playing Modes
MODE Button — There are 3 kind of function :
A. Repeat Play
During PLAY mode
• Press the MODE button once to play single track repeatedly.
• The repeat indicator ONE will appear in the display.
During PLAY mode
• Press the MODE button twice to play the entire disc repeatedly.
• The repeat indicator will appear in the display.
NOTE - To cancel REPEAT simply press the MODE button until the repeat indicator disappears.
B. Intro Scan
In STOP mode
• Press the MODE button three times.
• The INTRO indicator will appear in the display.
• Press the PLAY button to play the first 10 seconds of each track on the disc.
NOTE - To cancel INTRO SCAN simply press the MODE button until the INTRO indicator
disappears.
C. Random Play
In STOP mode
• Press the MODE button four times.
• The SHUF indicator will appear in the display.
• Press the PLAY button, all the tracks on a disc to be played in a random sequence.
NOTE - To cancel RANDOM PLAY simply press the MODE button until the SHUF indicator
disappears.
Program Play
1. Press the PROG button when the unit is in the stop mode until PGM show on the display.
* The PGM indicator will appear on the display.
2. Press or to select the desired track.
3. Press the PROG button to enter the track into memory. The program numbers which will be
increment one step.
4. Repeat step 2 and 3 to program the order of more tracks can be programmed into memory.
5. Press to start the program play.
6. To erase the program, simply press the STOP button to turn the power off.
— ENGLISH P.5 —
— ENGLISH P.6 —
PORTABLE COMPACT DISC PLAYER
WITH 45 SECONDS ANTI-SHOCK SYSTEM
AND PLL AM/FM STEREO RADIO
DIGITAL ANTI-SHOCK OPERATION
The digital ELECTRONIC SHOCK PROTECTION function uses semiconductor memory to
prevent the second from skipping when the unit is subjected to shocks and vibration during
play.
When the PLAY/PAUSE button is pressed and the power turns on, the
digital Electronic Shock Protection function turns on automatically.
The display will show and the function is initialized, when
shows in the display, the data buffer is full.
It will give approximately 45 seconds of protection against
interruption of sound output, if the player is subjected to shocks of
more than 45 seconds duration, some interruption of sound output
will occur, this is normal and to be expected, the sound will resume
once the player has stabilized from the shock.
To turn this function off, press ASP button once, the ESP indicator
will disappear.
• Weak batteries.
Troubleshootin
Guide
Problem
No sound from Earphones
No sound when played throu
h
an external amplifier
Intermittent Sound
• Earphones' plu
is not firmly inserted into the Phon es socket.
• Connectio n is incorrect.
• Dirty or defective disc.
• Dirty pick up lens.
• The player is subject to excessive vibration or shock.
• Low battery power.
• Poor Earphone connection.
• Power to an external am plifier not switched on.
• Earphones have been inserted into the line out socket.
Player fails to function • The disc m ay be inserted upside down.
• The disc not mounted correctly on the chuck.
• Dirty or a defective disc.
• Dirty pick up lens.
• Player lid not closed.
• AC Pow er to an adaptor sw itche d off.
• H old sw itch es at O N po sition, switch to O FF po sition.
• Auto power off has occurred, press PLAY button to restore power.
• Moisture condensation, allow the player to warm up to room
temperature for 60 minutes.
Points to check
TROUBLE SHOOTING GUIDE
Cleaning the Disc
When a disc becomes dirty, clean it with a cleaning cloth. Wipe the disc from the
center out.
Note - Do not use solvents such as benzine, thinner, commercially available
cleaners or anti-static spray intended for analogue discs.
** Should you experience difficulties in the use of this player please refer
to the following chart before contacting your dealer or the place of purchase.
— ENGLISH P.3 —
MAINTENANCE
Cleaning the Lens
If the lens becomes dusty, clean it with camera lens blower. Be careful not to scratch the surface
of the lens.
Cleaning the Cabinet
From time to time, clean the cabinet with a soft dry cloth. For more stubborn stains, slightly
moisten the cloth with water or a mild detergent solution. Never use benzene, alcohol or other
solvents as they may damage the finish of the cabinet.
SPECIFICATIONS
Power : DC 4.5V external and size “AA” batteries 1.5V x 2, UM-3, HP-7, R6
Dimensions : 136mm(W) x 143mm(D) x 32mm(H)
CAUTION
USE OF CONTROLS OR ADJUSTMENTS OR PERFORMANCE OF PROCEDURES OTHER
THAN THOSE SPECIFIED HEREIN MAY RESULT IN HAZARDOUS RADIATION EXPOSURE.
THIS SHOULD NOT BE ADJUSTED OR REPAIRED BY ANYONE EXCEPT QUALIFIED
SERVICE PERSONNEL.
IMPORTANT : Since movement of the CD mechanism and the sensitive circuitry may cause
interference to the radio tuner nearby, switch this unit off while operating other
radio devices.
** For improvement purposes, specification and design are subject to change without notice.
**
INSTRUCTION MANUAL
CD185



Praat mee over dit product
Laat hier weten wat jij vindt van de Curtis CD185 Discman. Als je een vraag hebt, lees dan eerst zorgvuldig de handleiding door. Een handleiding aanvragen kan via ons contactformulier.