1. Plug charger into the back of the unit with power
switch in the OFF position. Insure charger light comes on.
2. Take to a Service Center or call 1.800.321.1134.
1. Plug charger into the back of the unit with power
switch in the OFF position.
2. Empty the dust cup.
3. Turn unit around.
4. Pull BRUM
TM
towards you with Dirt Devil logo up.
Refer to “HOW TO OPERATE” for specific instructions.
5. Clean filter.
1. Switch On/Off Button “Off”.
2. Call 1.800.321.1134.
1. Switch On/Off Button “Off”.
2. Call 1.800.321.1134.
MODE D’EMPLOI
• Veuillez lire attentivement ces instructions avant d’utiliser votre Dirt Devil
®
.
• Nous pouvons vous aider à assembler cet appareil et répondre à vos
questions, pour cela composez le :
1-800-321-1134 (Canada et États-Unis) • site Web : www.dirtdevil.com
INSTRUCTION MANUAL
• Please read these instructions carefully before using your Dirt Devil
®
.
• Let us help you put your cleaner together or answer any questions, call:
1-800-321-1134 (USA & Canada) • website: www.dirtdevil.com
• N’utilisez pas l’appareil à l’extérieur ou sur des surfaces mouillées.
• Ne chargez pas l’appareil à l’extérieur.
• Ne laissez pas les enfants jouer avec l’appareil. Exercez une surveillance étroite
quand l’appareil est utilisé par des enfants ou à proximité de ceux-ci.
• Utilisez l’appareil en respectant à la lettre les consignes de ce manuel. Utilisez seulement
les accessoires recommandés par le fabricant.
• N’utilisez pas l’appareil si la fiche ou le cordon sont endommagés. Si l’aspirateur ou le
chargeur ne fonctionnent pas comme prévu, s’ils sont tombés, s’ils sont endommagés,
si on les a laissés à l’extérieur, ou qu’ils sont tombés dans l’eau, envoyez l’appareil à
un centre de service.
• Ne malmenez pas le cordon électrique. Ne transportez jamais le chargeur ou la base
en tirant sur le cordon. Ne tirez pas sur le cordon pour le débranche. Saisissez plutôt
le chargeur et tirez dessus pour le débrancher. Tenez le cordon à l'écart des surfaces
chauffées. Ne tirez pas sur le cordon lorsqu’il repose sur des coins ou rebords
tranchants. Ne fermez pas la porte sur le cordon du chargeur.
• Ne manipulez pas la fiche ou l’aspirateur avec les mains mouillées.
• Ce produit contient des piles rechargeables au nickel-cadmium. Évitez d’incinérer les
piles ou de les exposer à des températures élevées, car elles pourraient exploser.
• Débranchez le chargeur de la prise avant d’effectuer tout nettoyage ou entretien
régulier.
• N’insérez pas d’objets dans les orifices. N’utilisez pas l’appareil si ses orifices sont
obstrués; enlevez de ces derniers la poussière, les peluches, les cheveux et tout ce
qui pourrait réduire le débit d’air.
• Gardez les cheveux, les vêtements amples, les doigts et toute partie du corps à l’écart
des orifices et des pièces en mouvement.
• Évitez d’aspirer ce qui brûle ou fume, comme les cigarettes, les allumettes et les
cendres chaudes.
• N’utilisez pas l’appareil sans le filtre.
• Éteignez toutes les commandes avant de débrancher l’appareil.
• Faites bien attention quand vous nettoyez les marches d’escalier.
• N’aspirez pas les liquides inflammables ou combustibles comme l’essence; n’utilisez
pas l’appareil en présence de ces matières.
• Des fuites de piles peuvent se produire dans des conditions extrêmes. Si le liquide,
composé d’une solution de 20-35 % d'hydroxyde de potassium, entre en contact avec
la peau (1), lavez immédiatement la partie touchée avec du savon et de l’eau ou (2)
neutralisez-le avec un acide doux comme du jus de citron ou du vinaigre. Si le liquide
entre en contact avec les yeux, rincez-les immédiatement à l’eau pendant au moins
10 minutes. Consultez un médecin.
• Pour recharger l’appareil, utilisez uniquement le chargeur fourni par le fabricant.
• Débranchez l’appareil avant de procéder à tout entretien.
VEUILLEZ CONSERVER CESINSTRUCTIONS
THIS VACUUM IS INTENDED FOR HOUSEHOLD USE ONLY.
IMPORTANT SAFETY INSTRUCTIONS
When using an electrical appliance, basic precautions should always be followed,
including the following:
• READ ALL INSTRUCTIONS BEFORE USING THIS APPLIANCE.
• ALWAYS FOLLOW THESE SAFETY INSTRUCTIONS.
• ANY SERVICE OTHER THAN ROUTINE CLEANING AND MAINTENANCE
SHOULD BE DONE BY AN AUTHORIZED SERVICE REPRESENTATIVE.
• WARNING: FULLY ASSEMBLE VACUUM CLEANER BEFORE OPERATING.
• WARNING: THE CORDS, WIRES AND/OR CABLES SUPPLIED WITH THIS
PRODUCT CONTAINS CHEMICALS, INCLUDING LEAD OR LEAD COMPOUNDS,
KNOWN TO THE STATE OF CALIFORNIA TO CAUSE CANCER AND BIRTH
DEFECTS OR OTHER REPRODUCTIVE HARM. WASH HANDS AFTER USING.
WARNING: TO REDUCE THE RISK OF FIRE,
ELECTRIC SHOCK OR INJURY:
• Do not use outdoors or on wet surfaces.
• Do not charge the unit outdoors.
• Do not allow to be used as a toy. Close attention is necessary when used by or near
children.
• Use only as described in this manual. Use only manufacturer’s recommended attachments.
• Do not use charger with damaged cord or plug. If vacuum or charger is not working
as it should, has been dropped, damaged, left outdoors, or dropped into water, return
it to a service center.
• Do not abuse the cord. Never carry the charger or base by the cord or yank to
disconnect from an outlet; instead grasp the charger and pull to disconnect. Keep
cord away from heated surfaces. Do not pull cord around sharp edges or corners. Do
not close door on the charger cord.
• Do not handle plug or appliance with wet hands.
• This product includes rechargeable nickel cadmium batteries. Do not incinerate batteries
or expose to high temperatures, as they may explode.
• Unplug the charger from the outlet before any routine cleaning or maintenance.
• Do not put any object into openings. Do not use with any opening blocked; keep free
of dust, lint, hair and anything that may reduce air flow.
• Keep hair, loose clothing, fingers, and all parts of body away from openings and moving parts.
• Do not pick up anything that is burning or smoking, such as cigarettes, matches or
hot ashes.
• Do not use without filter in place.
• Turn off all controls before unplugging.
• Use extra care when cleaning on stairs.
• Do not use to pick up flammable or combustible liquids such as gasoline or use in
areas where they may be present.
• Leaks from battery cells can occur under extreme conditions. If the liquid, which is
20-35% solution of potassium hydroxide, gets on the skin (1) wash quickly with soap
and water or (2) neutralize with a mild acid such as lemon juice or vinegar. If the liquid
HANDLE ASSEMBLY
TROUBLESHOOTING GUIDE
ASSEMBLAGE DU MANCHE
LIMITED WARRANTY
To the consumer, Royal Appliance Mfg. Co. warrants this vacuum cleaner to be free of defects in material or workmanship
commencing upon the date of the original purchase. Refer to your vacuum cleaner carton for the length of warranty and
save your original sales receipt to validate start of warranty period.
If the vacuum cleaner should become defective within the warranty period, we will repair or replace any defective parts free
of charge. The complete machine must be delivered prepaid to any ROYAL Authorized Sales & Warranty Service Station.
Please include complete description of the problem, day of purchase, copy of original sales receipt and your name, address
and telephone number. If you are not near a Warranty Station, call the factory for assistance at USA:
1-800-321-1134 / CANADA: 1-800-321-1134. Use only genuine Royal
®
replacement parts.
The warranty does not include unusual wear, damage resulting from accident or unreasonable use of the vacuum cleaner.
This warranty does not cover belts, brushes, bags, filters, bulbs or fan damage. This warranty does not cover unauthorized
repairs. This warranty gives you specific legal rights and you may also have other rights. (Other rights may vary from state
to state in the USA).
For quick reference, please record your
vacuum information below.
Model #:
Mfg. Code:
(Mfg. code located on the lower backside of cleaner)
ANY OTHER SERVICING SHOULD BE DONE BY AN AUTHORIZED SERVICE REPRESENTATIVE
CUSTOMER SERVICE (1-800-321-1134)
In the event that further assistance is required, see your Yellow Pages for an authorized Royal
®
Dealer. Costs of any
transportation to and from any place of repair are to be paid by the owner. The service parts used in this unit are easily
replaced and readily available from an authorized Royal
®
Dealer or retailer. Always identify your cleaner by the model
number and manufacturing code when requesting information or ordering replacement parts. (The model number appears
on the bottom of the cleaner.)
Part # 1-113235-000 • 3/08
N° de référence 1-113235-000 • 3/08
No. de Parte 1-113235-000 • 3/08
AVERTISSEMENT :
L’assemblage de l’appareil comprend
des petites pièces. Ces dernières
présentent un danger d’étouffement.
FRANÇAIS
MANUAL DE INSTRUCCIONES
• Por favor lea estas instrucciones con cuidado antes de usar su Dirt Devil
®
.
• Permítanos ayudarle a ensamblar su aspiradora o a contestar sus preguntas, llame al:
1-800-321-1134 (EE.UU. y Canadá) • Sitio Web: www.dirtdevil.com
ADVERTENCIA:
El ensamble de la aspiradora puede incluir
partes pequeñas. Las partes pequeñas
pueden presentar riesgo de ahogamiento.
Para tener una referencia rápida, anote por favor
la información de su aspiradora aquí.
No. de modelo:
Código de fabricante:
(El código del fabricante aparece en la parte posterior e inferior
de la aspiradora).
FRANÇAIS
WARNING:
Cleaner assembly may include
small parts. Small parts can
present a choking hazard.
Consignez les renseignements ci-dessous pour
pouvoir les consulter rapidement.
Nº de modèle :
Code de fabrication :
(Le code de fabrication se trouve sur la partie inférieure arrière
de l’aspirateur)
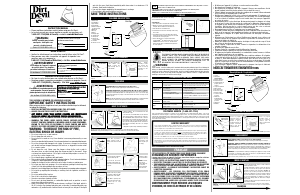
HOW TO OPERATE
EMPTY DIRT CUP
CHARGEMENT
MODE D’EMPLOI
PROBLEM POSSIBLE REASON POSSIBLE SOLUTION
1. Battery not charged.
2. Needs service.
1. Low battery.
2. Dust cup full.
3. Unit being used backwards.
4. Pushing BRUM
TM
like an upright.
5. Filter is clogged.
1. Switch is in th “On” position.
2. Needs service.
1. Switch is in the “On” position.
2. Needs service.
No power
Power decreasing
(Low pick up)
Charging light is
not illuminating
Unit does not
charge
CET ASPIRATEUR A ÉTÉ CONÇU POUR USAGE DOMESTIQUE SEULEMENT.
CONSIGNES DE SÉCURITÉ IMPORTANTES
Lorsque vous utilisez un appareil électrique, vous devez toujours respecter certaines
consignes de sécurité, dont les suivantes :
• LISEZ TOUTES LES INSTRUCTIONS AVANT D’UTILISER CET APPAREIL.
• RESPECTEZ TOUJOURS À LA LETTRE CES INSTRUCTIONS DE SÉCURITÉ.
• TOUT SERVICE AUTRE QUE LE NETTOYAGE ET L’ENTRETIEN DE ROUTINE
DOIT ÊTRE EFFECTUÉ PAR UN REPRÉSENTANT AGRÉÉ DU SERVICE.
• AVERTISSEMENT : ASSEMBLEZ ENTIÈREMENT L’ASPIRATEUR AVANT DE
LE METTRE EN MARCHE.
• AVERTISSEMENT : LES CORDONS, FILS ÉLECTRIQUES ET/OU CÂBLE
FOURNIS AVEC CE PRODUIT CONTIENNENT DES PRODUITS CHIMIQUES Y
COMPRIS DU PLOMB OU DES COMPOSÉS DU PLOMB CONNU PAR L’ÉTAT
DE CALIFORNIE POUR SON EFFET CANCÉRIGÈNE, POUVANT ENTRAÎNER
DES MALFORMATIONS CONGÉNITALES ET ENDOMMAGER LES ORGANES
DE REPRODUCTION. LAVEZ-VOUS LES MAINS APRÈS TOUTE UTILISATION.
AVERTISSEMENT: POUR RÉDUIRE LES RISQUES
D’ICENDIE, DE CHOC ÉLECTRIQUE ET DE LÉSION :
CHARGING
gets into the eyes, flush them immediately with clean water for a minimum of 10
minutes. Seek medical attention.
• Use only the charger supplied by the manufacturer to recharge.
• Be sure plug is disconnected before servicing.
SAVE THESE INSTRUCTIONS
Insert Upper Handle into
Lower Handle until
Handle Locking Pin
snaps through hole in
Lower Handle.
Insert Handle
assembly to main
unit. Ensure the
handle is securely
assembled to the
main unit.
Insert upper handle
into lower handle.
Push and insert
handle assembly
into main unit .
1.
2.
TO CHARGE UNIT: Power switch must be in the OFF position.
NOTE: Use only the charger supplied by the manufacturer to recharge.
IMPORTANT: BEFORE FIRST USE, CHARGE YOUR UNIT FOR AT LEAST 24 HOURS.
Connect wall charger to the outlet. Plug charger end into the back of the unit. When it is
on charge, the white LED light will be on. If this light does not come on, check if the plug
charger and wall plug are properly connected. Vacuum can remain on charge for an
indefinite period.
NOTE: The indicator light will come on to indicate that the appliance is charging. Unit will
be charged in 16-24 hours. The light will not change when the unit is charged.
1.
1. Hold the BRUM
TM
like a conventional broom and
sweep dirt into a pile.
2. To remove the accumulated dirt, turn the vacuum
“ON” using the button located at the top of the han-
dle. Hold BRUM
TM
with long bristle side of vacuum
facing away from you and vacuum up the dirt. Be sure
to turn vacuum “OFF” once you have finished vacuum-
ing up the dirt. Sweeping with vacuum “ON” will not
harm battery, but battery will need to be charged
more often.
3. Empty dirt cup after using to maximize performance.
Press “Dirt Cup Release”
button, located on side of
cleaner, and remove the dirt
cup.
To clean the filter simply lift
out of the Dirt Cup Lid.
To clean the Pre-Screen
(located underneath the fil-
ter) remove it from the Dirt
Cup Lid.
1.
2.
NOTE: RETURN WARRANTY CARD TO REGISTER YOUR CLEANER.
Depress Dirt Cup
Lid Release and
pivot cup lid open
to empty.
3.
4.
Tap filter in trash
to remove debris.
NOTE: If needed,
filter can be
rinsed. Must dry
for 24 hours
before replacing
filter into unit.
Insérer la poignée
supérieure dans la
poignée inférieure,
jusqu’à ce que la
cheville d’arrêt de la
poignée s’enclenche
dans le trou de la
poignée inférieure
Insérer la poignée
assemblée dans le
corps de l’appareil.
S’assurer que la
poignée est bien fixée
à l’appareil.
1.
2.
POUR CHARGER L'UNITÉ : L’interrupteur doit être HORS TENSION.
REMARQUE : Utiliser uniquement le chargeur fourni par le fabricant pour recharger.
IMPORTANT : AVANT LA PREMIÈRE UTILISATION, CHARGER L’APPAREIL PENDANT AU
MOINS 24 HEURES. Brancher le chargeur mural à une prise de courant. Brancher la fiche
du chargeur à l’arrière de l’appareil. Pendant la charge, le témoin DEL blanc s’allume. Si
le témoin ne s’allume pas, vérifier si les fiches sont bien branchées dans l’appareil et dans
le mur. L’aspirateur peut rester branché au chargeur pendant une période indéfinie.
REMARQUE : Le voyant lumineux s’allume pour indiquer que l’appareil se charge. L’unité
sera chargée 16 à 24 heures après avoir été connectée. Le voyant lumineux ne change
pas lorsque l’unité est complètement chargée.
1.
2.
Vacuuming
CLEANER DESCRIPTION
To preserve natural resources, please recycle or dispose of expired battery pack properly.
THIS PRODUCT CONTAINS NICKEL-CADMIUM BATTERY. MUST BE DISPOSED OF
PROPERLY. LOCAL, STATE, OR FEDERAL LAWS MAY PROHIBIT DISPOSAL OF
NICKEL-CADMIUM BATTERIES IN ORDINARY TRASH, CONSULT YOUR LOCAL
WASTE AUTHORITY FOR INFORMATION REGARDING AVAILABLE RECYCLING
AND/OR DISPOSAL OPTIONS. FOR DISPOSAL INFORMATION, CALL THE
RECHARGEABLE RECYCLING CORPORATION AT 1-800-8-BATTERY.
Upon removal, cover the batter pack’s terminals with heavy duty adhesive tape. Do not attempt to
destroy or disassemble battery pack or remove any of its components. Nickel-cadmium batteries
must be recycled or disposed of properly. Also, never touch both terminals with metal objects and/or
body parts as short circuit may result. Keep away from children. Failure to comply with these
warnings could result in fire and/or serious injury.
BATTERY DISPOSAL
WARNING:
1.
Sweeping
Description de l’aspirateur
Pour passer l’aspirateur
Pour balayer
1. Tenir l'aspirateur-balai comme un balai ordinaire et
mettre la poussière en tas.
2. Mettre l’aspirateur en marche à l’aide de l’interrup-
teur situé sur le dessus de la poignée. Pour aspirer la
poussière accumulée, tenir l’aspirateur BRUMMC de
façon à ce que le côté à poils longs de la brosse soit
éloigné de l’utilisateur. S’assurer d’éteindre l’appareil
une fois l’évacuation de la poussière terminée. La pile
ne sera pas endommagée si l’aspirateur est laissé en
marche pour balayer, mais elle devra être rechargée
plus souvent.
3. Videz le godet à poussière après utilisation pour une
performance maximale.
1.
2.
1. Handle Hook
2. On/Off Button
3. Upper Handle
4. Lower Handle
5. Handle Locking Pin
(located on back)
6. Main Body
7. Dirt Cup
8. Bristles
9. Charging Light
10. Charging Port
11. Dirt Cup Lid
12. Dirt Cup Lid
Release Button
13. F30 Filter
14. Filter Pre-Screen
1
2
3
4
6
7
10
9
8
11
12
13
14
NOTE: If unit powers on when assembling the handle assembly to the main unit, depress the On/Off button to switch the
unit off.
Replace Dirt Cup by lining
up bottom of Dirt Cup with
guide tracks on the inside.
Tip: When replacing Dirt
Cup, push along lower edge
of Dirt Cup for easy
replacement.
STORAGE
Hang BRUM
TM
by handle hook for easy storage
and to maintain bristle shape.
F30
For F30 filter replacement, please visit our website at www.dirtdevil.com to buy online or call cus-
tomer service at 1-800-321-1134.
Tip: The filter and Pre-Screen are able to be cleaned by rinsing with cool to warm tap water.
IMPORTANT: Before next use they must be completely dry.
NOTE: Be sure to return both the Pre-Screen and Filter to the Dirt Cup Lid prior to use.
Tip: For best results and optimal performance it is a good practice to clean the filter after each use.
NOTE: Handle may get warm during use. This is normal as the batteries are located inside the handle.
Back
7
Front
REMARQUE : Si l’appareil se met en marche au moment d’y insérer la poignée, appuyer sur l’interrupteur MARCHE/ARRÊT pour l’éteindre.
Conseil : Pour obtenir de meilleurs résultats et un rendement optimal, il est recommandé de nettoyer le filtre après chaque utilisation.
REMARQUE : Il est possible que la poignée devienne chaude en cours d’utilisation. Cela est normal, car les piles se trouvent à l’intérieur
de la poignée.
5
Dirt Cup
11
5.
NOTE: Handle may get warm during charging. This is normal as batteries are located inside the handle.
To Wall Mount:
1. Place wall mount hook against the mounting surface.
2. Mark hole locations using wall mount as the
template. Remove wall mount and drill holes.
3. Push wall anchors into drilled holes.
4. Screw wall mount hook into mounting surface using
two screws.
5. Insert wall mount cover by inserting upper tab into
wall mount and then gently pressing cover over wall
mount until it is securely in place.
6. Ensure wall mount is securely mounted before
hanging BRUM
TM
. Use wall mount hook to store your
BRUM
TM
whenever it is not in use. This will ensure
that the bristle shape is maintained throughout the
life of the product.
3.
2.
1.
Insert wall
anchor and
screws.
1. Crochet
2. Interrupteur
MARCHE/ARRÊT
3. Poignée supérieure
4. Poignée inférieure
5. Cheville d’arrêt de la
poignée (située à
l’arrière)
6. Corps de l’aspirateur
7. Vide-poussière
8. Poils de la brosse
9. Témoin de charge
10. Port de charge
11. Couvercle du vide
poussière
12. Bouton de
dégagement du
couvercle du vide
poussière
13. Filtre F30
14. Préfiltre
1
2
3
4
6
7
10
9
8
11
12
13
14
l’arrière
7
Devant
5
Vide-poussière
11
Insérer la poignée
supérieure dans la
poignée inférieure.
Pousser et insérer
la poignée assem-
blée dans le corps
de l’appareil.
REMARQUE : Il est possible que la poignée devienne chaude pendant la charge. Cela est normal, car les piles se trouvent à l’intérieur de la
poignée.



Praat mee over dit product
Laat hier weten wat jij vindt van de Dirt Devil M0414slv BRUM Stofzuiger. Als je een vraag hebt, lees dan eerst zorgvuldig de handleiding door. Een handleiding aanvragen kan via ons contactformulier.