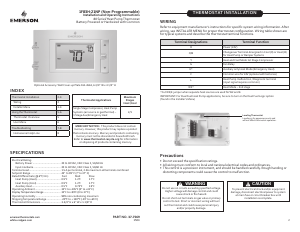
Handleiding Emerson 1F83H-21NP Thermostaat

Handleiding voor je Emerson 1F83H-21NP Thermostaat nodig? Hieronder kun je de handleiding gratis bekijken en downloaden als PDF in het Nederlands en/of Engels. Dit product heeft 2 veelgestelde vragen, 0 comments en heeft 2 stemmen met een gemiddelde score van 50/100. Is dit niet de handleiding die je zoekt, neem dan contact met ons op.

Is je product kapot en biedt de handleiding geen oplossing meer? Dan kun je voor reparatie gratis terecht bij Repair Café.

Handleiding

Loading…

3
INSTALLER MENU
To prevent changes that may aect system performance, this thermostat has an INSTALLER’S
MENU and a USER MENU. The INSTALLER’S MENU provides access to every option, while the
USER MENU provides access to items that will not aect system performance. To access the
INSTALLER’S MENU press the Menu button for 8 seconds. The display will show item 30 in
the table below. Use Next to navigate through menu items. Press or to change a menu
setting.
Installer’s Menu #
(Hold Menu 8 Seconds)
Description
Default Setting
(ashing icons)
Settings
(Press or )
30
Heat Cycle Rate (how often
the heat will turn on)
MEd
SLO – slow
MEd – medium
FAS – fast
32
Aux Cycle Rate (how often the
auxiliary heat will turn on)
MEd
SLO – slow
MEd – medium
FAS – fast
35
Cool Cycle Rate (how often
the cooling will turn on)
MEd
SLO – slow
MEd – medium
FAS – fast
50
Compressor Lockout
(protects the compressor
from short cycling)
OFF
On5 minute delay
OFF – no delay
60
Duel Fuel Logic (turn On when using
gas as the auxiliary heat source)
OFF
On- gas auxiliary heat
OFF- electric auxiliary heat
65
Maximum Heat Limit
(maximum set point for heat mode)
99 47 to 99
66
Minimum Cool Limit
(minimum set point for cool mode)
45 45 to 97
(Installer Menu continued on next page)
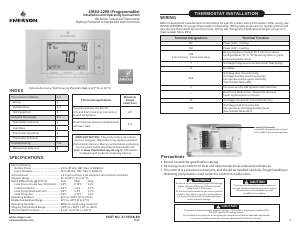
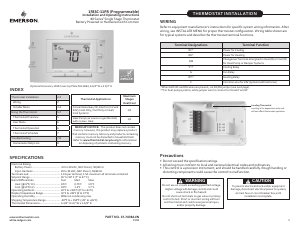
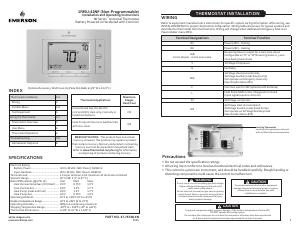
1.) W2/E Jumper Wire
This thermostat electrically connect the W2 and E terminals so that you do not need to
do this with a jumper wire. If your system has separate W2 and E wires, clip the W2/E
jumper located on the back of the thermostat. This will isolate both terminals so they can
be used independently.
2.) O/B Terminal Switch
The O/B switch on this thermostat is factory set to the O position. This will accommodate
the majority of heat pump applications, which require the changeover relay to be
energized in Cool. If the heat pump being installed requires a B terminal to energize the
changeover relay in Heat, the O/B switch must be moved to the B position.
Baery Locaon
Premium AA alkaline batteries
are required when C-wire is
not available. When C-wire is
available, the batteries provide
a back-up source of power (this
will maintain the clock in the
event of a power outage).
1
2
4
CAUTION
!
To prevent compressor and/or property damage, if the outdoor temperature is below 50°F,
DO NOT operate the cooling system.
Do not allow the compressor to run unless the compressor oil heaters have been operational
for 6 hours and the system has not been operational for at least 5 minutes.
TEST EQUIPMENT
Turn on power to the system.
Fan Operation
If your system does not have a G terminal connection, skip to Heating System.
1.) Move fan switch to On position. The blower should begin to operate.
2.) Move fan switch to Auto position. The blower should stop immediately.
Heating System
1.) Move System Switch to Heat position. If the auxiliary heating system has a standing
pilot, be sure to light it.
2.) Press to adjust thermostat setting to above room temperature. The heat pump
system should begin to operate and the thermostat will indicate Heat On.
3.) Press to adjust thermostat setting to 3° above room temperature. The auxiliary heat
should begin to operate and the thermostat will indicate Heat On Auxiliary.
4.) Press to adjust thermostat setting below room temperature. The heating system
should stop operating and the thermostat should indicate Heat.
Auxiliary System
1.) Move System Switch to Aux position. If the auxiliary heating system has a standing pilot,
be sure to light it.
2.) Press to adjust thermostat setting to above room temperature. The auxiliary heating
system should begin to operate and the thermostat will indicate Heat On Auxiliary.
3.) Press to adjust thermostat setting below room temperature. The auxiliary heating
system should stop operating and the thermostat should indicate Heat Auxiliary.
Cooling System
1.) Move System Switch to Cool position.
2.) Press to adjust thermostat setting below room temperature. The blower should
come on immediately on high speed, followed by cold air circulation. The thermostat will
indicate Cool On. There can be up to a 5 minute delay. (see INSTALLER MENU, item 50)
3.) Press to adjust thermostat setting to above room temperature. The cooling system
should stop operating and the thermostat will indicate Cool.
Note: If Starting Soon is shown on the display, the compressor lockout feature is operating.
There will be up to a 5 minute delay before the compressor turns on.(see INSTALLER MENU,
item 50)
Installer’s Menu #
(Hold Menu 8 Seconds)
Description
Default Setting
(ashing icons)
Settings
(Press or )
79
Fahrenheit or Celsius °F
°F – Fahrenheit
°C – Celsius
81
Temperature Display Adjustment
(adjust the displayed “Room
Temperature”)
0 -5 to +5
83
Continuous Display Light (keep
the backlight always on – “C” wire
required)
OFF
On – always on
OFF – momentarily
99
Keypad Lock (prevent unwanted
changes to the thermostat)
OFF
On – disable buttons
OFF – all buttons are active
INSTALLER MENU (C0ntinued)
Download de handleiding in het Nederlands en/of Engels (PDF, 2.3 MB)
(Denk aan het milieu en print deze handleiding alleen als dat echt noodzakelijk is)

Loading…

Beoordeling

Laat ons weten wat je van de Emerson 1F83H-21NP Thermostaat vindt door een beoordeling achter te laten. Wil je je ervaringen met dit product delen of een vraag stellen? Laat dan een bericht achter onderaan de pagina.
Bent u tevreden over de Emerson 1F83H-21NP Thermostaat?
Ja Nee
50%
50%
2 stemmen

Praat mee over dit product

Laat hier weten wat jij vindt van de Emerson 1F83H-21NP Thermostaat. Als je een vraag hebt, lees dan eerst zorgvuldig de handleiding door. Een handleiding aanvragen kan via ons contactformulier.

Meer over deze handleiding

We begrijpen dat het prettig is om een papieren handleiding te hebben voor je Emerson 1F83H-21NP Thermostaat. Je kunt de handleiding bij ons altijd downloaden en daarna zelf printen. Indien je graag een originele handleiding wilt hebben, raden we je aan contact op te nemen met Emerson. Zij kunnen wellicht nog voorzien in een originele handleiding. Zoek je de handleiding van Emerson 1F83H-21NP Thermostaat in een andere taal? Kies op de homepage je taal naar keuze en zoek daarna op het modelnummer om te zien of we deze beschikbaar hebben.

Specificaties

Merk Emerson
Model 1F83H-21NP
Categorie Thermostaten
Bestandstype PDF
Bestandsgrootte 2.3 MB

Alle handleidingen voor Emerson Thermostaten
Meer handleidingen voor Thermostaten

Veelgestelde vragen over Emerson 1F83H-21NP Thermostaat

Ons supportteam zoekt dagelijks naar nuttige productinformatie en antwoorden op veelgestelde vragen. Als er onverhoopt toch een onjuistheid tussen onze veelgestelde vragen staat, laat het ons dan weten via het contactformulier.

Wat is de dode zone van een thermostaat? Geverifieerd

Veel modernere thermostaten hebben een dode zone. Als de temperatuur minder dan ongeveer 4°C afwijkt van de ingestelde temperatuur, dan zal het systeem niet verwarmen of koelen. Deze zogenoemnde dode zone van de thermostaat voorkomt dat het systeem te vaak aan- en afslaat en bespaart zo energie.

Ik vind dit nuttig (1588) Lees meer

Wat is de beste locatie om een thermostaat te plaatsen? Geverifieerd

De beste plek voor een thermostaat is ongeveer 1,5 meter van de grond. Plaats de thermostaat niet in de buurt van een radiator of andere apparatuur die warmte afgeeft of in direct zonlicht. Kies een kamer die vaak wordt gebruikt. In veel gevallen is dit de woonkamer.

Ik vind dit nuttig (991) Lees meer
Handleiding Emerson 1F83H-21NP Thermostaat

Gerelateerde producten

Gerelateerde categorieën