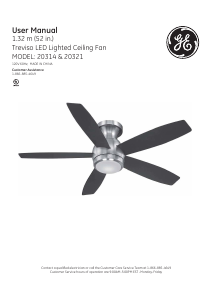
Handleiding GE 20321 Treviso Plafondventilator

Handleiding voor je GE 20321 Treviso Plafondventilator nodig? Hieronder kun je de handleiding gratis bekijken en downloaden als PDF in het Nederlands en/of Engels. Dit product heeft 2 veelgestelde vragen, 0 comments en heeft 0 stemmen. Is dit niet de handleiding die je zoekt, neem dan contact met ons op.

Is je product kapot en biedt de handleiding geen oplossing meer? Dan kun je voor reparatie gratis terecht bij Repair Café.

Handleiding

Loading…

9
Fan Installation
WARNING: To avoid possible electric
shock, be sure electricity is turned
off at the main fuse box before wiring.
NOTE: Fan must be installed at
a maximum distance of 6 m (20
ft.) from the transmitting unit for
proper signal transmission between
the transmitting unit and fan’s
receiving unit.
CAUTION: Do not use wall switch
with dimmer function.
WARNING: Check to see that all
connections are tight, including
ground wire, and that no bare wire
is visible at the wire nuts, except for
the ground wire.
WARNING: Electrical diagrams are
for reference only. Optional use of
any light kit shall be cUL listed and
marked suitable for use with this fan.
MAKING THE ELECTRICAL CONNECTIONS
Supply Circuit
Motor to receiver electrical connections:
Connect the black wire from the fan to black wire marked
“TO MOTOR L” from the receiver. Connect the white wire from
the fan to the white wire marked “TO MOTOR N” from the
receiver. Connect the blue wire from the fan to the blue wire
marked “For Light” from the receiver. Secure the wire
connections with the plastic wire nuts (H) and electrical tape..
Receiver to house supply wires electrical connections:
Connect the black (hot) wire from the ceiling to the black
wire marked “AC in L” from the receiver. Connect the white
(neutral) wire from the ceiling to the white wire marked “AC
in N” from the receiver. Secure the wire connections with the
plastic wire nuts (H) and electrical tape.
If your outlet box has a ground wire (green or bare copper),
connect it to the ground wire from mounting bracket and
ground wire from the fan motor assembly, secure the wire
connection with a plastic wire nut (H); otherwise connect
the ground wire from the fan motor assembly to the ground
wire from mounting bracket, secure the wire connection with
plastic wire nut (H) and electrical tape.
WHITE
WHITE
BLACK
BLACK
BLUE
GREEN
BLACK
BLACK
BLUE
WHITE
WHITE
H
R
V
Q
To install wire nuts, strip wires 1.9 cm (3/4
in). Line up wires in parallel, insert into
wire nut, hand tight wire nut by twisting
clockwise until snug. Tape around wires
and wire nut. After connecting the wires,
carefully tuck the wire connections and
wires into the canopy.
Loosen two (one of each across) of the
four screws (V) from the mounting bracket
(Q) and remove the other two. Remove
the motor assembly (R) from the hook of
mounting bracket (Q) and push up the
motor assembly (R) until the two screws (V)
on mounting bracket (Q) are engaged with
L type slot holes on canopy of the motor
assembly (R). Rotate the motor assembly
(R) slightly until the two screw heads are
in the L type slot holes. Install the two
screws previously removed and tighten all
four screws.
Ground conductor
from ceiling
Ground wire from
mounting bracket
Ground wire from
the fan motor
assembly
BLACK for motor
BLUE for light
WHITE for neutral
Outlet box
WARNING: After making the
electrical connections, carefully
unhook the fan and hold the fan
firmly while attaching the fan to the
mounting plate.
NOTE : For best remote control
reception, make sure the brown
antenna wire is placed away from
the electrial wires (blue, white and
black colors).
If you feel you do not hav e enough electrical wiring knowledge
or experience, have your fan installed by a licensed electrician.
Follow the steps below to prepare the electrical connections.
After that, conform with the descriptions and diagrams below
to connect the fan to your household wiring. Use the wire nuts
supplied with your fan. Secure the wire nuts with electrical tape.
Make sure there are no loose strands or connections.
Download de handleiding in het Nederlands en/of Engels (PDF, 4.56 MB)
(Denk aan het milieu en print deze handleiding alleen als dat echt noodzakelijk is)

Loading…

Meer over deze handleiding

We begrijpen dat het prettig is om een papieren handleiding te hebben voor je GE 20321 Treviso Plafondventilator. Je kunt de handleiding bij ons altijd downloaden en daarna zelf printen. Indien je graag een originele handleiding wilt hebben, raden we je aan contact op te nemen met GE. Zij kunnen wellicht nog voorzien in een originele handleiding. Zoek je de handleiding van GE 20321 Treviso Plafondventilator in een andere taal? Kies op de homepage je taal naar keuze en zoek daarna op het modelnummer om te zien of we deze beschikbaar hebben.

Specificaties

Merk GE
Model 20321 Treviso
Categorie Plafondventilators
Bestandstype PDF
Bestandsgrootte 4.56 MB

Alle handleidingen voor GE Plafondventilators
Meer handleidingen voor Plafondventilators

Veelgestelde vragen over GE 20321 Treviso Plafondventilator

Ons supportteam zoekt dagelijks naar nuttige productinformatie en antwoorden op veelgestelde vragen. Als er onverhoopt toch een onjuistheid tussen onze veelgestelde vragen staat, laat het ons dan weten via het contactformulier.

Maakt het uit in welke richting mijn plafondventilator draait? Geverifieerd

Ja, dit hangt af van het seizoen. In de warmere seizoenen moet de plafondventilator tegen de klok in draaien om koude lucht naar beneden te blazen. Deze lucht zorgt dat vocht verdampt en heeft hierdoor een verkoelend effect. In de koudere seizoenen moet de plafondventilator met de klok mee draaien om koude lucht naar boven te zuigen, wat de warme lucht omlaag drukt.

Ik vind dit nuttig (188) Lees meer

Kan ik mijn GE apparaat ook later werken met een aggregaat? Geverifieerd

In principe wel, maar vraag dit altijd na bij de fabrikant van uw aggregaat. Let er ook op dat sommige apparaten bij het opstarten extra veel stroom verbruiken (bijv: koelkasten, vriezers en airconditioners). Ook is het verstandig om een aggregaat te gebruiken dat is uitgerust met piekbescherming. Neem bij twijfel contact op met de fabrikant.

Ik vind dit nuttig (41) Lees meer

Beoordeling

Laat ons weten wat je van de GE 20321 Treviso Plafondventilator vindt door een beoordeling achter te laten. Wil je je ervaringen met dit product delen of een vraag stellen? Laat dan een bericht achter onderaan de pagina.
Bent u tevreden over de GE 20321 Treviso Plafondventilator?
Ja Nee
Beoordeel dit product als eerste
0 stemmen

Praat mee over dit product

Laat hier weten wat jij vindt van de GE 20321 Treviso Plafondventilator. Als je een vraag hebt, lees dan eerst zorgvuldig de handleiding door. Een handleiding aanvragen kan via ons contactformulier.

Handleiding GE 20321 Treviso Plafondventilator

Gerelateerde producten

Gerelateerde categorieën