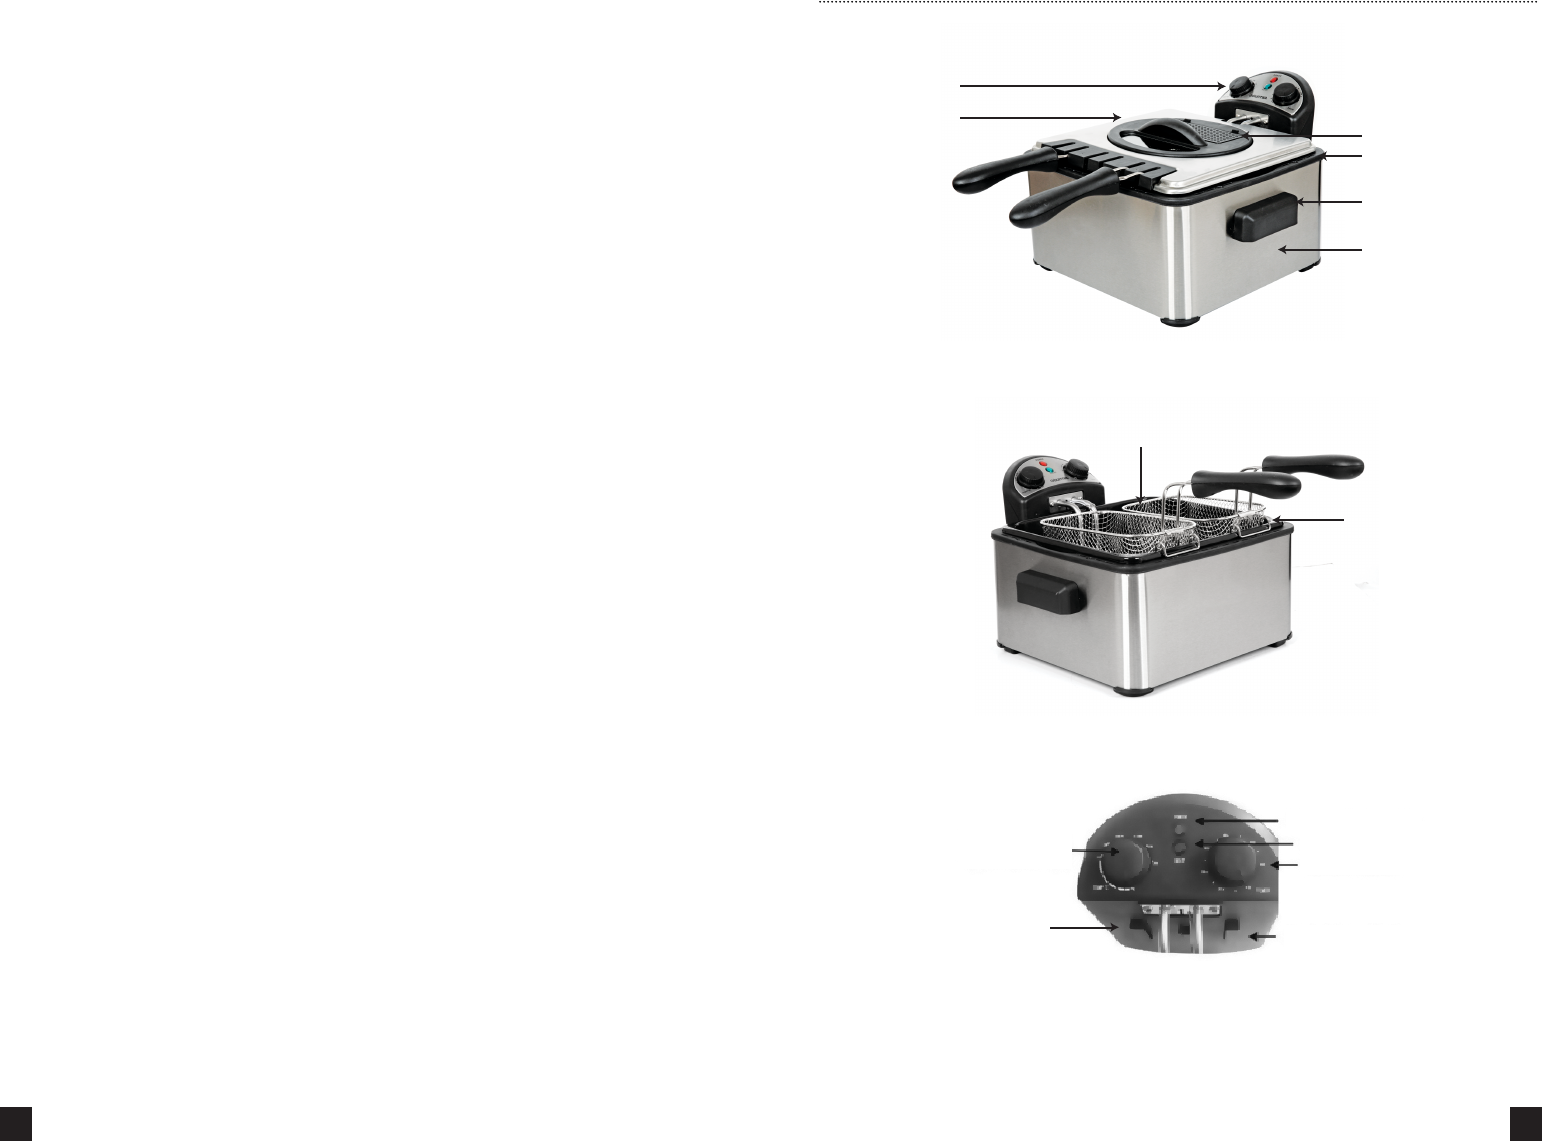
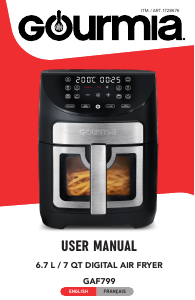
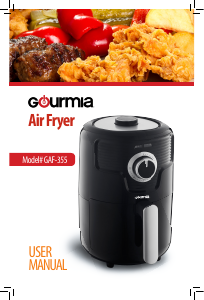
Power Indicator
Heat Indicator
Timer Knob
Retaining Slots
Temperature
Control Knob
Reset Button
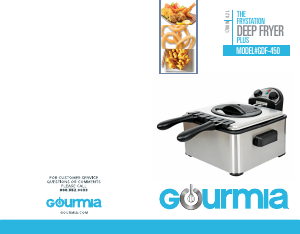
Basket Hook
Fryer Basket
Disclaimer: Manual instructions should always be read and implemented prior to
product use. Manufacturer is not responsible for inappropriate use, due to negli-
gence or failure to follow directions.
This product is intended for indoor household use only!
Children: Keep this device out of the reach of children or other unqualified persons,
since the misuse of contents and packaging materials may result in hazard or
death.
SCORCHING AND BURNS
Prevent burns by being aware that this product transmits high levels of heat. Take
precautions when handling and operating.
Avoid:
1) Insertion of oversized foods or metal utensils within the device while in use, as
they may cause fire or possible electric shock.
2) Solid fats when frying, since high heat output can forcibly release hot contents.
3) Metal based scouring pads when cleaning your appliance, since they may cause
electrical shocks.
4) Placement of paper, cardboard, plastic, or other materials/ accessories within the
unit for storage.
• Never leave the device unattended during use, and avoid moving the base or its
contents while hot.
• Never place flammable materials in close proximity of the device while in use.
SETUP HAZARDS
• Always operate the device in a well ventilated area, with sucient distance from
external heat sources to prevent damage.
• Place the device on a dry surface that's adequately leveled and heat resistant.
Never place the device on or near the proximity of a hot gas or electric burner, nor
near a heated oven.
• Connection use should always involve proper socket installation, with easy access
after a connection is established. Use compatible power cords whose data configu-
ration matches that of the device.
• Exercise caution when positioning the power cord, maintaining a smooth wire
placement without bending or damaging the wiring. Avoid trip and fall situations by
applying caution during wire placement.
• Prevent electric shock: do not immerse product, cord, or plug in liquids.
• Never operate this device with a malfunctioning cord or plug. Return the appliance
to the nearest authorized service facility for examination, repair, or adjustment.
• Never apply accessory attachments which are not specified for this device, since
they may result in injury.
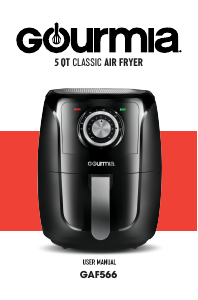
PRODUCT SPECS
6 7
FRYER CONTROLS
Indicator LED’s:
The red light indicates the power is ON.
The green light is on when heating and turns o when ready.
Temperature Control Dial:
Adjustable, based on desired temperature setting.
Timer Control DIal:
1) Once the desired temperature setting is selected, turn the timer dial clockwise
to the 15 minutes position. The red and green indicator light will turn on. Once the
green light turns o, you may rotate the knob to the desired timer marker.
2) While frying, the green indicator light will turn on when the oil temperature
drops with the addition of new foods, and will periodically switch o when frying
temperatures are met.
• The timer will sound once the desired cooking time is reached and the appli-
ance will simultaneously shut o once the timer hits the OFF position at the end
of a frying cycle.
Oil Tank:
Comprised of enamel treated steel and removable for easy clean purposes.
Outer Casing:
Comprised of stainless steel and easy to clean. The fryer’s viewing window allows
access to view the cooking process within the vessel.
Filter:
Carbon activated filter reduces odor.
Fryer Basket:
Easy to assemble and use for transferring and removing food from fryer.
Fryer Hook:
For attaching the basket to the fryer’s edge during food preparation.
Control Box and Heating Element:
Should not be immersed in liquid and should not be separated when disassem-
bling the fryer.
HEALTH HAZARDS
To avoid contamination, clean the device prior to its first use to get rid of
manufacturing residues. Precise details are included in the "Using your fryer" guide
AUTOMATED SAFETY SWITCH
An automatic thermal safety device switches the machine o when overheated. The
small red button is located on the front of the control box. You may reactivate the
switch when safe by pushing the button with a pointed object.
CAUTION: disconnect the device from its power outlet prior to reactivating.
POWER CORD SAFETY
Short cord purpose: A short power supply cord is included with the device for
safety during use, since longer wiring poses a risk of tripping and falling or
entanglement. When using your own longer extension cord to power the device,
follow all safety precautions to refrain from damage or injury.
Polarized plug: In the event that you opt to use a polarized plug, with one blade
being wider than the other, be sure to follow safety guidelines. To reduce the risk of
electric shock, only insert the plug into a designated polarized outlet in the advis-
able direction, based on safety guidelines. Do not attempt to modify the plug in any
way.
The frying times given in the chart are only a guide and should be adjusted
accordingly to the quantity of food being fried.
• Refried
French
fries tend to be lighter and crispier in consistency.
• Always fry foods in accordance w ith their required temperature levels, first
frying f oods requiring the lowest temperature settings.
• Be advised, frying precooked meals may require less secondary frying time.
• Don't use the fryer lid when frying French fries or other high moisture content
foods.
• Never combine different oil types for frying.
• Fill with enough oil when operating, following the MIN and MAX marker levels
within the oil pot. Oil should always be present prior to plugging in the device.
• Never place water or other liquid sources within the pan.
• Replace oil after each 10-15 minute interval, or when oil turns brown/ thick in
consis-tency.
• Never use shortening, butter, or margarine. Solid fat can result in pressurized
heat output.
• Always use a good brand of cooking oil when deep frying.
• Only use metal utensils when frying, since plastic or rubber can ruin or melt.
Never leave metal utensils within the hot oil during use.
BEFORE FIRST USE
• Remove all packaging materials prior to use.
• Removable parts should be rinsed with hot water and dried prior to use.
CAUTION: never immerse power cord or control box/ heating elements of the
dryer into any liquids.
• Place on a leveled surface, away from external heat sources or flammables.
• Fill with proper oil amounts prior to use. Make sue the fryer remains unplugged
prior to the appliance’s complete setup.
• You may wipe the inner chamber of the viewing window with a hint of oil to
prevent condensation during use.
• Check the temperature control and timer dials so that they’re in the OFF position
before operating.
• Plug the power cord into an available outlet.
• Select the desired temperature and timer settings using the designated dials.
The indicator light should turn o once the desired temperature is reached.
OIL AND FOOD APPLICATION
• To reduce oil splatter, Lower the basket slowly into oil. If oil starts to rise within
the tank, lift the fryer basket and allow oil to settle before lowering food slowly
into the oil once again.
• Fill the oil to the appropriate capacity, 2.5 liters at the minimum, not exceeding 4
liters in total.
• When frying frozen foods, remove ice particles and thaw properly. Make sure
foods are as dry as possible prior to frying and refrain from adding water or ice,
since they may cause hot oil to splatter.
• If reusing oil, strain first to remove settled food particles.
• Replace oil immediately if:
1-Unpleasant odor is emitted.
2-Excessive smoke emittance occurs during heating.
3-Oil turns dark in color.
4-Oil has been stored for prolonged time periods.
• Routinely replace oil after every 10-15 uses.
• When frying cycle is complete, turn the temperature and timer dials to the OFF
position and unplug the fryer.
• Remove the fryer lid and place the fryer basket using the designated hook to
allow the excess oil to accumulate in the oil tank.
CAUTION: Removing the fryer lid causes the release of hot steam which can
cause severe burns.
OIL TANK
• Refrain from storing oil in the tank while the control with element are still
assembled.
• Allow the oil to cool completely prior to attempting to clean or store oil.
• Remove the control with element and set on paper towel atop a cookie sheet.
The element will still contain oil residue at that time.
• Carefully lift the oil tank out of the stainless base.
• Do not place oil in the refrigerator while still contained in the oil tank with its
control panel in place. Never place the appliance in your refrigerator. Instead,
remove oil and store in a tightly sealed container prior to refrigerating.
REPLACING THE FILTERS
Change the carbon filter every 6 months.
Change the oil filter every 12 months.
Filter replacement instructions:
1-Unclip and remove the filter cover.
2-Remove both, black and white, filter parts.
3-Discard old filters and replace with new ones. Make sure the white filter piece
rests into the metal surface directly below the (black) carbon filter.
CLEANING TUTORIAL
1-Turn the switch OFF.
2-Unplug the appliance from its electrical wall outlet and remove the unit's
magnetic plug.
3-Allow unit to cool completely.
4-Once cooled, disassemble the unit by reversing the assembly steps.
5-Proceed to cleaning the parts as directed.
• All fryer parts are fully immersible in water and dishwasher safe, except the
control panel with heating element, and its magnetic plug.
• NEVER IMMERSE temperature control panel or magnetic plug in liquid.
• Remove the filter from the fryer prior to immersing in water.
CLEANING FRYER CONTROL PANEL AND MAGNETIC CORD
Clean with a damp dishcloth that has been dipped into water and mild dishwash-
ing soap. Completely proceed to wipe down all parts of the temperature control
panel and heating element. Rinse the cloth and wipe all soap residues. Similarly,
wipe down the magnetic plug and cord. Do not reassemble the deep fryer until all
parts are thoroughly dry.
• Refrain from using abrasive scouring brushes or chemical cleaners while
cleaning the device.
CLEANING LID AND FILTERS
Lift the filter lid to remove both filters. Wash the filters in warm, soapy water and
rinse thoroughly. Allow filters to dry completely and then follow assembly instruc-
tions to properly reassemble prior to appliance use.
CLEANING OIL TANK, FRYER LID, AND FRY BASKETS
These parts are fully immersible and dishwasher safe. Fryer should be thoroughly
cleaned prior to each use. Dishwasher use may alter the product color or appear-
ance, but it won't aect the appliance's performance.
Control Panel
Lid
Filter Cover
Oil Tank
Carry Handle
Outer Casing

Praat mee over dit product
Laat hier weten wat jij vindt van de Gourmia GDF450 Friteuse. Als je een vraag hebt, lees dan eerst zorgvuldig de handleiding door. Een handleiding aanvragen kan via ons contactformulier.