
CLEANING AND CARE
10 11
FRYER CONTROLS
Indicator LED’s:
The red light indicates the power is ON.
The green light is on when heating and turns o when ready.
Temperature Control Dial:
Adjustable, based on desired temperature setting.
Timer Control DIal:
1) Once the desired temperature setting is selected, turn the timer dial clockwise
to the 15 minutes position. The red and green indicator light will turn on. Once the
green light turns o, you may rotate the knob to the desired timer marker.
2) While frying, the green indicator light will turn on when the oil temperature
drops with the addition of new foods, and will periodically switch o when frying
temperatures are met.
• The timer will sound once the desired cooking time is reached and the appli-
ance will simultaneously shut o once the timer hits the OFF position at the end
of a frying cycle.
Oil Tank:
Comprised of enamel treated steel and removable for easy clean purposes.
Outer Casing:
Comprised of stainless steel and easy to clean. The fryer’s viewing window allows
access to view the cooking process within the vessel.
Filter:
Carbon activated filter reduces odor.
Fryer Basket:
Easy to assemble and use for transferring and removing food from fryer.
Fryer Hook:
For attaching the basket to the fryer’s edge during food preparation.
Control Box and Heating Element:
Should not be immersed in liquid and should not be separated when disassem-
bling the fryer.
BEFORE FIRST USE
• Remove all packaging materials prior to use.
• Removable parts should be rinsed with hot water and dried prior to use.
CAUTION: never immerse power cord or control box/ heating elements of the
dryer into any liquids.
• Place on a leveled surface, away from external heat sources or flammables.
• Fill with proper oil amounts prior to use. Make sue the fryer remains unplugged
prior to the appliance’s complete setup.
• You may wipe the inner chamber of the viewing window with a hint of oil to
prevent condensation during use.
• Check the temperature control and timer dials so that they’re in the OFF position
before operating.
• Plug the power cord into an available outlet.
• Select the desired temperature and timer settings using the designated dials.
The indicator light should turn o once the desired temperature is reached.
OIL AND FOOD APPLICATION
• To reduce oil splatter, Lower the basket slowly into oil. If oil starts to rise within
the tank, lift the fryer basket and allow oil to settle before lowering food slowly
into the oil once again.
• Fill the oil to the appropriate capacity, 2.5 liters at the minimum, not exceeding 4
liters in total.
• When frying frozen foods, remove ice particles and thaw properly. Make sure
foods are as dry as possible prior to frying and refrain from adding water or ice,
since they may cause hot oil to splatter.
• If reusing oil, strain first to remove settled food particles.
• Replace oil immediately if:
1-Unpleasant odor is emitted.
2-Excessive smoke emittance occurs during heating.
3-Oil turns dark in color.
4-Oil has been stored for prolonged time periods.
• Routinely replace oil after every 10-15 uses.
• When frying cycle is complete, turn the temperature and timer dials to the OFF
position and unplug the fryer.
• Remove the fryer lid and place the fryer basket using the designated hook to
allow the excess oil to accumulate in the oil tank.
CAUTION: Removing the fryer lid causes the release of hot steam which can
cause severe burns.
OIL TANK
• Refrain from storing oil in the tank while the control with element are still
assembled.
• Allow the oil to cool completely prior to attempting to clean or store oil.
• Remove the control with element and set on paper towel atop a cookie
sheet. The element will still contain oil residue at that time.
• Carefully lift the oil tank out of the stainless base.
• Do not place oil in the refrigerator while still contained in the oil tank with
its control panel in place. Never place the appliance in your refrigerator.
Instead, remove oil and store in a tightly sealed container prior to
refrigerating.
REPLACING THE FILTERS
Change the carbon filter every 6 months.
Change the oil filter every 12 months.
Filter replacement instructions:
1. Unclip and remove the filter cover.
2. Remove both, black and white, filter parts.
3. Discard old filters and replace with new ones. Make sure the white filter
piece rests into the metal surface directly below the (black) carbon filter.
CLEANING TUTORIAL
1. Turn the switch OFF.
2. Unplug the appliance from its electrical wall outlet and remove the
unit's magnetic plug.
3. Allow unit to cool completely.
4. Once cooled, disassemble the unit by reversing the assembly steps.
5. Proceed to clean the parts as directed.
• All fryer parts are fully immersible in water and dishwasher safe, except
the control panel with heating element, and its magnetic plug.
• NEVER IMMERSE temperature control panel or magnetic plug in liquid.
• Remove the filter from the fryer prior to immersing in water.
CLEANING FRYER CONTROL PANEL AND MAGNETIC CORD
Clean with a damp dishcloth that has been dipped into water and mild dishwashing
soap. Proceed to wipe down all parts of the temperature control panel and heating
element. Rinse the cloth and wipe all soap residues. Similarly, wipe down the
magnetic plug and cord. Do not reassemble the deep fryer until all parts are
thoroughly dry.
• Refrain from using abrasive scouring brushes or chemical cleaners while
cleaning the device.
CLEANING LID AND FILTERS
Lift the filter lid to remove both filters. Wash the filters in warm, soapy water and
rinse thoroughly. Allow filters to dry completely and then follow assembly instruc-
tions to properly reassemble prior to appliance use.
CLEANING OIL TANK, FRYER LID, AND FRY BASKETS
These parts are fully immersible and dishwasher safe. Fryer should be thoroughly
cleaned prior to each use. Dishwasher use may alter the product color or appear-
ance, but it won't aect the appliance's performance.
WARRANTY DETAILS
This product is guaranteed under a 1 year limited warranty period, applicable to the
original purchaser and not transferable to a third party user.
Repair or replacement of defective parts are at the seller's discretion. In the event
that repair isn't possible, the seller will replace the product/ part. If product repair/
replacement won’t suce, the seller has the option of refunding the cash value of
the product or component returned.
Product defects not covered under the warranty provisions include normal wear
and damage incurred from use or accidental negligence, misuse of instruction
specifications, or repair by unauthorized parties. The manufacturing company is not
liable for any incidental or consequential damages incurred by such circumstances.

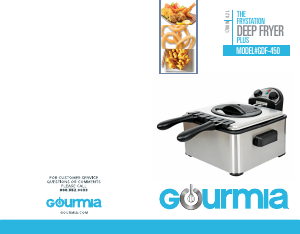

Praat mee over dit product
Laat hier weten wat jij vindt van de Gourmia GDF450 Friteuse. Als je een vraag hebt, lees dan eerst zorgvuldig de handleiding door. Een handleiding aanvragen kan via ons contactformulier.