
STRONG
STANDARD
DRAIN
Dear Friend,
At the outset, we at Haier thank you for your interest in our range of products. A unique and
international range of appliances designed solely with the purpose of making modern life
simpler. And how! The entire Haier range of appliances, ranging from refrigerators,
televisions, washing machines, airconditioners, microwave ovens, dishwashers and
wine-coolers, combines the best of technology, features, performance and styling. All, a result
of our perfect understanding of your lifestyle and your needs.
But what is a great product without great service? Leaving no stone unturned in giving you the
best of service, we have also established an extensive network of authorised dealers and
authorised service centres, so that you get a lifetime of great and timely service for your Haier
appliance.
It has been an honour and a pleasure bringing these hi-tech products to you and we hope that
you get as much happiness using them as we have got, creating them for you.
Happy Inspired Living!
Thanking you,
CONTENTS
NAMES OF THE PARTS 1
SAFETY PRECAUTIONS 2
INSTALLATION AND ADJUSTMENT 4
PREPARATION BEFORE WASHING 7
THE MANDATORIES FOR WASHING 8
USAGE OF THE DETERGENT 8
WASHING SEQUENCE 9
TROUBLE-SHOOTING 13
PACKING LIST & SPECIFICATIONS 15
Pleasecheckifthepowerreceptacleisingoodearthingcondition
beforeuse,toguaranteeyoursafety.
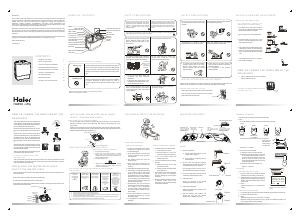
Buzzer
Water-inlet
Water inlet selector handle
Wash selector
Wash/Soak timer
Control panel
Overflow filter
Quick water-filling entrance
Drain hose hook
Water level adjusting lever
Lint filter(Installed by user)
Drain hose
Wash tub cover
Outer cover of the spin tub
Inner cover of the spin tub
Spin timer
Spin tub frame
Spin tub
Cabinet
Base frame
Wash tub
Pulsator
MEANING AND DESCRIPTION OF THE SYMBOLS
Contentsmarkedwiththatsymbolarerelatedtothesafetyof
theproductandpersonalsafetyoftheusers.Pleaseoperate
instrictconformitytothecontents,otherwiseitmaycause
damagetothemachineorinjurethepersonalsafetyofthe
user.
Forbidding sign
Contentsmarkedwiththatsymbolareforactionsforbidden
to perform. Performing of those actions may result in
damageofthemachineorinjurethepersonalsafetyofthe
user.
Warning sign
NAMES OF THE PARTS
1
INSTALLING THE WATER INLET HOSE;
SELECT THE WATER LEVEL
Insertthewaterinlethoseintothewater-fillingentranceonthecontrolpaneldirectly(Pullit
outtodismantleit).
Selectwaterlevelaccordingtothequantityofthelaundry.
Setthewaterleveladjustinglevertotherequiredline.
Usethenewwaterinlethoseprovidedwiththemachinetoconnecttothewaterfaucet.Old
hosesetsshouldnotbereused.
You can fill water into the wash tub directly through this entrance. It can reduce the
humidity inside the control panel significantly and prolong the operating life of the
components.
Insertthewaterinlethoseintothewater-fillingentrance,thenpushthewater-fillingjointer
intothequickwater-fillingentrance.(Todismantlethewaterinletpipe,justpushthecontrol
handleasindicatedinthefigureandpullitout.)
QUICK WATER-FILLING ENTRANCE
Quick water-filling entrance
Water inlet hose
Water inlet jointer
Control handle
Push
Quick water-filling entrance
6
HOW TO CHANGE THE DIRECTION OF THE
DRAIN HOSE
• Figure1indicatestheex-factoryinstallation
positionofthedrainhose.
Takeoffthedrainhosefromthehanginghole
ofthecabinet.Pullthedrainhosefixinghook
outwardsgentlytotakeoutthedrainhosefrom
thetwofixinghooks.(AsperFigure2)
o
Rotatethedrainhosefixinghookby90 totake
itoutfromtheinstallationhole.(AsperFigure
3).
Installthe two drainhose fixing hookstaken
outintotheinstallationholeattheothersideof
thebaseframe(toaimattheinstallationhole
accuratelyyoucanleanthewashingmachine
o
forwardslightly).Thenrotate90 (AsperFigure
4).
Pullthefixinghookoutwardsslightly.Inlaythe
drainhoseintothefixinghooksreliablyalong
thegrooveatspintubside,andmakeitextend
towardsthespintubside.
Thenhangthedrainhoseintothehanginghole
atthespintubside.(AsperFigure5).
EXTEND THE DRAIN HOSE FROM
THE REAR SIDE
Takeoutthedrainhosefromthefixinghook.Extenditfromtherearside(Whenthedrain
hoseisextendedfromtherearside,itcanbehungonthepointfordrainhose,atthetwo
sidesofthecabinet.)(SeeFigure6).
EXTEND THE DRAIN HOSE FROM THE
SIDE OF SPIN TUB
Figure 1
Drain hose
fixing hook
Figure 2
Drain hose
fixing hook
Pull outwards
slightly
Side sectional view
Fixing hook
installation hole
Drain hose
Take off
the drain hose
Figure 3
Take off the fixing
hook do wnwards
Rotate the fixing
hook for 90
Figure 4
Insert the fixing hook into the
installation hole upwards
Rotate the fixing
hook for 90
to fix it
Figure 5
Figure 6
5
SAFETY PRECAUTIONS
Donotputthemachineatadampplace
like the bathroom. Never wash it with
water.Donotplacewetlaundryonthe
controlpanel.
o
Donotusewaterhotterthan50 C.
For washing machines with ventilation
openingsatthebase,makesurethata
carpetdoesnotobstructtheopenings.
Ventilation
hole at the
bottom of
thewashing
machine.
Do not wash water-proof laundry like
raincoat, bike covers etc. to avoid
abnormalvibrationsinspinning.
• Do not let the machine share one
receptacle with other electrical
appliances.
• Ifthepowerplugisdamaged,orthe
pluggingintothereceptacleisloose,
donotusethepluganymore.
When the machine is being used normally,
pleaseputthepowerplugatthelocationeasyto
beinsertedandextractedbyhand.Besureto
pulltheplugoffwhenthereispowerfailureor
themachineisbeingmoved,cleanedorwhenit
isidle.
Ifthesupplycordisdamaged,itmustbereplacedbythemanufactureroritsserviceagentora
similarlyqualifiedpersoninordertopreventamishap.
Please insert the power cord into special
receptaclewithratedvoltage.Besuretouse
single-phasethreepinreceptacle.Theearthing
terminal of the receptacle must be earthed
reliably. If possible, please adopt electric
leakageprotector.
2
PAY ATTENTION TO THE FOLLOWING BEFORE WASHING
THE LAUNDRY
a. Checkifthelaundryiscompatibletowashinginmachines.
b. Dividethelaundryinwhichcolourrunsandwashseparately.
c. Soakthelaundrywhichabsorbswaterwithdifficultybyhand.
d. Fortheheavilysoiledlaundry,firstremovedirtlikemudordust.Pleaseapplydetergentonthesoiledpartsin
advance.Thismakesiteasierforthestaintoclean.
e. Forlaundrywhichmaygetstuckinlintballorwithfur,pleaseturntheclothoverbeforeputtinginthemachine.
f. Donotputlaundrypollutedbychemicalsintothewashingmachinedirectly.
Checkifthe
laundry
hasspecial
requirement
for
washing.
Clearthe
pocket.Take
outthecoins,
sand,hairpins
etc.
Thequantity
ofthelaundry
shouldnotbe
toolarge.
Stretchand
loosenthe
laundry
beforeputting
itinthe
tub.
Whenthe
pulsatoris
running,the
buttons
ofthelaundry
maymakenoise.
Forthesake
ofdiscretion,
pleaseputthe
laundrywith
buttons
separately.
Tiethelong
strips,fasten
thebuttons,
closezippers.
7
SAFETY PRECAUTIONS
Do not stretch hands into the machine
whenitisswitchedON.Itisdangerous
eveniftherotationisslow.Takespecial
careofchildren.
Do not dismantle, repair or alter the
machinebyyourself.
Donotputanyhotorheavyitems(such
asakettlewithhotwater)onthewashing
machine.
Donotwashlaundrywithvolatilematerials
(suchasthinner,petroletc.).
Petro
l
Th
inner
Handicapped or children without
supervisionmustnotusethemachine.
Keep the machine away from direct
sunlightandheatsourcelikeheater.
• Toprotectyourlaundryandwashing
machine, please take out all coins,
buttons, sand, hairpins and other
foreign materials from the clothes
beforewashing.
• Please check if the water faucet is
open,andtheconnectionofthewater
inletpipeisproper.
• It is suggested to use foamless
washingpowder.
3
HOW TO USE WHITENER
• Fillwater to the decided level. Dilute
whitenerwithcontainer.Pouritslowly
intothewashingtub.
• Avoidusingwhiteneronlaundrywith
coloursorpatternsastheyareprone
tolosingcolour.
• The whitener should not touch the
laundrydirectly.
• Refer to the user's manual for the
usageandquantityofthewhitenerto
beused.
• Pleasedissolvewhitenerbeforeusing.
• Thecapacityofwashingandspinning
of the machine refer to the largest
weightofthestandardlaundryunder
dryconditionsthatcanbewashedor
spinnedatonetime.Laundryquantity
in one washing cycle should be less
thantheratedcapacityifwashingand
spinningatthesametime.
• Thethickness,size,typeofclothwill
influencetheactualwashingcapacity.
It is suitable to put in reasonable
amountoflaundryandthelaundrycan
be turned round in washing for one
timewashing.
• Donot select"Maximum"waterlevel
forlaundrylessthan2.4kg.toavoid
splashingofwater.
• Itissuggestednottousehighsudsing
detergent.
HOW TO USE WASHING POWDER
• Todirectlydissolveitinthemachine:
1. Fillsmallquantityofwater.
2. Add the powder to it. Run for 3
secondstodissolveitcompletely.
3. Put in the laundry. Select the
suitablewaterlevel.
• Forinstantdissolvingofthewashing
powder:
o
1. Preparewarmwaterof30 Cand
pourintoacontainer.
2. Addthepowderandkeepstirring
tofullydissolveit.
• Thepowderismorepronetopolluting
the laundry than the detergent.
Therefore please use in with proper
quantities.
• Dosageofdifferentwashingpowders
is different. Please refer to the
instructions of the washing powder
forthedetaileddosage.
THE MANDATORIES FOR WASHING
USAGE OF DETERGENT
8
INSTALLATION AND ADJUSTMENT
INSTALLING THE LINT FILTER
Overflowfilter
Lintfilter
Please install and adjust the machine according to the requirements mentioned in the
manual.Itisveryimportantforyoursecurityandcorrectoperationofthemachine.
Afteropeningthepackage,pleasetakeoutthelintfilter
fromthedocumentbag, andinstallittotheoverflow
filterofthewashtub.(Seefigure)
USAGE OF THE DRAIN HOSE
TH E DRAINAGE S HOU LD B E
SMOOTH WITH THE DRAIN HOSE.
1. The height of the drain hose should be
lessthan10cmelsethedrainagewillnot
besmoothandwillbeincomplete.
2. Donottramponorpressthedrainhose.
3. Ifthedrainhoseistoolong,cutitatmid
point.Forsmoothdrainage,cutthefront
endofthehoseataslant.
4. Ifextradrainhoseisneeded,pleasemake
aseparatepurchase.Theinnerdiameter
oftheextrahoseshouldnotbelessthan
30mm,andthelengthshouldnotexceed
1.5m.
Iftheextrahoseistoolong,cutiteitherat
pointAorB.(Seefigure)
<10cm
> 30mm
<1.5m
BA
4
9
WASHING SEQUENCE
Overfilling sign
Water-filling selector handle
Wash/Soak timer
Wash selector
Buzzer
Water inlet
(To set to below 2 minutes,
first set to 5 minutes then
turn it back. It increases
the life of the timer).
(Strong speed,
Standard speed)
(The buzzer will ring
whenthewashingcycle
finishes)
Spin timer
(To set to below 1 minute,
first set to 2 minutes then
turn it back. It increases
the life of the timer).
WASH
1. Water-fillingselector
(1) Set the water-filling selector to the
"WASH"side.(Figure1)
(2) Setthewaterleveladjustingleverto
thedesiredline.
2. Fill the water and add the dissolved
washingpowdertomakethewaterlevel
reachthepresetposition.(Figure2)
Runwashingprogramfor sometimeto
stiranddissolvethepowdercompletely.
3. Putinthelaundry.Ifthewaterquantityis
insufficient,pleaseaddmorewater.
4. Selectthespeed.
Select the strength of the speed
accordingtothelaundry.(Figure3)
5. Selectthewashingtime.
Selectthewashingtimeaccordingtothe
laundry.(Figure4)
6. After the washing cycle finishes, the
buzzer will ring. Set the "WASH
SELECTOR"at"DRAIN".(Figure5).
WASH SELECTOR
Figure 3
WASH SELECTOR
Figure 4
Figure 5
Figure 2
Figure 1
SPIN
WASH
#
SOAK TIMER
INSTALLATION AND ADJUSTMENT
HOW TO CHANGE THE DIRECTION OF THE
DRAIN HOSE
INSTALLING THE WATER INLET HOSE;
SELECT THE WATER LEVEL
PREPARATION BEFORE WASHING
PREPARATION BEFORE WASHING
1. Connectthewaterinlethose.
2. Confirm that the washing machine is earthed
reliably. Then insert the power plug into the
receptacle.Donotconnecttheearthterminaltothe
gaspipeandtapwaterpipe.
3. Putdownthedrainhose.
4. Slantingoruneven groundmayresultin unstable
working or abnormal noise. Please make the
machinestandhorizontally.
Outercoverof
Thespintub
Innercoverof
Thespintub
Thelaundry
is slanting
Gland
Push
Proper
Push
Proper
Nogland
SPIN
WASH
1.Putthelaundryintothespintubevenlyandsmoothly.
2.Spin
(1)Puttheglandinproperly,evenifthelaundryquantityissmall.
(2)Closetheinnerandoutercoverofthespintub.
(3)Spinfor1-2minutes.
3. Runthefoam-removingspin.
(1) Opentheoutercoverofthespintub.
(2) Setthewater-fillingselectorcontrolrod
atthe"SPIN"side.Fillwaterforabout1
minute.Ifthewaterquantityfilledistoo
large, the water may flow out from the
washtubside.Pleasetwistthewatertap
tolimitthewaterlevel.
(3)Closetheoutercoverofthespintub.
Spinfor1-2minutes.
MIDWAY SPINNING
RINSING
RINSE WITH WATER-FILLING
1. Putthelaundryintothewashtub.Select
suitablecurrentaccordingtothelaundry.
2. Adjustthewaterlevel.Setthewaterlevel
adjustingleveraccordingtothequantityof
laundry.Thenfillsuitablequantityofwater
continuously.
3. Rinse:
Adjustthewashtimerto5-7minutestodo
rinsing.
(Repeatthemidwayspinningand
rinsing with stored water 2-3
times).
OVERFILL
If you find water
flowing out here,
pleasetwistthewater
tap to limit the water
level.
RINSE WITH STORED WATER
1. Putthelaundryintothewashtub.Selectsuitablespeedaccordingtothelaundry.
2. Fillwatertopresetwaterlevel.
3. Rinse:
Adjustthewashtimerto2-3minutestodorinsing.
Whenthelaundryquantityisbelow2.4kg.,pleaseuse"Standard"speed.Ifyou
use"Strong"speed,watermaysplash.
7
STRONG
STANDARD
DRAIN
OFF
6
9
1
2
25
3
5
1
5
45
PR
OG
RAM
S
EL
ECT
O
R
T
I
ME
R
SP
IN
T
IM
E
R
O
FF
1
2
3
OFF
MAX
BUZZER
OFF
6
9
12
2
5
3
5
15
45
T
I
M
ER
STRONG
STANDARD
DRAIN
OFF
MAX
BUZZER
STRONG
STANDARD
DRAIN
PROGRAM
SELECTOR
OFF
6
9
12
25
35
15
45
Water inlet hose
Water inlet
Maximum
Max.
Minimum
Min
Medium
Med
Water level
indicator
STRONG
STANDARD
DRAIN
OFF
6
9
12
25
35
15
45
PROGRAM
SELECTOR
TIMER
SPIN
TIMER
OFF
1
2
3
OFF
MAX
BUZZER



Praat mee over dit product
Laat hier weten wat jij vindt van de Haier XPB68-116S Wasmachine. Als je een vraag hebt, lees dan eerst zorgvuldig de handleiding door. Een handleiding aanvragen kan via ons contactformulier.