
840303800 10/18
IMPORTANT SAFEGUARDS
PRÉCAUTIONS IMPORTANTES
Lors de l’utilisation d’appareils électroménagers, des précautions préliminaires de sécurité
doivent toujours être observées, y compris ce qui suit :
1. Lire toutes les instructions.
2. Cet appareil n’est pas destiné à être
utilisé par des personnes (y compris
les enfants) dont les capacités
physiques, sensorielles ou mentales sont
réduites, ou manquant d’expérience
et de connaissance, sauf si elles sont
étroitement surveillées et instruites
sur l’utilisation de l’appareil par une
personne responsable de leur sécurité.
3. Une surveillance étroite est requise pour
tout appareil utilisé par ou près des
enfants. Surveiller que les enfants ne
jouent pas avec l’appareil.
4. Ne pas toucher les surfaces chaudes.
Utiliser les poignées ou les boutons.
Utiliser des sous-plats pour déposer les
récipients chauds.
5. Pour se protéger contre le risque de
choc électrique, ne pas immerger le
cordon, la fiche ou la base dans l’eau ou
tout autre liquide.
6. Débrancher l’appareil de la prise de
courant électrique lorsqu’il n’est pas
utilisé et avant un nettoyage. Le laisser
refroidir avant un nettoyage et avant d’y
placer ou d’y enlever des pièces.
7.
Ne pas faire fonctionner un appareil
électroménager avec un cordon ou une
fiche endommagée, ou lorsque l’appareil
ne fonctionne pas bien ou a été échappé
ou endommagé d’une manière quelconque.
Le remplacement et la réparation du
cordon d’alimentation doivent être faits par
le fabricant, son agent de service ou toute
personne qualifiée de façon à éviter tout
danger. Appeler le numéro de service à la
clientèle fourni pour des renseignements
concernant l’examen, la réparation ou
l’ajustement.
8. L’utilisation d’accessoires non
recommandés par le fabricant de
l’appareil peut causer des blessures.
9. Ne pas utiliser à l’extérieur.
10. Ne pas laisser le cordon pendre du bord
d’une table ou d’un comptoir, ou toucher
des surfaces chaudes, y compris la
cuisinière.
11. Ne pas placer le pot amovible ou base
sur ou près d’un brûleur à gaz chaud, ou
d’un élément électrique.
12. Il est nécessaire de faire preuve de la
plus grande prudence en déplaçant
un appareil électroménager contenant
de l’huile chaude ou d’autres liquides
chauds.
13. Pour débrancher le cordon, tourner les
boutons de rélage à OFF ( /arrêt) puis
débrancher la fiche de la prise murale.
Pour débrancher, saisir la fiche et la
retirer de la prise. Ne pas tirer sur le
cordon d’alimentation.
14. Ne pas utiliser l’appareil électroménager
à une fin autre que celle prévue.
15. ATTENTION : Afin de prévenir
l’endommagement ou le risque de
choc, ne pas cuire dans la base. Cuire
seulement dans le pot amovible.
16. AVERTISSEMENT ! Les éclaboussures
d’aliments peuvent causer des brûlures
sérieuses. Garder l’appareil et son
cordon hors de la portée des enfants.
Ne jamais laisser pendre le cordon sur
le bord du comptoir, ne jamais utiliser
une prise située sous le comptoir et ne
jamais utiliser avec une extension.
17. Le pot peut rester chaud une fois que
l’appareil est éteint.
18. Éviter les changements soudains
de température, tels que l’ajout de
nourriture sortant du réfrigérateur dans
un pot amovible chauffé.
19. Conçu pour être utilisé sur un comptoir
seulement.
CONSERVER CES INSTRUCTIONS
Autres consignes de sécurité pour le consommateur
Cet appareil destiné à un usage domestique uniquement.
w AVERTISSEMENT
Risque de choc
électrique : Ce produit est fourni avec une
fiche polarisée (une broche large) pour
réduire le risque d’électrocution. Cette fiche
n’entre que dans un seul sens dans une
prise polarisée. Ne contrecarrer pas l’objectif
sécuritaire de cette fiche en la modifiant de
quelque manière que ce soit ou en utilisant
un adaptateur. Si vous ne pouver pas insérer
complètement la fiche dans la prise, inverser
la fiche. Si elle refuse toujours de s’insérer,
faire remplacer la prise par un électricien.
Un cordon d’alimentation court est
utilisé pour éviter le risque d’être attrapé
par un enfant, de s’enchevêtrer ou un
trébuchement provoqué par un cordon plus
long.
Pour éviter la surcharge du circuit
électrique, ne pas utiliser un autre appareil à
haute puissance sur le même circuit que cet
appareil.
When using electrical appliances, basic safety precautions should always be followed to
reduce the risk of fire, electric shock, and/or injury to persons, including the following:
1. Read all instructions.
2. This appliance is not intended for use by
persons (including children) with reduced
physical, sensory, or mental capabilities,
or lack of experience and knowledge,
unless they are closely supervised
and instructed concerning use of the
appliance by a person responsible for
their safety.
3. Close supervision is necessary when any
appliance is used by or near children.
Children should be supervised to ensure
that they do not play with the appliance.
4. Do not touch hot surfaces. Use handles
or knobs. Use pot holders when removing
hot containers.
5. To protect against risk of electrical shock,
do not immerse cord, plug, or base in
water or other liquid.
6. Unplug from outlet when not in use and
before cleaning. Allow to cool before
putting on or taking off parts.
7. Do not operate any appliance with a
damaged supply cord or plug, or after
the appliance malfunctions or has been
dropped or damaged in any manner.
Supply cord replacement and repairs
must be conducted by the manufacturer,
its service agent, or similarly qualified
persons in order to avoid a hazard. Call
the provided customer service number
for information on examination, repair, or
adjustment.
8. The use of accessory attachments
not recommended by the appliance
manufacturer may cause injuries.
9. Do not use outdoors.
10. Do not let cord hang over edge of
table or counter or touch hot surfaces,
including stove.
11. Do not place on or near a hot gas or an
electric burner, or in a heated oven.
12. Extreme caution must be used when
moving an appliance containing hot oil or
other hot liquids.
13. To disconnect cord, turn to OFF ( ); then
remove plug from wall outlet. To unplug,
grasp the plug and pull from the outlet.
Never pull from the power cord.
14. Do not use appliance for other than
intended use.
15. CAUTION: To prevent damage or shock
hazard, do not cook in base. Cook only in
removable crock.
16. WARNING! Spilled food can cause
serious burns. Keep appliance and cord
away from children. Never drape cord
over edge of counter, never use outlet
below counter, and never use with an
extension cord.
17. Crock may remain hot after unit is turned
off.
18. Avoid sudden temperature changes,
such as adding refrigerated foods into a
heated crock.
19. Intended for countertop use only.
SAVE THESE INSTRUCTIONS
Other Consumer Safety Information
This appliance is intended for household use only.
w WARNING
Electrical Shock Hazard: This
appliance is provided with a polarized plug
(one wide blade) to reduce the risk of electric
shock. The plug fits only one way into a
polarized outlet. Do not defeat the safety
purpose of the plug by modifying the plug in
any way or by using an adapter. If the plug
does not fit fully into the outlet, reverse the
plug. If it still does not fit, have an electrician
replace the outlet.
A short power-supply cord is used to reduce
the risk resulting from it being grabbed by
children, becoming entangled in, or tripping
over a longer cord.
To avoid an electrical circuit overload, do not
use another high-wattage appliance on the
same circuit with this appliance.
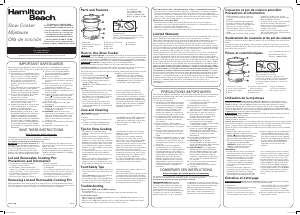
Parts and Features
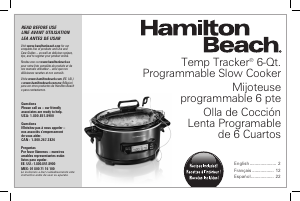
Programmable Slow Cooker
Mijoteuse programmable
Olla de cocción programable
Read before use.
Lire avant utilisation.
Lea antes de usar.
Lid and Crock: Precautions and Information
• Please handle crock and lid carefully to
ensure long life.
• Avoid sudden, extreme temperature changes.
For example, do not place a hot lid or crock
into cold water, or onto a wet surface.
• Avoid hitting crock or lid against faucet or
other hard surfaces.
• Do not use crock or lid if chipped, cracked,
or severely scratched.
• Do not use abrasive cleansers or metal
scouring pads.
• The bottom of crock is very rough and can
damage countertop. Use caution.
• The crock and lid can become very hot.
Use caution. Do not place directly on any
unprotected surface or countertop.
• The crock is microwave-safe and oven-
proof, but never heat crock when empty.
Never place crock on a burner or stove top.
• Do not place lid in a microwave oven,
conventional oven, or on stove top.
Removing Lid and Crock
When removing lid, tilt so that opening faces away from you to avoid being burned by steam.
The sides of the slow cooker’s base get very warm because the heating elements are located
here. Use handles on base if necessary. Use oven mitts to remove crock.
To order parts:
US: 1.800.851.8900
www.hamiltonbeach.com
Canada: 1.800.267.2826
México: 01 800 71 16 100
Pour commander des pièces :
www.hamiltonbeach.ca
Canada: 1.800.267.2826
How to Use Slow Cooker
w WARNING
Food Safety Hazard. Food must be hot enough to prevent bacterial growth before using WARM
setting. The WARM setting should only be used after a recipe has been thoroughly cooked. Do not reheat food on
WARM setting. If food has been cooked and then refrigerated, reheat it on LOW or HIGH and then switch to WARM.
Visit foodsafety.gov for more information.
w CAUTION
Burn Hazard. Escaping steam is hot. Use oven mitts to lift lid.
Before first use: Wash Lid and Crock in hot, soapy water. Rinse and dry.
Crock capacity:
For best results, fill Crock no more than 1 inch (2.5 cm) from the rim. If only half-filled, check for
doneness 1 to 2 hours earlier than recipe states.
1. Plug into outlet.
2. Add ingredients to Crock.
3. Place Lid on Crock. The Lid should sit level on the
Crock for even cooking and to prevent heat loss.
Cooking Modes
No matter what you plan to cook, the programmable Slow Cooker has three cooking modes to make it easy.
If you will be away when your food is finished
cooking: Use Program Mode. Input preferred amount of
cooking time and the Slow Cooker automatically shifts
to WARM at the end of the selected cooking time. Food
won’t overcook!
If you are cooking a large cut of meat or using
a recipe that requires food to reach a certain
temperature: Use PROBE Mode. For many foods,
especially large cuts of meat like roasts, chicken, turkey,
and pork, internal food temperature is the best test for
doneness. The temperature Probe with this Slow Cooker
takes the guesswork out of slow cooking. Select the
desired internal food temperature and the Slow Cooker
will automatically shift to WARM once the temperature
is reached. By using the Cooking Guide for Probe, you
can estimate the amount of time the food will need to
cook. Visit foodsafety.gov for more information about
cooking times.
If you want to cook the traditional way without
setting a time or if you want to heat previously
cooked food: Use MANUAL Mode, which allows you to
select traditional High or Low settings.
To keep heated foods warm: Select the WARM
setting in any of the three cooking modes: PROGRAM,
MANUAL, or PROBE.
PROGRAM Mode
1. Press On/Off button ( ) to turn on.
2. Press PROGRAM. “Cooking Time” will illuminate.
3. Press arrows to select cooking time, or for Manual
Mode, press arrows to select heat setting.
4. Press ENTER. “Heat Setting” will illuminate.
5. Press arrows to select heat setting. NOTE: Do not
use WARM setting to cook food.
6. Press ENTER to start and a 3-second beep will
sound. NOTE: Slow Cooker will automatically
start in 20 seconds if ENTER is not pressed.
Display will alternate between heat setting and
remaining time.
7. At the end of cook time, Slow Cooker will
automatically switch to WARM setting. Unit will
turn off and display “OFF” after a total of 14 “ON”
hours if On/Off button ( ) is not pressed.
MANUAL Mode
1. Press On/Off button ( ) to turn on.
2. Press MANUAL. “Heat Setting” will illuminate.
3. Press arrows to select heat setting. NOTE: Do not
use WARM setting to cook food.
4. Press ENTER to start and a 3-second beep will
sound. NOTE: Slow Cooker will automatically
start in 20 seconds if ENTER is not pressed.
The display will alternate between “COOK” and heat
setting (if HIGH or LOW is selected).
5. Press On/Off button ( ) to turn off Slow Cooker.
Unit will turn off and display “OFF” after a total of
14 “ON” hours if On/Off button ( ) is not pressed.
PROBE Mode (on certain models)
1. Make sure Probe is in center of food and not
touching bottom of Crock.
2. Insert Probe into jack on side of Slow Cooker.
3. Press On/Off button ( ) to turn on.
4. Press PROBE. “Heat Setting” will be illuminated.
5. Press arrows to select desired heat setting. Select
HIGH or LOW. NOTE: Do not use WARM setting to
cook food.
6. Press ENTER. “Desired Temp” will illuminate.
7. Press arrows to select desired temperature.
NOTE: To change temperature display from ºF
to ºC:
Press PROBE and ENTER at the same time.
The temperature in ºC will now be displayed. If
the Slow Cooker is unplugged, it will reset to ºF.
8. Press ENTER. “COOK” will display and a 3-second
beep will sound. NOTE: Unit will automatically start
in 20 seconds if ENTER is not pressed. Display
will alternate between actual temperature and the
temperature selected.
9. When selected temperature is reached, the unit will
switch to WARM. The unit will automatically turn
off and display “OFF” after a total of 14 “ON” hours
if On/Off button ( ) is not pressed.
Care and Cleaning
w WARNING
Electrical Shock Hazard. Disconnect power before cleaning. Do not immerse cord, plug, or
base in any liquid.
1. Unplug and cool.
2. Use oven mitts to remove Crock.
3. Wipe metal end of Probe with hot, soapy water.
Rinse and dry.
4. Crock and Lid are dishwasher-safe or wash in
hot, soapy water. Rinse and dry. DO NOT use the
“SANI” setting when washing in the dishwasher.
“SANI” cycle temperatures could damage your
product.
5. Wipe Base with a soft, damp cloth or sponge and
dry.
6. Do not clip Lid during storage. Store with Lid ajar.
Tips for Slow Cooking
• The Crock should be at least half-filled for best
results. If only half-filled, check for doneness
1 to 2 hours earlier than recipe time.
• Stirring is not necessary when slow cooking.
Removing Lid results in major heat loss and the
cooking time may need to be extended. However, if
cooking on HIGH, you may want to stir occasionally.
• If cooking soups or stews, leave a 2-inch (5-cm)
space between the top of the Crock and the food so
that the recipe can come to a simmer.
• Many recipes call for cooking all day. If your
morning schedule doesn’t allow time to prepare a
recipe, do it the night before. Place all ingredients
in Crock, cover with Lid, and refrigerate overnight.
In the morning, simply place Crock in Slow Cooker.
• Some foods are not suited for extended cooking
in a Slow Cooker. Pasta, seafood, milk, cream,
or sour cream should be added 2 hours before
serving. Evaporated milk or condensed soups are
perfect for slow cooking.
• The higher the fat content of meat, the less liquid
is needed. If cooking meat with a high fat content,
place thick onion slices underneath so meat will
not sit on (and cook in) fat.
• Slow Cookers allow for very little evaporation. If
making your favorite soup, stew, or sauce, reduce
liquid called for in original recipe. If too thick, liquid
can be added later.
• If cooking a vegetable-type casserole, there will
need to be liquid in the recipe to prevent scorching
on the sides of Crock.
• If cooking a recipe with root vegetables, place root
vegetables in the bottom of the Crock.
• To prevent lingering food smells, clean rubber Lid
Gasket with hot, soapy water after each use. Do
not clip Cid during storage. Store with Lid ajar.
Food Safety Tips
• Do not use frozen, uncooked meat in the Slow
Cooker. Thaw any meat or poultry before slow
cooking.
• Visit www.foodsafety.gov for more information
on safe internal cooking temperatures.
• To store leftovers after cooking, do NOT place the
entire Crock in the refrigerator since contents will
take too long to cool. Instead, divide leftovers into
smaller containers and place into refrigerator.
• Never allow undercooked or raw meat to sit at
room temperature in the Slow Cooker. Once meat
is placed into the Crock, it should be cooked
immediately (unless prepping Slow Cooker the
night before, where Crock should be placed into
the refrigerator).
Limited Warranty
This warranty applies to products purchased and used in the
U.S. and Canada. This is the only express warranty for this
product and is in lieu of any other warranty or condition.
This product is warranted to be free from defects in material
and workmanship for a period of five (5) years from the date
of original purchase in Canada and one (1) year from the
date of original purchase in the U.S. During this period, your
exclusive remedy is repair or replacement of this product or
any component found to be defective, at our option; however,
you are responsible for all costs associated with returning the
product to us and our returning a product or component under
this warranty to you. If the product or component is no longer
available, we will replace with a similar one of equal or greater
value.
This warranty does not cover glass, filters, wear from normal
use, use not in conformity with the printed directions, or
damage to the product resulting from accident, alteration,
abuse, or misuse. This warranty extends only to the original
consumer purchaser or gift recipient. Keep the original sales
receipt, as proof of purchase is required to make a warranty
claim. This warranty is void if the product is used for other
than single-family household use or subjected to any voltage
and waveform other than as specified on the rating label (e.g.,
120 V ~ 60 Hz).
We exclude all claims for special, incidental, and consequential
damages caused by breach of express or implied warranty.
All liability is limited to the amount of the purchase price.
Every implied warranty, including any statutory warranty
or condition of merchantability or fitness for a particular
purpose, is disclaimed except to the extent prohibited by
law, in which case such warranty or condition is limited
to the duration of this written warranty. This warranty
gives you specific legal rights. You may have other legal
rights that vary depending on where you live. Some states or
provinces do not allow limitations on implied warranties or
special, incidental, or consequential damages, so the foregoing
limitations may not apply to you.
To make a warranty claim, do not return this appliance
to the store. Please call 1.800.851.8900 in the U.S. or
1.800.267.2826 in Canada or visit hamiltonbeach.com in the
U.S. or hamiltonbeach.ca in Canada. For faster service, locate
the model, type, and series numbers on your appliance.
MODELS:
MODÈLES :
33863, 33966,
33969
33863, 33966,
33969
33963,
33967
33963,
33967
Optional
Features
Caractéristiques
en option
PROGRAM
Cooking Heat
Desired
Actual
Temp
Temp
Setting
Time
MANUAL
ENTER
PROBE
PROGRAM
Cooking Heat
Desired
Actual
Temp
Temp
Setting
Time
MANUAL
ENTER
PROBE
1.
Lid
2.
Crock
3.
Base
4.
Steam Vent Holes
5.
Lid Gasket (inside Lid)
6.
Probe Hole
7.
Handles
8.
Clip Latch (on certain models) NOTE: Lid may be latched
during transporting
9.
Control Panel
10.
Probe Jack (on certain models)
11.
Probe (included with certain models)
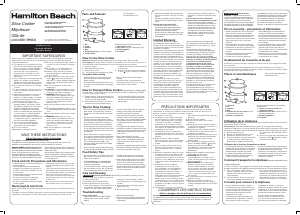
1.
Couvercle
2.
Pot
3.
Base
4.
Orifices d’évacuation
5.
Joint d’étanchéité de couvercle (à l’intérieur du couvercle)
6.
Oeillet
7.
Poignées
8.
Attaches en fil (sur certains modèles)
REMARQUE : Le couvercle peut être verrouillé pour
transporter la mijoteuse
9.
Panneau de contrôle
10.
Prise de sonde (sur certains modèles)
11.
Sonde (compris avec certains modèles)
For questions and other
information:
Pour des questions et
d’autres informations :
Para preguntas y otra
información:
USA Canada México
hamiltonbeach.com
1.800.851.8900
hamiltonbeach.ca
1.800.267.2826
hamiltonbeach.com.mx
01 800 71 16 100
Le invitamos a leer cuidadosamente este instructivo antes de usar su aparato.
Couvercle et pot : précautions et information
• Veuiller manipuler le pot et le couvercle
avec soin pour assurer leur durabilité.
• Éviter des changements de température
brusques et extrêmes. Par exemple, ne
placer pas un couvercle ou un pot chaud
dans l’eau froide ou sur une surface
mouillée.
• Éviter de frapper le pot et le couvercle sur
le robinet ou sur toute surface rigide.
• N’utiliser pas le pot ou le couvercle si l’un
ou l’autre est ébréché, fendillé ou très
écorché.
• N’utiliser pas de nettoyeurs abrasifs ou de
tampon métallique à récurer.
• La base du pot est très rugueuse et peut
endommager un revêtement de comptoir.
Faites preuve de prudence.
• Le pot et son couvercle peuvent devenir
très chauds. Faites preuve de prudence.
Ne les déposer pas directement sur une
surface ou un revêtement de comptoir non
protégés.
• Le pot peut aller au four à micro-ondes
et au four régulier. Évitez, toutefois, de
chauffer le pot lorsqu’il est vide. Ne placer
jamais le couvercle sur un rond de poêle
ou directement sur le poêle.
• Ne placer pas le couvercle dans le four à
micro-ondes, dans le four conventionnel ou
directement sur le poêle.
Soulèvement du couvercle et du pot
Soulever le couvercle de façon à diriger les vapeurs loin de votre visage pour éviter de vous
brûler.
Les côtés de la base de la mijoteuse deviennent très chauds car c’est là que se trouvent les
éléments chauffants. Au besoin, utiliser les poignées sur la base. Utiliser des gants de cuisine
pour retirer le pot.
Pièces et caractéristiques
Utilisation de la mijoteuse
w AVERTISSEMENT
Danger pour la salubrité des aliments. Les aliments doivent être
suffisamment chauds pour prévenir toute croissance bactérienne avant d’utiliser le réglage WARM (chaleur). Le
réglage WARM (chaleur) ne doit être utilisé qu’après la cuisson complète des aliments. Ne réchauffer pas les
aliments placés sous le réglage WARM (chaleur). Si les aliments ont cuit et ont été réfrigérés, réchauffez-les à
température LOW (basse) ou HIGH (élevée) ; passer ensuite au réglage WARM (chaleur). Visiter le site Internet
foodsafety.gov pour de plus amples informations.
w ATTENTION
Risque de brûlure. Le couvercle sera chaud. Utiliser des gants de cuisson ou des poignées
pour le four pour prendre l’appareil.
Avant la première utilisation : Laver le couvercle et le pot dans l’eau chaude savonneuse. Rincer et
assécher.
Capacité du pot :
Pour de meilleurs résultats, ne pas remplir le pot à moins de 2,5 cm (1 po) du bord. Si le pot est rempli
à mi-hauteur, vérifier l’état de cuisson 1 à 2 heures avant l’achèvement du temps de cuisson indiqué dans la recette.
1. Brancher dans la prise.
2. Ajouter les ingrédients dans le pot.
3. Mettre le couvercle sur le pot. Le couvercle doit
reposer correctement sur le pot afin d’assurer une
cuisson uniforme et prévenir la perte de chaleur.
Modes de cuisson
Quoi que vous voulier cuire, la mijoteuse programmable a trois modes de cuisson pour vous faciliter la tâche.
Si vous dever vous absenter avant la fin de la
cuisson de vos aliments : Utiliser le mode PROGRAM
(programme). Inscriver votre durée préférée de cuisson
et la mijoteuse conservera automatiquement au chaud
les aliments à la fin de la durée de cuisson choisie. Vos
aliments ne brûleront pas !
Si vous utiliser une coupe de viande plus grosse
ou si vous suiver une recette dont les aliments
doivent atteindre une température précise :
Utiliser le mode PROBE (sonde). Pour beaucoup
d’aliments, en particulier pour les morceaux de
viande particulièrement gros, comme les rôtis, les
poulets, les dindes et le porc, c’est la température
intérieure des aliments qui indique le mieux le degré de
cuisson. La sonde de température de votre mijoteuse
vous permet d’obtenir automatiquement la bonne
température. Vous choisisser la température intérieure
de l’aliment que vous désirer et la mijoteuse s’arrêtera
automatiquement de chauffer mais continuera à
conserver l’aliment la réglage WARM (chaleur) quand
cette température sera atteinte. En utilisant le guide
de cuisson avec sonde, vous pouver estimer la
durée de cuisson des aliments. Visiter le site Internet
foodsafety.gov pour de plus amples informations sur la
durée de cuisson.
Si vous souhaiter suivre un mode de cuisson
traditionnel sans régler de durée ou si vous vouler
réchauffer des aliments déjà cuits : Utiliser le
mode MANUAL. Ce mode vous permet de choisir les
réglages traditionnels HIGH (élevée) ou LOW (basse).
Pour garder la chaleur des aliments réchauffés :
Seleccioner la réglage WARM (chaleur) dans l’un des
trois modes : PROGRAM (programme), MANUAL, ou
PROBE (sonde).
Mode de PROGRAM (programme)
1. Appuyer sur le bouton marche/arrêt ( ) pour
mettre en marche.
2. Appuyer sur PROGRAM (programme). « Cooking
Time » (durée de cuisson) s’allume.
3. Appuyer sur les flèches pour choisir la durée de
cuisson, ou pour passer en mode manuel, appuyer
sur les flèches pour sélectionner le réglage de
chaleur.
4. Appuyer sur ENTER (entrée). « Heat Setting »
(réglage de température) s’allume.
5. Appuyer sur les flèches pour choisir la réglage
de température. REMARQUE : N’utiliser PAS
le réglage de degré de conservation de WARM
(chaleur) pour cuire les aliments.
6. Appuyer sur ENTER (entrée) pour mettre en
marche la mijoteuse et un signal sonore de 3
secondes se fait entendre. REMARQUE : Votre
appareil se met automatiquement en marche au
bout de 20 secondes si vous n’appuyer pas sur
ENTER (entrée). L’écran indique alternativement
le réglage de chaleur et le temps résiduel.
7. À la fin de la période de cuisson, la mijoteuse
passera automatiquement au réglage WARM
(chaleur). L’appareil s’éteindra et affichera « OFF »
(arrêt) au bout de 14 heures au total si le bouton
marche/arrêt ( ) n’est pas appuyér.
840303800 v04.indd 1 10/3/18 3:52 PM


Praat mee over dit product
Laat hier weten wat jij vindt van de Hamilton Beach 33967 Slowcooker. Als je een vraag hebt, lees dan eerst zorgvuldig de handleiding door. Een handleiding aanvragen kan via ons contactformulier.