IMPORTANT SAFEGUARDS
When using electrical appliances, basic safety precautions should always be followed to reduce the
risk of fire, electric shock, and/or injury to persons, including the following:
1. Read all instructions.
2. This appliance is not intended for use by
persons (including children) with reduced
physical, sensory, or mental capabilities, or
lack of experience and knowledge, unless
they are closely supervised and instructed
concerning use of the appliance by a person
responsible for their safety.
3. Close supervision is necessary when any
appliance is used by or near children.
Children should be supervised to ensure that
they do not play with the appliance.
4. Do not touch hot surfaces or hot water. Use
handles or knobs. Care must be taken since
burns can occur from touching hot parts or
from spilled hot liquid.
5. To protect against fire, electric shock, and
personal injury, do not immerse cord, plug,
power base, or electric kettle in water or
other liquid.
6. Unplug from outlet when kettle is not in use
and before cleaning. Allow to cool before
putting on or taking off parts, and before
cleaning the appliance.
7. Do not operate any appliance with a
damaged supply cord or plug, or after the
appliance malfunctions or has been dropped
or damaged in any manner. Supply cord
replacement and repairs must be conducted
by the manufacturer, its service agent,
or similarly qualified persons in order to
avoid a hazard. Contact Customer Service
for information on examination, repair,
or adjustment as set forth in the Limited
Warranty.
8. The use of accessory attachments not
recommended or sold by the appliance
manufacturer may cause a risk of injury to
persons.
9. Do not use outdoors.
10. Do not let cord hang over edge of table or
counter, or touch hot surfaces, including the
stove.
11. Do not place electric kettle on or near a hot
gas or electric burner or in a heated oven.
12. To disconnect electric kettle, turn any control
to OFF ( ) and then remove plug from wall
outlet. To unplug, grasp the plug and pull
from the outlet. Never pull from the power
cord.
13. Do not use appliance for other than intended
use.
14. Do not use for other than heating water.
Other liquids or food will contaminate the
interior and void warranty.
15. Do not allow kettle to boil dry.
16. To avoid circuit overload, do not operate
another high-wattage appliance on the same
circuit.
17. Heater may remain hot after the kettle is
turned off.
18. WARNING: If the kettle is overfilled, boiling
water may be ejected.
19. WARNING: Scalding may occur if the lid is
opened during the heating cycle.
20. Be certain kettle lid is securely in place during
operation and when pouring hot water. Do
not use force when placing lid on kettle.
21. Do not clean glass with cleansers, steel wool
pads, or other abrasive material.
22. Use only the power base provided.
SAVE THESE INSTRUCTIONS
Other Consumer Safety Information
This appliance is intended for household use only.
w WARNING
Electrical Shock Hazard: This
appliance is provided with either a polarized
(one wide blade) or grounded (3-prong) plug to
reduce the risk of electric shock. Do not defeat
the safety purpose of the plug by modifying the
plug in any way or by using an adapter. If it still
does not fit, have an electrician replace the outlet.
The length of the cord used on this appliance
was selected to reduce the hazards of becoming
tangled in or tripping over a longer cord. If a
longer cord is necessary, an approved extension
cord may be used. The electrical rating of the
extension cord must be equal to or greater than
the rating of the appliance. Care must be taken
to arrange the extension cord so that it will not
drape over the countertop or tabletop where
it can be pulled on by children or accidentally
tripped over.
To avoid an electrical circuit overload, do not
use another high-wattage appliance on the same
circuit with this appliance.
Parts and Features
To order parts, visit:
hamiltonbeach.com/parts
WiFi Information
How to Erase WiFi Profile:
Press and hold and buttons for 10 seconds; then (WiFi) Button will flash red and turn off when WiFi
credentials are erased. You may also unregister the Kettle through the app, via the Alexa App settings page.
Supports routers with WEP, WPA, WPA2 802.11 b/g/n 2.4 GHz
This device complies with Part 15 of the FCC Rules. Operation is subject to the following two conditions: (1) this
device may not cause harmful interference, and (2) this device must accept any interference received, including
interference that may cause undesired operation.
NOTE: This equipment has been tested and found to comply with the limits for a Class B digital device, pursuant to
part 15 of the FCC Rules. These limits are designed to provide reasonable protection against harmful interference
in a residential installation. This equipment generates, uses and can radiate radio frequency energy, and, if not
installed and used in accordance with the instructions, may cause harmful interference to radio communications.
However, there is no guarantee that interference will not occur in a particular installation. If this equipment does
cause harmful interference to radio or television reception, which can be determined by turning the equipment off
and on, the user is encouraged to try to correct the interference by one or more of the following measures:
• Reorient or relocate the receiving antenna.
• Increase the separation between the equipment and receiver.
• Connect the equipment into an outlet on a circuit different from that to which the receiver is connected.
• Consult the dealer or an experienced radio/TV technician for help.
Changes or modifications not expressly approved by the manufacturer could void your authority to operate the
equipment.
Hamilton Beach Brands, Inc.
4421 Waterfront Drive
Glen Allen, VA 23060
1.800.851.8900
Limited Warranty
This warranty applies to products purchased and
used in the U.S. and Canada. This is the only express
warranty for this product and is in lieu of any other
warranty or condition.
This product is warranted to be free from defects
in material and workmanship for a period of five (5)
years from the date of original purchase in Canada
and one (1) year from the date of original purchase
in the U.S. During this period, your exclusive remedy
is replacement of this product or any component
found to be defective, at our option; however, you are
responsible for all costs associated with our returning
a product or component under this warranty to you.
If the product or component is unavailable, we will
replace with a similar one of equal or greater value.
This warranty does not cover glass, filters, wear from
normal use, use not in conformity with the printed
directions, or damage to the product resulting from
accident, alteration, abuse, or misuse. This warranty
extends only to the original consumer purchaser or
gift recipient. Keep the original sales receipt, as proof
of purchase is required to make a warranty claim.
This warranty is void if the product is used for other
than single-family household use or subjected to any
voltage and waveform other than as specified on the
rating label (e.g., 120V ~ 60 Hz).
We exclude all claims for special, incidental, and
consequential damages caused by breach of express
or implied warranty. All liability is limited to the amount
of the purchase price. Every implied warranty,
including any statutory warranty or condition of
merchantability or fitness for a particular purpose, is
disclaimed except to the extent prohibited by law, in
which case such warranty or condition is limited to
the duration of this written warranty. This warranty
gives you specific legal rights. You may have other
legal rights that vary depending on where you live.
Some states or provinces do not allow limitations
on implied warranties or special, incidental, or
consequential damages, so the foregoing limitations
may not apply to you.
To make warranty claim, do not return this appliance
to the store. Please write Hamilton Beach Brands,
Inc., Customer Service Department, 4421 Waterfront
Dr., Glen Allen, VA 23060, or visit hamiltonbeach.
com/customer-service in the U.S. or hamiltonbeach.
ca/customer-service in Canada. For faster service,
locate the model, type, and series numbers on your
appliance.
Read before use / Lire avant utilisation / Lea antes de usar.
For recipes, tips,
product information and
registration:
hamiltonbeach.com
Pour des recettes,
des conseils, des
renseignements sur le
produit et l’enregistrement :
hamiltonbeach.ca
Para recetas, consejos,
información del producto
y registro:
hamiltonbeach.com.mx
Le invitamos a leer cuidadosamente este instructivo antes de usar su aparato.
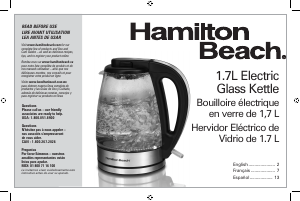
Alexa Smart Kettle
Bouilloire intelligente Alexa
Hervidor inteligente Alexa
ENTER TO WIN $100 TO
SPEND ON WEBSITE
Visit
register.hamiltonbeach.com
PARTICIPEZ POUR COURIR
LA CHANCE DE GAGNER
UN MONTANT DE 100 $
À DÉPENSER SUR NOTRE
SITE WEB
Visitez le
register.hamiltonbeach.com
INGRESE PARA TENER LA
OPORTUNIDAD DE GANAR
$100 PARA GASTAR EN
NUESTRO SITIO WEB
Visite
register.hamiltonbeach.com
Open to US customers only • Ce concours s’adresse aux clients des États-Unis
seulement • Este concurso está disponible sólo a clientes de los Estados Unidos
Control Panel/Display
Change from Fahrenheit to Celsius:
Press and hold and
Buttons for 4 seconds to change from °F (Fahrenheit) to °C (Celsius). Default
temperature is Fahrenheit.
How to Set up with WiFi
1. Download Alexa App from Apple App Store or
Google Play Store.
2. Plug Kettle into outlet.
3. In Alexa App, select “devices” icon in lower right
corner. Next, click + icon in top right corner.
Select “Kettle” from list of devices that appears.
Follow screen instructions to connect to WiFi.
4. After Kettle is connected, press WiFi Button again
to enable voice commands. WiFi LED Light will
turn from red to blue when Kettle is ready for
voice commands.
NOTES:
• For more Kettle information, visit
hamiltonbeach.com/alexa-products.
• To keep Kettle connected, Kettle must remain
plugged into an outlet.
• French and Spanish language commands may not
be available.
How to Use without WiFi
w WARNING
Burn Hazard. Do not overfill Kettle. Boiling water may spit out of the spout.
Before first use: Press Lid Button to raise Lid, and fill Kettle with water to MAX Fill Line on Water Window. Press
(On/Off) Button to turn Kettle on. Kettle will bring water to a boil. Press (On/Off)) Button to turn Kettle off ( ).
Discard water and repeat 2–3 times, rinsing out Kettle each time. Kettle is now ready for use.
1. Remove Kettle from Power Base before filling.
2. Fill Kettle with water. Water level should be above
MIN Fill Line and below MAX Fill Line. Place Kettle
on Base.
3. Kettle Lid must be locked in place and Power
Base on a level surface and positioned away from
countertop edge.
4. Plug into outlet. HELLO scrolls in Display from right
to left; then Display goes blank. Select temperature
by pressing or Button to increase or decrease
in one-degree increments. Temperature can be set
from 100°F (38°C) to 212°F (100°C).
5. Once desired temperature is set, Display will flash
set temperature. Press (On/Off) Button for Kettle
to begin heating. Temperature can be adjusted
while heating. Kettle will remember last set
temperature for next use. If (On/Off) Button isn’t
pressed, Display will turn blank. NOTE: Display will
show current water temperature and heating will
resume. Kettle will turn off if not returned to Base
within 30 seconds. Any time Kettle is removed
from Base, Display will show - - - - for 30 seconds.
6. Display will toggle between actual temperature for
3 seconds and selected temperature for 1 second.
Meanwhile, 3 dots on left of Display will scroll in an
upwards direction to indicate Kettle is heating.
7. When set temperature is reached, 3 dots disappear
from Display for 20 seconds while set temperature
shows. After 20 seconds, 3 dots return as solid in
Display during the Keep Warm default time of
30 minutes. Keep Warm can be adjusted from 0
minutes to maximum of 60 minutes while using
Alexa App.
8. When Keep Warm cycle is complete, 3 dots in
Display will disappear and Display will show HOT.
Once temperature cools to 158°F (70°C) Display
and Kettle turn off.
9. Press (On/Off) Button at any time to turn Kettle
off. Remember, the surface of Kettle gets hot; take
care—only grip Kettle by handle.
10. Unplug and empty Kettle if not using WiFi. If using
WiFi, keep plugged in and refill Kettle with water.
NOTE: Only use Kettle to heat water. If Kettle is used to heat other liquids, such as coffee or tea, the warranty will
be voided.
If Kettle Floor Discolors:
It is normal for Kettle floor to discolor due to heating. This does not affect the performance of the Kettle. Do
not use abrasive scouring pads or cleaners since this may damage the stainless steel surface.
Automatic Boil Dry Shutoff
Kettle heating element is protected by two automatic safety devices. If Kettle is empty or it is below MIN water
level anytime during the heating cycle, heating cycle will automatically stop and FILL H2O will scroll from
right to left in Display. Remove Kettle from Base and fill with water. Return Kettle to Base and press (On/Off)
Button to restart. If Kettle isn’t filled in 10 minutes, Display will turn off.
Troubleshooting
Make these simple checks before contacting
Customer Service:
• Have you pressed the (On/Off) Button?
• If Kettle heats but does not boil, the reached set
temperature may need to be adjusted, or Kettle
might need descaling. See “Care and Cleaning”
section.
• Has Kettle been accidentally turned On ( ) without
being filled with water or allowed to boil dry?
Press (On/Off) Button to turn off and wait 20
minutes. Fill Kettle with water and try again.
• Is cord firmly plugged into outlet and Kettle firmly
seated on Power Base?
Kettle will not turn on.
• Make sure Kettle is on Base and plugged into an
electrical outlet. Restart heating process.
App or voice commands not working.
• Red WiFi LED Light: press and release WiFi Button
to accept voice commands.
• Flashing Red WiFi LED Light: register Kettle to
Alexa App.
• Make sure Blue WiFi LED Light is on.
WiFi LED Light is flashing red and blue.
• WiFi connection has been lost. If lost more than 1
hour, WiFi LED Light will turn off, and automatically
reconnect when connection is available.
Connection loss can be due to router power or
password changes, or loss at internet service
provider.
WiFi LED Light is Red.
• App or voice commands are not working. Press
WiFi Button to enable voice and app commands.
WiFi LED Light must be blue for Kettle to accept
voice and app commands.
Display Messages:
• FILL H2O:
• No water in Kettle. Add filtered or preferred
water to Kettle above MIN Fill Line and below
MAX fill line.
• Kettle is low on water. Add filtered or preferred
water to Kettle above MIN Fill Line and below
MAX Fill Line.
• PrESS On Or LiFt: If Kettle has not been lifted from
Base, 4 heating cycles in 1 day or 2 heating cycles
over 2 days, Kettle will stop responding to voice
and app commands. To reset remote operation
on Kettle, lift Kettle and place back on Base.
Tea Guide
1. Fill Kettle with 6 oz. filtered or preferred water for
each cup of tea.
2. View chart below to select type of tea and
temperature, or say “Alexa set Kettle to <drink
type>” then begin brewing by saying “Alexa turn
kettle on.”
3. If using loose tea instead of tea bags, measure
one rounded teaspoon (5 g) of tea per cup into
an infuser and place infuser in cup. If no infuser is
available, put tea directly into cup.
4. Pour heated water directly over tea. For stronger
tea, add more leaves rather than infusing longer
than is recommended. Tea that is oversteeped will
become bitter.
Temperature & Guide
TYPE TEMPERATURE STEEPING
Warm 100°F (38°C)
Yellow Tea 158°F (70°C) 1-2 minutes
Green Tea 175°F (79°C) 1-3 minutes
White Tea 180°F (82°C) 1-3 minutes
Instant Coffee 190°F (88°C) Stir until
dissolved
Hot Chocolate 190°F (88°C) Stir until well
blended
Oolong Tea 190°F (88°C) 2-3 minutes
TYPE TEMPERATURE STEEPING
French Press
Coffee
200°F (93°C) 2-4 minutes
Mate 205°F (96°C) Ready
immediately
Rooibos Tea 205°F (96°C) 5-6 minutes
Herbal Tea 212°F (100°C) 4-5 minutes
Black Tea 212°F (100°C) 3-5 minutes
Noodles 212°F (100°C) See package
directions
Boil 212°F (100°C)
NOTES:
• Only heat water in Kettle.
• Temperature settings can vary depending on a number of factors, such as altitude, impurities in the water,
and amount of water in Kettle.
Care and Cleaning
w WARNING
Electrical Shock Hazard. Do not immerse kettle, power base, or plug in water or any other liquid.
1. Unplug. Allow to cool completely.
2. Wipe exterior of Kettle with a damp cloth. Do not
use abrasive scouring pads or powders since they
may scratch Kettle surface.
To remove discoloration or scale/lime deposit from
inside Kettle:
1. Unplug.
2. Pour 1 tablespoon (15 mL) white vinegar and 1/4
cup (59 mL) water into Kettle and let stand 10
minutes.
3. Rub Kettle floor with a paper towel. Remove paper
towel and vinegar.
4. Wash with soap and water, then rinse and dry.
TIP: To avoid scale/lime deposit buildup, empty Kettle
after each use.
w WARNING
Burn Hazard. Allow kettle to cool before attempting to remove mesh filter.
To Remove Mesh Filter: Make sure water has been removed from Kettle. Mesh Filter is visible through Kettle
opening in spout. Press down on tab to remove. Rinse Filter under running water and brush with a small, soft
brush. Rinse. To replace, insert bottom tab and then press down on top tab until it snaps into place. Filter will fit
only one way.
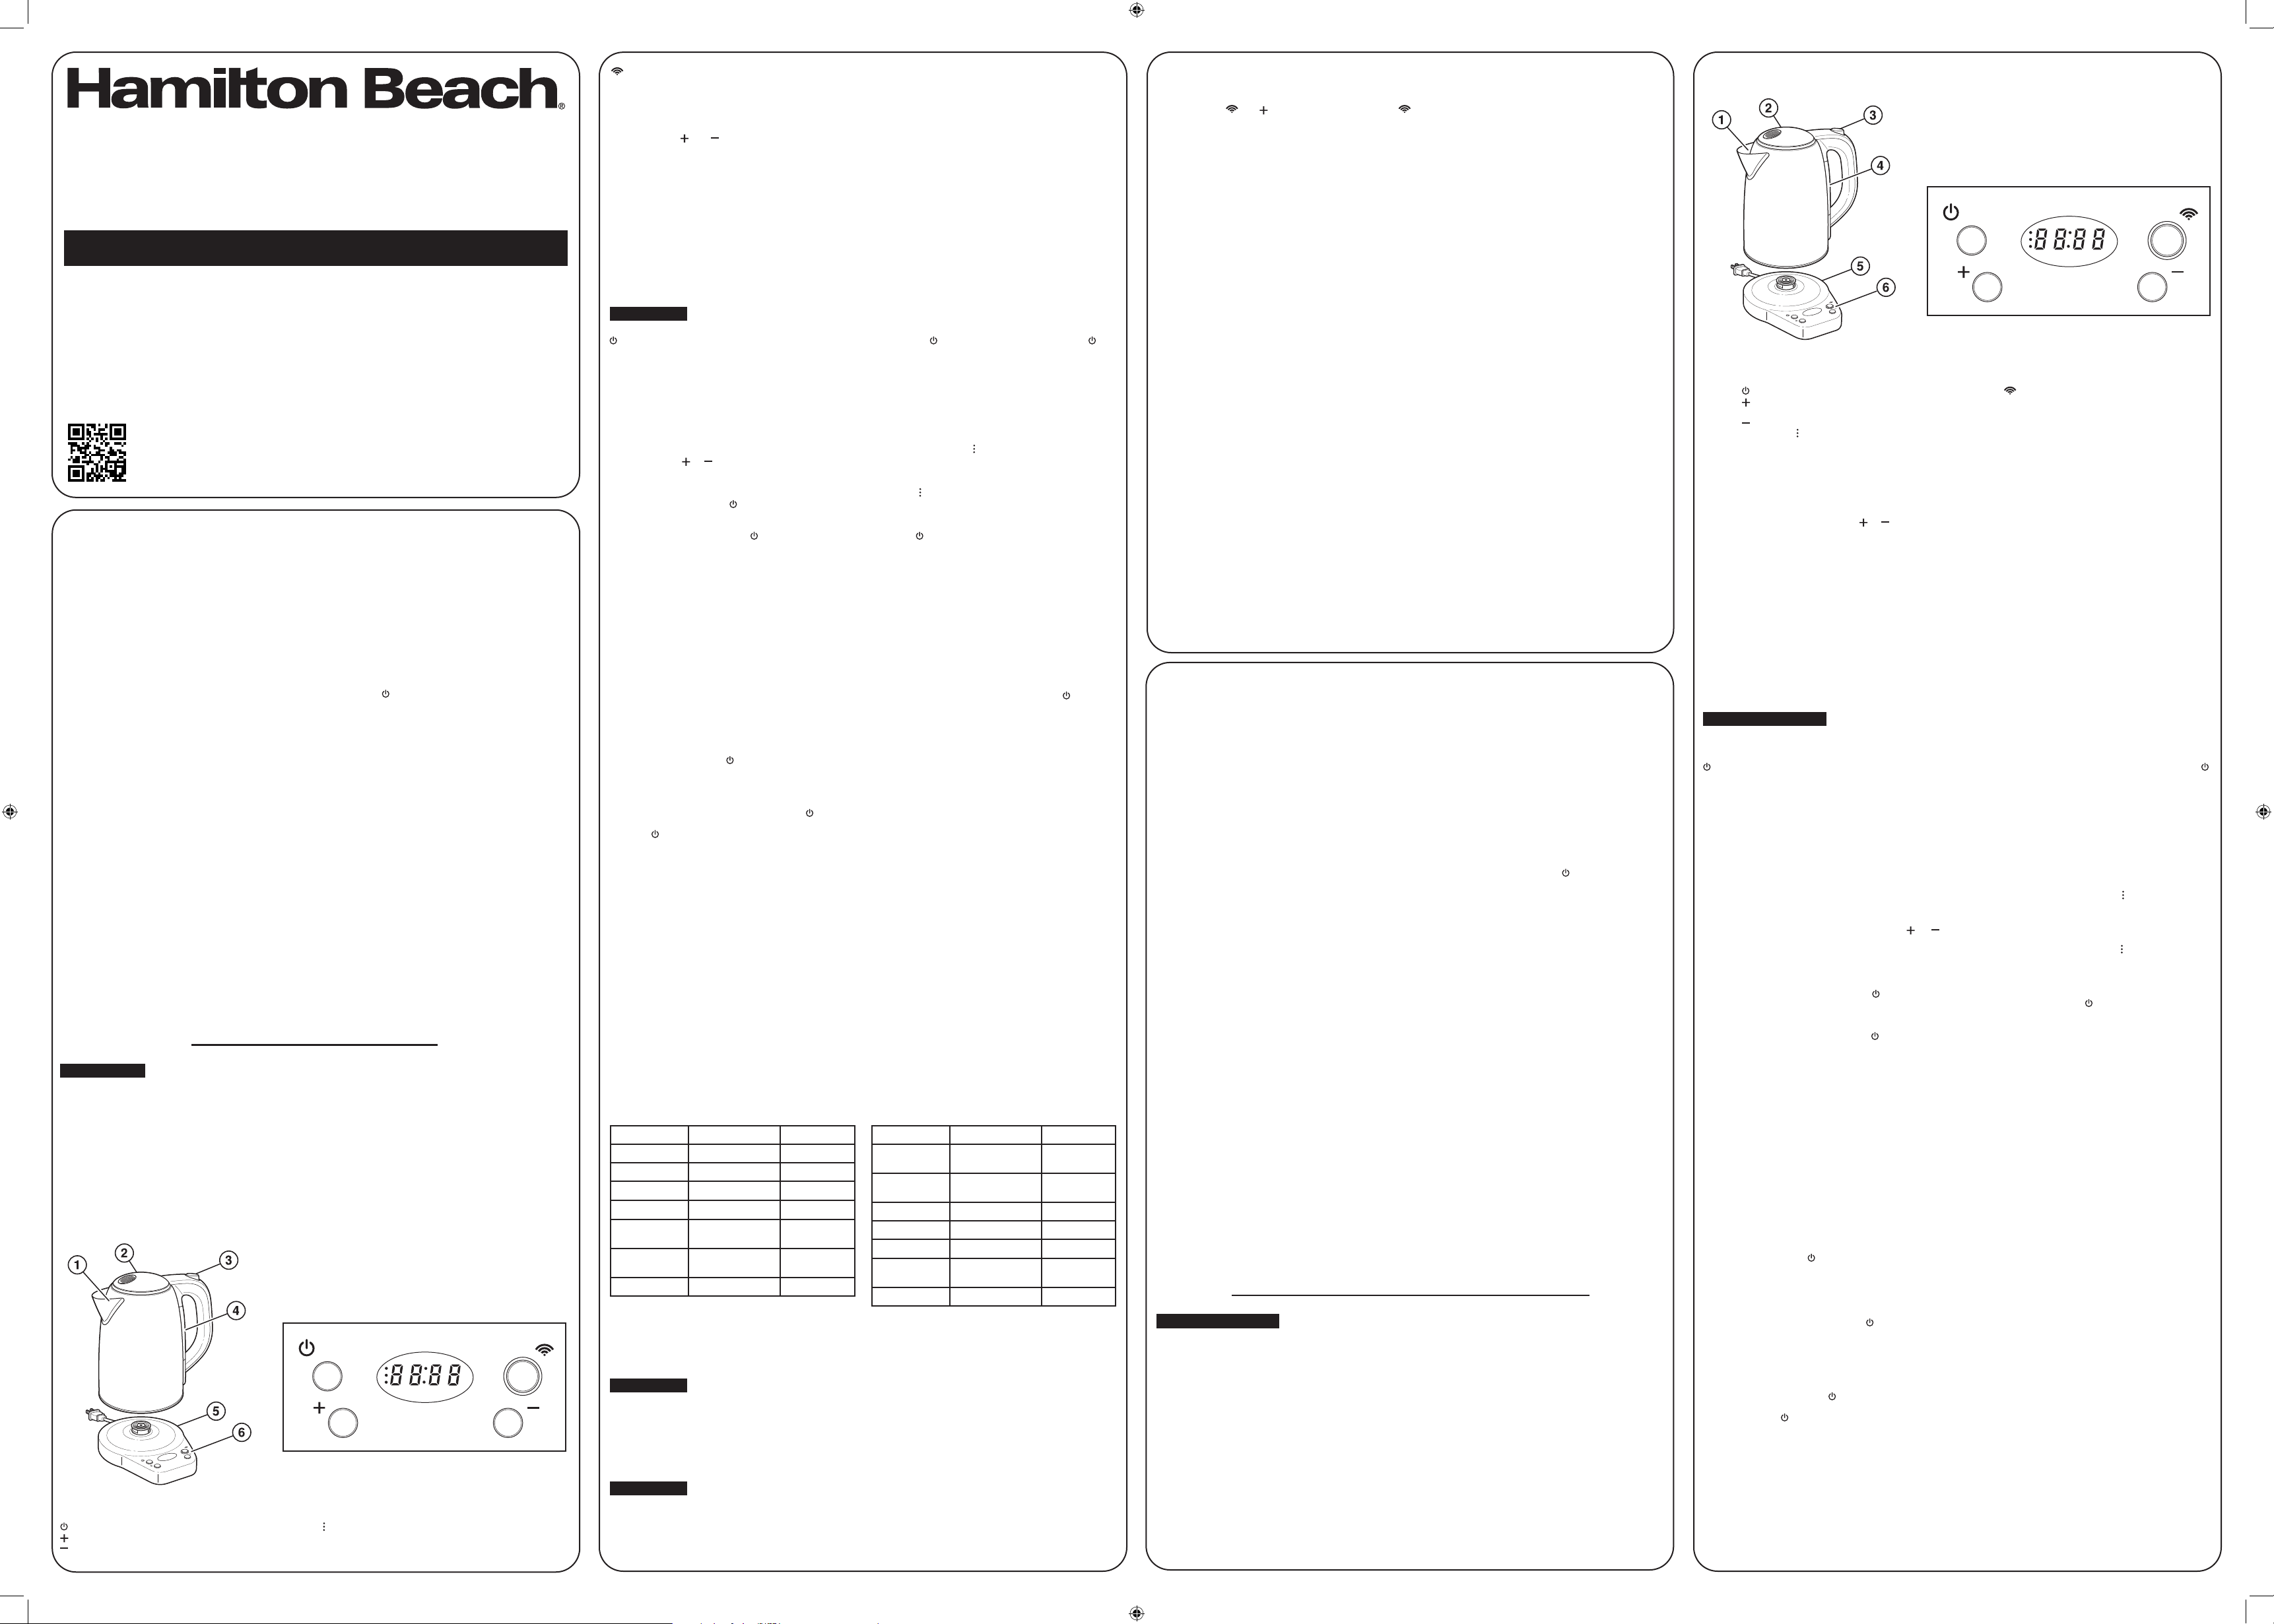
Control Panel/Display
Display will show current temperature and selected temperature.
(On/Off) Button – Use to turn on and off.
Button – Use to increase water temperature.
Button – Use to decrease water temperature.
Heating Icon – Dots scroll in an upward direction
while heating and become solid in Keep Warm
cycle.
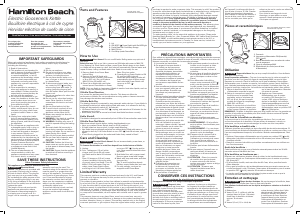
1. Removable Anti-Scale
Mesh Filter (inside
spout)
2. Lid
3. Lid-Opening Button
4. Water Window with
MAX and MIN Fill Lines
5. Power Base
6. Control Panel/Display
NOTE: Kettle can be used at any time without a WiFi
connection.
(WiFi) Button – Use for setup and to enable
remote commands.
WiFi LED Light –
Flashing Red: Setup mode.
Solid Red: Registered to customer account but
unable to take remote commands.
Solid Blue: Registered to customer account and able
to take remote commands.
PRÉCAUTIONS IMPORTANTES
Pour utiliser un appareil électroménager, vous devez toujours prendre des mesures élémentaires de
sécurité pour réduire le risque d’incendie, d’électrocution et/ou de blessure corporelle, en particulier
les mesures suivantes :
1. Lire toutes les instructions.
2. Cet appareil n’est pas destiné à être utilisé
par des personnes (y compris les enfants)
dont les capacités physiques, sensorielles
ou mentales sont réduites, ou manquant
d’expérience et de connaissance, sauf si elles
sont étroitement surveillées et instruites sur
l’utilisation de l’appareil par une personne
responsable de leur sécurité.
3. Une surveillance étroite est requise pour
tout appareil utilisé par ou près des enfants.
Surveiller que les enfants ne jouent pas avec
l’appareil.
4. Ne pas toucher les surfaces chaudes ou l’eau
bouillante/chaude. Utiliser les poignées ou
les boutons. Prendre toutes les précautions
nécessaires pour éviter les brûlures causées
par les surfaces chaudes ou les
déversements de liquide chaud.
5. Pour protéger contre les incendies, les chocs
électriques et les blessures corporelles, ne
pas immerger le cordon d’alimentation, la
fiche, la base d’alimentation ou la bouilloire
électrique dans l’eau ou tout autre liquide.
6. Débrancher de la prise murale dès la fin de
l’utilisation et avant le nettoyage. Laisser
refroidir l’appareil avant d’installer ou de
retirer des pièces et avant de le nettoyer.
7. Ne pas faire fonctionner un appareil
électroménager avec un cordon ou une
fiche endommagée, ou lorsque l’appareil
ne fonctionne pas bien ou a été échappé ou
endommagé d’une manière quelconque. Le
remplacement et la réparation du cordon
d’alimentation doivent être faits par le
fabricant, son agent de service ou toute
personne qualifiée de façon à éviter tout
danger. Veuillez communiquer avec le service
à la clientèle pour obtenir de l’information
concernant l’inspection, la réparation ou le
réglage, comme précisé dans la garantie
limitée.
8. L’utilisation d’accessoires non recommandés
ou vendus par le fabricant de l’appareil peut
causer des blessures.
9. Ne pas utiliser à l’extérieur.
10. Ne pas laisser pendre le cordon de la table
ou du comptoir et éviter tout contact entre
le cordon et les surfaces chaudes incluant la
cuisinière.
11. Ne pas placer la bouilloire électrique sur ou
près d’un brûleur chaud à gaz ou électrique
ou dans un four chaud.
12. Pour débrancher la bouilloire, tourner
toute commande à OFF ( /arrêt), puis
déconnecter la fiche de la prise murale. Pour
le débrancher, tenir la fiche et la retirer de la
prise. Ne jamais tirer sur le cordon.
13. N’utiliser cet appareil que pour les fonctions
auxquelles il est destiné.
14. Cet appareil n’est destiné qu’à faire bouillir
l’eau. Bouillir d’autres types de liquide
ou d’aliments contaminera l’intérieur de
l’appareil et annulera la garantie.
15. Ne pas faire fonctionner la bouilloire sans
liquide.
16. Pour éviter la surchauffe d’un circuit
électrique, ne pas brancher d’autre appareil
de haute puissance sur le même circuit.
17. L’élément chauffant peut rester chaud une
fois que la bouilloire est éteinte.
18. AVERTISSEMENT : Si la bouilloire est trop
pleine, l’eau bouillante peut éclabousser.
19. AVERTISSEMENT : Il y a un risque de
brûlure si le couvercle est ouvert durant le
cycle de chauffage.
20. S’assurer que le couvercle de la bouilloire est
bien fixé pendant l’utilisation et au moment
de verser l’eau chaud. Ne pas utiliser la force
pour fixer le couvercle de la bouilloire.
21. Ne pas nettoyer le verre avec des nettoyants,
des tampons d’acier ou autres matériaux
abrasifs.
22. Utiliser seulement la base d’alimentation
fournie.
CONSERVER CES INSTRUCTIONS
Autres consignes de sécurité pour le consommateur
Cet appareil est destiné à un usage domestique uniquement.
w AVERTISSEMENT
Risque de choc
électrique : Cet appareil est doté d’une fiche
polarisée (lame plus large) ou d’une fiche (3
lames et mise à la terre) pour réduire le risque
d’électrocution. Cette fiche s’insère d’une seule
manière dans une prise polarisée ou prise avec
mise à la terre. Ne pas transformer le dispositif
de sécurité de la fiche en modifiant celle-ci de
quelconque façon ou en utilisant un adaptateur.
Si vous ne pouvez pas insérer complètement la
fiche dans la prise, inversez la fiche. Si elle refuse
toujours de s’insérer, faire remplacer la prise par
un électricien.
La longueur du cordon installé sur cet appareil
a été sélectionnée afin de réduire les risques
d’enchevêtrement ou de faux pas causés par
un fil trop long. L’utilisation d’une rallonge
approuvée est permise, si le cordon est trop
court. Les caractéristiques électriques de la
rallonge doivent être équivalentes ou supérieures
aux caractéristiques de l’appareil. Si cet appareil
est du type à mise à la terre, la rallonge doit
être du type à mise à la terre, à 3 fils. Prendre
toutes les précautions nécessaires pour installer
la rallonge de manière à ne pas la faire courir
sur le comptoir ou sur une table pour éviter
qu’un enfant ne tire sur le cordon ou trébuche
accidentellement.
Pour éviter la surcharge du circuit électrique, ne
pas utiliser un autre appareil à haute puissance
sur le même circuit que cet appareil.
Pièces et caractéristiques
Pour commander des pièces, visiter :
hamiltonbeach.ca/parts
Panneau de commandes/écran
Panneau de commandes/écran
L’écran affichera la température actuelle et la température sélectionnée.
Bouton (marche/arrêt) – Pour allumer et éteindre.
Bouton – Pour augmenter la température de
l’eau.
Bouton – Pour diminuer la température de l’eau.
Icône de chauffage – Les points défilent vers le
haut lors du chauffage et arrêtent de défiler lors du
cycle Garder chaud.
Bouton (WiFi) – Pour régler et activer les
commandes à distance.
Témoin à DEL du WiFi –
Rouge clignotant : Mode de réglage.
Rouge constant : Le produit est enregistré au
compte du client, mais ne peut accepter les
commandes à distance.
Bleu constant : Le produit est enregistré au compte
du client et il peut accepter les commandes à
distance.
1. Filtre en mailles
tartrifuge amovible
(à l’intérieur du bec
verseur)
2. Couvercle
3. Bouton pour ouverture
du couvercle
4. Fenêtre du niveau
d’eau avec lignes de
remplissage MAX et
MIN
5. Base d’alimentation
6. Panneau de
commandes/écran
REMARQUE : La bouilloire peut être utilisée en tout temps
sans connexion WiFi.
Modification des degrés Fahrenheit en Celsius:
Appuyer et maintenir les boutons et enfoncés pendant 4 secondes pour passer du mode °F (Fahrenheit) à
°C (Celsius). La température par défaut est en Fahrenheit.
Comment configurer le WiFi
1. Télécharger l’application Alexa à partir du App
Store de Apple ou du Google Play Store.
2. Brancher la bouilloire dans la prise.
3. Dans l’application Alexa, sélectionner l’icône
« devices » (appareils) située dans le coin
inférieur droit. Ensuite, cliquer sur l’icône + dans
le coin supérieur droit. Sélectionner « Kettle »
(bouilloire) à partir de la liste d’appareils affichée.
Suivre les instructions sur l’écran pour vous
connecter au réseau WiFi.
4. Une fois que la bouilloire est connectée, appuyer
sur le bouton WiFi de nouveau pour activer les
commandes vocales. Le témoin à DEL du WiFi
s’allumera et passera du rouge au bleu lorsque la
bouilloire sera prête à recevoir des commandes
vocales.
REMARQUES :
• Pour plus de renseignements sur la bouilloire,
consultez le hamiltonbeach.com/alexa-products.
• Pour maintenir la connexion de la bouilloire,
celle-ci doit rester branchée dans une prise.
• Il se peut que les commandes en français et en
espagnol ne soient pas disponibles.
Comment utiliser sans connexion WiFi
w AVERTISSEMENT
Risque de brûlures. Ne pas trop remplit la bouilloire. L’eau brûlante peut jaillir hors du
bec.
Avant la première utilisation : Appuyer sur le bouton du couvercle pour soulever le couvercle et remplir la
bouilloire avec de l’eau jusqu’à la ligne de remplissage MAX de la fenêtre du niveau d’eau. Appuyer sur le bouton
On/Off (marche/arrêt) pour allumer la bouilloire. La bouilloire amènera l’eau à ébullition. Appuyer sur le bouton
On/Off (marche/arrêt) pour éteindre la bouilloire. Jeter l’eau et répéter cette étape 2 à 3 fois en rinçant chaque fois
la bouilloire. La bouilloire est maintenant prête à utiliser.
1. Retirer la bouilloire de la base d’alimentation avant
de la remplir.
2. Remplir la bouilloire avec de l’eau. Le niveau d’eau
doit être au-dessus de la ligne de remplissage MIN
et en dessous de la ligne de remplissage MAX.
Mettre la bouilloire sur la base.
3. Le couvercle de la bouilloire doit être verrouillé en
place et la base d’alimentation doit être sur une
surface plane et loin du bord du comptoir.
4. Brancher dans la prise. Le mot « HELLO » (bonjour)
défile dans l’écran de la droite vers la gauche.
Par la suite, l’écran s’éteint. Sélectionner la
température en appuyant sur les boutons ou
pour augmenter ou diminuer par incréments de
un degré. La température peut être réglée de 38 °C
(100 °F) à 100 °C (212 °F).
5. Une fois que la température souhaitée est
réglée, l’écran affichera la température réglée en
clignotant. Appuyer sur le bouton (marche/arrêt)
pour commencer à chauffer. La température peut
être modifiée durant le chauffage. La bouilloire
retiendra la dernière température réglée pour la
prochaine utilisation. Si le bouton (marche/arrêt)
n’est pas appuyé, l’écran s’éteindra.
REMARQUE : L’écran affichera la température
actuelle de l’eau et le chauffage continuera. La
bouilloire s’éteindra si elle n’est pas replacée sur
la base dans les 30 secondes. Chaque fois que la
bouilloire est retirée de la base, l’écran affichera - - -
- pendant 30 secondes.
6. L’écran affichera la température actuelle pendant
3 secondes pour passer ensuite à la température
sélectionnée pendant 1 seconde. Entretemps, les 3
points à la gauche de l’écran défileront vers le haut
pour indiquer que la bouilloire chauffe,
7. Lorsque la température réglée est atteinte, les 3
points disparaissent de l’écran pendant 2 secondes
pendant que la température réglée est affichée.
Après 20 secondes, les trois points arrêtent de
clignoter dans l’écran durant le la durée par
défaut du cycle Garder chaud de 30 minutes. Le
cycle Garder chaud peut être ajusté de 0 minutes
jusqu’à un maximum de 60 minutes en utilisant
l’application Alexa.
8. Lorsque le cycle Garder chaud est terminé, les 3
points dans l’écran disparaissent et l’écran affichera
le mot HOT (chaud). Une fois que la température
refroidit à 70 °C (158 °F), l’écran et la bouilloire
s’éteignent.
9. Appuyer sur le bouton (marche/arrêt) en tout
temps pour éteindre la bouilloire. N’oubliez
pas, la surface de la bouilloire devient chaude.
Faites attention, ne prenez la bouilloire que par la
poignée.
10. Débrancher et vider la bouilloire si vous n’utilisez
pas WiFi. Si vous utilisez WiFi, veuillez garder la
bouilloire branchée et la remplir d’eau.
REMARQUE : N’utiliser la bouilloire que pour faire bouillir de l’eau. La garantie est annulée si la bouilloire est
utilisée pour faire bouillir d’autres sortes de liquides comme le café ou le thé.
Si le fond de la bouilloire se décolore :
Il est normal que le fond de la bouilloire se décolore en raison du chauffage. Ceci ne nuit pas au
fonctionnement de la bouilloire. Ne pas utiliser de tampons à récurer ou nettoyants, car ils pourraient
endommager la surface en acier inoxydable.
Arrêt automatique pour prévenir l’ébullition à sec
L’élément chauffant de la bouilloire sont protégés par deux dispositifs de sécurité automatiques. Si la
bouilloire est vide ou que le niveau d’eau se situe en dessous de la ligne MIN en tout temps durant le cycle
de chauffage, le cycle de chauffage s’arrêtera automatiquement et les mots FILL H2O défileront de droite à
gauche dans l’écran. Retirer la bouilloire de la base et la remplir d’eau. Remettre la bouilloire sur la base et
appuyer sur le bouton (marche/arrêt) pour redémarrer. Si la bouilloire n’est pas remplie dans les 10 minutes,
l’écran s’éteindra.
Dépannage
Veuillez effectuer ces simples vérifications avant de
communiquer avec le Service à la clientèle :
• Avez-vous appuyé sur le bouton (marche/arrêt) ?
• Si la bouilloire se met à chauffer, mais que l’eau
ne bout pas, la température atteinte peut avoir
besoin d’être ajustée, ou la bouilloire peut avoir
besoin d’un détartrage. Voir le chapitre « Entretien
et nettoyage ».
• La bouilloire peut-elle avoir été mise en marche
non intentionnellement (
)
sans avoir été remplie
d’eau ou l’a-t-on laissée bouillir à sec? Appuyer
sur le bouton (marche/arrêt) pour éteindre et
attendre 20 minutes. Remplir la bouilloire avec de
l’eau et essayer de nouveau.
• Le cordon d’alimentation est-il bien branché dans
la prise? La bouilloire est-elle bien placée sur la
base d’alimentation?
La bouilloire ne se met pas en marche.
• Veuillez vous assurer que la bouilloire est sur
la base et qu’elle est branchée dans une prise
électrique. Recommencer le processus de
chauffage.
L’application ou les commandes vocales ne
fonctionnent pas.
• Témoin à DEL rouge du WiFi : appuyer et relâcher
le bouton WiFi pour accepter les commandes
vocales.
• Témoin à DEL rouge du WiFi qui clignote :
enregistrer la bouilloire dans l’application Alexa.
• Veuillez vous assurer que le témoin à DEL bleu du
WiFi est allumé.
Le témoin à DEL du WiFi clignote en rouge et en
bleu.
• La connexion WiFi a été interrompue. Si elle a été
interrompue pendant plus d’une heure, le témoin
à DEL du WiFi s’éteindra et se reconnectera
automatiquement lorsque la connexion sera
disponible. La perte de la connexion peut être due
à l’alimentation du routeur ou à la modification du
mot de passe, ou la perte de la connexion avec le
fournisseur internet.


Praat mee over dit product
Laat hier weten wat jij vindt van de Hamilton Beach 41036 Waterkoker. Als je een vraag hebt, lees dan eerst zorgvuldig de handleiding door. Een handleiding aanvragen kan via ons contactformulier.