
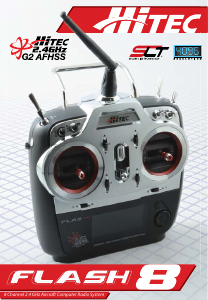
8 Channel 2.4 GHz Aircraft Computer Radio System8 Channel 2.4 GHz Aircraft Computer Radio System
Section 3: System Menu Programming Section 3: System Menu Programming
30 31
There are two primary menus in the Flash 8 programming structure: the System Function Menu, and
the Model Function Menu. The rst menu we will explore will be the System Menu. This menu has all
the common programming functions that are available for ACRO, GLID and HELI models. There are also
numerous options for customizing the operating characteristics of the Flash 8 transmitter.
The Model Select menu can be accessed two dierent ways. One method is to highlight the model name
in the main menu and press the jog dial button. The other method is to select “MDL. SEL” from the System
Menu. From the System Menu you can program the following features:
MDL.SEL: Model Select menu
SELECT: Select an existing model
NEW: Create a new model
COPY: Copy one model’s data into a new model memory slot.
RESET: Reset the model memory to the factory defaults
DELETE: Delete a model memory
RENAME: Rename the model to a name of your choice
MDL TYPE: Model Type menu
ACRO: Provides programming for most powered xed-wing aircraft
GLID: Provides programming for gliders, both powered and unpowered
HELI: Provides helicopter programming functions
CHANNEL: Model channel assignment menu. Allows control of any channel to be assigned to a switch or
joystick axis.
TRIM STEP: Trim step size adjustment menu (1-200). Default value is 12
TRAINER: Trainer options menu
SENSOR: Telemetry sensor setup menu
SPECTRA: Receiver set-up
Receiver: Receiver type selection menu, Optima/Minima, Maxima or SLT
Range Check: Power down mode for performing preight range check
Binding: Use to bind a new receiver to your Flash 8
Scanning: Scan the frequency table for the clearest channels
MODE: Stick mode change Mode 1-4
MANAGEMENT: System management menu
BACKLIGHT: Adjusts how long the backlight remains active
CONTRAST: Adjusts the screen contrast
BATTERY: Used to specify the battery type used in the transmitter: NiMh/NiCD, LiPo or LiFe
UI FEEDBACK: Turns the user interface sound feedback on or o
WARNING SETUP: Controls the various transmitter warnings
RF CHECK: Prompts if you are “Ready to Transmit”
HIGH THROTTLE: Warns if the throttle is not in “idle” position
FLIGHT CONDITION: Warns if a ight condition switch is on
FEEDBACK: Used to select types of user feedback (o, tone, vibration)
INFO.: Displays transmitter information such as software version
System Menu
If you have not already programmed a model with the preceding quick start guide, we
encourage you to do so before tackling the System and Model programming sections of the manual.
Model Select Menu
Select an existing model:
a. In the model select screen, use the jog dial to scroll through
the list of models. When you have highlighted the model you
want to work with, press the jog dial to conrm your selection.
b. Highlight “SELECT” and press the jog dial.
c. When asked if you would like to change the model, highlight
“YES” and press the jog dial.
Copy one model’s data into another memory slot:
a. If you haven’t already done so, create a new model by
following the ACRO or HELI Quick Start instructions.
b. In the model select menu, highlight the model you wish to
copy data from and press the jog dial.
c. Scroll to “COPY” and press the jog dial to enter the copy menu.
d. Press the jog dial to activate the destination menu.
e. Scroll to select the model memory slot where you would like
to place the data. Press the jog dial to conrm your selectio
f. When prompted to conrm that you want to copy, select “YES”
and press the jog dial to conrm your selection.
Create a new model: When you create a new model you are
also prompted to do other setup items. To avoid repetitive
information it is recommended that you read the quick start
guides in order to understand what other steps are required
when creating a new model. The “New” option is only available if
the last model in the list is selected.



Praat mee over dit product
Laat hier weten wat jij vindt van de Hitec Flash 8 RC Controller. Als je een vraag hebt, lees dan eerst zorgvuldig de handleiding door. Een handleiding aanvragen kan via ons contactformulier.