Handleiding Kichler 15556WH Transformer Lamp

Handleiding voor je Kichler 15556WH Transformer Lamp nodig? Hieronder kun je de handleiding gratis bekijken en downloaden als PDF in het Nederlands en/of Engels. Dit product heeft 7 veelgestelde vragen, 0 comments en heeft 0 stemmen. Is dit niet de handleiding die je zoekt, neem dan contact met ons op.

Is je product kapot en biedt de handleiding geen oplossing meer? Dan kun je voor reparatie gratis terecht bij Repair Café.

Handleiding

Loading…

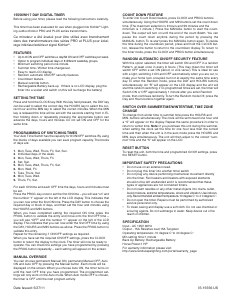
15556WH 7 DAY DIGITAL TIMER
Before using your timer, please read the following instructions carefully.
This timer has been evaluated for use when plugged into Kichler
®
Light-
ing outdoor/indoor PRO and PLUS series transformers.
Ce minuteur a été évalué pour être utilisé avec branchement
dans des transformateurs des séries PRO et PLUS pour éclai-
rage intérieur/extérieur signé Kichler
®
.
FEATURES
Up to 8 ON and OFF switches a day/56 ON and OFF switches per week.
Option to program individual days or 8 different weekday groups.
Minimum switching period one minute.
Summer time / Winter time changeover.
Easy to read LCD display.
Random automatic ON/OFF security features
Countdown feature..
Manual override button.
Rechargeable Battery back-up. (If there is no LCD display, plug the
timer into a socket and switch on,this will re-charge the battery)
SETTING THE TIME
Press and hold the CLOCK key. With this key held pressed, the DAY key
can be used to select the correct day, the HOURS key to select the cor-
rect hour and the MIN key to select the correct minutes. When the MIN
key is released the time will be set with the seconds starting from 0. Ei-
ther holding down or repeatedly pressing the appropriate button can
advance the days, hours and minutes. Do not set ON and OFF for the
same time.
PROGRAMMING OF SWITCHING TIMES
Your Auto Time Switch has the capacity for 8 ON/OFF switches. By using
the blocks of days available you can save program capacity. The blocks
of days are:
1. Mon, Tues, Wed, Thurs, Fri, Sat, Sun.
2. Individual days of the week.
3. Mon, Tues, Wed, Thurs, Fri.
4. Sat, Sun.
5. Mon, Tues, Wed, Thurs, Fri, Sat.
6. Mon, Wed, Fri.
7. Tues, Thurs, Sat.
8. Mon, Tues, Wed.
9. Thurs, Fri, Sat.
For each ON time and each OFF time the days, hours and minutes must
be set.
Press the PROG. key once to set the rst ON time you will see “on” and
the number “1” appear on the left of the LCD display. This indicates that
you can now enter the rst ON time. Press the DAY button to choose the
required day or block of days, and then set the hour and minutes using
the HOURS and MIN buttons.
When you have completed setting the required ON time press the
PROG. button to validate the entry and move onto the rst OFF time
you will see “OFF” and the number “1” appear on the left of the LCD
display. This indicates that you can now enter the rst OFF time by using
the DAY, HOURS and MIN buttons as above. Press the PROG button to
validate this entry.
Repeat for the remaining 7 ON/OFF settings as required.
When you have set the required ON/OFF settings, press the CLOCK
button to return the display to the clock. The timer will now be ready to
operate. You can check the settings you have programmed by pressing
the PROG button repeatedly – each setting will appear on the screen.
MANUAL OVERRIDE
You can choose permanent Manual ON, permanent Manual OFF, Auto
ON and Auto OFF by pressing the Manual button .Each mode will be
displayed on the screen. When you choose Auto ON, the timer turns on
until the next OFF time you have programmed. The programmed set-
tings will only work on the Auto mode. When Auto mode OFF is chosen,
the timer is OFF until the next program activity.
COUNT DOWN FEATURE
To enter into Count Down feature, press CLOCK and PROG buttons
simultaneously. Using the HOURS and MIN buttons set the count down
time. (The maximum selection is 9 hours and 59 minutes and the
minimum is 1 minute. ) Press the MANUAL button to start the count-
down. The output will turn on until the end of the count
down. You can
pause the count down anytime during the period by pressing the
MANUAL button. To re-start press the MANUAL button again. To review
the time during the countdown period, press and hold the CLOCK but-
ton, release the button to return to the countdown display. To return to
the timer mode, press the CLOCK and PROG button simultaneously.
RANDOM AUTOMATIC ON/OFF SECURITY FEATURE
With this option selected, the timer will switch ON and OFF in a random
Pattern. at least once in every 8 hours. (This may mean the timer will
switch OFF within a set ON period, or vice versa.) This is ideal for use
with a light, switching it ON and OFF automatically when you are out, to
make your home look occupied. but not at exactly the same time every
day. To enter the Random mode, press the DAY and HOURS buttons
simultaneously. An “R” will appear on the LCD display and the unit will
start the random switching. if no programmed times are set, the timer will
Switch ON or OFF approximately 1 minute after you enter Random
mode, then continues randomly. To turn the Random mode Off, press the
Day and Hours buttons together again.
SWITCH OVER SUMMERTIME/WINTERTIME, TIME ZONE
CHANGE
To change from winter time to summer time press the HOURS and
MIN. buttons simultaneously. The clock will be set forward one hour and
a “S” will appear on the display. Repeat the same procedure in order to
return to winter time. Note: if you purchase this unit during the summer,
when setting the clock set the time for one hour less than the correct
time and then when the unit is in the auto mode press the HOURS and
MIN. keys simultaneously. The unit will then adjust to the correct “sum-
mer” time and the “S” will appear on the LCD.
RESET BUTTON
To reset the unit, both the time and programmed On/Off settings. press
the RESET button.
IMPORTANT SAFETY PRECAUTIONS
Do not use on an extension lead.
Do not plug this timer into another timer switch
Do not plug any device performing mechanical movement directly
into the timer. Fan heaters and heaters with exposed elements
should not be left unattended and it is recommended that these
types of appliances are not connected timers.
Do not insert needles or any other metal objects into mains outlet.
Avoid moisture, extreme temperatures, shock and vibration. Use indoors
only. Recommended ambient temperature-10 degree C° to 4 0 degree C°.
Do not open the timer. Repairs must be performed by authorized
service personnel only.
To clean casing and display use a soft cloth. Do not use chemical or
scouring agents. Do not submerge in water. Keep device out of he
reach of children.
SPECIFICATION
Input - AC 125V 60Hz
Output - 15A Resistive load,15A Tungsten
Operating temperature:-10 degree C°to 40 degree C°
Min setting time:1 minute
Back Up Battery: Rechargeable Battery
Horse Power:1 HP
For warranty information please visit:
http://www.landscapelighting.com/portal/warranty_page
IS-15556-USDate Issued: 5/27/11
Download de handleiding in het Nederlands en/of Engels (PDF, 0.05 MB)
(Denk aan het milieu en print deze handleiding alleen als dat echt noodzakelijk is)

Loading…

Meer over deze handleiding

We begrijpen dat het prettig is om een papieren handleiding te hebben voor je Kichler 15556WH Transformer Lamp. Je kunt de handleiding bij ons altijd downloaden en daarna zelf printen. Indien je graag een originele handleiding wilt hebben, raden we je aan contact op te nemen met Kichler. Zij kunnen wellicht nog voorzien in een originele handleiding. Zoek je de handleiding van Kichler 15556WH Transformer Lamp in een andere taal? Kies op de homepage je taal naar keuze en zoek daarna op het modelnummer om te zien of we deze beschikbaar hebben.

Specificaties

Merk Kichler
Model 15556WH Transformer
Categorie Lampen
Bestandstype PDF
Bestandsgrootte 0.05 MB

Alle handleidingen voor Kichler Lampen
Meer handleidingen voor Lampen

Veelgestelde vragen over Kichler 15556WH Transformer Lamp

Ons supportteam zoekt dagelijks naar nuttige productinformatie en antwoorden op veelgestelde vragen. Als er onverhoopt toch een onjuistheid tussen onze veelgestelde vragen staat, laat het ons dan weten via het contactformulier.

Is alle LED verlichting dimbaar? Geverifieerd

Nee, niet alle LED lampen zijn standaard dimbaar. Dit wordt aangegeven op de verpakking en evetueel op de lamp zelf.

Ik vind dit nuttig (598) Lees meer

Ik heb een nieuwe lichtbron in de lamp gedaan, maar deze gaat niet aan, waar kan dit door komen? Geverifieerd

Sommige lampen zijn gemaakt voor lichtbronnen van een specifiek wattage. Wanneer er een lichtbron in wordt gedaan die een hoger wattage vereist van de lamp kan leveren, dan kan het zijn dat het licht niet aangaat. Als de lamp een veel hoger wattage levert van waarvoor de lichtbron gemaakt is, kan de lichtbron doorbranden.

Ik vind dit nuttig (456) Lees meer

Waarom is de kleur van licht belangrijk? Geverifieerd

Er zijn grofweg twee soorten soort licht, warm licht en koud licht. Koud licht houdt je alerter en wakkerder. Warm licht werkt ontspannender. De warmte van licht wordt gemeten in Kelvin en staat aangegeven op de verpakking of de lamp zelf.

Ik vind dit nuttig (351) Lees meer

Wat is lumen? Geverifieerd

Lumen is een meeteenheid voor de totale hoeveelheid zichtbaar licht die een lichtbron naar alle kanten uitstraalt.

Ik vind dit nuttig (277) Lees meer

Welke fittingen zijn er? Geverifieerd

Wereldwijd worden vele soorten fittingen gebruiken, maar de meest gebruikte zijn die met de Edison schroefdraad, aangegeven met de letter E. In de meeste landen zijn fittingen E27 en E14 de standaard. In de Verenigde Staten zijn E26, E17, E12 en E10 de standaard.

Ik vind dit nuttig (218) Lees meer

Wat zegt het wattage over mijn lamp? Geverifieerd

Wattage is een meeteenheid voor het energieverbruik. Lampen met een hogere lichtopbrengst hebben een doorgaans hoger energieverbruik, maar voor het vergelijken van lichtopbrengst moet altijd gekeken worden naar de hoeveelheid lumen.

Ik vind dit nuttig (178) Lees meer

Wat is LED? Geverifieerd

LED staat voor light-emitting diode. Door in de juiste richting stroom door de halfgeleider te laten lopen ontstaat licht.

Ik vind dit nuttig (165) Lees meer

Beoordeling

Laat ons weten wat je van de Kichler 15556WH Transformer Lamp vindt door een beoordeling achter te laten. Wil je je ervaringen met dit product delen of een vraag stellen? Laat dan een bericht achter onderaan de pagina.
Bent u tevreden over de Kichler 15556WH Transformer Lamp?
Ja Nee
Beoordeel dit product als eerste
0 stemmen

Praat mee over dit product

Laat hier weten wat jij vindt van de Kichler 15556WH Transformer Lamp. Als je een vraag hebt, lees dan eerst zorgvuldig de handleiding door. Een handleiding aanvragen kan via ons contactformulier.

Handleiding Kichler 15556WH Transformer Lamp

Gerelateerde producten

Gerelateerde categorieën

×
Download