Handleiding Kichler 2345NI Circolo Lamp

Handleiding voor je Kichler 2345NI Circolo Lamp nodig? Hieronder kun je de handleiding gratis bekijken en downloaden als PDF in het Nederlands en/of Engels. Dit product heeft 7 veelgestelde vragen, 0 comments en heeft 0 stemmen. Is dit niet de handleiding die je zoekt, neem dan contact met ons op.

Is je product kapot en biedt de handleiding geen oplossing meer? Dan kun je voor reparatie gratis terecht bij Repair Café.

Handleiding

Loading…

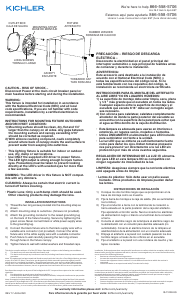
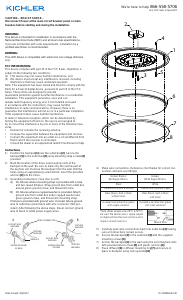
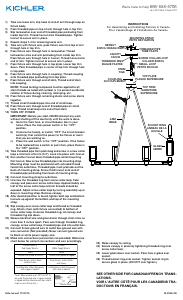
1) Take one loose arm, slip hook at end of arm through loop on
fixture body.
2) Pass threaded pipe on top of arm through hole in top trim.
3) Slip lockwasher over end of threaded pipe protruding from
inside top trim. Thread hexnut onto threaded pipe. Tighten
hexnut to secure arm in place.
4) Repeat steps 1-4 for remaining loose arm.
5) Take arm with fixture wire, pass fixture wire from top of arm
through hole in top trim.
6) Pass fixture wire through hole in lockwasher. Thread
lockwasher onto end arm protruding from inside top trim.
Pass fixture wire through hole in hexnut. Thread henxut onto
end of arm. Tighten hexnut to secure arm in place.
7) Pass fixture wire through hole in top plate. Lower top trim
down. Pass threaded pipe in center of top trim through hole
in top plate.
8) Pass fixture wire through hole in coupling. Thread coupling
onto threaded pipe protruding from top plate.
9) Pass fixture wire through end of stem. Thread end of stem
into coupling.
NOTE: Thread locking compound must be applied to all
stem threads as noted with symbol (3) to prevent accidental
rotation of fixture during cleaning, relamping, etc.
10) Pass fixture wire through remaining stems and screw stems
together.
11) Thread small threaded pipe into end of small loop.
12) Pass fixture wire through end of threaded pipe on small
loop. Thread small loop onto end of last stem.
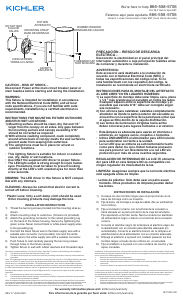
13) TURN OFF POWER.
IMPORTANT: Before you start, NEVER attempt any work
without shutting off the electricity until the work is done.
a) Go to the main fuse, or circuit breaker, box in your
home. Place the main power switch in the “OFF”
position.
b) Unscrew the fuse(s), or switch “OFF” the circuit breaker
switch(s), that control the power to the fixture or room
that you are working on.
c) Place the wall switch in the “OFF” position. If the fixture
to be replaced has a switch or pull chain, place those in
the “OFF” position.
14) Take threaded pipe from parts bag and screw in screw collar
loop a minimum of 6 mm (1/4”). Lock into place with hexnut.
15) Run another hexnut down threaded pipe almost touching
first hexnut. Now screw threaded pipe into mounting strap.
Mounting strap must be positioned with extruded thread
faced into outlet box. Threaded pipe must protrude out the
back of mounting strap. Screw third hexnut onto end of
threaded pipe protruding from back of mounting strap.
16) Connect mounting strap to outlet box.
17) Unscrew the threaded ring from screw collar loop. Take
canopy and pass over screw collar loop. Approximately one
half of the screw collar loop exterior threads should be
exposed. Adjust screw collar loop by turning assembly up or
down in mounting strap. Remove canopy.
18) After desired position is found, tighten both top and bottom
hexnuts up against the bottom and top of the mounting
strap.
19) Slip canopy over screw collar loop and thread on threaded
ring. Attach chain (with fixture connected) to bottom of
screw collar loop. Unscrew threaded ring, let canopy and
threaded ring slip down.
20) Weave electrical wire and ground wire through chain links no
more than 3 inches apart. Pass wire through threaded ring,
canopy, screw collar loop, threaded pipe and into outlet box.
21) Connect fixture ground wire to outlet box ground wire with
wire connector. (Not provided.) Never connect ground wire
to black or white power supply wire.
22) Make wire connections (connectors not provided). Reference
chart below for correct connections and wire accordingly.
Date Issued: 11/20/15 IS-2345-CB
INSTRUCTIONS
For Assembling and Installing Fixtures in Canada
Pour L’assemblage et L’installation Au Canada
SEE OTHER SIDE FOR CANADIAN FRENCH TRANS-
LATIONS.
VOIR L’AUTRE CÔTÉ POUR LES CANADIENS TRA-
DUCTIONS EN FRANÇAIS.
Were here to help 866-558-5706
Hrs: M-F 9am to 5pm EST
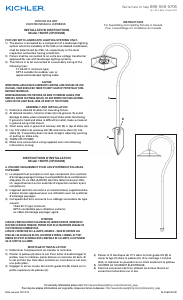
MOUNTING STRAP
PATTE DE FIXATION
HEXNUT
ECROU HEXAGONAL
THREADED PIPE
TUBE FILETÉ
SCREW COLLAR LOOP
COLLIER-ÉCROU
CANOPY
CACHE
THREADED RING
BAGUE FILETÉE
SMALL LOOP
PETITE BOUCLE
STEM
TIGE
3
SOCKET RING
ANNEAU DE LA
DOUILLE
GLASS
VERRE
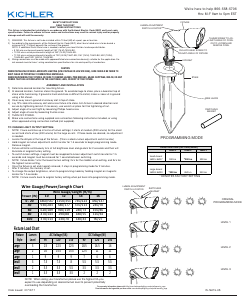
Connect Black or
Red Supply Wire to:
Connect
White Supply Wire to:
Black White
*Parallel cord (round & smooth) *Parallel cord (square & ridged)
Clear, Brown, Gold or Black
without tracer
Clear, Brown, Gold or Black
with tracer
Insulated wire (other than green)
with copper conductor
Insulated wire (other than green)
with silver conductor
*Note: When parallel wires (SPT I & SPT II)
are used. The neutral wire is square shaped
or ridged and the other wire will be round in
shape or smooth (see illus.)
Neutral Wire
ARM
BRAS
COUPLING
ACCOUPLEMENT
TOP PLATE
PLAQUE SUPÉRIEURE
TOP TRIM
GARNITURE
SUPÉRIEURE
23) Raise canopy to ceiling.
24) Secure canopy in place by tightening threaded ring onto
screw collar loop.
25) Lower glass down over socket. Pass hole in glass over
socket.
26) Thread socket ring onto socket. Tighten socket ring to
secure glass in place. (DO NOT over tighten.)
3
Download de handleiding in het Nederlands en/of Engels (PDF, 0.14 MB)
(Denk aan het milieu en print deze handleiding alleen als dat echt noodzakelijk is)

Loading…

Meer over deze handleiding

We begrijpen dat het prettig is om een papieren handleiding te hebben voor je Kichler 2345NI Circolo Lamp. Je kunt de handleiding bij ons altijd downloaden en daarna zelf printen. Indien je graag een originele handleiding wilt hebben, raden we je aan contact op te nemen met Kichler. Zij kunnen wellicht nog voorzien in een originele handleiding. Zoek je de handleiding van Kichler 2345NI Circolo Lamp in een andere taal? Kies op de homepage je taal naar keuze en zoek daarna op het modelnummer om te zien of we deze beschikbaar hebben.

Specificaties

Merk Kichler
Model 2345NI Circolo
Categorie Lampen
Bestandstype PDF
Bestandsgrootte 0.14 MB

Alle handleidingen voor Kichler Lampen
Meer handleidingen voor Lampen

Veelgestelde vragen over Kichler 2345NI Circolo Lamp

Ons supportteam zoekt dagelijks naar nuttige productinformatie en antwoorden op veelgestelde vragen. Als er onverhoopt toch een onjuistheid tussen onze veelgestelde vragen staat, laat het ons dan weten via het contactformulier.

Is alle LED verlichting dimbaar? Geverifieerd

Nee, niet alle LED lampen zijn standaard dimbaar. Dit wordt aangegeven op de verpakking en evetueel op de lamp zelf.

Ik vind dit nuttig (510) Lees meer

Ik heb een nieuwe lichtbron in de lamp gedaan, maar deze gaat niet aan, waar kan dit door komen? Geverifieerd

Sommige lampen zijn gemaakt voor lichtbronnen van een specifiek wattage. Wanneer er een lichtbron in wordt gedaan die een hoger wattage vereist van de lamp kan leveren, dan kan het zijn dat het licht niet aangaat. Als de lamp een veel hoger wattage levert van waarvoor de lichtbron gemaakt is, kan de lichtbron doorbranden.

Ik vind dit nuttig (374) Lees meer

Waarom is de kleur van licht belangrijk? Geverifieerd

Er zijn grofweg twee soorten soort licht, warm licht en koud licht. Koud licht houdt je alerter en wakkerder. Warm licht werkt ontspannender. De warmte van licht wordt gemeten in Kelvin en staat aangegeven op de verpakking of de lamp zelf.

Ik vind dit nuttig (297) Lees meer

Wat is lumen? Geverifieerd

Lumen is een meeteenheid voor de totale hoeveelheid zichtbaar licht die een lichtbron naar alle kanten uitstraalt.

Ik vind dit nuttig (236) Lees meer

Welke fittingen zijn er? Geverifieerd

Wereldwijd worden vele soorten fittingen gebruiken, maar de meest gebruikte zijn die met de Edison schroefdraad, aangegeven met de letter E. In de meeste landen zijn fittingen E27 en E14 de standaard. In de Verenigde Staten zijn E26, E17, E12 en E10 de standaard.

Ik vind dit nuttig (180) Lees meer

Wat zegt het wattage over mijn lamp? Geverifieerd

Wattage is een meeteenheid voor het energieverbruik. Lampen met een hogere lichtopbrengst hebben een doorgaans hoger energieverbruik, maar voor het vergelijken van lichtopbrengst moet altijd gekeken worden naar de hoeveelheid lumen.

Ik vind dit nuttig (155) Lees meer

Wat is LED? Geverifieerd

LED staat voor light-emitting diode. Door in de juiste richting stroom door de halfgeleider te laten lopen ontstaat licht.

Ik vind dit nuttig (141) Lees meer

Beoordeling

Laat ons weten wat je van de Kichler 2345NI Circolo Lamp vindt door een beoordeling achter te laten. Wil je je ervaringen met dit product delen of een vraag stellen? Laat dan een bericht achter onderaan de pagina.
Bent u tevreden over de Kichler 2345NI Circolo Lamp?
Ja Nee
Beoordeel dit product als eerste
0 stemmen

Praat mee over dit product

Laat hier weten wat jij vindt van de Kichler 2345NI Circolo Lamp. Als je een vraag hebt, lees dan eerst zorgvuldig de handleiding door. Een handleiding aanvragen kan via ons contactformulier.

Handleiding Kichler 2345NI Circolo Lamp

Gerelateerde producten

Gerelateerde categorieën