Handleiding KitchenAid KCMS185JSS3 Magnetron

Handleiding voor je KitchenAid KCMS185JSS3 Magnetron nodig? Hieronder kun je de handleiding gratis bekijken en downloaden als PDF in het Nederlands en/of Engels. Dit product heeft 7 veelgestelde vragen, 0 comments en heeft 0 stemmen. Is dit niet de handleiding die je zoekt, neem dan contact met ons op.

Is je product kapot en biedt de handleiding geen oplossing meer? Dan kun je voor reparatie gratis terecht bij Repair Café.

Handleiding

Loading…

1
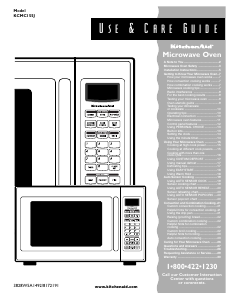
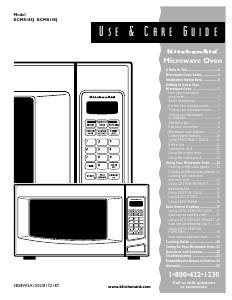
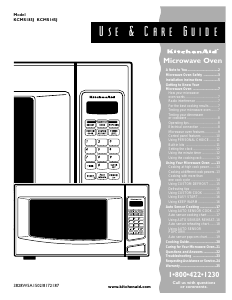
Use & Care Guide
Microwave Oven
3828W5A1502/8172187
Model
KCMS185J KCMS145J
A Note to You..................................2
Microwave Oven Safety ................3
Installation Instructions ................5
Getting to Know Your
Microwave Oven ............................7
How your microwave
oven works....................................7
Radio interference ........................7
For the best cooking results..........7
Testing your microwave oven........7
Testing your dinnerware
or cookware ..................................8
Operating tips................................8
Electrical connection ....................8
Microwave oven features ..............9
Control panel features ................10
Using PERSONAL CHOICE........11
Built-in kits ..................................11
Setting the clock..........................12
Using the minute timer................12
Using the cooking rack................12
Using Your Microwave Oven ......13
Cooking at high cook power........13
Cooking at different cook powers..13
Cooking with more than
one cook cycle ............................14
Using CUSTOM DEFROST ........15
Defrosting tips ............................15
Using CUSTOM COOK ..............15
Using EASY START....................16
Using KEEP WARM ....................16
Auto Sensor Cooking ..................17
Using AUTO SENSOR COOK....17
Auto sensor cooking chart ..........17
Using AUTO SENSOR REHEAT..18
Auto sensor reheating chart........18
Using AUTO SENSOR
POPCORN ..................................19
Auto sensor popcorn chart..........19
Cooking Guide..............................20
Caring for Your Microwave Oven..21
Questions and Answers ..............22
Troubleshooting ..........................23
Requesting Assistance or Service..24
Warranty........................................25
1•800•422•1230
Call us with questions
or comments.
www.kitchenaid.com
2
A Note to You
Thank you for buying a KITCHENAID
®
appliance!
KitchenAid designs the best tools for the most important room in your house. To ensure that you enjoy many
years of trouble-free operation, we developed this Use and Care Guide. It contains valuable information
concerning how to operate and maintain your new appliance properly. Please read it carefully.
Also, please complete and mail the enclosed Product Registration Card.
For assistance or service
Call the Customer Interaction Center toll free ........................................................................1-800-422-1230
If you need assistance or service, first see the “Troubleshooting” section of this book. After checking
“Troubleshooting,” additional help can be found by checking the “Requesting Assistance or Service”
section, or by calling the telephone number above.
When calling, you will need to know your appliance’s complete model number and serial number. You can find
this information on the model and serial number label/plate (see diagram in the “Getting to Know Your
Microwave Oven” section.)
Keep this book and the sales slip together in a safe place for future reference. You must provide proof
of purchase or installation date for in-warranty service.
Model Number_____________________________
Serial Number _____________________________
Date Installed _____________________________
Builder/Dealer Name _______________________
Address __________________________________
Phone____________________________________
3
Microwave Oven Safety
Your safety and the safety of others are very important.
wDANGER
wWARNING
You can be killed or seriously injured if you don't
immediately follow instructions.
You can be killed or seriously injured if you don't
follow instructions.
All safety messages will tell you what the potential hazard is, tell you how to reduce the chance of injury,
and tell you what can happen if the instructions are not followed.
We have provided many important safety messages in this manual and on your appliance. Always read and
obey all safety messages.
This is the safety alert symbol.
This symbol alerts you to potential hazards that can kill or hurt you and others.
All safety messages will follow the safety alert symbol and either the word “DANGER” or
“WARNING.” These words mean:
continued on next page
As with any appliance, close supervision is
necessary when used by children.
Do not operate the microwave oven if it has a
damaged cord or plug, if it is not working properly,
or if it has been damaged or dropped.
The microwave oven should be serviced only by
qualified service personnel. Call an authorized
service company for examination, repair or
adjustment.
Do not cover or block any openings on the
microwave oven.
Do not store the microwave oven outdoors. Do
not use the microwave oven near water – for
example, near a kitchen sink, in a wet basement,
or near a swimming pool, and the like.
Do not immerse cord or plug in water.
Keep cord away from heated surfaces.
Do not let cord hang over edge of table or count-
er.
See door surface cleaning instructions in the
“Caring for Your Microwave Oven” section.
IMPORTANT SAFETY INSTRUCTIONS
When using electrical appliances basic safety precautions should be followed, including the following:
WARNING: To reduce the risk of burns,
electric shock, fire, injury to persons or exposure
to excessive microwave energy:
Read all instructions before using the
microwave oven.
Read and follow the specific “PRECAUTIONS TO
AVOID POSSIBLE EXPOSURE TO EXCESSIVE
MICROWAVE ENERGY” found in this section.
The microwave oven must be grounded. Connect
only to properly grounded outlet. See “GROUND-
ING INSTRUCTIONS” found in the “Installation
Instructions” section.
Install or locate the microwave oven only in
accordance with the installation instructions.
Some products such as whole eggs and sealed
containers – for example, closed glass jars –
may explode and should not be heated in the
microwave oven.
Use the microwave oven only for its intended use
as described in this manual. Do not use corrosive
chemicals or vapors in the microwave oven. This
type of oven is specifically designed to heat,
cook, or dry food. It is not designed for industrial
or laboratory use.
SAVE THESE INSTRUCTIONS
4
Microwave Oven Safety
SAVE THESE INSTRUCTIONS
Do not operate any heating or cooking appliance
beneath the microwave oven.
Do not mount microwave oven over or near any
portion of a heating or cooking appliance.
Do not mount over a sink.
Do not store anything directly on top of the
microwave oven surface when the microwave
oven is in operation.
To reduce the risk of fire in the oven cavity:
Do not overcook food. Carefully attend the
microwave oven if paper, plastic, or other
combustible materials are placed inside the
oven to facilitate cooking.
PRECAUTIONS TO AVOID POSSIBLE EXPOSURE TO
EXCESSIVE MICROWAVE ENERGY
(a)Do not attempt to operate this oven with the
door open since open-door operation can result
in harmful exposure to microwave energy. It is
important not to defeat or tamper with the safety
interlocks.
(b)Do not place any object between the oven front
face and the door or allow soil or cleaner residue
to accumulate on sealing surfaces.
(c) Do not operate the oven if it is damaged. It is
particularly important that the oven door close
properly and that there is no damage to the:
(1) door (bent),
(2) hinges and latches (broken or loosened),
(3) door seals and sealing surfaces.
(d) The oven should not be adjusted or repaired by
anyone except properly qualified service personnel.
IMPORTANT SAFETY INSTRUCTIONS
Remove wire twist-ties from paper or plastic
bags before placing bag in oven.
If materials inside the oven should ignite, keep
oven door closed, turn oven off, and disconnect
the power cord, or shut off power at the fuse or
circuit breaker panel.
Do not use the cavity for storage purposes. Do
not leave paper products, cooking utensils, or
food in the cavity when not in use.
17
Auto Sensor Cooking
Your microwave oven has a sensor that detects
the humidity released by the food. The amount
of humidity detected tells the oven how long to
cook or heat your food. The sensor is used by
3 special functions: AUTO SENSOR COOK,
AUTO SENSOR REHEAT, and AUTO SENSOR
POPCORN. The simple instructions for these
functions are on the following pages.
NOTES:
If you want to cook by entering a time and cook
power, see “Microwave cooking guide” in the
“Cooking Guide” section.
The oven should be plugged in at least 5 minutes
before sensor cooking.
Room temperature should not exceed 95°F (35°C).
Be sure the exterior of the cooking container and
the interior of the oven are dry. Wipe off each with
a paper towel.
The oven will not generate microwave energy for
approximately 28 seconds at the beginning of the
sensor cooking cycle.
When covering foods, be sure to leave an opening
big enough for moisture to escape so that the
sensor can determine cooking or reheating time.
Using AUTO SENSOR
COOK
To use AUTO SENSOR COOK:
1. Put the food in the oven and close the
door.
2. Touch AUTO SENSOR COOK until
desired food type is displayed.
AUTO SENSOR COOK will start automatically
after a short delay.
(See Auto Sensor Cooking Chart.)
Auto sensor cooking chart
DIRECTIONS
Pierce each potato several times with a fork and place
on the oven tray around the edge, at least 1 inch (2.5 cm)
apart.
Remove from package. Place vegetables in a microwav-
able container. Cover with plastic wrap and vent.
Most vegetables need stirring and 2-3 minutes standing
time after cooking.
Place moist vegetables in a microwavable
container. Cover with plastic wrap and vent.
Most vegetables need stirring and 2-3 minutes standing
time after cooking.
Remove from outer package. Loosen cover on three
sides. If entrée is not in a microwave-safe container, place
it on a plate, cover with plastic wrap and vent.
Most entrees need 2-3 minutes standing time after cook-
ing.
Follow measurements on package for ingredient amounts.
Place rice and liquid (water or chicken or vegetable stock)
in a microwavable dish. Cover with plastic wrap and vent.
When cooking is complete, allow rice to stand 5 minutes or
until liquid is absorbed. Stir rice.
SERVING SIZE
1 to 4 medium,
about 8 to 10 oz
(227 to 284 g) each
1 to 4 cups
(250 mL to 1 L)
1 to 4 cups
(250 mL to 1 L)
Works best if entree
is 10 to 20 oz.
(284 to 567 g)
1
2 to 2 cups (125 to
500 mL) of dry rice
(Use medium or long
grain rice. Cook
instant rice accord-
ing to directions on
the package.)
FOOD
Baked
Potatoes
Frozen
Vegetables
Fresh
Vegetables
Frozen Entree
Rice
18
Auto Sensor Cooking
Auto sensor reheating chart
DIRECTIONS
Place food to be heated on a dinner plate or similar dish.
Cover with plastic wrap and vent.
Place food to be heated in a microwave container. Cover with
plastic wrap and vent.
Place food to be heated in a microwave container. Cover with
plastic wrap and vent.
Place food to be heated in a microwave container. Cover with
plastic wrap and vent.
SERVING SIZE
About 8 to 16 oz
(227 to 454 g)
1 to 4 cups
(250 mL to 1 L)
1 to 4 cups
(250 mL to 1 L)
1 to 2 cups
(250 to 500 mL)
FOOD
Dinner plate
Soup
Sauce
Casserole
DIRECTIONS
Place the food around the sides of a microwave
-safe
container. Season and add
1
4 to
1
2 cup (63 to 125 mL)
liquid (wine, water, salsa, etc.) if desired. Cover with
plastic wrap, vented.
Auto sensor cooking chart (cont.)
SERVING SIZE
1
4 to 2 lbs
(113 to 907 g)
FOOD
Fish, Seafood
Using AUTO SENSOR
REHEAT
1. Put the food in the oven and close the
door.
2. Touch AUTO SENSOR REHEAT until
desired food type is displayed.
AUTO SENSOR REHEAT will start automatically
after a short delay.
(See Auto Sensor Reheating Chart.)
NOTE: When covering foods, be sure to leave an
opening big enough for moisture to escape so that
the sensor can determine cooking or reheating time.
19
Auto Sensor Cooking
Using AUTO SENSOR
POPCORN
AUTO SENSOR POPCORN lets you pop commercial-
ly packaged microwave popcorn with just one touch.
NOTES:
Pop only 1 package at a time.
If you are using a microwave popcorn popper,
follow manufacturer's instructions.
1. Place the bag in the center of the
turntable and close the door.
2. Touch AUTO SENSOR POPCORN.
NOTE: The sensor will determine “popping time”,
based on the size of the package.
DIRECTIONS
Follow package directions.
Use a popcorn package which is made especially for microwave
cooking.
Do not try to pop unpopped kernels.
Pop only 1 package at a time.
Do not leave the microwave oven unattended while popping
popcorn.
If you are using a microwave popcorn popper, follow manufacturer’s
instructions.
How well your popcorn cooks will depend on the brand of popcorn
and how much fat it has in it. Try several brands to decide which
pops the best. For best results, use fresh bags of popcorn.
SERVING SIZE
3.5 oz (99 g)
3.0 oz (85 g)
1.75 oz (50 g)
1.5 oz (42 g)
POPCORN
Auto sensor popcorn chart
21
Microwave cooking tips
(cont.)
Using aluminum foil
Metal containers should not be used in a microwave
oven. There are, however, some exceptions. If you
have purchased food which is prepackaged in an
aluminum foil container, refer to the instructions on
the package. When using aluminum foil containers,
cooking times may be longer because microwaves
will only penetrate the top of the food.
If you use aluminum containers without package
instructions, follow these guidelines:
Place the container in a glass bowl and add some
water so that it covers the bottom of the container,
not more than
1
4 in. (.64 cm) high. This ensures even
heating of the container bottom.
Always remove the lid to avoid damage to the
oven.
Use only undamaged containers.
Do not use containers taller than
3
4 in. (1.9 cm).
Container must be at least half filled.
To avoid arcing, there must be a minimum
1
4 in.
(.64 cm) between the aluminum container and the
walls of the oven and also between two aluminum
containers.
Always place the container on the turntable.
Reheating food in aluminum foil containers usually
takes up to double the time compared to reheating
in plastic, glass, china, or paper containers. The
time when food is ready will vary depending upon
the type of container you use.
Let food stand for 2 to 3 minutes after heating so
that heat is spread evenly throughout container.
Cooking you should not do in your
microwave oven
Do not do canning of foods in the oven. Closed
glass jars may explode, resulting in damage to the
oven.
Do not use the microwave oven to sterilize objects
(baby bottles, etc.). It is difficult to keep the oven at
the high temperature needed for sterilization.
To make sure your microwave oven looks
good and works well for a long time, you
should maintain it properly. For proper care,
please follow these instructions carefully.
For interior surfaces: Wash often with warm, sudsy
water and a sponge or soft cloth. Use only mild, non-
abrasive soaps or a mild detergent. Be sure to keep
the areas clean where the door and oven frame
touch when closed. Wipe well with clean water. Over
time, stains can occur on the surfaces as the result of
food particles spattering during cooking. This is nor-
mal.
For stubborn soil, boil a cup (250 mL) of water in the
oven for 2 or 3 minutes. Steam will soften the soil. To
get rid of odors inside the oven, boil a cup (250 mL)
of water with lemon juice or vinegar.
For exterior surfaces and control panel: Use a
soft cloth with spray glass cleaner. Apply the spray
glass cleaner to the soft cloth; do not spray directly
on the oven.
NOTE: Abrasive cleansers, steel-wool pads,
gritty wash cloths, some paper towels, etc., can
damage the control panel and the interior and exteri-
or oven surfaces.
To clean turntable and turntable support, wash in
mild, sudsy water; for heavily soiled areas use a mild
cleanser and scouring sponge. The turntable and
turntable support are dishwasher-safe.
Caring for Your Microwave Oven
Download de handleiding in het Nederlands en/of Engels (PDF, 0.5 MB)
(Denk aan het milieu en print deze handleiding alleen als dat echt noodzakelijk is)

Loading…

Meer over deze handleiding

We begrijpen dat het prettig is om een papieren handleiding te hebben voor je KitchenAid KCMS185JSS3 Magnetron. Je kunt de handleiding bij ons altijd downloaden en daarna zelf printen. Indien je graag een originele handleiding wilt hebben, raden we je aan contact op te nemen met KitchenAid. Zij kunnen wellicht nog voorzien in een originele handleiding. Zoek je de handleiding van KitchenAid KCMS185JSS3 Magnetron in een andere taal? Kies op de homepage je taal naar keuze en zoek daarna op het modelnummer om te zien of we deze beschikbaar hebben.

Specificaties

Merk KitchenAid
Model KCMS185JSS3
Categorie Magnetrons
Bestandstype PDF
Bestandsgrootte 0.5 MB

Alle handleidingen voor KitchenAid Magnetrons
Meer handleidingen voor Magnetrons

Veelgestelde vragen over KitchenAid KCMS185JSS3 Magnetron

Ons supportteam zoekt dagelijks naar nuttige productinformatie en antwoorden op veelgestelde vragen. Als er onverhoopt toch een onjuistheid tussen onze veelgestelde vragen staat, laat het ons dan weten via het contactformulier.

Mijn magnetron gaat niet aan wanneer ik op de start-knop druk, wat kan ik doen? Geverifieerd

In veel gevallen is dit omdat de deur van de magnetron niet goed gesloten is. Doe de deur open en weer dicht en probeer het nog een keer.

Ik vind dit nuttig (3260) Lees meer

Kan ik mijn magnetron nog gebruiken als het draaiplateau niet meer werkt? Geverifieerd

Het draaiplateau zorgt ervoor dat de warmte evenredig wordt verdeeld. Als dit plateau niet draait kunt u de magnetron dus niet goed gebruiken. Laat deze repareren.

Ik vind dit nuttig (1952) Lees meer

De magnetron staat wel aan, maar werkt niet. Hoe komt dit? Geverifieerd

Het is mogelijk dat de deur niet goed sluit. Om de veiligheid te garanderen zal een magetron niet werken als de deur niet volledig gesloten is. Soms kan dit verholpen worden door het deurscharnier te stellen.

Ik vind dit nuttig (1362) Lees meer

Het mica/kartonnen plaatje in de magnetron is losgeraakt. Kan ik de magnetron blijven gebruiken? Geverifieerd

Nee, absoluut niet. Het mica/kartonnen plaatje verdeeld de microgolven in de magnetron. Plaats het plaatje terug of zorg voor een vervanger.

Ik vind dit nuttig (1227) Lees meer

Mijn magnetron blijft geluid maken, ook nadat hij klaar is. Is dit normaal? Geverifieerd

Ja, dit is een normaal geluid. De ventilator laat de magnetron afkoelen na gebruik. Hoe lang dit duurt hangt af van hoe lang de magnetron heeft gewerkt.

Ik vind dit nuttig (1030) Lees meer

Kan ik water koken in de magnetron? Geverifieerd

Nee, absoluut niet. Het water kan oververhit raken. Dit houdt in dat het water een temperatuur van meer dan 100℃ bereiken zonder te koken. Wanneer het water daarna in aanraking komt met een object kan het ineens gaan koken en opspatten wat brandwonden kan verzoorzaken.

Ik vind dit nuttig (758) Lees meer

Waarom mag er geen metaal in een magnetron? Geverifieerd

Metaal laat de microgolven van het apparaat niet door, maar kaatst deze juist terug. Wanneer er veel van deze golven terug worden gekaatst naar één punt kunnen er vonken ontstaan.

Ik vind dit nuttig (754) Lees meer

Beoordeling

Laat ons weten wat je van de KitchenAid KCMS185JSS3 Magnetron vindt door een beoordeling achter te laten. Wil je je ervaringen met dit product delen of een vraag stellen? Laat dan een bericht achter onderaan de pagina.
Bent u tevreden over de KitchenAid KCMS185JSS3 Magnetron?
Ja Nee
Beoordeel dit product als eerste
0 stemmen

Praat mee over dit product

Laat hier weten wat jij vindt van de KitchenAid KCMS185JSS3 Magnetron. Als je een vraag hebt, lees dan eerst zorgvuldig de handleiding door. Een handleiding aanvragen kan via ons contactformulier.

Handleiding KitchenAid KCMS185JSS3 Magnetron

Gerelateerde producten

Gerelateerde categorieën