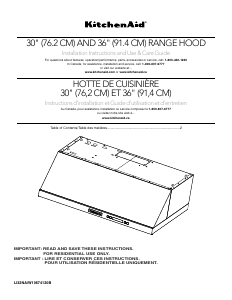
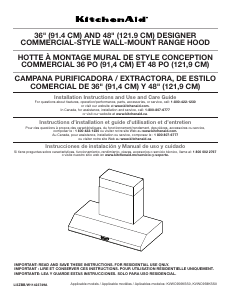
Handleiding KitchenAid KXW9736YSS Afzuigkap

Handleiding voor je KitchenAid KXW9736YSS Afzuigkap nodig? Hieronder kun je de handleiding gratis bekijken en downloaden als PDF in het Nederlands en/of Engels. Dit product heeft 2 veelgestelde vragen, 0 comments en heeft 0 stemmen. Is dit niet de handleiding die je zoekt, neem dan contact met ons op.

Is je product kapot en biedt de handleiding geen oplossing meer? Dan kun je voor reparatie gratis terecht bij Repair Café.

Handleiding

Loading…

7
INSTALLATION INSTRUCTIONS
Prepare Location
It is recommended that the vent system be installed before
range hood is installed.
Before making cutouts, make sure there is proper clearance
within the ceiling or wall for exhaust vent.
Range hood is to be installed 24" (61.0 cm) min. for electric
cooking surfaces, 30" (76.2 cm) min. for gas cooking
surfaces, to a suggested maximum of 36" (91.4 cm) above
the cooking surface.
Check your ceiling height and the range hood height
maximum before you select your range hood.
1. Disconnect power.
2. Determine which venting method to use: roof or wall.
3. Select a flat surface for assembling the range hood. Place
covering over that surface.
4. Using 2 or more people, lift range hood onto covered surface.
Range Hood Mounting Screws Installation
1. Determine and mark the centerline on the wall where the
range hood will be installed.
2. Based on the ceiling or soffit height, determine the distance
“X” (24" [61.0 cm] min. from electric cooking surface or
30" [76.2 cm] min. to gas cooking surface, suggested
36" [91.4 cm] max.) needed between the cooking surface and
the bottom of the range hood. To this distance, add
17¹⁄₈" (43.5 cm) and draw a horizontal line (A) about
24" (61.0 cm) long centered on the vertical centerline (B) at
this distance.
3. Following the illustrations in Step 4, mark points on each side
of the horizontal line as measured from the vertical centerline.
4. Drill ³⁄₃₂" (2.4 mm) pilot holes for installation into wood. The
screws provided for mounting this range hood must be
fastened into solid wood. Do not fasten only into sheet rock.
IMPORTANT: All screws must be installed into wood. If there
is no wood to screw into, additional wall framing supports
may be required.
5. Install the 5 x 45 mm mounting screws. Leave a ¹⁄₄"(6.4mm)
gap between the wall and the back of the screw head to slide
range hood into place.
Chimney Support Bracket Installation
1. Place two of the chimney brackets against the wall so that
their top edges are ¹⁄₁₆" (2.0 mm) from the ceiling or soffit and
level. Mark holes.
2. Drill pilot holes.
If installing into wood, drill 4 - ³⁄₃" (2.4 mm) pilot holes.
3. Attach each bracket to the wall with a 4.2 x 8 mm mounting
screw. Tighten screws securely.
Complete Preparation
1. Determine and make all necessary cuts in the wall for the vent
system. Install the vent system before installing the range
hood. See the “Venting Requirements” section.
A. Horizontal line
B. Vertical centerline
C. Cooking surface
D. Distance “X” (24" [61.0 cm] min. from electric
cooking surface, 30" [76.2 cm] min. from gas
cooking surface, suggested 36" [91.4 cm]
max.) +17
¹⁄₈
" (43.5 cm)
WARNING
Excessive Weight Hazard
Use two or more people to move and install
range hood.
Failure to do so can result in back or other injury.
A
B
C
D
X + 17¹⁄₈" (43.5 cm)
A. Horizontal line
B. Vertical centerline of range hood
C. 5¹¹⁄₁₆" (14.4 cm)
A. Vertical centerline
B.
¹⁄₁₆
" (1.6 mm)
C. 10
⁹⁄₁₆
" (26.9 cm)
A
B
C
¹⁄₄"
(6.4 mm)
B
A
C
C
Download de handleiding in het Nederlands en/of Engels (PDF, 3.67 MB)
(Denk aan het milieu en print deze handleiding alleen als dat echt noodzakelijk is)

Loading…

Meer over deze handleiding

We begrijpen dat het prettig is om een papieren handleiding te hebben voor je KitchenAid KXW9736YSS Afzuigkap. Je kunt de handleiding bij ons altijd downloaden en daarna zelf printen. Indien je graag een originele handleiding wilt hebben, raden we je aan contact op te nemen met KitchenAid. Zij kunnen wellicht nog voorzien in een originele handleiding. Zoek je de handleiding van KitchenAid KXW9736YSS Afzuigkap in een andere taal? Kies op de homepage je taal naar keuze en zoek daarna op het modelnummer om te zien of we deze beschikbaar hebben.

Specificaties

Merk KitchenAid
Model KXW9736YSS
Categorie Afzuigkappen
Bestandstype PDF
Bestandsgrootte 3.67 MB

Alle handleidingen voor KitchenAid Afzuigkappen
Meer handleidingen voor Afzuigkappen

Veelgestelde vragen over KitchenAid KXW9736YSS Afzuigkap

Ons supportteam zoekt dagelijks naar nuttige productinformatie en antwoorden op veelgestelde vragen. Als er onverhoopt toch een onjuistheid tussen onze veelgestelde vragen staat, laat het ons dan weten via het contactformulier.

Hoe hoog moet een afzuigkap minimaal boven een kookplaat hangen? Geverifieerd

Dit kan licht verschillen per merk, maar over het algemeen kunt u 65 centimeter aanhouden voor afzuigkappen boven een gaskookplaat en 50 centimeter boven een elektrische of inductiekookplaat. Deze afstanden zijn er ter bevordering van de brandveiligheid.

Ik vind dit nuttig (1246) Lees meer

Heb ik een afzuigkap met of zonder motor nodig? Geverifieerd

Afzuigkappen met motor zijn bedoeld voor wanneer er een directe luchtafvoer naar buiten beschikbaar is. Een afzuigkap zonder motor is bedoeld om aan te sluiten wanneer er een centraal afzuigsysteem is. Sluit nooit een afzuigkap met motor aan op een centraal afzuigsysteem!

Ik vind dit nuttig (680) Lees meer

Beoordeling

Laat ons weten wat je van de KitchenAid KXW9736YSS Afzuigkap vindt door een beoordeling achter te laten. Wil je je ervaringen met dit product delen of een vraag stellen? Laat dan een bericht achter onderaan de pagina.
Bent u tevreden over de KitchenAid KXW9736YSS Afzuigkap?
Ja Nee
Beoordeel dit product als eerste
0 stemmen

Praat mee over dit product

Laat hier weten wat jij vindt van de KitchenAid KXW9736YSS Afzuigkap. Als je een vraag hebt, lees dan eerst zorgvuldig de handleiding door. Een handleiding aanvragen kan via ons contactformulier.

Handleiding KitchenAid KXW9736YSS Afzuigkap

Gerelateerde producten

Gerelateerde categorieën