Handleiding LG FRS640D1F0B Lamp

Handleiding voor je LG FRS640D1F0B Lamp nodig? Hieronder kun je de handleiding gratis bekijken en downloaden als PDF in het Nederlands en/of Engels. Dit product heeft 7 veelgestelde vragen, 0 comments en heeft 0 stemmen. Is dit niet de handleiding die je zoekt, neem dan contact met ons op.

Is je product kapot en biedt de handleiding geen oplossing meer? Dan kun je voor reparatie gratis terecht bij Repair Café.

Handleiding

Loading…

- 2 -
NEUTRAL
LIVE
P.E.
NEUTRAL
LIVE
P.E.
NEUTRAL
LIVE
P.E.
NEUTRAL
LIVE
P.E.
NEUTRAL
LIVE
P.E.
Interior wiring
of the building
Wire connectors
Product’s
power cables
NEUTRANEUTRALL
LIVLIVEE
P.EP.E..
NEUTRAL
LIVE
P.E.
NEUTRAL
LIVE
P.E.
NEUTRAL
LIVE
P.E.
NEUTRAL
LIVE
P.E.
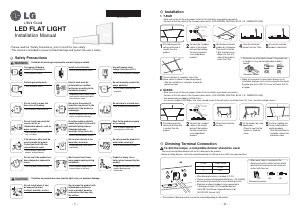
Installation
Dimming Terminal Connection
1. T-BAR
• Make sure to turn off the main power switch of the installation space before connection.
• Connect so that the colors of the 3 power cables match. (LIVE: BROWN, NEUTRAL: BLUE, P.E.: GREEN/YELLOW)
1
Drill and prepare the
ceiling so the hole is
smaller than the
product.
2
Connect the 3 product
cables to the interior
wiring of the building.
For wire connectors,
use standardized
products.
3
Rotate the connected
product by 20 degrees.
Then insert it into the
T-Bar insertion space.
• Make sure that all 4
sides of the product
match the T-Bar.
4
Place the horizontal
product into the T-Bar.
5
Ensure the inserted
product is horizontal.
NEUTRAL
LIVE
P.E.
NEUTRAL
LIVE
P.E.
NEUTRAL
LIVE
P.E.
NEUTRAL
LIVE
P.E.
Interior wiring
of the building
Wire connectors
Product’s
power cables
NEUTRANEUTRALL
LIVLIVEE
P.EP.E..
NEUTRAL
LIVE
P.E.
2. M-BAR
• Make sure to turn off the main power switch of the installation space before connection.
• Connect so that the colors of the 3 power cables match. (LIVE: BROWN, NEUTRAL: BLUE, P.E.: GREEN/YELLOW)
• Use woodscrews provided by LG Electronics.
(In case of a model of 620 M-Bar, Use silver colored screws if the ceiling tiles are thicker than 9.0t. If not, use black colored screws.)
1
Drill and prepare the
ceiling so that the hole
is smaller than the
product.
2
Connect the 3 product
cables to the interior
wiring of the building.
For wire connectors,
use standardized
products.
3
Check the installation
location. 4
Fix the product by using
woodscrews.
• Check to see that the
product is fixed into
place.
5
Perform a lighting test
to see if the product is
working properly.
• After the installation is
complete, remove the
protective sheet.
6
Once installation is complete, turn on the
power switch to check it is operating properly.
• After the installation is complete, remove the
protective sheet.
During the use of connector socket, if the power line
is forced in, it may not be lighted due to defect
contact.
When this luminaire is connected to branch circuit,
installation engineer must use the connector that meets
the glow-wire test of 650°C (in case of France, 850°C)
or higher.
-Connector Socket-
-Dimming Connector-
(O) (X)
When each cable is inserted into the
dimming connector socket, the wire which
removes the covering must not come into
contact with the case.
To dim the lamps, a compatible dimmer should be used.
The use of incompatible dimmers will result in damage to the products.
Before installing dimmers, verify the compatible dimmer list with your local LGE sales representative.
Wire dimming function is included. (0-10V)
Please use wire with designated thickness. (24-20AWG)
Be careful of the polarity for correct dimming control.
Maximum number of products to be connected to
1 dimming controller: 20 (Compatible dimmer:
ArteorTM Fluo Dimmer (Legrand Electric Ltd.),
AU-DSPLED (Aurora Ltd.))
The function of dimming control may not be served depending on the product.
1
2
Pin No. Output Name
1 0~10V
2 GND
- 1 -
LED FLAT LIGHT
Installation Manual
Please read the Safety Precautionsprior to install for your safety.
• This manual is intended to prevent product damage and protect the user’s safety.
Violation of warnings may lead to serious injury or death.
Safety Precautions
W ARNING
Turn power off before
contact of the product.
• Risk of electric shock.
Install a circuit breaker.
• Risk of fire and electric shock.
Use with proper rated
voltage. (less than ±10%)
• Risk of fire and product damage.
Perform grounding work.
Risk of electric shock.
Electric work must be
performed by a certified
technician according to the
installation manual.
• Inadequate power capacity and
faulty electric work may lead to
fire or electric shock.
Do not randomly connect the
power polarities.
• Risk of product damage and
accidents.
Do not install in areas that
have risks of flooding.
• Risk of electric shock and fire.
Do not use the product if
impurities are present in the
product or if the product is
submerged.
• Risk of accidents such as electric
shock and product damage.
Do not store in a humid area.
• Risk of product malfunctioning.
If the lamp turns off by itself, do
not disassemble the product.
Contact your local LGE sales
representative for repair.
• Risk of electric shock and
product malfunctioning.
Do not stare directly at the
lamp when turned on.
• Strong light may cause visual
impairment.
Do not expose the product to
water when cleaning it.
• Risk of fire and electric shock.
Do not use if the product has
been dropped or exposed to
shock.
• Risk of product malfunctioning.
Must have at least two or
more people working during
installation.
• Risk of product dropping and
causing injury to the user.
Product is heavy. Use a
trolley when transporting the
product.
• Dropping the product may cause
product damage and
malfunction.
Do not install where it may
be exposed to direct
sunlight, humidity, or dust.
Do not clean the product with
inflammable substances
such as alcohol, benzene,
and acetone that may alter
the surface.
Do not install near potential
sources of fire or
inflammable objects, such as
paper or cloth.
• Risk of product malfunctioning
and accidents.
Do not disassemble or arbitrarily
remodel the product. Do not use for
underwater lighting purposes.
(Underwater landscape,
searchlight, fishing, events, etc.)
• Risk of fire and electric shocks.
Must fix the product properly
on the ceiling.
• Risk of product dropping and
causing injury to the user.
Violation of precautions may lead to light injury or product damage.
CAUTION
MFL67703801
Download de handleiding in het Nederlands en/of Engels (PDF, 3.87 MB)
(Denk aan het milieu en print deze handleiding alleen als dat echt noodzakelijk is)

Loading…

Beoordeling

Laat ons weten wat je van de LG FRS640D1F0B Lamp vindt door een beoordeling achter te laten. Wil je je ervaringen met dit product delen of een vraag stellen? Laat dan een bericht achter onderaan de pagina.
Bent u tevreden over de LG FRS640D1F0B Lamp?
Ja Nee
Beoordeel dit product als eerste
0 stemmen

Praat mee over dit product

Laat hier weten wat jij vindt van de LG FRS640D1F0B Lamp. Als je een vraag hebt, lees dan eerst zorgvuldig de handleiding door. Een handleiding aanvragen kan via ons contactformulier.

Meer over deze handleiding

We begrijpen dat het prettig is om een papieren handleiding te hebben voor je LG FRS640D1F0B Lamp. Je kunt de handleiding bij ons altijd downloaden en daarna zelf printen. Indien je graag een originele handleiding wilt hebben, raden we je aan contact op te nemen met LG. Zij kunnen wellicht nog voorzien in een originele handleiding. Zoek je de handleiding van LG FRS640D1F0B Lamp in een andere taal? Kies op de homepage je taal naar keuze en zoek daarna op het modelnummer om te zien of we deze beschikbaar hebben.

Specificaties

Merk LG
Model FRS640D1F0B
Categorie Lampen
Bestandstype PDF
Bestandsgrootte 3.87 MB

Alle handleidingen voor LG Lampen
Meer handleidingen voor Lampen

Veelgestelde vragen over LG FRS640D1F0B Lamp

Ons supportteam zoekt dagelijks naar nuttige productinformatie en antwoorden op veelgestelde vragen. Als er onverhoopt toch een onjuistheid tussen onze veelgestelde vragen staat, laat het ons dan weten via het contactformulier.

Is alle LED verlichting dimbaar? Geverifieerd

Nee, niet alle LED lampen zijn standaard dimbaar. Dit wordt aangegeven op de verpakking en evetueel op de lamp zelf.

Ik vind dit nuttig (462) Lees meer

Ik heb een nieuwe lichtbron in de lamp gedaan, maar deze gaat niet aan, waar kan dit door komen? Geverifieerd

Sommige lampen zijn gemaakt voor lichtbronnen van een specifiek wattage. Wanneer er een lichtbron in wordt gedaan die een hoger wattage vereist van de lamp kan leveren, dan kan het zijn dat het licht niet aangaat. Als de lamp een veel hoger wattage levert van waarvoor de lichtbron gemaakt is, kan de lichtbron doorbranden.

Ik vind dit nuttig (315) Lees meer

Waarom is de kleur van licht belangrijk? Geverifieerd

Er zijn grofweg twee soorten soort licht, warm licht en koud licht. Koud licht houdt je alerter en wakkerder. Warm licht werkt ontspannender. De warmte van licht wordt gemeten in Kelvin en staat aangegeven op de verpakking of de lamp zelf.

Ik vind dit nuttig (255) Lees meer

Wat is lumen? Geverifieerd

Lumen is een meeteenheid voor de totale hoeveelheid zichtbaar licht die een lichtbron naar alle kanten uitstraalt.

Ik vind dit nuttig (190) Lees meer

Welke fittingen zijn er? Geverifieerd

Wereldwijd worden vele soorten fittingen gebruiken, maar de meest gebruikte zijn die met de Edison schroefdraad, aangegeven met de letter E. In de meeste landen zijn fittingen E27 en E14 de standaard. In de Verenigde Staten zijn E26, E17, E12 en E10 de standaard.

Ik vind dit nuttig (142) Lees meer

Wat zegt het wattage over mijn lamp? Geverifieerd

Wattage is een meeteenheid voor het energieverbruik. Lampen met een hogere lichtopbrengst hebben een doorgaans hoger energieverbruik, maar voor het vergelijken van lichtopbrengst moet altijd gekeken worden naar de hoeveelheid lumen.

Ik vind dit nuttig (113) Lees meer

Wat is LED? Geverifieerd

LED staat voor light-emitting diode. Door in de juiste richting stroom door de halfgeleider te laten lopen ontstaat licht.

Ik vind dit nuttig (98) Lees meer
Handleiding LG FRS640D1F0B Lamp