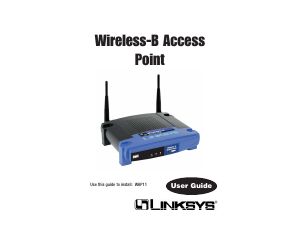
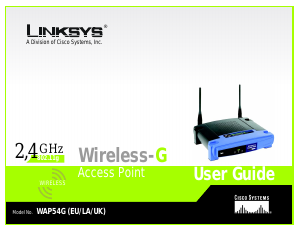
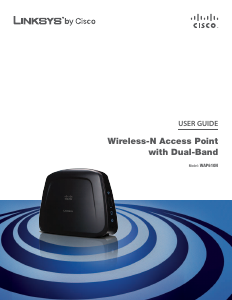
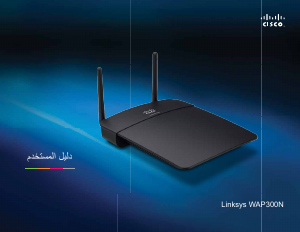
Handleiding Linksys LAPN600 Access point

Handleiding voor je Linksys LAPN600 Access point nodig? Hieronder kun je de handleiding gratis bekijken en downloaden als PDF in het Nederlands en/of Engels. Dit product heeft 1 veelgestelde vraag, 0 comments en heeft 0 stemmen. Is dit niet de handleiding die je zoekt, neem dan contact met ons op.

Is je product kapot en biedt de handleiding geen oplossing meer? Dan kun je voor reparatie gratis terecht bij Repair Café.

Handleiding

Loading…

LAPN600
User Guide
ii
Table of Contents
Linksys
ii
CHAPTER 1 QUICK START GUIDE . . . . . . . . . . . . . . . . . . . . .1
Package Contents
. . . . . . . . . . . . . . . . . . . . . . . . . . . . . .1
Physical Details
. . . . . . . . . . . . . . . . . . . . . . . . . . . . . . . .1
Mounting Guide
. . . . . . . . . . . . . . . . . . . . . . . . . . . . . . .2
CHAPTER 2 ACCESS POINT SETUP
. . . . . . . . . . . . . . . . . . . .3
Overview
. . . . . . . . . . . . . . . . . . . . . . . . . . . . . . . . . . . .3
Setup Using a Web Browser
. . . . . . . . . . . . . . . . . . . . . . . .3
Setup Wizard
. . . . . . . . . . . . . . . . . . . . . . . . . . . . . . . . .4
User Accounts
. . . . . . . . . . . . . . . . . . . . . . . . . . . . . . . .5
Time Screen
. . . . . . . . . . . . . . . . . . . . . . . . . . . . . . . . . .6
Log Settings
. . . . . . . . . . . . . . . . . . . . . . . . . . . . . . . . . .7
Management Access
. . . . . . . . . . . . . . . . . . . . . . . . . . . .8
SSL Certificate
. . . . . . . . . . . . . . . . . . . . . . . . . . . . . . . .9
Network Setup
. . . . . . . . . . . . . . . . . . . . . . . . . . . . . . . 10
Advanced
. . . . . . . . . . . . . . . . . . . . . . . . . . . . . . . . . . 11
Basic Settings
. . . . . . . . . . . . . . . . . . . . . . . . . . . . . . . .13
Security Settings
. . . . . . . . . . . . . . . . . . . . . . . . . . . . . .14
Rogue AP Detection
. . . . . . . . . . . . . . . . . . . . . . . . . . . .19
Scheduler
. . . . . . . . . . . . . . . . . . . . . . . . . . . . . . . . . . 20
Scheduler Association
. . . . . . . . . . . . . . . . . . . . . . . . . . 21
Connection Control
. . . . . . . . . . . . . . . . . . . . . . . . . . . . 21
Rate Limit
. . . . . . . . . . . . . . . . . . . . . . . . . . . . . . . . . . 22
QoS
. . . . . . . . . . . . . . . . . . . . . . . . . . . . . . . . . . . . . . 22
Workgroup Bridge
. . . . . . . . . . . . . . . . . . . . . . . . . . . . .23
Advanced Settings
. . . . . . . . . . . . . . . . . . . . . . . . . . . . 24
CHAPTER 3 OPERATION AND STATUS
. . . . . . . . . . . . . . . . .27
Operation
. . . . . . . . . . . . . . . . . . . . . . . . . . . . . . . . . . 27
System Summary
. . . . . . . . . . . . . . . . . . . . . . . . . . . . . 27
LAN Status
. . . . . . . . . . . . . . . . . . . . . . . . . . . . . . . . . .28
Wireless Status
. . . . . . . . . . . . . . . . . . . . . . . . . . . . . . . 29
Wireless Clients
. . . . . . . . . . . . . . . . . . . . . . . . . . . . . . .30
Statistics
. . . . . . . . . . . . . . . . . . . . . . . . . . . . . . . . . . . 30
Log View
. . . . . . . . . . . . . . . . . . . . . . . . . . . . . . . . . . . 31
CHAPTER 4 ACCESS POINT MANAGEMENT
. . . . . . . . . . . . . 32
Overview
. . . . . . . . . . . . . . . . . . . . . . . . . . . . . . . . . . .32
Firmware Upgrade
. . . . . . . . . . . . . . . . . . . . . . . . . . . . .32
Configuration Backup/Restore
. . . . . . . . . . . . . . . . . . . . . 33
Factory Default
. . . . . . . . . . . . . . . . . . . . . . . . . . . . . . .34
Reboot
. . . . . . . . . . . . . . . . . . . . . . . . . . . . . . . . . . . . 34
Ping Test
. . . . . . . . . . . . . . . . . . . . . . . . . . . . . . . . . . . 35
Packet Capture
. . . . . . . . . . . . . . . . . . . . . . . . . . . . . . . 35
Diagnostic Log
. . . . . . . . . . . . . . . . . . . . . . . . . . . . . . . 36
APPENDIX A TROUBLESHOOTING
. . . . . . . . . . . . . . . . . . . 37
Overview
. . . . . . . . . . . . . . . . . . . . . . . . . . . . . . . . . . .37
General Problems
. . . . . . . . . . . . . . . . . . . . . . . . . . . . . 37
APPENDIX B ABOUT WIRELESS LANS
. . . . . . . . . . . . . . . . . 38
Overview
. . . . . . . . . . . . . . . . . . . . . . . . . . . . . . . . . . .38
Wireless LAN Terminology
. . . . . . . . . . . . . . . . . . . . . . . .38
Table of Contents
iii
Table of Contents
Linksys
APPENDIX C PC AND SERVER CONFIGURATION . . . . . . . . . . 40
Overview
. . . . . . . . . . . . . . . . . . . . . . . . . . . . . . . . . . .40
Using WEP
. . . . . . . . . . . . . . . . . . . . . . . . . . . . . . . . . .40
Using WPA2-PSK
. . . . . . . . . . . . . . . . . . . . . . . . . . . . . . 40
Using WPA2-Enterprise
. . . . . . . . . . . . . . . . . . . . . . . . . .41
802.1x Server Setup (Windows 2000 Server) . . . . . . . . . . . . 41
802.1x Client Setup on Windows XP. . . . . . . . . . . . . . . . . .46
Using 802.1x Mode (without WPA). . . . . . . . . . . . . . . . . . .49
1
CHAPTER 1 Quick Start Guide
Linksys
1
CHAPTER 1 Quick Start Guide
Package Contents
• LinksysWirelessAccessPoint
• QuickStartGuide
• EthernetCable
• ACPowerAdapter
• CDwithDocumentation
• MountingBracket
• MountingKit
• CeilingMountBackPlate
• DrillingLayoutTemplate
Physical Details
There is one LED for the device.
LED
LED Color Activity Status
Green Blinking System is booting.
Solid System is normal; no wireless device
connected.
Blue Blinking Software upgrade in process.
Solid System is normal; at least one wireless
device connected.
Red Solid Booting process or update failed; hard
reset or service required.
Port and Button
Power Port - Connect the AC power adapter to this port.
NOTE: Use only the adapter that came with your access point.
Ethernet Port - Connect a wired network device to this port. This port supports
PoE (Power over Ethernet) with a PoE switch or PoE injector. LAPN600 is
powered on from an 802.3at compliant source.
NOTE: When both PoE and AC power adapter are connected to access point,
device will get power from PoE as higher precedence.
Using Cat5e or better cable is highly recommended.
Reset Button - Press and hold this button for less than 15 seconds to power
cycle device. Press and hold for longer than 15 seconds to reset the device to
factory default settings.
2
CHAPTER 1 Quick Start Guide
Linksys
Mounting Guide
To avoid overheating, do not install your access point if ambient temperatures
exceed 104°F (40°C). Install on a flat, stable surface, near the center of your
wireless coverage area making sure not to block vents on the sides of the device
enclosure.
Wall Installation
1. Position drilling layout template at the desired location.
2. Drill four screw holes on the mounting surface. If your Ethernet cable is
routed behind the wall, mark Ethernet cable hole as well.
3. Secure the mounting bracket on the wall with anchors and screws.
4. If your Ethernet cable is routed behind the wall, cut or drill the Ethernet
cable hole you marked in Step 2. Feed the Ethernet cable through the hole.
5. Connect the Ethernet cable and/or AC power adapter to your device.
6. Slide the device into the bracket. Turn clockwise until it locks into place.
Ceiling Installation
1. Select ceiling tile for mounting and remove tile.
2. Position drilling layout template at the desired location.
3. Drill four screw holes and Ethernet cable hole on the surface of ceiling tile.
4. Place back plate on the opposite side of ceiling tile. Secure mounting
bracket to the ceiling tile with flathead screw and nut. Route the Ethernet
cable through the Ethernet cable hole.
5. Connect the Ethernet cable and/or AC power adapter to your device
6. Slide the device into the bracket. Turn access point clockwise until it locks.
7. Replace tile in ceiling.
IMPORTANT
Improper or insecure mounting could result in damage to the device or personal
injury. Linksys is not responsible for damages caused by improper mounting.
CHAPTER 2 Access Point Setup
Linksys
3
CHAPTER 2 Access Point Setup
Overview
This chapter describes the setup procedure to connect the wireless access
point to your LAN, and configure it as an access point for your wireless stations.
Wireless stations may also require configuration. For details, see Appendix C -
Wireless Station Configuration.
The wireless access point can be configured using a Web browser.
Setup using a Web Browser
Your browser must support JavaScript. The configuration program has been
tested on the following browsers:
• Firefox3.5orlater,Chrome8orlater,Safari5orlater
• InternetExplorer7orlater
Setup Procedure
Makesuredeviceispoweredonbeforeyou continuesetup.If LEDlightisoff,
check that AC power adapter, or PoE cable, is properly connected on both ends.
Access device’s browser-based setup:
1. Use the included cable to connect the access point to your network via a
network switch or router.
2. Open a web browser on a computer connected to your network. Enter the
IP address ofyour accesspoint. By factory default, the IPaddress will be
assignedbyaDHCPserver(usuallythenetworkrouter).IfthereisnoDHCP
serveronyournetwork,thedefaultIPaddressis192.168.1.252/255.255.255.0.
Note: Use a computer hardwired to the same network as your access point for
browser-based setup access. Access to browser-based setup via WiFi is disabled
by default.
3. Typeindefaultusername:admin,andpassword:admin.
4. Click Login to launch the browser-based setup and follow the on-screen
instructions.
Figure1:PasswordDialog
IF YOU CAN’T CONNECT:
ItislikelythatyourPC’sIPaddressisincompatiblewiththewireless
accesspoint’sIPaddress.ThiscanhappenifyourLANdoesnot
haveaDHCPServer.IfthereisnoDHCPserverinyournetwork,the
accesspointwillfallbacktoitsdefaultIPaddress:192.168.1.252,
withanetworkmaskof255.255.255.0.
Or,ifyourPC’sIPaddressisnotcompatiblewiththis,youmust
changeyourPC’sIPaddresstoanunusedvalueintherange
192.168.1.1~192.168.1.254,withanetworkmaskof255.255.255.0.
SeeAppendixA-WindowsTCP/IPfordetailsforthisprocedure.
CHAPTER 2 Access Point Setup
Linksys
4
Setup Wizard
The first time you connect to the wireless access point, run the Setup Wizard to
configure the device.
1. Click the Quick Start link on the main menu
Figure 2: Setup Wizard
2. On the first screen, click Launch.
3. Set the password on the Device Password screen, if desired.
4. Configure the time zone, date and time for the device on System Settings
screen.
Figure 3: Setup Wizard - System Settings
5. On the IPv4 Address screen (Figure 4) configure the IP address of the device
then click Next. If you want to configure more than 4 SSIDs, please go to
Configuration Wireless Basic Settings. The access point supports up
to 8 SSIDs per radio.
Figure 4: Setup Wizard - IPv4
6. Set the SSID information on the Wireless Network screen. Click Next.
Figure 5: Setup Wizard - Wireless Network
7. On the Wireless Security Screen (Figure 6) configure the wireless security
settings for the device. Click Next. If you are looking for security options that
are not available in the wizard, go to Configuration Wireless Security
page. The access point supports more sophisticated security options there.
CHAPTER 2 Access Point Setup
Linksys
5
Figure 6: Setup Wizard - Wireless Security
8. On the Summary screen, check the data to make sure they are correct and
then click Submit to save the changes.
Figure 7: Setup Wizard - Summary
9. Click Finish to leave the wizard.
Figure 8: Setup Wizard - Finish
User Accounts
Click User Accounts on the Administration menu to manage user accounts. The
access point supports up to 5 users: one administrator and four normal users.
Figure 9: User Accounts
Download de handleiding in het Nederlands en/of Engels (PDF, 1.78 MB)
(Denk aan het milieu en print deze handleiding alleen als dat echt noodzakelijk is)

Loading…

Meer over deze handleiding

We begrijpen dat het prettig is om een papieren handleiding te hebben voor je Linksys LAPN600 Access point. Je kunt de handleiding bij ons altijd downloaden en daarna zelf printen. Indien je graag een originele handleiding wilt hebben, raden we je aan contact op te nemen met Linksys. Zij kunnen wellicht nog voorzien in een originele handleiding. Zoek je de handleiding van Linksys LAPN600 Access point in een andere taal? Kies op de homepage je taal naar keuze en zoek daarna op het modelnummer om te zien of we deze beschikbaar hebben.

Specificaties

Merk Linksys
Model LAPN600
Categorie Access points
Bestandstype PDF
Bestandsgrootte 1.78 MB

Alle handleidingen voor Linksys Access points
Meer handleidingen voor Access points

Veelgestelde vragen over Linksys LAPN600 Access point

Ons supportteam zoekt dagelijks naar nuttige productinformatie en antwoorden op veelgestelde vragen. Als er onverhoopt toch een onjuistheid tussen onze veelgestelde vragen staat, laat het ons dan weten via het contactformulier.

Wat is het verschil tussen een range extender en een access point? Geverifieerd

Het grootste verschil is dat een access point over het algemeen een bedrade verbinding heeft met een modem of router. Een range extender versterkt daarentegen een bestaand draadloos signaal.

Ik vind dit nuttig (10) Lees meer

Beoordeling

Laat ons weten wat je van de Linksys LAPN600 Access point vindt door een beoordeling achter te laten. Wil je je ervaringen met dit product delen of een vraag stellen? Laat dan een bericht achter onderaan de pagina.
Bent u tevreden over de Linksys LAPN600 Access point?
Ja Nee
Beoordeel dit product als eerste
0 stemmen

Praat mee over dit product

Laat hier weten wat jij vindt van de Linksys LAPN600 Access point. Als je een vraag hebt, lees dan eerst zorgvuldig de handleiding door. Een handleiding aanvragen kan via ons contactformulier.

Handleiding Linksys LAPN600 Access point

Gerelateerde producten

Gerelateerde categorieën