
GB-1 GB-2 GB-3
UNPACKING
Remove all packaging from the vacuum cleaner. Retain the packaging. If you
dispose of it please do so according to any local regulations.
The following items are included:
• Main Unit
• Wall Stand
(P.N.: D5901015305001533)
• Upholstery Brush
(P.N.: C97590101703)
• Mains Adapter
(P.N.: G28100331301)
• Instruction Manual
(P.N.: L48VHH12-002)
• Crevice Tool
(P.N.: D5901019F1003)
IMPORTANT!
Please read the following BEFORE wall mounting the charger base.
1. Before drilling any holes ensure that their position is away from hidden cables and
pipes.
2. Ensure that there is a reachable mains socket for the mains adapter.
3. Ensure the wall is strong enough to support the vacuum cleaner and charger base
plus the reasonable down force involved when inserting and removing the
vacuum cleaner.
4. There should be at least 300mm of free space above and 130mm below the
bracket to facilitate storage and removal of vacuum cleaner.
5. Choose a mounting location away from heat and dampness and out of easy reach
of children. Garages, workshops and indoor areas are the ideal storage / charging
places for the vacuum cleaner.
6. Extreme weather (too hot or too cold) is dangerous and not good for the battery.
Do not charge the battery in temperatures above 37°C, or below 0°C.
BASIC OPERATION
1. Lift and remove the vacuum cleaner from the charging stand and move the On
/O switch to the “ ” position. The vacuum cleaner will start up.
2. Vacuum the selected surface in any direction until the area is clean.
3. Cleaning attachments are provided. Ensure the vacuum cleaner is fully turned
o before attaching the attachments.
All 3 attachments t into the mouth of the dust container.
Crevice Tool : For vacuuming hard to reach spaces such as along cracks
and corners.
Squeeze Nozzle : For vacuuming up liquids (non-ammable) such as spilt
drinks.
Upholstery Brush : For vacuuming upholstery, curtains, etc.
4. Move the On/O backwards to the “ ” position to turn o the vacuum cleaner.
Slightly lift the appliance head upwards to avoid dust leaking out of the dust
container before switching it o.
5. Empty the container before doing any more vacuuming and clean it before
putting it away.
6. Slot the vacuum cleaner onto the charger base. The pilot light will illuminate to
indicate that the vacuum cleaner is being charged.
Regular charging time is 14 hours. Do not exceed 24 hours of charging time.
1. Make sure the recharging socket of the vacuum cleaner is connected.
2. Plug in the mains adapter. The charging indicator will illuminate to indicate that the
vacuum cleaner is being charged. It is recommended to charge the vacuum cleaner
for 16 hours before rst use.
3. A fully charged battery pack will give approximately 7-10 minutes of cleaning time.
It is normal that the charger base will become warm while charging.
64mm
WALL MOUNTING THE CHARGING STAND
Hitch the wall stand onto the bolts
3
Slide the vacuum cleaner and the
accessories into the charging stand
4
ABOUT THE BATTERIES
The NI-MH batteries in this vacuum cleaner are rechargeable and have a service
life of many years (depending on use and storage conditions). When the
batteries eventually expire, they should be removed for recycling. Please contact
your local solid waste authority for recycling information.
• Always dispose of batteries safely. • Never dispose of batteries in a re.
• Never try to dismantle batteries. • Never short circuit batteries.
MAINTENANCE / CLEANING
Dirt and liquid in the dust container should be emptied after each use or at the
time when the dust exceeds the maximum dust mark.
1. Hold the vacuum cleaner vertically with the air-intake (nozzle end) pointing
down to avoid spillage.
2. Press the release button on the top of the vacuum cleaner and release the dust
container over a rubbish bin and remove the lter and water baffle from the
dust container.
3. Empty the contents of the dust container into the rubbish bin.
4. Wash, then wipe and dry the interior of the dust container. Do not clean the
vacuum cleaner with paint thinner or chemical solutions as this will damage
the vacuum cleaner.
5. Rinse the lter, water baffle, air intake in running water at regular intervals. Dry
before reinstalling. Ret the air intake.
6. Wipe the inside of the dust container with a damp cloth.
7. Ret the water baffle and the lter into the dust container.
8. Ret the dust container onto the handle (it will click into place) and slot the
vacuum cleaner to the charging stand.
On/O SwitchRelease Button
Crevice Tool
Upholstery Brush
Squeeze Nozzle Mains Adapter
Handle
PRODUCT OVERVIEW
Storage Compartments for Crevice Tool,
Upholstery Brush and Squeeze Nozzle
Charging Stand
Dust
Container
Water Baffle
Filter
Charging
Indicator
Recharging Socket
If items are missing or damaged, please contact Partmaster (UK only).
Tel: 0844 800 3456 for assistance.
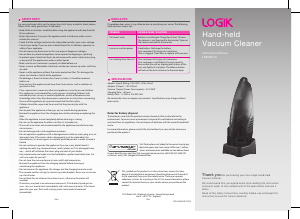
Hand-held
Vacuum Cleaner
Instruction Manual
L48VHH12
Thank you for purchasing your new Logik Hand-held
Vacuum Cleaner.
We recommend that you spend some time reading this instruction
manual so that to fully understand all the operational features it
offers.
Read all the safety instructions carefully before use and keep this
instruction manual for future reference.
C
M
Y
CM
MY
CY
CMY
K
Logik L48VHH12_IB_final_RC120601.pdf 2 01/06/2012 10:00 AM

Praat mee over dit product
Laat hier weten wat jij vindt van de Logik L48VHH12 Kruimeldief. Als je een vraag hebt, lees dan eerst zorgvuldig de handleiding door. Een handleiding aanvragen kan via ons contactformulier.