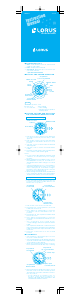
Seconds setting
Depress button “D” in accordance with a time
signal. The seconds are reset to “00” and start
immediately.
When the seconds count any number from “30” to
“59” and button “D” is depressed, one minute is
added and the seconds are reset to “00”.
Notes:
1. When setting the hour digits in the 12-hour
indication, check that “A”(AM)/“P”(PM) mark
is set properly. In the 24-hour indication, there
is no indication.
2. Once the year, month and date have been set,
the day of the week is set automatically.
3. If the watch is left untouched in the time/cal-
endar setting display with the digits flashing,
it will automatically return to the time/calendar
display in 2 to 3 minutes.
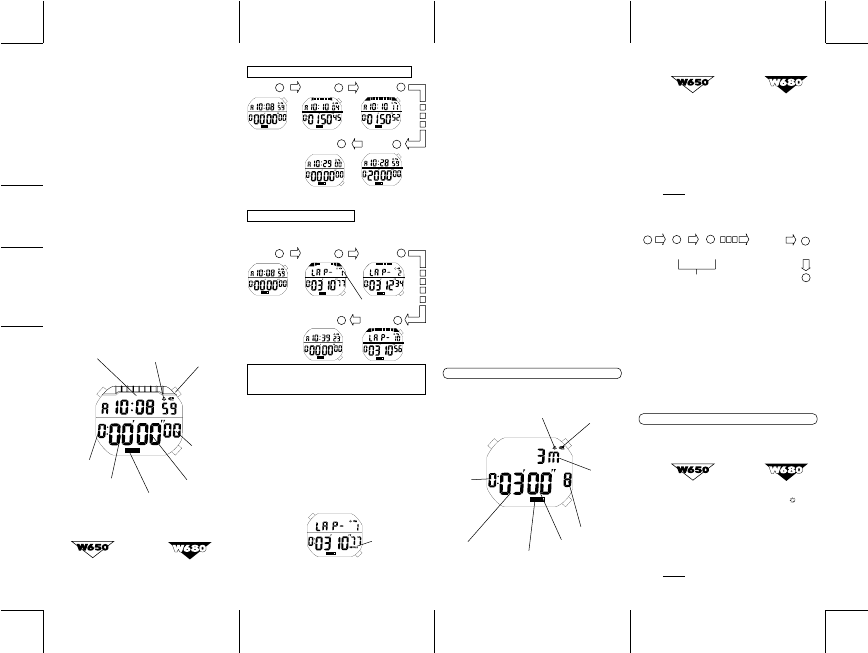
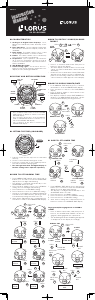
Stopwatch Operation
Depress mode selector
“A” to show the
stopwatch display.
Turn mode selector
“A” to set “CHRONO
G.” at the 12 o’clock
position.
Accumulated elapsed time measurement
C
C
Stop
Start
Reset D
**Accumulate repeatedly by depressing button
“C”.
C
Restart
Stop
C
[Memory recall after measurement]
1. Depress button “B” to show the memory recall
display. The oldest measurement stored in
memory is displayed.
2. Wity each depression of button “D”, the stored
data are recalled successively from the oldest
to the newest.
[Memory recall during measurement]
1. Depress button “B” to show the memory recall
display. The newest measurement stored in
memory is displayed.
2. With each depression of button “D”, the stored
data are recalled successively from the oldest
to the newest.
Note: Even if the digits are reset to “00” in the
stopwatch measurement, stored data is not
erased and can be recalled unless a new
measurement is started.
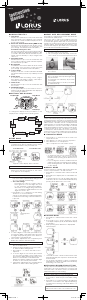
Lap time measurement
• “Lap time” refers to an elapsed time required to
cover a given section of the whole distance.
C
D
Lap 1 D
C
Lap 2Start
D
StopReset
Notes:
1. The lap number counts up to “99”. After “99”,
the number is displayed in two digits such as
“00” for 100, “01” for 101, and so on.
2. Up to 8 lap times can be stored in memory. If
more than 8 lap times are measured, the measurements
over 8 will not be stored in memory.
Memory Function
• Up to 8 lap times are automatically stored in
memory, and they can be recalled either during
or after the measurement.
Selection of the preset time
How to Use the Preset Timer
Hourly time
signal mark
• Four different lengths of time (3, 5, 10 and 15
minutes) have been preset for the timer.
Auto
illumination
mark
Turn mode
selector “A” to
set the desired
preset time at
the 12 o’clock
position.
1. Depress mode selector
“A” to show the timer
display. The time set
previously will be displayed.
2. Depress button “D” to
select the desired preset
time. Selection of the
preset time is made in
the following order by
depressing button “D”.
5 min.3 min.
Adjustable
timer
↓
10 min.15 min.
→→
←
↑
C
C
Preset timer operation
Depress buttons in the following order.
Stop
C
C
D
Start Restart Stop
Restart and stop of the
timer can be repeated
by depressing button
“C”.
Warning
sound
beeps.
Time-up
* When the set time is up, a warning sound beeps
for 5 seconds as the display is illuminated. To
stop them manually, depress/turn mode selector
“A”, or depress button “B”, “C”, “D” or LITE
button.
Notes:
1. After the countdown is repeated 99 times, the
number of times the countdown is repeated is
displayed in two digits such as “00” for 100,
“01” for 101, and so on.
2. Once the timer is set, the set time is retained
and can be used repeatedly unless it is readjusted.
How to Use the Adjustable Timer
• The adjustable timer can be set up to 9 hours
and 59 minutes in minutes.
Adjustable timer setting
1. Depress mode selector
“A” to show the timer
display.
2. Depress button “D” to
select the adjustable timer.
Selection of the adjustable
timer and preset timers
is made in the following
order by depressing button
“D”.
5 min.3 min.
Adjustable
timer
↓
10 min.15 min.
→→
←
↑
1. Turn mode
selector “A”
to set “
MIN.”
at the 12
o’clock posi-
tion. Then,
proceed to step
“3” below,
skipping step
“2”.
➧
➧
←
CHRONO
←
CHRONO
←
CHRONO
←
CHRONO
←
CHRONO
←
CHRONO
CHRONO
←
**
**
←
CHRONO
←
CHRONO
←
CHRONO
“RECALL” mark
D
B
Preset
time
Hour
Minutes
Number of
times the
countdown
is repeated
CHRONO
TIMER
D
C
B
B
C
D
1/100
seconds
Seconds
Minutes
Stopwatch display mark
Hour
CHRONO
Lap No.
Seconds
Timer display mark
Reset
* Lap time measured and lap number remain
displayed for 10 seconds, and then the mea-
surement in progress and the current time
appear.
** Can repeat by depressing button “D”.
■ HOW TO USE THE TIMER
• Two types of timers (adjustable timer and preset
timer) are available.
• After the set time is up, the timer counts down
the set time repeatedly. After the timer is used,
therefore, be sure to reset it as the battery
energy is consumed enormously to shorten the
battery life.
• By turning on the button operation confirmation
sound, a beep sounds every minute to signal
the lapse of time.
• By turning on the auto illumination function,
the display is illuminated every minute to signal
the lapse of time for the last 19 minutes of the
countdown. If the countdown is repeated more
than 10 times, however, the display will not be
illuminated.
■
HOW TO USE THE STOPWATCH
• The stopwatch can measure up to 9 hours, 59
minutes, 59 seconds and 99 in 1⁄100 seconds.
• By turning on the button operation confirmation
sound, a beep sounds every minute to signal the
lapse of time.
• By turning on the auto illumination function,
the display is illuminated every minute to signal
the lapse of time for the first 19 minutes.
* Even if the stopwatch display is changed to
another while the measurement is in prog-
ress, it continues counting properly. After
the stopwatch is used, however, be sure to
reset it as the battery energy is consumed
enormously to shorten the battery life.
* While the stopwatch is measuring, the graphic
display turns on and off repeatedly.
Current time
Hourly time
signal mark
Auto
illumination
mark


Praat mee over dit product
Laat hier weten wat jij vindt van de Lorus W680 Uurwerk. Als je een vraag hebt, lees dan eerst zorgvuldig de handleiding door. Een handleiding aanvragen kan via ons contactformulier.