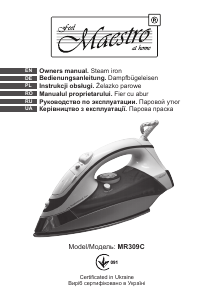
Handleiding Maestro MR316 Strijkijzer

Handleiding voor je Maestro MR316 Strijkijzer nodig? Hieronder kun je de handleiding gratis bekijken en downloaden als PDF in het Nederlands en/of Engels. Dit product heeft 4 veelgestelde vragen, 0 comments en heeft 0 stemmen. Is dit niet de handleiding die je zoekt, neem dan contact met ons op.

Is je product kapot en biedt de handleiding geen oplossing meer? Dan kun je voor reparatie gratis terecht bij Repair Café.

Handleiding

Loading…

6 7
SELECTING THE TEMPERATURE Picture 2.3
- Put the iron in a vertical position.
- Put the plug in the socket.
- Adjust the thermostat knob (9/Picture 1) according to the international symbol on the
garment label [Table1]. The plate temperature control light (8/Picture 1) indicates that the
iron is heating up. Wait until the plate temperature control light goes off before ironing.
Warning: during ironing, the plate temperature control light (8/Picture 1) comes on at
intervals, indicating that the selected temperature is maintained. If you lower the thermostat
temperature after ironing at a high temperature, do not start ironing until the plate
temperature control light comes on again.
SELECTING THE STEAM Picture 2.1
The quantity of steam is regulated by the steam selector (3/Picture 1).
- Move the steam selector to a position between minimum and maximum depending
on the quantity of steam required and the temperature selected.
Please note: the iron gives off steam continuously only if you hold the iron horizontally.
You can stop the continuous steam by placing the iron in a vertical position or by moving
the steam selector to «0». As indicated on the thermostat knob and in the initial table, you
can only use steam at the highest temperatures. If the selected temperature is too low,
water may drip onto the plate.
Selecting Steam shot and steam when ironing vertically. Pictures 2.4-2.5
Press the steam shot button (5/Picture 1) to generate a powerful burst of steam that can
penetrate the fabrics and smooth the most difcult and tough creases. Wait for a few
seconds before pressing again.
By pressing the steam shot button at intervals you can also iron vertically (curtains, hung
garments, etc.).
Warning: the steam shot function can only be used at high temperatures. Stop the
emission when the plate temperature control light (8/Picture 1) comes on, than start ironing
again only after the light has gone off.
DRY IRONING
To iron without steam, follow the instructions in section “steam ironing”, leaving the steam
selector (8/Picture 1) in the position ”no steam”.
SPRAY FUNCTION Picture 2.6
Make sure that there is water in the water tank. Press the spray button (4/Picture 1) slowly
(for a dense spray) or quickly (for a vaporized spray).
Warning: for delicate fabrics, we recommend moistening the fabric beforehand using the
spray function , or putting a damp cloth between the iron and the fabric. To avoid staining,
spray on silk or synthetic fabrics.
EN
SELF-CLEANING
The self-cleaning feature cleans inside the plate, removing impurities. We
recommend using it every 10-15 days. Directions:
-Fill the reservoir according to the “lling the water reservoir” section.
-Plug the product into a standard electrical outlet near a sink , turn the temperature control
dial the MAX position, rest the heel of the iron on a at, stable surface and allow it to heat
until the temperature light (8/Picture 1) goes out.
-Hold the iron horizontally over the sink and turn the steam control dial (3/Picture1) to
”self-clean”. Picture 2.7 Boiling water and steam will be released from the soleplate do not
use the, taking impurities with them . Move the iron forward and backward until the water
reservoir is empty. Then, turn the steam control dial to ”no steam” and the temperature
control dial to MIN . Unplug the product, rest it on the heel . and allow it to completely cool.
- If it appears that more self-cleaning is necessary (e.g., if impurities can stell be seen),
repeat steps 1-3 until the soleplate and water reservoir are clean. Dry thoroughly.
impurities come out.
- When the soleplate has cooled down, you can clean it with a damp cloth.
Maintenance and care
Warning!
Before cleaning the iron in any way, make sure that the appliance plug is not connected to
the socket.
Before cleaning unplug the appliance and let it cool completely.
Do not let water get inside the appliance, except the parts are special made for it.
-Avoid scratching the plate with steel wool or metallic objects.
-Any deposits, starch residue or size left on the plate can be removed using a damp cloth
or an unabrasive liquid detergent.
The plastic parts can be cleaned with a damp cloth then wiped over with a dry cloth.
Storage
- Before cleaning unplug the appliance and let it cool completely.
- Turn the temperature control dial and steam adjustment knob to the «0» position.
- Open ller cover, turn appliance upside down and pour out the water.
- Keep the appliance in cool dry place, away from children and persons with reduced
mental or physical abilities Picture 2.8.
Environmental protection
Old appliances contain valuable materials that can be recycled. Please arrange for the
proper recycling of old appliances. Please dispose your old appliances using appropriate
collection systems.
Subject to technical modications!
Download de handleiding in het Nederlands en/of Engels (PDF, 1.83 MB)
(Denk aan het milieu en print deze handleiding alleen als dat echt noodzakelijk is)

Loading…

Beoordeling

Laat ons weten wat je van de Maestro MR316 Strijkijzer vindt door een beoordeling achter te laten. Wil je je ervaringen met dit product delen of een vraag stellen? Laat dan een bericht achter onderaan de pagina.
Bent u tevreden over de Maestro MR316 Strijkijzer?
Ja Nee
Beoordeel dit product als eerste
0 stemmen

Praat mee over dit product

Laat hier weten wat jij vindt van de Maestro MR316 Strijkijzer. Als je een vraag hebt, lees dan eerst zorgvuldig de handleiding door. Een handleiding aanvragen kan via ons contactformulier.

Meer over deze handleiding

We begrijpen dat het prettig is om een papieren handleiding te hebben voor je Maestro MR316 Strijkijzer. Je kunt de handleiding bij ons altijd downloaden en daarna zelf printen. Indien je graag een originele handleiding wilt hebben, raden we je aan contact op te nemen met Maestro. Zij kunnen wellicht nog voorzien in een originele handleiding. Zoek je de handleiding van Maestro MR316 Strijkijzer in een andere taal? Kies op de homepage je taal naar keuze en zoek daarna op het modelnummer om te zien of we deze beschikbaar hebben.

Specificaties

Merk Maestro
Model MR316
Categorie Strijkijzers
Bestandstype PDF
Bestandsgrootte 1.83 MB

Alle handleidingen voor Maestro Strijkijzers
Meer handleidingen voor Strijkijzers

Veelgestelde vragen over Maestro MR316 Strijkijzer

Ons supportteam zoekt dagelijks naar nuttige productinformatie en antwoorden op veelgestelde vragen. Als er onverhoopt toch een onjuistheid tussen onze veelgestelde vragen staat, laat het ons dan weten via het contactformulier.

Kan ik de strijkzool schoonmaken met een schuurspons? Geverifieerd

Nee, dit kan de strijkzool beschadigen. Gebruik voor het schoonmaken een vochtige doek of een zachte spons.

Ik vind dit nuttig (365) Lees meer

Wat zijn de verschillen tussen een stoomstrijkijzer en een gewoon strijkijzer? Geverifieerd

Het grootste voordeel van een stoomstrijkijzer is dat het de stof makkelijker glad krijgt door gebruik van stoom. Een gewoon strijkijzer is daarentegen een stuk lichter en vaak veel goedkoper.

Ik vind dit nuttig (298) Lees meer

Mijn strijkzool is verkleurd, kan ik hier nog mee strijken? Geverifieerd

Dat kan, echter is er wel een kans dat het afgeeft op lichtgekleurde kleding.

Ik vind dit nuttig (247) Lees meer

Kan ik over knopen heen strijken? Geverifieerd

Nee, dit kan de strijkzool beschadigen en hierdoor zal het strijkijzer minder goed werken. Strijk daarom nooit over knopen, ritsen of harde voorwerpen.

Ik vind dit nuttig (171) Lees meer
Handleiding Maestro MR316 Strijkijzer

Gerelateerde producten

Gerelateerde categorieën