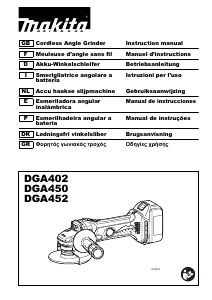
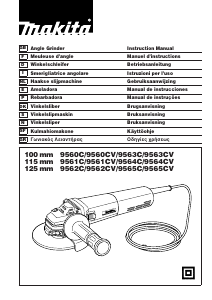
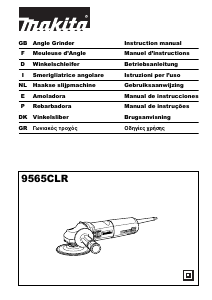
Handleiding Makita 9565CLR Haakse slijpmachine

Handleiding voor je Makita 9565CLR Haakse slijpmachine nodig? Hieronder kun je de handleiding gratis bekijken en downloaden als PDF in het Nederlands en/of Engels. Dit product heeft 4 veelgestelde vragen, 0 comments en heeft 0 stemmen. Is dit niet de handleiding die je zoekt, neem dan contact met ons op.

Is je product kapot en biedt de handleiding geen oplossing meer? Dan kun je voor reparatie gratis terecht bij Repair Café.

Handleiding

Loading…

7
FUNCTIONAL DESCRIPTION
CAUTION:
Always be sure that the tool is switched off and
unplugged before adjusting or checking function on the
tool.
Shaft lock (Fig. 1)
CAUTION:
Never actuate the shaft lock when the spindle is
moving. The tool may be damaged.
Press the shaft lock to prevent spindle rotation when
installing or removing accessories.
Switch action (Fig. 2)
CAUTION:
Before plugging in the tool, always check to see that
the slide switch actuates properly and returns to the
“OFF” position when the rear of the slide switch is
depressed.
To start the tool, slide the slide switch toward the “I (ON)”
position. For continuous operation, press the front of the
slide switch to lock it.
To stop the tool, press the rear of the slide switch, then
slide it toward the “O (OFF)” position.
Indication lamp (Fig. 3)
The indication lamp lights up green when the tool is
plugged. If the indication lamp does not light up, the mains
cord or the controller may be defective. The indication
lamp is lit but the tool does not start even if the tool is
switched on, the carbon brushes may be worn out, or the
controller, the motor or the ON/OFF switch may be
defective.
Unintentional restart proof
The tool does not start with the switch being lock-on even
when the tool is plugged.
At this time, the indication lamp flickers red and shows the
unintentional restart proof device is on function.
To cancel the unintentional restart proof, return the slide
switch to “O(OFF)” position, then release it.
Speed adjusting dial (Fig. 4)
The rotating speed can be changed by turning the speed
adjusting dial to a given number setting from 1 to 5.
Higher speed is obtained when the dial is turned in the
direction of number 5. And lower speed is obtained when
it is turned in the direction of number 1.
Refer to the below table for the relationship between the
number settings on the dial and the approximate rotating
speed.
CAUTION:
If the tool is operated continuously at low speeds for a
long time, the motor will get overloaded and heated up.
The speed adjusting dial can be turned only as far as 5
and back to 1. Do not force it past 5 or 1, or the speed
adjusting function may no longer work.
The tools equipped with electronic function are easy to
operate because of the following features.
Electronic constant speed control
Possible to get fine finish, because the rotating speed
is kept constantly even under the loaded condition.
Soft start feature
Soft start because of suppressed starting shock.
Overload protector
When the load on the tool exceeds admissible levels,
power to the motor is reduced to protect the motor from
overheating. When the load returns to admissible
levels, the tool will operate as normal.
ASSEMBLY
CAUTION:
Always be sure that the tool is switched off and
unplugged before carrying out any work on the tool.
Installing side grip (handle) (Fig. 5 & 6)
Remove one of the screws which secure gear housing
and head cover, then screw the side grip on the tool.
CAUTION:
Always be sure that the side grip is installed securely
before operation.
Installing or removing abrasive
disc (Fig. 7)
Remove all dirt or foreign matter from the pad.
Screw the pad onto the spindle with pressing the shaft
lock.
Attach the disc to the pad so carefully that the edges of
disc and pad overlap each other without protruding.
To remove the abrasive disc, pull off its edge from the
pad. (Fig. 8)
IF USED AS A GRINDER
Removing head cover (Fig. 9 & 10)
When use as a grinder, remove the head cover. Loosen
the screws and pull off the head cover while pulling out its
corners.
Installing side grip (handle) (Fig. 11)
CAUTION:
Always be sure that the side grip is installed securely
before operation.
Screw the side grip securely on the position of the tool as
shown in the figure.
Number min
-1
(R.P.M.)
12,000
23,000
34,500
46,000
56,800
Download de handleiding in het Nederlands en/of Engels (PDF, 1.15 MB)
(Denk aan het milieu en print deze handleiding alleen als dat echt noodzakelijk is)

Loading…

Meer over deze handleiding

We begrijpen dat het prettig is om een papieren handleiding te hebben voor je Makita 9565CLR Haakse slijpmachine. Je kunt de handleiding bij ons altijd downloaden en daarna zelf printen. Indien je graag een originele handleiding wilt hebben, raden we je aan contact op te nemen met Makita. Zij kunnen wellicht nog voorzien in een originele handleiding. Zoek je de handleiding van Makita 9565CLR Haakse slijpmachine in een andere taal? Kies op de homepage je taal naar keuze en zoek daarna op het modelnummer om te zien of we deze beschikbaar hebben.

Specificaties

Merk Makita
Model 9565CLR
Categorie Haakse slijpmachines
Bestandstype PDF
Bestandsgrootte 1.15 MB

Alle handleidingen voor Makita Haakse slijpmachines
Meer handleidingen voor Haakse slijpmachines

Veelgestelde vragen over Makita 9565CLR Haakse slijpmachine

Ons supportteam zoekt dagelijks naar nuttige productinformatie en antwoorden op veelgestelde vragen. Als er onverhoopt toch een onjuistheid tussen onze veelgestelde vragen staat, laat het ons dan weten via het contactformulier.

Voor welk materiaal zijn haakse slijpmachines geschikt? Geverifieerd

Haakse slijpmachines zijn het meest geschikt voor slijpen van metaal of steen. Slijpmachines ontwikkelen veel warmte en zijn daardoor minder geschikt voor hout en kunststof.

Ik vind dit nuttig (65) Lees meer

Moet ik gehoorbescherming dragen bij het gebruik van een haakse slijper? Geverifieerd

Dat is wel verstandig. Hoewel de hoeveelheid lawaai die een haakse slijper produceert verschilt per merk en model, kan langdurige blootstelling aan lawaai voor blijvende gehoorschade zorgen. Het is daarom goed om altijd gehoorbescherming te dragen.

Ik vind dit nuttig (16) Lees meer

Moet ik oogbescherming dragen bij het gebruik van een haakse slijper? Geverifieerd

Ja. Bij het slijpen kunnen kleine restanten opvliegen. Als deze in een oog komen kan dit voor blijvende oogschade zorgen. Het is daarom nodig om altijd oogbescherming te dragen.

Ik vind dit nuttig (14) Lees meer

Kan ik elektrisch gereedschap in een schuur of garage opbergen? Geverifieerd

Over het algemeen kunt u elektrisch gereedschap in een schuur of garage opbergen, ook als het daar soms vriest. Voor de levensduur van het elektrisch gereedschap is het echter beter om het op een droge plaats zonder grote temperatuurschommelingen op te slaan. In een schuur of garage kunnen door temperatuurverschillen condensvorming ontstaan ​​waardoor roest kan ontstaan. Bovendien gaan gereedschappen die op batterijen werken korter mee en laden ze minder goed op bij zeer lage temperaturen. Om er zeker van te zijn hoe uw elektrisch gereedschap moet worden opgeborgen, leest u altijd aandachtig de gebruikershandleiding.

Ik vind dit nuttig (8) Lees meer

Beoordeling

Laat ons weten wat je van de Makita 9565CLR Haakse slijpmachine vindt door een beoordeling achter te laten. Wil je je ervaringen met dit product delen of een vraag stellen? Laat dan een bericht achter onderaan de pagina.
Bent u tevreden over de Makita 9565CLR Haakse slijpmachine?
Ja Nee
Beoordeel dit product als eerste
0 stemmen

Praat mee over dit product

Laat hier weten wat jij vindt van de Makita 9565CLR Haakse slijpmachine. Als je een vraag hebt, lees dan eerst zorgvuldig de handleiding door. Een handleiding aanvragen kan via ons contactformulier.

Handleiding Makita 9565CLR Haakse slijpmachine

Gerelateerde producten

Gerelateerde categorieën