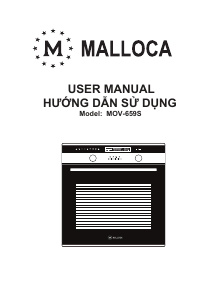
USER MANUAL
HƯỚNG DẪN SỬ DỤNG
Model: MOV-65DA
MOV-659I
ACKNOWLEDGMENT
Thank you for purchasing our product. We hope you We hope you enjoy using the many features
and benefits itprovides. Before using this product please study this entire Instruction Manual
carefully. Keep thismanual in a safe place for future reference. Ensure that other people using the
product are familiarwith these instructions as well.
WARNING
When the oven is first switched on, it may give off an unpleasant smell. This
is due to the bonding agent used for the insulating panels within the oven. Please
run up the new empty product with theconventional cooking function, 250 ℃, 90
minutes to clean oil impurities inside the cavity.
During the first use, it is completely normal that there will be a slight smoke
and odors. If it does occur, you merely have wait for the smell to clear before putting
food into the oven.
Please use the product under the open environment.
The appliance and its accessible parts become hot during use. Care should
be taken to avoid touching heating elements. Children less than 8 years of age shall
be kept away unless continuously supervised.
If the surface is cracked, switch off the appliance to avoid the possibility of
electric shock.
This appliance can be used by children aged from 8 years and above and
persons with reduced physical, sensory or mental capabilities or lack of experience
and knowledge if they have been given supervision or instruction concerning use of
the appliance in a safe way and understand the hazards involved. Children shall not
play with theappliance. Cleaning and user maintenance shall not be made by
children without supervision.
During use, the appliance becomes very hot. Care should be taken to avoid
touching heating elements inside the oven.
Do not allow children to go near the oven when it is operating, especially
when the grill is on.
Ensure that the appliance is switched off before replacing the oven lamp to
avoid the possibility of electric shock.
The means for disconnection must be incorporated in the fixed wiring in
accordance with the wiring specifications.
Children should be supervised to ensure that they do not play with the appli-
ance.
This appliance is not intended for use by persons
(including children) with reduced physical, sensory or mental capabilities, or lack of
experience and knowledge, unless they have been given supervision or instruction
concerning use of the appliance by person responsible for their safety.
Accessible parts may become hot during use. Young children should be
kept away.
An all-pole disconnection means must be incorporated in the fixed wiring in
accordance with the wiring rules.
If the supply cord is damaged, it must be replaced by the manufacturer, its
service agent or similarly qualified persons in order to avoid a hazard.
Do not use harsh abrasive cleaners or sharp metal scrapers to clean the
oven door glass since they can scratch the surface, which may result in shattering
of the glass.
Only use the temperature probe recommended for this oven.
Under the conditions of the pyrolytic cleaning the surfaces may be get
hotter than usual, children should be kept away.
Excess spillage must be removed before cleaning.(For pyrolytic self-clean-
ing ovens.)
During pyrolytic cleaning, accessible parts may become hotter than normal.
Young children should be kept away. (For pyrolytic self-cleaning ovens.)
A steam cleaner is not to be used.
The appliances are not intended to be operated by means of an external
timer or separate remotecontrol system.
The instructions for ovens that have shelves shall include details indicating
the correct installations of the shelves.
SAFETY HINTS
Do not use the oven unless you are wearing something on your feet. Do not
touch the oven with wet or damp hands or feet.
For oven: Oven door should not be opened often during the cooking period.
The appliance must be installed by an authorized technician and put into
use. The producer is not responsible for any damage that might be caused by defec-
tive placement, and installation by unauthorized personnel.
When the door or drawer of oven is open do not leave anything on it, you
may unbalance your appliance or break the door.
Some parts of appliance may keep its heat for a long time; it is required to
wait for it to cool down before touching onto the points that are exposed to the heat
directly.
If you will not use the appliance for a long time, it is advised to plug it off.
FITTING THE OVEN INTO THE KITCHEN UNIT
Fit the oven into the space provided in the kitchen unit; it may be fitted underneath
a work top or into an upright cupboard. Fix the oven in position by screwing into
place, using the two fixing holes in the frame. To locate the fixing holes, open the
oven door and look inside. To allow adequate ventilation, the measurements and
distances adhered to when fixing the oven.
IMPORTANT
If the oven is to work properly, the kitchen housing must be suitable. The panels of
the kitchen unit that are next to the oven must be made of a heat resistant material.
Ensure that the glues of units that are made of veneered wood can with stand
temperatures of at least 120 ºC. Plastics or glues that cannot withstand such
temperatures will melt and deform the unit, once the oven has been lodged inside
the units, electrical parts must be completely insulated. This is a legal safety require-
ment. All guards must be firmly fixed into place so that it is impossible to remove
them without using special tools. Remove the back of the kitchen unit to ensure an
adequate current of air circulates around the oven. The hob must have a rear gap of
at least 45 mm.
DECLARATION OF COMPLIANCE
When you have unpacked the oven, make sure that it has not
been damaged in any way. If you have any doubts at all, do not
use it: contact a professionally qualified person. Keep packing
materials such as plastic bags, polystyrene, or nails out of the
reach of children because these are dangerous to children.
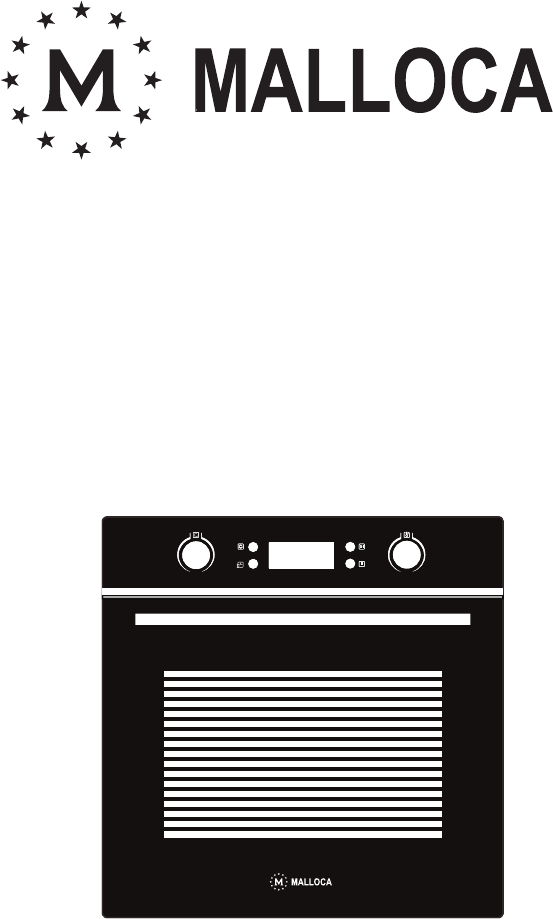
PRODUCT DESCRIPTION
OPERATION INSTRUCTIONS
1. Clock Setting
After connectiong the unit to the power, the symbols "0:00" will be visible
on the display.
1. Press " ", the hour gures will ash.
2. Rotate "K2" to adjust the hour gures, (Time should be within
0--23).
3. Press " ", the minutes will ash.
4. Rotate "K2" to adjust the minutes setting, (time should be within
0-59).
5. Press " " to nish the clock settings. ":" will ash, and the time
will be illuminated.
Note: The clock is 24 hours. After power on, if not set, the clock will
show "0:00".
2. Function Setting
1. Rotate "K1" to choose the cooking function you require .The
related symbol will illuminated .
2. Rotate "K2" to adjust the temperature.
3. Press " " to conrm the start of cooking.
4. If step 2 is ignored, Press " " to conrm the start of cooking.
and the default time is 9 hours, the default temperature will display on
the LED.
NOTE:
1. The step quantities for the adjustment time of the knobs are as
follow: 0--0:30min: step 1 minute 0:30--9:00hour :step 5 minutes
2. The step quantities for the adjustment of temperature is 5
ºC,
and the grill function is 30
ºC
3. Rotate "K1" to adjust the cooking time when cooking begins.
Then press " " to start cooking.
If " " not pressed within 3 seconds,the oven will revert back to the previ-
ous time to continue cooking.
4. Rotate"K2" to adjust the temperature when cooking begins.The
related indicator will be illuminated. Then press " " to start cooking. If
" " not pressed in 3seconds, the oven will revert back to the previous
temperatrue to continue cooking.
3. Lamp Setting
1. Rotate"K1" to select the relevant function, then the correspond-
ing icon will be on.
2. Press " " button to start, "0:00" and lamp icon " " will light
up, " : " will ash.
4. Inquiring function
During cooking process, you can use inquiring function, after 3 seconds
return to the current working state.
1. During cooking mode, press " " button to see the current time.
2. If the reminder function was set, press " "button to see the
current time.
5. Child lock function
To Lock : press " " and " " simultaneously for 3 seconds, there
will be a long "beeping" sound and the " " will be illuminated.
Lock quitting : press " " and " " simultaneously for 3 seconds,
there will be a long "beeping" sound indicating the child-lock is released.
Note: During working mode, if you want to stop cooking, press stop
button quickly. Do not need to long pressing on stop button,it is invalid.
6. Reminder Function:
The oven has 9 hours reminder, this function will help to remind you to
start cooking in a certain time from 1 minute to 9 hours. Only when oven
in standby mode, the reminder can be set. Follow below to set the
reminder:
1.Press reminder setting button " ";
2.Rotate " K2 " to set the hour time of reminder. (Time should be
within 0--9).
3.Press reminder setting button " " again;
4.Rotate "K2 " to set minute time of reminder. (Time should be
within 0--59).
5.Press " " to conrm setting. The time will count down.
Note: The oven buzzer will sound for 10 times after the time back to the
zero hour . " " symbol disappears on the screen to remind you to start
cooking. You can cancel the reminder during setting by pressing the stop
button; After the reminder has been set, you can cancel it by pressing
stop button twice.
7. Start/Pause/Cancel Function
1.If the cooking time has been set, press " " to start cooking. If the
cooking is paused, press " " to resume cooking.
2.During cooking process, press " " once to pause the cooking.
Press " " twice to cancel the cooking.
8. Energy-Saving Function
1.During in waiting state and reminding state , press " " for three
seconds, the LED display will go o and set to energy-saving mode.
2.If no operation in 10 minutes under waiting state, the LED
display will go o and go into energy-saving mode.
3.Under the energy-saving mode, press any key or rotate any knob
can quit the energy-saving mode.
9.Reservation function
1.To use reservation function, clock must be set in advance. Then,
in the way of setting the clock, reserved time must be set (a> Press reser-
vation setting button " "; b> Rotate "K2" to set the hour time of reserva-
tion. Time should be within 0--9. c> Press reservation setting button " "
again; d> Rotate "K2" to set minute time of reservation. Time should be
within 0--59.), but don't press clock this time. Next, turn knob "K1" to
chosse function.
2.Press " " button to set cooking time and temperature. Then
turn knob "K1" to adjust time, and " K2 " to adjust temperature.
3.Press the " " button to nish cooking setting, and the clock will
be on the screen with reservation sign " " always lighting. But no other
function signals are presented. Reservation time can be checked
by pressing " ", 3 seconds later the screen will show clock again.
4.At the time of reservation, cooking will start automatically after a
buzzing sound. The reservation symbol will put out, and other indicating
signs will work normally.
Note:
- Lamp, defrost can't be reserved.
- During the status of reservation, press cancel button once, time
and temperature of reservation menu will be shown with menu icon
lighting constantly. Press again, screen returns to clock, or press start
button to return to reservation status.
- Reminder function is invalid during reservation status.
10. Note
1.The oven lamp will be on for all functions.(except pyrolytic func-
tion)
2.Once the cooking programme has been set and the " " button
is not pressed within 5 minutes, the current time will be displayed or turn
back to waitting state. The setting program will be invalid.
3.The buzzer sounds when eectively pressed, if not eectively
pressed there will be no response.
4.The buzzer will sound ve times to remind you when cooking
has nished.
CLEANING AND MAINTENANCE
For the sake of a good appearance and reliability, keep the unit clean. The
modern design of the unit facilitates maintenance to a minimum. The
parts of the unit which come into contact with food have to be cleaned
regularly.
- Before any maintenance and cleaning, disconnect the power. Set
all controls in the OFF position.
- Wait until the inside of the unit is not hot but only slightly warm-
cleaning is easier than when warm.
- Clean the surface of the unit with a damp cloth, soft brush or ne
sponge and then wipe dry.
- In case of heavy soiling, use hot water with non- abrasive clean-
ing product.
- For cleaning the glass of the oven door,do not use abrasive clean-
ers or sharp metal scrapers, these can scratch the surface or lead to the
glass being damaged.
- Never leave acidic substances (lemon juice, vinegar) on stainless
steel parts.
- Do not use a high pressure cleaner for cleaning the unit. The
baking pans may be washed in mild detergent.
This appliance is marked according to the European directive 2012/19/EU
on Waste Electrical and Electronic Equipment(WEEE).
By ensuring this product is disposed correctly, you will help
prevent potential negative consequences for the environ-
ment and human health,which could otherwise be caused by
inappropriate waste handling of this product. The symbol on
the product indicates that this product may not be treated as
household waste. Instead it shall be handed over to the appli-
cable collection point for the recycling of electrical and elec-
tronic equipment.Disposal must be carried out in accordance
with local environmental regulations for waste dispoasl.For
more detailed information about treatment, recovery and
recycling of this product, please contact your local city oce,
your household waste disposal service or the shop where you
purchased the product.

Praat mee over dit product
Laat hier weten wat jij vindt van de Malloca MOV-659I Oven. Als je een vraag hebt, lees dan eerst zorgvuldig de handleiding door. Een handleiding aanvragen kan via ons contactformulier.