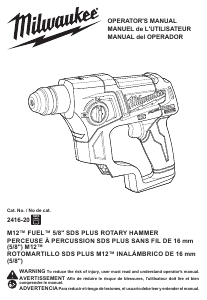
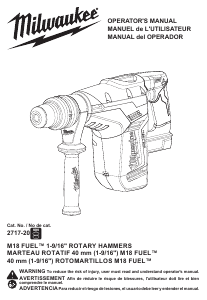
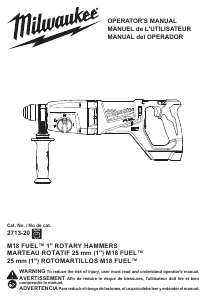
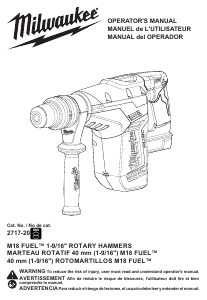
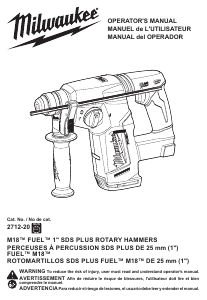
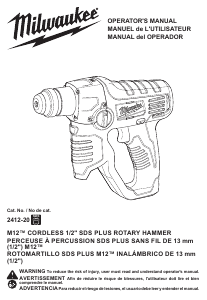
Handleiding Milwaukee 2412-20 Boorhamer

Handleiding voor je Milwaukee 2412-20 Boorhamer nodig? Hieronder kun je de handleiding gratis bekijken en downloaden als PDF in het Nederlands en/of Engels. Dit product heeft 4 veelgestelde vragen, 0 comments en heeft 0 stemmen. Is dit niet de handleiding die je zoekt, neem dan contact met ons op.

Is je product kapot en biedt de handleiding geen oplossing meer? Dan kun je voor reparatie gratis terecht bij Repair Café.

Handleiding

Loading…

4
For reverse (counterclockwise) rotation, push in the
control switch from the left side of the tool. Check
direction of rotation before use.
To lock the trigger, push the control switch to the
center position. The trigger will not work while the
control switch is in the center locked position. Always
lock the trigger or remove the battery pack before
performing maintenance, changing accessories,
storing the tool and any time the tool is not in use.
Starting, Stopping and Controlling Speed
1. To start the tool, grasp the handle rmly and pull
the trigger.
NOTE: An LED is turned on when the trigger is
pulled.
2. To vary the speed, increase or decrease the pres-
sure on the trigger. The further the trigger is pulled,
the greater the speed.
3. To stop the tool, release the trigger. Make sure
the tool comes to a complete stop before laying
the tool down.
Operating
Position the tool, grasp the handle rmly and pull
the trigger. Always hold the tool securely to maintain
control. This tool has been designed to achieve top
performance with only moderate pressure. Let the
tool do the work.
If the speed begins to drop o󰀨 when drilling large or
deep holes, pull the bit partially out of the hole while
the tool is running to help clear dust. Do not use water
to settle the dust since it will clog the bit utes and
tend to make the bit bind in the hole. If the bit should
bind, stop the tool, free the bit and begin again.
APPLICATIONS
WARNING
To reduce the risk of electric shock,
check work area for hidden pipes
and wires before drilling or driving screws.
Selecting Bits
When selecting a bit, use the right type for your job.
For best performance, always use sharp bits.
Drilling
1. Before drilling, be sure the workpiece is clamped
securely. Use backing material to prevent damage
to the workpiece during breakthrough.
2. When starting a hole, place the drill bit on the work
surface and apply rm pressure. Begin drilling at
a slow speed, gradually increasing the speed as
you drill.
3. Always apply pressure in line with the bit. Use
enough pressure to keep the drill biting, but do
not push hard enough to stall the motor.
4. Reduce pressure and ease the bit through the last
part of the hole. While the tool is still running, pull
the bit out of the hole to prevent jamming.
Drilling in Wood, Composition Materials
and Plastic
(Use chuck adapter kit Cat. No. 48-66-1370)
When drilling in wood, composition materials and
plastic, start the drill slowly, gradually increasing
speed as you drill. When drilling into wood, use
wood augers or twist drill bits. Always use sharp
bits. When using twist drill bits, pull the bit out of the
hole frequently to clear chips from the bit utes. To
reduce the chance of splintering, back work with a
piece of scrap wood. Use low speeds for plastics with
a low melting point.
WARNING
Always remove battery pack before
changing or removing accessories.
To insert the battery, slide the pack into the body
of the tool. Make sure it latches securely into place.
WARNING
Only use accessories specically
recommended for this tool. Others
may be hazardous.
Installing Bits
NOTE: Only use accessories with SDS or SDS Plus
shanks.
Be sure that the shank of the bit is clean. Dirt particles
may cause the bit to line up improperly. Do not use
bits larger than the maximum recommended capacity
of the drill because gear damage or motor overload-
ing may result. For best performance, be sure that
the bit is properly sharpened and the shank is lightly
greased before use.
1. Insert the bit into the nose of the tool.
2. Rotate bit slowly until it aligns with the locking
mechanism.
3. Push bit into tool until it locks.
4. Check that the bit is locked properly; it should be
possible to pull the bit back and forth slightly (about
1/4”).
5. To remove bits, pull bit holder release collar toward
the rear of tool and remove bit.
NOTE: Use caution when handling hot bits.
OPERATION
WARNING
Always remove battery pack before
changing or removing accesso-
ries. Only use accessories specically recom-
mended for this tool. Others may be hazardous.
To reduce the risk of injury, keep hands away
from the bit and all moving parts. Always wear
safety goggles or glasses with side shields.
To reduce the risk of injury, wear a dust mask or
use an OSHA compliant dust extraction solution
when working in dusty situations.
Fuel Gauge
To determine the amount of charge left in the bat-
tery, pull the trigger. The Fuel Gauge will light up for
2-3 seconds.
To signal the end of charge, 1 light on the fuel gauge
will ash for 2-3 seconds.
Selecting Action
Always allow the motor to come to a complete stop
before changing the mode selection to avoid dam-
age to the tool.
1. For drilling, turn the mode selector
so the arrow points to the twist
drill
symbol.
2. For rotary hammering, turn the
mode selector so the arrow
points to the hammer and twist
drill
symbol.
NOTE: To engage the hammering mechanism,
maintain pressure on the bit. When pressure on the
bit is released, the hammering action will stop.
Using the Control Switch
The control switch may be set to three positions:
forward, reverse and lock. Always allow the motor
to come to a complete stop before using the control
switch to avoid damage to the tool.
For forward (clockwise) rotation, push in the control
switch from the right side of the tool. Check the direc-
tion of rotation before use.
Download de handleiding in het Nederlands en/of Engels (PDF, 1.4 MB)
(Denk aan het milieu en print deze handleiding alleen als dat echt noodzakelijk is)

Loading…

Meer over deze handleiding

We begrijpen dat het prettig is om een papieren handleiding te hebben voor je Milwaukee 2412-20 Boorhamer. Je kunt de handleiding bij ons altijd downloaden en daarna zelf printen. Indien je graag een originele handleiding wilt hebben, raden we je aan contact op te nemen met Milwaukee. Zij kunnen wellicht nog voorzien in een originele handleiding. Zoek je de handleiding van Milwaukee 2412-20 Boorhamer in een andere taal? Kies op de homepage je taal naar keuze en zoek daarna op het modelnummer om te zien of we deze beschikbaar hebben.

Specificaties

Merk Milwaukee
Model 2412-20
Categorie Boorhamers
Bestandstype PDF
Bestandsgrootte 1.4 MB

Alle handleidingen voor Milwaukee Boorhamers
Meer handleidingen voor Boorhamers

Veelgestelde vragen over Milwaukee 2412-20 Boorhamer

Ons supportteam zoekt dagelijks naar nuttige productinformatie en antwoorden op veelgestelde vragen. Als er onverhoopt toch een onjuistheid tussen onze veelgestelde vragen staat, laat het ons dan weten via het contactformulier.

Wat is het verschil tussen een klopboormachine en een boorhamer? Geverifieerd

Een klopboormachine kan gebruikt worden voor het boren van gaten in bakstenen muren. Voor gaten in een betonnen muur is een boorhamer nodig.

Ik vind dit nuttig (216) Lees meer

Wat houdt het aantal Joule (J) in bij boorhamers? Geverifieerd

Het aantal Joule geeft aan hoeveel slagkracht de boorhamer heeft. Voor reguliere gaten in beton is een boorhamer van 2.2J vaak voldoende.

Ik vind dit nuttig (150) Lees meer

Moet ik gehoorbescherming dragen bij het gebruik van een boormachine? Geverifieerd

Dat is wel verstandig. Hoewel de hoeveelheid lawaai die een boormachine produceert verschilt per merk en model, kan langdurige blootstelling aan lawaai voor blijvende gehoorschade zorgen. Het is daarom goed om altijd gehoorbescherming te dragen.

Ik vind dit nuttig (98) Lees meer

Kan ik elektrisch gereedschap in een schuur of garage opbergen? Geverifieerd

Over het algemeen kunt u elektrisch gereedschap in een schuur of garage opbergen, ook als het daar soms vriest. Voor de levensduur van het elektrisch gereedschap is het echter beter om het op een droge plaats zonder grote temperatuurschommelingen op te slaan. In een schuur of garage kunnen door temperatuurverschillen condensvorming ontstaan ​​waardoor roest kan ontstaan. Bovendien gaan gereedschappen die op batterijen werken korter mee en laden ze minder goed op bij zeer lage temperaturen. Om er zeker van te zijn hoe uw elektrisch gereedschap moet worden opgeborgen, leest u altijd aandachtig de gebruikershandleiding.

Ik vind dit nuttig (24) Lees meer

Beoordeling

Laat ons weten wat je van de Milwaukee 2412-20 Boorhamer vindt door een beoordeling achter te laten. Wil je je ervaringen met dit product delen of een vraag stellen? Laat dan een bericht achter onderaan de pagina.
Bent u tevreden over de Milwaukee 2412-20 Boorhamer?
Ja Nee
Beoordeel dit product als eerste
0 stemmen

Praat mee over dit product

Laat hier weten wat jij vindt van de Milwaukee 2412-20 Boorhamer. Als je een vraag hebt, lees dan eerst zorgvuldig de handleiding door. Een handleiding aanvragen kan via ons contactformulier.

Handleiding Milwaukee 2412-20 Boorhamer

Gerelateerde producten

Gerelateerde categorieën