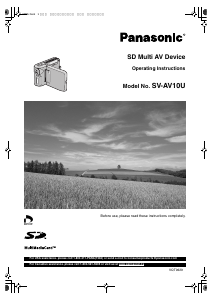
Handleiding Panasonic SV-AV10U Camcorder

Handleiding voor je Panasonic SV-AV10U Camcorder nodig? Hieronder kun je de handleiding gratis bekijken en downloaden als PDF in het Nederlands en/of Engels. Dit product heeft 5 veelgestelde vragen, 0 comments en heeft 0 stemmen. Is dit niet de handleiding die je zoekt, neem dan contact met ons op.

Is je product kapot en biedt de handleiding geen oplossing meer? Dan kun je voor reparatie gratis terecht bij Repair Café.

Handleiding

Loading…

R
Before use, please read these instructions completely.
VQT9629
SD Multi AV Device
Operating Instructions
Model No.
SV-AV10U
For USA assistance. please call:1-800-211-PANA(7262) or send e-mail to:consumerproducts@panasonic.com
For Canadian assistance. please call:1-800-561-5505 or visit us at www.panasonic.ca
SDV1U.book1ページ2002年2月15日 金曜日 午後9時44
2
Contents
Information for Your Safety ...........................................3
Introduction....................................................................4
Power supply frequency..........................................4
Preparation
Standard Accessories ................................................... 4
Optional Accessory .......................................................4
Controls and Components.............................................5
Attaching the Neck Strap...............................................5
Power Supply ................................................................6
Using AC Adaptor ................................................... 6
Using the Battery ....................................................6
Inserting a Card.............................................................7
Removing the Card.................................................7
Using the LCD Monitor ..................................................7
Turning the Power ON...................................................8
Turning the Power OFF ..........................................8
Selecting Operation Modes ........................................... 8
About the Operation Modes ....................................8
Using the Menu Screen.................................................9
List of Menus .................................................................9
REC MODE.............................................................9
PLAYBACK MODE ...............................................10
Setting the power supply frequency ............................12
To reduce the appearance of horizontal stripes
consisting of light and dark patterns .....................12
Adjusting Brightness and Color Level .........................13
To Adjust...............................................................13
Setting Date and Time.................................................13
Basic Functions
Recording Moving Pictures (MPEG4) .........................14
To stop recording ..................................................14
Display in the moving picture (MPEG4) mode ......14
Playing Moving Pictures (MPEG4) .............................. 15
To stop playback...................................................15
To find the beginning of a moving picture file .......15
To Change the Display Size .................................15
Recording Still Pictures ...............................................16
Display in the Still picture mode............................ 16
Playing back Still Pictures ...........................................17
To stop playback...................................................17
To play the next /previous file ...............................17
Recording Voice (Voice Recording Function) .............18
To stop recording ..................................................18
Display in the Voice Mode ....................................18
Hearing the Voice Recorded (Playback Sound)..........19
To stop playback...................................................19
Fast forward (fast backward) playback ................. 19
To find the beginning of a voice file ......................19
Listening to Music (Music Play)...................................20
To stop playback...................................................20
To find the beginning of a music file .....................20
Using the Earphones...................................................21
Adjusting the Volume ..................................................21
Advanced Functions
Backlight Compensation Function...............................22
Adjusting White Balance .............................................22
Erasing the Files Recorded on a Card ........................23
To erase All Files ..................................................23
Protecting files (File Protection) ..................................24
To release the File Protection...............................24
To lock all files ......................................................24
Writing Printing Data on a Card (DPOF Setting) .........25
To release all the DPOF settings..........................25
Playing back still pictures one by one (Slide Show) .... 26
To cancel the Slide Show .....................................26
Formatting the Card ....................................................26
For using SD-MovieStage
SD-MovieStage ...........................................................27
Operating environment................................................27
Installing SD-MovieStage ............................................28
Cautions for Windows XP/2000 Professional .......29
Connecting an SD Memory Card ................................29
Starting SD-MovieStage..............................................29
Others
Notes & Precautions....................................................30
Charge the built-in battery for maintaining
the date information ..............................................30
After Use...............................................................30
Using a Card in a Personal Computer ..................31
Indications ...................................................................32
Cautions for Use ...................................................33
About the Lens......................................................34
About the AC Adaptor ...........................................34
About the LCD Monitor .........................................34
Optimal Use of the Battery.................................... 34
Notes on the SD Memory Card Write-Protect
Switch ...................................................................35
Cautions for Storage .............................................35
State of Power Lamp while charging ....................35
Before Requesting Service..........................................36
Specifications ..............................................................37
Limited Warranty (For U.S.A. Only).............................38
Customer Services Directory (For U.S.A. Only) ..........39
Spanish Quick Use Guide/Guía española
para el uso rápido
Spanish Quick Use Guide/Guía española para el uso
rápido ..........................................................................40
SDV1U.book2ページ2002年2月15日 金曜日 午後9時44
3
Dear Customer,
We would like to take this opportunity to thank you for
purchasing this Panasonic SD Multi AV Device. Please
read these Operating Instructions carefully and keep them
handy for future reference.
Information for Your Safety
Carefully observe copyright laws.
Recording of pre-recorded tapes or discs or other
published or broadcast material for purposes other
than your own private use may infringe copyright
laws. Even for the purpose of private use, recording
of certain material may be restricted.
Please note that the actual controls and components,
menu items, etc. of your SD Multi AV Device may look
somewhat different from those shown in the illustrations
in these Operating Instructions.
:
SD Logo is a trademark.
Other names, company names, and product names
printed in these instructions are trademarks or
registered trademarks of the companies concerned.
The SD Multi AV Device uses copyright-protected
technologies and is protected by the patented
technologies and intellectual properties of Japan and
the U.S. To use these copyright-protected technologies,
authorization of the Macrovision Company is required. It
is prohibited to disassemble or modify the SD Multi AV
Device.
(l 00) indicates the page to be referred to.
Note that the SD Multi AV Device may not play back the
data recorded or created on another product and
another product may not play back the data recorded on
the SD Multi AV Device.
The nameplate of the SD Multi AV Device is fixed on the
bottom of the battery compartment.
WARNING
TO REDUCE THE RISK OF FIRE OR SHOCK
HAZARD AND ANNOYING INTERFERENCE, USE
ONLY THE RECOMMENDED ACCESSORIES AND
DO NOT EXPOSE THIS EQUIPMENT TO RAIN OR
MOISTURE. DO NOT REMOVE THE COVER (OR
BACK); THERE ARE NOT USER SERVICEABLE
PARTS INSIDE. REFER SERVICING TO QUALIFIED
SERVICE PERSONNEL.
Notice:
This product has parts that contain a small amount of
mercury. It also contains lead in some components.
Disposal of these materials may be regulated in your
community due to environmental considerations. For
disposal or recycling information please contact your
local authorities, or the Electronics Industries Alliance:
<http://www.eiae.org.>
FCC Note: (U.S. only)
This equipment has been tested and found to comply
with the limits for a Class B digital device, pursuant to
Part 15 of the FCC Rules. These limits are designed to
provide reasonable protection against harmful
interference in a residential installation. This
equipment generates, uses, and can radiate radio
frequency energy and, if not installed and used in
accordance with the instructions, may cause harmful
interference to radio communications. However, there
is no guarantee that interference will not occur in a
particular installation. If this equipment does cause
harmful interference to radio or television reception,
which can be determined by turning the equipment off
and on, the user is encouraged to try to correct the
interference by one or more of the following measures:
Reorient or relocate the receiving antenna.
Increase the separation between the equipment and
receiver.
Connect the equipment into an outlet on a circuit
different from that to which the receiver is connected.
Consult the dealer or an experienced radio/TV
technician for help.
FCC Caution: To assure continued compliance,
follow the attached installation
instructions and use only shielded
interface cables when connecting to
computer or peripheral devices.
Any changes or modifications not
expressly approved by the party
responsible for compliance could void
the user’s authority to operate this
equipment.
This device complies with Part 15 of the FCC Rules.
Operation is subject to the following two conditions: (1)
This device may not cause harmful interference, and
(2) this device must accept any interference received,
including interference that may cause undesired
operation.
This Class [B] digital apparatus complies with
Canadian ICES-003.
SDV1U.book3ページ2002年2月15日 金曜日 午後9時44
4
Introduction
This SD Multi AV Device can record both still picture data and MPEG4
moving pictures. Additionally, it can play back a high quality music file of
the MPEG2-AAC and MP3 format (Records files with the supplied Real
Jukebox
®
and USB Reader/Writer). And using the viewer software SD-
MovieStage (supplied accessory), pictures recorded with this SD Multi
AV Device can be displayed on the computer screen, and the MPEG4
moving picture data can be edited on the computer.
ª Power supply frequency
Under fluorescent lighting, horizontal stripes consisting of light
and dark patterns may appear on the screen as illustrated below.
To reduce the effect of the horizontal stripes, switch
the power supply frequency to 50 Hz or 60 Hz.
(l 12)
Preparation
Standard Accessories
Illustrated on the left are accessories packaged with the SD Multi AV
Device (Panasonic SV-AV10U).
1) AC Adaptor(VSK0620) (l 6)
Supplies power to the SD Multi AV Device.
2) Battery Pack (CGA-S301) (l 6)
Supplies power to the SD Multi AV Device.
3) SD Memory Card (64 MB) (RP-SD064BVE0) (l 7)
4) Power Cable (JSX0102) (l 6)
5) Earphone (LOBAB0000172) (l 19, 20, 21)
6) Neck Strap (VFC3833) (l 5)
7) USB Reader/Writer (BN-SDCBAE)
For the operation of the USB Reader/Writer, refer to the additional
instructions supplied in the same package.
8) CD-ROM (l 27)
SD-MovieStage (For Windows
®
98SE/Me/2000 Professional/XP
Home Edition/XP Professional), Adobe
®
Acrobat
®
Reader™ 5.0
(VFF0139)
Panasonic Media Manager (Real Jukebox
®
,Real Player etc.)
(VFF0149)
For the installation and the operation of the Panasonic Media
Manager, refer to the additional instructions supplied in the same
package.
For using the SD-MovieStage software, refer to the PDF manual.
This manual describes installation only.
9) Carrying Case (RFC0069-H)
Put the SD Multi AV Device in the Carrying Case supplied after use
or when carrying it.
Optional Accessory
10) Battery Pack (CGA-S301) (l 6)
Same product as that mentioned in 2).
CAUTION:
This unit will operate on 110/120/220/240 V AC. An AC plug adaptor
may be required for voltages other than 120 V AC. Please contact
either a local or foreign electrical parts distributor for assistance in
selecting an alternate AC plug. We recommend using the accessory
power plug adaptor (VJSS0070) in an area which has special AC
outlets.
1)
2)
3)
4)
5)
6)
7)
8)
9)
SDV1U.book4ページ2002年2月15日 金曜日 午後9時44
11
CARD EDITING
PRESS MENU TO RETURN
ERASE ALL FILES
YES
FILE PROTECTION
YES
DPOF SETTING YES
SLIDE SHOW YES
CARD FORMAT YES
OTHER FUNCTIONS
DATE/TIME OFF D/T DATE
DISPLAY OFF ON
LCD SET YES
LCD MONITOR
NORMAL UPSIDE-DOWN
CLOCK SET YES
OTHER FUNCTIONS
DATE/TIME OFF D/T DATE
DISPLAY OFF ON
LCD MONITOR
NORMAL UPSIDE-DOWN
CLOCK SET YES
REPEAT SETUP
REPEAT SETUP
OFF 1MUSIC ALL
List of Menus (Cont.)
Sub-Menu for PLAYBACK MODE
1 Erase All Files [ERASE ALL FILES] (l
ll
l 23)
File Protection [FILE PROTECTION] (l
ll
l 24)
Card Format [CARD FORMAT] (l
ll
l 26)
2 Date/Time [DATE/TIME] (l
ll
l 10)
Display [DISPLAY] (l
ll
l 10)
LCD Set [LCD SET] (l
ll
l 13)
Display Size [DISPLAY SIZE] (l
ll
l 15)
LCD Monitor [LCD MONITOR] (l
ll
l 7)
Clock set [CLOCK SET] (l
ll
l 13)
3 Erase All Files [ERASE ALL FILES] (l
ll
l 23)
File Protection [FILE PROTECTION] (l
ll
l 24)
DPOF Setting [DPOF SETTING] (l
ll
l 25)
Slide Show [SLIDE SHOW] (l
ll
l 26)
Card Format [CARD FORMAT] (l
ll
l 26)
4 Date/Time [DATE/TIME] (l
ll
l 10)
Display [DISPLAY] (l
ll
l 10)
LCD Set [LCD SET] (l
ll
l 13)
LCD Monitor [LCD MONITOR] (l
ll
l 7)
Clock set [CLOCK SET] (l
ll
l 13)
5 Erase All Files [ERASE ALL FILES] (l
ll
l 23)
File Protection [FILE PROTECTION] (l
ll
l 24)
Card Format [CARD FORMAT] (l
ll
l 26)
6 Date/Time [DATE/TIME] (l
ll
l 10)
Display [DISPLAY] (l
ll
l 10)
LCD Monitor [LCD MONITOR] (l
ll
l 7)
Clock set [CLOCK SET] (l
ll
l 13)
7 Repeat Setup [REPEAT SETUP] (l
ll
l 20)
8 Date/Time [DATE/TIME] (l
ll
l 10)
Display [DISPLAY] (l
ll
l 10)
LCD Monitor [LCD MONITOR] (l
ll
l 7)
Clock set [CLOCK SET] (l
ll
l 13)
Sub-Menu for PLAYBACK
3
CARD EDITING
ERASE ALL FILES
YES
FILE PROTECTION
YES
CARD FORMAT YES
OTHER FUNCTIONS
DATE/TIME OFF D/T DATE
DISPLAY OFF ON
LCD MONITOR
NORMAL UPSIDE-DOWN
CLOCK SET YES
4
5
6
7
8
CARD EDITING
ERASE ALL FILES
YES
FILE PROTECTION
YES
CARD FORMAT YES
OTHER FUNCTIONS
PRESS MENU TO RETURN
DATE/TIME OFF D/T DATE
DISPLAY OFF ON
LCD SET YES
DISPLAY SIZE FULL NORMAL
LCD MONITOR
NORMAL UPSIDE-DOWN
CLOCK SET YES
1
2
SDV1U.book11ページ2002年2月15日 金曜日 午後9時44分
12
MPEG4 RECORD
PRESS MENU TO EXIT
RECORDING SETUP
OTHER FUNCTIONS
OTHER FUNCTIONS
PRESS MENU TO RETURN
DATE/TIME OFF D/T TIME
DISPLAY OFF ON
LCD SET YES
LCD MONITOR
NORMAL UPSIDE-DOWN
AC MAINS 50HZ 60HZ
CLOCK SET YES
1/100
1/120
4
5
Setting the power supply frequency
Set the power supply frequency before using the SD Multi AV Device.
The power supply frequency is different depending on the country or
region.
Adjustment of the frequency will help reduce the appearance of
horizontal stripes consisting of light and dark patterns under fluorescent
lighting.
1
Set the Operation Mode to [REC>>MPEG4] or [REC>>
PICTURE]
1
. (l 8)
2
Select the [OTHER FUNCTIONS]
2
.
3
Set the [AC MAINS]
3
to [50 HZ] or [60 HZ].
This setting may not completely suppress the horizontal stripes.
Irrespective of the setting, the horizontal stripes may appear in the
following cases.
-When using the SD Multi AV Device to record pictures under a
lighting instrument such as a high-frequency fluorescent lamp:
-When using the SD Multi AV Device to record a lighting instrument
such as a fluorescent lamp:
ª To reduce the appearance of horizontal stripes
consisting of light and dark patterns
If adjustment of the frequency does not have much effect on reducing
horizontal stripes, operate the SD Multi AV Device as follows.
1
Set the Operation Mode to [REC>>MPEG4] or [REC>>
PICTURE]
1
. (l 8)
2
Move the Jog Lever down for about 1 second.
The [1/100] Indication 4 appears when the [AC MAINS] is set to
[50 HZ].
The [1/120] Indication 5 appears when the [AC MAINS] is set to
[60 HZ].
To Release this mode
Move the Jog Lever down for about 1 second.
Turning the power OFF will release this mode.
It is not possible to use Backlight Compensation Mode when this mode
is set to ON.
If this mode is used for outdoor recording, the entire image on the
screen (or recording images) may be tinged with white.
This mode cannot be set or released while recording.
The SD Multi AV Device adjusts the brightness by varying the shutter
speed. However, the shutter speed is fixed in this mode so the
brightness cannot be adjusted in this mode.
VOL
+
-
/
MENU
MODE/
VOL
MPEG4
PICTURE
VOICE
PUSH/SET
SELECT
RECPLAY
1
2
3
2,3
1
1,2,3
SDV1U.book12ページ2002年2月15日 金曜日 午後9時44分
13
VOL
+
-
/
MENU
OTHER FUNCTIONS
PRESS MENU TO RETURN
DATE/TIME OFF D/T DATE
DISPLAY OFF ON
LCD SET YES
LCD MONITOR
NORMAL UPSIDE-DOWN
AC MAINS 50HZ 60HZ
CLOCK SET YES
OTHER FUNCTION
PRESS MENU TO RETURN
DATE/TIME OFF D/T DATE
DISPLAY OFF ON
LCD SET YES
LCD MONITOR
NORMAL UPSIDE-DOWN
AC MAINS 50HZ 60HZ
CLOCK SET YES
CLOCK SET
PRESS MENU TO RETURN
YEAR : 2002
MONTH
: MAR.
DAY
: 20
HOUR : AM10
MINUTE : 35
Adjusting Brightness and Color Level
LCD Brightness [BRIGHTNESS] 4
It adjusts the brightness of the image on the LCD screen.
LCD Color Level [COLOR LEVEL] 5
It adjusts the color saturation of the image on the LCD screen.
ª To Adjust
1
Select the [OTHER FUNCTIONS]
1
.
2
Set the [LCD SET] to [YES]
2
.
3
Press down the center of the Jog Lever
3
to select the
item to be adjusted.
4
Move the Jog Lever up or down to raise or lower the
number of vertical bars in the Bar Indication.
A larger number of vertical bars indicates stronger brightness or
color saturation.
5
Press the [MENU] Button twice.
The [LCD SET] screen disappears.
These adjustments do not affect the recorded images.
Do adjustment in the moving picture record mode or still picture record
mode.
Setting Date and Time.
Set the date and time from the [MENU] screen.
1
Select the [OTHER FUNCTIONS].
2
Set the [CLOCK SET] to [YES].
6
3
Move the Jog Lever
3
up or down to set [YEAR] to a
desired value, and press down the center of the Jog
Lever to move to [MONTH].
4
In the same way, set [MONTH], [DAY], [HOUR], [MINUTE]
to a desired value.
7
5
Press the [MENU] Button to exit the date setting.
The second display starts from 0 (zero).
Press the [MENU] Button again to exit the menu screen.
The built-in battery sustains the operation of the clock.
The clock might cause a deviation from the correct date and/or time, so
be sure to check the current date and/or time before recording.
If the [0] indicator is displayed, set the date and time after the battery
has charged. (l
ll
l 30)
3
1,5
MPEG4 RECORD
PRESS MENU TO EXIT
RECORDING SETUP
OTHER FUNCTIONS
1
2
1,2,3,4
VOL
+
-
/
MENU
3
1,5
1,2,3,4
6
7
BRIGHTNESS
COLOR LEVEL
LCD SET
PRESS MENU TO RETURN
4
5
SDV1U.book13ページ2002年2月15日 金曜日 午後9時44分
14
VOL
+
-
/
MENU
MODE/
VOL
Basic Functions
Recording Moving Pictures (MPEG4)
You can record moving pictures on the Card.
1
Set the Operation Mode to [REC>>MPEG4]
1
2
Select the [RECORDING SETUP]
2
.
3
Set the [MPEG4 MODE]
3
to desired picture quality.
Select one of the options of [FINE], [NORMAL], [ECONOMY1], or
[ECONOMY2].
Press the [MENU] Button twice to exit menu.
4
Press the Recording Start/Stop Button.
Recording starts.
ª To stop recording
While recording the moving picture, press the Recording Start/Stop
Button 4.
If the moving picture is recorded again after stopping recording, it will
be saved as another file.
ª Display in the moving picture (MPEG4) mode
: Moving picture mode.
R 0h00m: Remaining Time Indication
F/N/E1/E2: Shows the picture quality. [F]: Fine, [N]: Normal , [E1]:
Economy1 and [E2] :Economy2.
(The picture quality in E2 is lower than E1).
The MPEG4 moving pictures can be recorded in any mode, but moving
pictures recorded in the [FINE], [NORMAL] or [ECONOMY1] mode
may not be played on other Panasonic digital video cameras. The
message [PUSH THE RESET SWITCH] may be displayed in such
case. This is not a fault of the SD Multi AV Device.
The MPEG4 moving pictures recorded in the [ECONOMY2] mode may
not be played, if it was a short recording (4 seconds or shorter).
The picture quality level deteriorates, if the [ECONOMY1/2] in the
[MPEG4 MODE] MENU is selected.
The recorded data can be played back on Windows
®
Media Player.
(l
ll
l 31)
Record the subject approx.1.7 ft (50 cm) away from the SD Multi AV
Device.
The capacities of the recording time for MPEG4 files are as follows:
The times listed in the above table are approximate.
Fine Normal Economy1 Economy2
8MB 2 min. 3 min. 6 min. 8 min.
16MB 4 min. 7 min. 14 min. 19 min.
32MB 10 min. 15 min. 30 min. 40 min.
64MB 20 min. 32 min. 60 min. 80 min.
MPEG4
PICTURE
VOICE
PUSH/SET
SELECT
RECPLAY
MPEG4 RECORD
PRESS MENU TO EXIT
RECORDING SETUP
OTHER FUNCTION
RECORDING SETUP
PRESS MENU TO EXIT
MPEG4 MODE
FINE NORMAL
ECONOMY1 ECONOMY2
2,3
1
1
2
3
MPEG4
0h10m14s N
R0h10m
1,2,3
4
4
SDV1U.book14ページ2002年2月15日 金曜日 午後9時44分
15
VOL
+
-
MODE/
VOL
OTHER FUNCTIONS
PRESS MENU TO RETURN
DATE/TIME OFF D/T TIME
DISPLAY OFF ON
LCD SET YES
DISPLAY SIZE FULL NORMAL
LCD MONITOR
NORMAL UPSIDE-DOWN
CLOCK SET YES
Playing Moving Pictures (MPEG4)
Plays back moving pictures recorded on the card.
1
Set the Operation Mode to [PLAY>>MPEG4]
1
Moving picture files recorded on the card are displayed in the form
of a list (six files per page) 2.
2
Move the Jog Lever up or down to select a desired file.
3
Press down the center of the Jog Lever
3
.
A moving picture file is played back.
After playing back continuously from the selected file to the last file,
the display reverts to the filelist.
ª To stop playback
While playing back, hold down the center of the Jog Lever 3 for
about two seconds.
Playback is stopped and moving picture files are displayed in the form
of a list.
Press once, and the playback will pause.
ª To find the beginning of a moving picture file
While playing back, move the Jog Lever up or down.
ª To Change the Display Size
Select [FULL] or [NORMAL] from the [DISPLAY SIZE] option under
the [OTHER FUNCTIONS] Menu 4.
If the [FULL] is selected, the quality of picture will degrade slightly.
If the picture recorded on another machine is played back in the [FULL]
mode, a part of the picture will be clipped.
To hear the sound, the earphone must be plugged into the jack of the
SD Multi AV Device.
Files are numbered hexadecimally.
The file format supported by this SD Multi AV Device is ASF. (Some
ASF formatted files may not be played back.)
When a moving picture is played back, a mosaic may appear or some
frames may be missing; but this is normal.
MPEG4 files recorded by another device may not be played back.
Fast forward or slow playback is not available.
When playing back a picture recorded by other equipment, picture size
may differ.
Refer to Page 21 for volume adjustment.
Refer to Page 31 for viewing pictures on a personal computer.
MPEG4
PICTURE
VOICE
MUSIC
RECPLAY
PUSH/SET
SELECT
MPEG4
MOL
001
. ASF
MOL
002
. ASF
MOL
003
. ASF
MOL
004
. ASF
MOL
005
. ASF
MOL
006
. ASF
1
3
1
2
1,2,3
4
SDV1U.book15ページ2002年2月15日 金曜日 午後9時44分
Download de handleiding in het Nederlands en/of Engels (PDF, 3.9 MB)
(Denk aan het milieu en print deze handleiding alleen als dat echt noodzakelijk is)

Loading…

Meer over deze handleiding

We begrijpen dat het prettig is om een papieren handleiding te hebben voor je Panasonic SV-AV10U Camcorder. Je kunt de handleiding bij ons altijd downloaden en daarna zelf printen. Indien je graag een originele handleiding wilt hebben, raden we je aan contact op te nemen met Panasonic. Zij kunnen wellicht nog voorzien in een originele handleiding. Zoek je de handleiding van Panasonic SV-AV10U Camcorder in een andere taal? Kies op de homepage je taal naar keuze en zoek daarna op het modelnummer om te zien of we deze beschikbaar hebben.

Specificaties

Merk Panasonic
Model SV-AV10U
Categorie Camcorders
Bestandstype PDF
Bestandsgrootte 3.9 MB

Alle handleidingen voor Panasonic Camcorders
Meer handleidingen voor Camcorders

Veelgestelde vragen over Panasonic SV-AV10U Camcorder

Ons supportteam zoekt dagelijks naar nuttige productinformatie en antwoorden op veelgestelde vragen. Als er onverhoopt toch een onjuistheid tussen onze veelgestelde vragen staat, laat het ons dan weten via het contactformulier.

Hoeveel beeldmateriaal kan ik opslaan op een SD kaart? Geverifieerd

Dit hangt sterk af van de instellingen, maar over het algemeen kan gezegd worden dat met 1GB er ongeveer 5 minuten aan HD film of 1 minuut aan 4K film opgeslagen kan worden.

Ik vind dit nuttig (84) Lees meer

Waar staat SD voor? Geverifieerd

SD staat voor Secure Digital. SD kaarten zijn het standaard opslagmedium voor veel digitale camera's.

Ik vind dit nuttig (49) Lees meer

Er is een batterij in mijn apparaat gaan oxideren, kan ik het nog veilig gebruiken? Geverifieerd

Ja, het apparaat kan nog veilig gebruikt worden. Verwijder eerst de geoxideerde batterij. Doet dit niet met blote handen. Reinig daarna het batterijcompartiment met een wattenstaafje gedipt in azijn of citroensap. Laat het drogen en doe nieuwe batterijen in het apparaat.

Ik vind dit nuttig (34) Lees meer

Wat is een megapixel? Geverifieerd

Een megapixel (MP) staat gelijk aan een miljoen pixels. Megapixels worden onder andere gebruikt om de resolutie van een digitale camera of camcorder weer te geven. Zo heeft een camera die beeld produceert van 1280x960 pixels een resolutie van ongeveer 1,3MP. Hoewel er heel veel factoren zijn die de kwaliteit van het beeld beïnvloeden kan over het algemeen gezegd worden dat meer megapixels zorgen voor een beter beeld.

Ik vind dit nuttig (31) Lees meer

Hoe voorkom ik 'rode ogen' op mijn foto's? Geverifieerd

Het 'rode ogen' fenomeen wordt veroorzaakt doordat er te snel, te veel licht in de ogen van de personen op de foto komt. Dit is met name in een donkere ruimte het geval. De volgende dingen kunnen als oplossing dienen: Laat de mensen op de foto niet direct in de camera kijken, zorg voor meer licht, ga dichter op het onderwerp staan of zoom minder/niet in.

Ik vind dit nuttig (25) Lees meer

Beoordeling

Laat ons weten wat je van de Panasonic SV-AV10U Camcorder vindt door een beoordeling achter te laten. Wil je je ervaringen met dit product delen of een vraag stellen? Laat dan een bericht achter onderaan de pagina.
Bent u tevreden over de Panasonic SV-AV10U Camcorder?
Ja Nee
Beoordeel dit product als eerste
0 stemmen

Praat mee over dit product

Laat hier weten wat jij vindt van de Panasonic SV-AV10U Camcorder. Als je een vraag hebt, lees dan eerst zorgvuldig de handleiding door. Een handleiding aanvragen kan via ons contactformulier.

Handleiding Panasonic SV-AV10U Camcorder

Gerelateerde producten

Gerelateerde categorieën