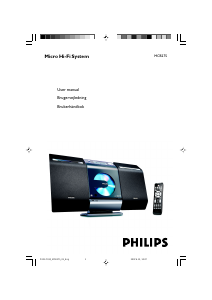
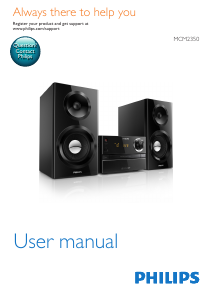
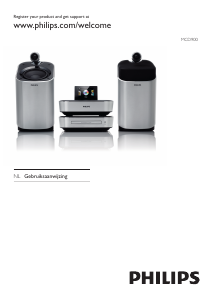
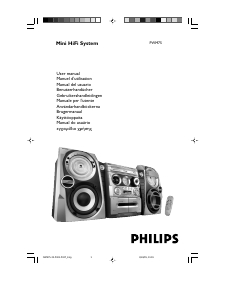
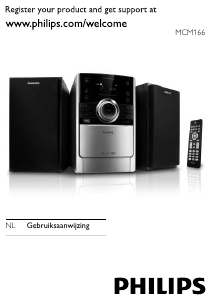
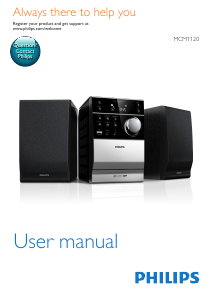
Handleiding Philips MCM1120 Stereoset

Handleiding voor je Philips MCM1120 Stereoset nodig? Hieronder kun je de handleiding gratis bekijken en downloaden als PDF in het Nederlands en/of Engels. Dit product heeft 0 veelgestelde vragen, 0 comments en heeft 0 stemmen. Is dit niet de handleiding die je zoekt, neem dan contact met ons op.

Is je product kapot en biedt de handleiding geen oplossing meer? Dan kun je voor reparatie gratis terecht bij Repair Café.

Handleiding

Loading…

1EN
Contents
1 Important 2
Safety 2
2 Your micro system 4
Introduction 4
What's in the box 4
Overview of the main unit 5
Overview of the remote control 6
3 Get started 7
Connect speakers 7
Connect power 8
Prepare the remote control 8
Turn on 8
Set clock 9
4 Play 9
Basic play operations 9
Play discs 9
Play from USB 10
Adjust sound 10
Program audio tracks 10
Listen to tape 11
5 Listen to radio 12
Tune to FM radio stations 12
Program radio stations automatically 12
Program radio stations manually 13
Show RDS information 13
6 Other features 14
Set alarm timer 14
Set sleep timer 14
Listen to external audio device 14
Listen through headphone 14
7 Product information 15
Specications 15
USB playability information 15
Supported MP3 disc formats 16
Maintenance 16
8 Troubleshooting 17
9 Notice 18
2 EN
1 Important
Safety
This 'bolt of lightning' indicates uninsulated
material within the device may cause an
electrical shock. For the safety of everyone in
your household, please do not remove the
covering.
The 'exclamation mark' calls attention to
features for which you should read the enclosed
literature closely to prevent operating and
maintenance problems.
WARNING:Toreducetheriskofreorelectric
shock, the device should not be exposed to rain
ormoistureandobjectslledwithliquids,such
as vases, should not be placed on the device.
CAUTION: To prevent electric shock, fully
insert the plug. (For regions with polarized
plugs: To prevent electric shock, match wide
blade to wide slot.)
Important Safety Instructions
• Follow all instructions.
• Heed all warnings.
• Do not use this device near water.
• Clean only with dry cloth.
• Do not block any ventilation openings.
Install in accordance with the
manufacturer's instructions.
• Do not install near any heat sources such
as radiators, heat registers, stoves, or other
devices(includingampliers)thatproduce
heat.
• Protect the power cord from being
walked on or pinched, particularly at plugs,
convenience receptacles, and the point
where they exit from the device.
• Onlyuseattachments/accessoriesspecied
by the manufacturer.
• Use only with the cart, stand, tripod,
bracket,ortablespeciedbythe
manufacturer or sold with the device.
When a cart is used, use caution when
moving the cart/device combination to
avoid injury from tip-over.
• Unplug this device during lightning storms
or when unused for long periods of time.
• Referallservicingtoqualiedservice
personnel.Servicingisrequiredwhenthe
device has been damaged in any way, such
as power-supply cord or plug is damaged,
liquidhasbeenspilledorobjectshave
fallen into the device, the device has been
exposed to rain or moisture, does not
operate normally, or has been dropped.
• Battery usage CAUTION – To prevent
battery leakage which may result in bodily
injury, property damage, or damage to the
unit:
• Install all batteries correctly, + and - as
marked on the unit.
• Do not mix batteries (old and new or
carbon and alkaline, etc.).
• Batteries (packed or installed) shall not
be exposed to excessive heat such as
sunshine,reorthelike.
• Remove batteries when the unit is not
used for a long time.
• The device shall not be exposed to
dripping or splashing.
• Do not place any sources of danger on
thedevice(e.g.liquidlledobjects,lighted
candles).
5EN
Overview of the main unit
a
• Turn on the main unit
• Switch to standby mode
b SOURCE
• Select a source.
c STOP
• Stop play or erase a program.
d PLAY/PAUSE
• Start or pause play.
a
b
c
f
e
d
g
h
i
k
l
m
n
j
e / PREVIOUS/NEXT
• Skip to the previous/next track.
• Fast reverse or fast forward within a
track or disc.
• Tune to a radio station.
• Adjust time.
f
• Connect to USB storage device.
g MP3-LINK
• Connect to an external audio device.
6 EN
h
• Connect to a headphone.
i
• Open/close the disc compartment.
j Display panel
• Show current status.
k MODE
• Select repeat play mode in CD, or USB
source.
• SelectshufeplaymodeinCD,orUSB
source.
l CLOCK
• Set clock.
m ALBUM/PRESET+/-
• Select a preset radio station.
• Skip to the previous/next album.
n VOLUME(Volume knob)
• Adjust volume.
Overview of the remote
control
a Source selection keys (CD, USB, TUNER,
TAPE, MP3 LINK)
• Select a source.
b CLOCK
• Set clock.
c REPEAT
• Select a repeat play mode: repeat one
track or all tracks.
d /
• Skip to the previous/next track.
• Tune to a radio station.
• Adjust time.
e PROG
• Program tracks.
• Program radio stations.
f /
• Fast reverse or fast forward within a
track or disc.
k
l
a
m
n
o
p
q
r
s
t
c
b
d
e
f
g
h
i
j
7EN
g ALB/PRESET -/+
• Skip to the previous/next album.
• Select a preset radio station.
h MUTE
• Mute volume.
i DSC
• Select a preset sound setting: POP,
JAZZ, ROCK, or CLASSIC.
j TIMER
• Set the alarm timer.
k
• Turn on the main unit.
• Switch to standby mode.
l DIMMER
• Access illuminate dimmer settings.
m SLEEP
• Set the sleep timer.
n SHUFFLE
• Play tracks randomly.
o
• Start or pause play.
p DISPLAY
• Show playback information.
q
• Stop play or erase a program.
r VOL +/-
• Adjust volume.
s DBB
• Turns on or off dynamic bass
enhancement.
t RDS
• For selected FM radio stations: display
RDS information.
3 Get started
Caution
Use of controls or adjustments or performance of
procedures other than herein may result in hazardous
radiation exposure or other unsafe operation.
Always follow the instructions in this chapter in
sequence.
If you contact Philips, you will be asked for the
model and serial number of this apparatus. The
model number and serial number are on the
back of the apparatus. Write the numbers here:
Model No. __________________________
Serial No. ___________________________
Connect speakers
Note
Make sure that the colors of the speaker wires and
terminals are matched.
1 Holddownthesocketap.
2 Insert the stripped part of the wire
completely.
• Insert the right speaker wires to
"RIGHT", left speaker wires to "LEFT".
• Insert the red wires to "+", black wires
to "-".
8 EN
3 Releasethesocketap.
Connect power
Caution
Risk of product damage! Ensure that the power supply
voltage corresponds to the voltage printed on the back
or the underside of the unit.
Risk of electric shock! When you unplug the AC power
cord, always pull the plug from the socket. Never pull
the cord.
Before you connect the AC power cord, make sure that
you have completed all other connections.
abc
Prepare the remote control
Caution
Risk of explosion! Keep batteries away from heat,
sunshineorre.Neverdiscardbatteriesinre.
Risk of decreased battery life! Never mix different
brands or types of batteries.
Risk of product damage! When the remote control is
not used for long periods, remove the batteries.
Danger of explosion if battery is incorrectly replaced.
Replaceonlywiththesameorequivalenttype.
To insert the remote control battery:
1 Open the battery compartment.
2 Insert 2 AAA batteries with correct
polarity (+/-) as indicated.
3 Close the battery compartment.
Turn on
Press to turn on.
» The unit switches to the last selected
source.
Tip
In standby mode, you can also press CD, TUNER, MP3
LINK to switch on the unit.
Switch to standby mode
Press again to switch the unit to standby
mode.
» The clock (if set) appears on the display
panel.
9EN
Note
When the unit remains idle for 15 minutes, it switches
from standby mode automatically.
Set clock
1 In standby mode, press and hold CLOCK
on the remote control for more than two
seconds.
» [24H] or [12H] hour format is
displayed.
2 Press / to select [24H] or [12H] hour
format.
3 press CLOCKtoconrm.
» The hour digits are displayed and begin
to blink.
4 Repeat steps 2-3 to set hour and minute.
Note
If no button is pressed in 90 seconds, the system exits
clock setting mode automatically.
Tip
You can view clock information in power-on mode by
pressing CLOCK.
4 Play
Basic play operations
You can control play through following
operations.
Key Function
/ Press and hold to fast-forward/fast-
reverse the track during playback,
then release to resume play.
To pause/resume play during
playback.
DISPLAY Select different play information.
REPEAT To select a repeat play mode:
[REP] (repeat): play current track
repeatedly.
[REP ALL] (repeat all): play all
tracks repeatedly.
Press again to return to normal
play.
SHUFFLE To play tracks randomly.
Press again to return to normal
play.
Play discs
1 Press CD on the remote control to select
the disc source.
2 Press on the top of the main unit.
» The disc door opens.
3 Place a disc face up onto the tray and
press again.
» Play starts automatically.
Download de handleiding in het Nederlands en/of Engels (PDF, 0.75 MB)
(Denk aan het milieu en print deze handleiding alleen als dat echt noodzakelijk is)

Loading…

Meer over deze handleiding

We begrijpen dat het prettig is om een papieren handleiding te hebben voor je Philips MCM1120 Stereoset. Je kunt de handleiding bij ons altijd downloaden en daarna zelf printen. Indien je graag een originele handleiding wilt hebben, raden we je aan contact op te nemen met Philips. Zij kunnen wellicht nog voorzien in een originele handleiding. Zoek je de handleiding van Philips MCM1120 Stereoset in een andere taal? Kies op de homepage je taal naar keuze en zoek daarna op het modelnummer om te zien of we deze beschikbaar hebben.

Specificaties

Merk Philips
Model MCM1120
Categorie Stereosets
Bestandstype PDF
Bestandsgrootte 0.75 MB

Alle handleidingen voor Philips Stereosets
Meer handleidingen voor Stereosets

Beoordeling

Laat ons weten wat je van de Philips MCM1120 Stereoset vindt door een beoordeling achter te laten. Wil je je ervaringen met dit product delen of een vraag stellen? Laat dan een bericht achter onderaan de pagina.
Bent u tevreden over de Philips MCM1120 Stereoset?
Ja Nee
Beoordeel dit product als eerste
0 stemmen

Praat mee over dit product

Laat hier weten wat jij vindt van de Philips MCM1120 Stereoset. Als je een vraag hebt, lees dan eerst zorgvuldig de handleiding door. Een handleiding aanvragen kan via ons contactformulier.

Handleiding Philips MCM1120 Stereoset

Gerelateerde producten

Gerelateerde categorieën