
Manual de instrucciones de la cerradura
electrónica SELO-A
Operating instructions for
electronic lock SELO-A
Instructions de service de la serrure
électronique SELO-A
Electronic lock SELO-A can be set for two opening methods: either for immediate opening upon entering of one of
the valid 6-digit secret codes or for delayed opening after a pre-programmed opening delay has lapsed. The lock is
unlocked using one of a total of nine secret codes.
A) GENERAL
• The opening procedure consists of two operations: CLEARING and UNBLOCKING.
• To start the opening procedure, check that the input unit is in the vertical end position.
• Each successful pressing of a key is acknowledged by the brief lighting up of the KEY ACKNOWLEDGEMENT
signal.
• If the code number is keyed in by mistake, return to the starting position of the lock by pressing the ON key, and
start over.
• After entering the wrong secret code three times in a row, the lock will automatically block all further entries for
5 minutes. If, after waiting for 5 minutes, the wrong code is entered again, the lock will block itself for a further
20 minutes (manipulation resistance). As the waiting period is in progress, the red BLOCKED signal blinks and
not even the valid number code will open the lock.
• If more than 30 seconds lapse between pressing any two keys, the lock automatically switches itself off for
safety reasons. The opening procedure has to be started over.
• Once data have been stored (numerical codes, opening delay), not even a power failure will delete them.
B) OPERATING THE LOCK
Clearing the lock without opening delay (factory setting)
1. Key-in the 6-digit number code (factory setting: administrator code 1 2 3 4 5 6).
2. As an indication that a valid number code has been entered and the lock is ready for opening, the green READY
FOR OPENING signal lights up for five seconds. The lock has now been cleared and is ready for unblocking
within this time. Entering of an invalid number code will cause the red DATA INPUT REJECTED signal to light up
for five seconds.
or: Clearing the lock with an opening delay (between 1 and 99 minutes)
1. Key-in the 6-digit number code (factory setting: administrator code 1 2 3 4 5 6).
2. The blinking green READY FOR OPENING signal shows that the number code entered is valid. Alternating with
the green light, the red BLOCKED signal blinks. If the code entered is not correct, the DATA INPUT REJECTED
signal will light up for five seconds.
3. Wait for the pre-programmed opening delay to pass; the lock cannot be unblocked in this condition. At the end
of the delay, the green KEY ACKNOWLEDGEMENT signal blinks for three minutes.
4. Enter the valid number code once more as the green signal is on.
5. To indicate the lock’s readiness for opening, the green READY FOR OPENING signal lights up for five seconds.
The user can now unblock the lock.
1. To unblock the lock during the five minute readiness for opening, turn the round input unit clockwise through a
half turn from its end position. Please note that the input unit can be turned a quarter turn at any time, but that
this distance is not enough to unblock the lock.
2. If the input unit is turned back to its starting position in anti-clockwise direction after the five-second ready-for
-opening period, the lock will return to the blocked position and can only be unblocked after renewed clearing
and re-entry of a valid code.
Unblocking the lock - relocking and securing the lock
Entering the programming mode to change the lock settings ONLY CHANGE THE LOCK SETTINGS WITH THE
SAFE DOOR OPEN AND BLOCKED. DO NOT MAKE UP NUMBER CODE OF PERSONAL DATES (i.e. no wedding
anniversaries, birthdays etc.)
• Start reprogramming the lock with either clearing procedure described on page 1. When, after clearing, the
green READY FOR OPENING signal lights up for 5 seconds, place a finger on the ENTER key and leave the key
pressed for approx. 5 seconds until the yellow PROGRAMMING STATUS signal lights up. It indicates that you
have successfully entered the programming mode and that the lock is waiting for instructions. If you wish to
abort the programming operation without results, press the ON key to return to the starting position of the lock.
Changing the administrator code (factory setting 1 2 3 4 5 6)
1. Enter the programming mode by keying-in the old administrator code.
2. Key-in ‘0’ to address the administrator slot and momentarily press the ENTER key.
3. Key-in the new 6-digit administrator code followed by momentarily pressing the ENTER key.
4. Key-in the new 6-digit administrator code again, and momentarily press the ENTER key. If this is followed by
the lighting up of the green READY FOR OPENING signal for 3 seconds, it means that the new administrator
code has been entered successfully. The old code is no longer valid. If, however, the action is followed by the
red DATA INPUT REJECTED signal for three seconds, it means that something went wrong during the
programming operation and that the old code is still valid.
Assigning or writing over a user code in one of the user slots 1 through 8
1. Enter the programming mode by keying-in the current administrator code.
2. Key-in ‘1’, ‘2’, or …..‘8’ to address the required user slot between 1 and 8, and then momentarily press the
ENTER key.
3. Key-in the new 6-digit user code followed by momentarily pressing the ENTER key.
4. Key-in the new 6-digit user code again, and momentarily press the ENTER key. If this is followed by the
lighting up of the green READY FOR OPENING signal for 3 seconds, it means that the new user code has been
entered successfully. The previous (written over) code is no longer valid. If, however, the action is followed by
the red DATA INPUT REJECTED signal for three seconds, it means that something went wrong during the
programming operation and that the old code is still valid.
Deleting a user code assigned to one of the user slots 1 through 8
1. Enter the programming mode by keying-in the current administrator code.
2. Key-in ‘1’, ‘2’, or …..‘8’ to address the required user slot between 1 and 8, and then momentarily press the
ENTER key.
3. Momentarily press the ENTER key once more.
4. Momentarily press the ENTER key a third time. If this is followed by the lighting up of the green READY FOR
OPENING signal for 3 seconds, it means that the user code has been deleted from the selected user slot. If,
however, the action is followed by the red DATA INPUT REJECTED signal for three seconds, it means that
something went wrong during the programming operation and that the old setting is still valid.
Changing an existing user code assigned to one of the user slots 1 through 8
1. Enter the programming mode by keying-in the current user code you wish to change.
2. Key-in ‘1’, ‘2’, or …..’8’ of the slot belonging to the current user code (between 1 and 8), and then
momentarily press the ENTER key.
3. Enter the new 6-digit user code, and then momentarily press the ENTER key.
4. Key-in the new 6-digit user code once more, and momentarily press the ENTER key. If the green READY FOR
OPENING signal lights up for 3 seconds, it means that the new user code has been assigned to the required
user slot, and that the old user code is no longer valid. If, however, the action is followed by the red DATA
INPUT REJECTED signal for three seconds, it means that something went wrong during the programming
operation and that the old setting is still valid.
Setting or changing an opening delay
1. Enter the programming mode by keying-in the current administrator code.
2. Key-in the figure ‘9’ to address the opening delay, and momentarily press the ENTER key.
3. Key-in the new 2-digit opening delay of between 01 and 99 minutes. The factory setting is ‘00’, which means
the lock is supplied without a pre-set opening delay.
4. Momentarily press the ENTER key. If this is followed by the lighting up of the green READY FOR OPENING
signal for 3 seconds, it means that the new opening delay has been programmed. However, if the red DATA
INPUT REJECTED signal for three seconds, it means that something went wrong during the programming
operation and that the old setting (or no delay) still applies.
TEST – TO BE PERFORMED WITHOUT FAIL!!
For safety reasons, only reprogram the lock with the safe door open and blocked in the open position. Only after you
are absolutely certain that the lock has been reprogrammed successfully and that the lock can be electrically
cleared and mechanically unblocked using the new settings, should the door be closed.
C) PROGRAMMING
READY FOR OPENING
BLOCKED
KEY ACKNOWLEDGEMENT
PROGRAMMING STATUS
DATA INPUT REJECTED
LOW BATTERIES
SERVICE CALL
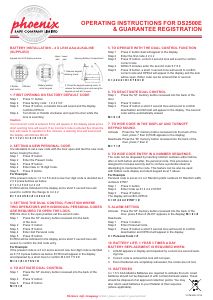
D) REPLACING THE BATTERIES
It is recommended to replace the batteries as soon as the red
BATTERIES LOW signal lights up, because the lock can only be
unblocked a further, approximately, 50 times. Please note that
none of the number codes can be changed until a set of fresh
batteries has been fitted. To change the batteries, lift off the
cover of the battery compartment with the tip of a screwdriver.
Fit three leak-proof, type Mignon LR6, AA, alkaline batteries,
paying attention to the correct polarity. Dispose of the old
batteries in accordance with anti-pollution legislation!
E) BATTERIES
Used batteries should not be disposed of with normal domestic waste.
These should be disposed of at approved collection points.
You may also return used batteries to your Retailer at their expense (where applicable).
La serrure électronique SELO-A permet ou l’ouverture immédiate de la serrure après l’introduction d’un code valide
à 6 chiffres ou l’ouverture retardée après une durée préprogrammée. Pour déverrouiller la serrure, on peut utiliser
un de max. neuf codes d’ouverture.
A) GENERALITES
• L’ouverture de la serrure est composée des opérations ACTIVER et DEVERROUILLER.
• Au début de l’opération d’ouverture, l’unité de commande doit être dans la position d’arrêt verticale.
• Chaque actionnement efficace d’une touche est acquitté par le signal TOUCHE ACQUITTEE s’allumant
brièvement.
• Si vous avez introduit par erreur un chiffre de code non correct, vous pouvez passer à la position initiale de la
serrure à l’aide de la touche ON et recommencer l’introduction.
• Si vous introduisez trois fois de suite un code incorrect aucune manipulation ne sera plus possible pour
5 minutes. Ensuite la serrure sera bloquée après chaque entrée de données incorrectes pour 20 minutes
(sécurisation contre des manipulations). Pendant ce temps, le signal rouge TEMPS DE BLOCAGE clignote et on
ne peut pas ouvrir la serrure même en introduisant un code valide.
• Si 30 secondes sont passées entre deux actionnements de touche, la serrure s’interrompt automatiquement
pour des raisons de sécurité. Il faut recommencer l’opération d’ouverture.
• Les données sauvegardées (codes de chiffres, retard d’ouverture) ne se perdent pas en cas de manque de
courant.
B) EMPLOI
Activer la serrure sans ouverture retardée (réglage effectué à l’usine)
1. Introduire le code à 6 chiffres (code d’administrateur enregistré à l’usine : 1 2 3 4 5 6).
2. La disponibilité d’ouverture est indiquée par le signal vert s’allumant pour 5 secondes. Pendant cette durée, la
serrure peut être déverrouillée. Si vous avez introduit un code non valide, le signal rouge ENTREE REFUSEE
s’allume pour cinq secondes.
ou: Activer la serrure avec ouverture retardée présélectionnée (réglable jusqu’à 99 minutes)
1. Introduire le code à 6 chiffres (code d’administrateur enregistré à l’usine : 1 2 3 4 5 6).
2. Le signal vert clignotant DIPONIBILITE D’OUVERTURE indique que le code introduit est correct. Le signal rouge
TEMPS DE BLOCAGE clignote en alternance. Si vous avez introduit un code non valide, le signal rouge ENTREE
REFUSEE s’allume pour cinq secondes.
3. Maintenant il faut attendre la fin du retard d’ouverture programmé. Pendant cette phase, la serrure ne peut pas
être déverrouillée. Passée la durée de retard programmé, le signal TOUCHE ACQUITTEE clignote pour trois
minutes.
4. Pendant ce temps vous devez introduire encore une fois la combinaison valide.
5. Indiquant la disponibilité d’ouverture, le signal vert DIPONIBILITE D’OUVERTURE s’allume pendant cinq secondes
et vous pouvez procéder au déverrouillage.
1. Pendant cette disponibilité d’ouverture de cinq secondes, vous pouvez déverrouiller la serrure en tournant toute
l’unité de commande ronde d’un demi tour en sens horaire à partir de l’arrêt. Il faut tenir compte du fait qu’un
quart de tour est toujours possible et ne donne pas lieu à l’ouverture.
2. Si vous tournez l’unité de commande en sens antihoraire dans sa position initiale après la fin de la disponibilité
d’ouverture, la serrure annule la disponibilité d’ouverture. Elle ne peut être déverrouillée qu’après une nouvelle
introduction du code d’ouverture valide.
Déverrouiller et remettre la serrure
Entrer dans le mode de programmation pour modifier les données enregistrées de la serrure FAITES
ATTENTION A CE QUE LA PORTE DU COFFRE-FORT SOIT TOUJOURS OUVERTE ET VERROUILLEE QUAND VOUS
MODIFIEZ LES DONNEES ENREGISTREES DE LA SERRURE ET N’UTILISEZ PAS DE DATES PERSONNELLES (par
ex. anniversaire) COMME CODE D’OUVERTURE.
• Commencez la nouvelle programmation par une des deux opérations d’ouverture décrites à la page 1. Pendant
que le signal vert DISPONIBILITE D’OUVERTURE reste allumé pour 5 secondes, mettez le doigt sur la touche
ENTER en la pressant pour environ 5 secondes jusqu’à ce que le signal jaune MODE DE PROGRAMMATION
s’allume. Celuici indique que vous êtes réussis à entrer dans le mode de programmation et que la serrure
attend d’autres programmations. Si vous voulez interrompre la programmation sans résultat, vous devez
appuyer sur la touche ON pour rentrer dans la position initiale de la serrure.
Modification du code d’administrateur (code enregistré à l’usine: 1 2 3 4 5 6)
1. Entrez dans le mode de programmation à l’aide du vieux code d’administrateur.
2. Introduisez le chiffre "0" pour activer le poste d’administrateur, puis appuyez brièvement sur la touche ENTER.
3. Introduisez le nouveau code d’administrateur, puis appuyez brièvement sur la touche ENTER.
4. Introduisez encore une fois le nouveau code d’administrateur, puis appuyez brièvement sur la touche ENTER.
Si le signal vert DISPONIBILITE D’OUVERTURE s’allume maintenant pour 3 secondes, le nouveau code
d’administrateur a été sauvegardé et le vieux code d’administrateur n’est plus valide. Si le signal rouge
INTRODUCTION REFUSEE s’allume cependant pour 3 secondes, la programmation n’était pas correcte et le
vieux code reste valide.
Enregistrer ou écraser un code d’utilisateur sur un des postes d’utilisateur de 1 à 8
1. Entrez dans le mode de programmation à l’aide du code d’administrateur actuel.
2. Introduisez le chiffre "1" ou "2" ou "3" ou … ou "8" pour activer un des postes d’utilisateur de 1 à 8, puis
appuyez brièvement sur la touche ENTER.
3. Introduisez le nouveau code d’utilisateur à 6 chiffres, puis appuyez brièvement sur la touche ENTER.
4. Introduisez encore une fois le nouveau code d’utilisateur à 6 chiffres, puis appuyez brièvement sur la touche
ENTER. Si le signal vert DISPONIBILITE D’OUVERTURE s’allume maintenant pour 3 secondes, le nouveau code
d’utilisateur a été sauvegardé et le vieux code d’utilisateur n’est plus valide. Si le signal rouge INTRODUCTION
REFUSEE s’allume cependant pour 3 secondes, la programmation n’était pas correcte et le vieux code reste
valide.
Effacer un code d’administrateur sur un des postes d’utilisateur de 1 à 8
1. Entrez dans le mode de programmation à l’aide du code d’administrateur actuel.
2. Introduisez le chiffre "1" ou "2" ou "3" ou … ou "8" pour activer un des postes d’utilisateur de 1 à 8, puis
appuyez brièvement sur la touche ENTER.
3. Appuyez encore une fois brièvement sur la touche ENTER.
4. Appuyez encore une fois brièvement sur la touche ENTER. Si le signal vert DISPONIBILITE D’OUVERTURE
s’allume maintenant pour 3 secondes, le code d’utilisateur existant sur le poste d’utilisateur sélectionné a été
effacé. Si le signal rouge INTRODUCTION REFUSEE s’allume cependant pour 3 secondes, la programmation
n’était pas correcte et le vieux code reste valide.
Modifier un code d’utilisateur déjà enregistré sur un des postes d’utilisateur de 1 à 8
1. Entrez dans le mode de programmation à l’aide du code d’utilisateur actuel qui sera modifié.
2. Introduisez le chiffre "1" ou "2" ou "3" ou … ou "8" pour activer le poste d’utilisateur 1 à 8 correspondant au
nouveau code d’utilisateur, puis appuyez brièvement sur la touche ENTER.
3. Introduisez le nouveau code d’utilisateur à 6 chiffres, puis appuyez brièvement sur la touche ENTER.
4. Introduisez encore une fois le nouveau code d’utilisateur à 6 chiffres, puis appuyez brièvement sur la touche
ENTER. Si le signal vert DISPONIBILITE D’OUVERTURE s’allume maintenant pour 3 secondes, le nouveau code
d’utilisateur a été sauvegardé sur le poste d’utilisateur correspondant et le vieux code d’utilisateur n’est plus
valide. Si le signal rouge INTRODUCTION REFUSEE s’allume cependant pour 3 secondes, la programmation
n’était pas correcte et le vieux code reste valide.
Enregistrer ou modifier un retard d’ouverture
1. Entrez dans le mode de programmation à l’aide du code d’administrateur actuel.
2. Introduisez le chiffre "9" pour activer la modification du retard d’ouverture, puis appuyez brièvement sur la
touche ENTER.
3. Introduisez la durée du retard d’ouverture à deux chiffres en minutes de "01" à "99". A l’usine, il a été
enregistré la valeur "00" – c’est-à-dire le retard d’ouverture est nul.
4. Appuyez brièvement sur la touche ENTER. Si le signal vert DISPONIBILITE D’OUVERTURE s’allume maintenant
pour 3 secondes, la nouvelle durée du retard d’ouverture a été sauvegardée. Si le signal rouge INTRODUCTION
REFUSEE s’allume cependant pour 3 secondes, la programmation n’était pas correcte et le vieux code reste
valide.
CONTROLE - ABSOLUMENT INDISPENSABLE !
Pour des raisons de sécurité, le résultat de la nouvelle programmation doit être vérifié avec porte ouverte et
verrouilée en cette position. Seulement après que vous vous êtes assurés que la nouvelle programmation était
correcte et que la serrure peut être activée électriquement et déverrouillée mécaniquement à l'aide des nouvelles
données enregistrées, vous devriez fermez la porte.
C) PROGRAMMATION
DISPONIBILITE D’OUVERTURE
TEMPS DE BLOCAGE
TOUCHE ACQUITTEE
MODE DE PROGRAMMATION
ENTREE REFUSEE
PILES FAIBLES
APPEL DE SERVICE
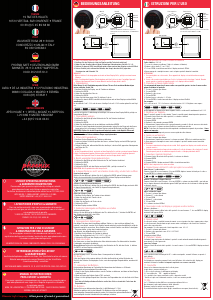
D) CHANGER LES PILES
Si le signal rouge PILES FAIBLES clignote, il faudrait changer les
piles. Sinon la serrure ne peut être ouverte qu’environ 50 fois.
Dans cette phase, il n’est pas possible de modifier les
combinaisons de chiffres. Pour changer les piles, on peut
enlever le couvercle à l’aide d’un tournevis. Mettez trois piles
étanches du type Mignon LR 6, AA, Alcaline, en tenant compte
de la polarisation correcte. Veillez à ce que les piles soient éliminées
en respectant l’environnement !
E) PILES
Les piles usagées ne doivent pas être jetés avec les ordures ménagères.
Celles-ci doivent être emmenées dans des points de collecte agréé.
Vous pouvez également retourner les piles usagées à votre détaillant à ses frais.
La cerradura electrónica SELO-A permite el desbloqueo inmediato tras introducción de un código válido de 6
dígitos, así como el desbloqueo con retardo, o sea la cerradura sólo se abre cuando ha concluido el retardo
programado. Para desbloquear la cerradura se puede utilizar uno de nueve códigos de apertura como máximo.
A) INFORMACIONES BÁSICAS
• Para abrir la cerradura se deberán llevar a cabo las operaciones HABILITAR y DESBLOQUEAR.
• Al inicio de la apertura, la botonera deberá estar en posición vertical en contacto con en el tope izquierdo.
• Cualquier activación de tecla aceptada es confirmada por la señal CONFIRMACIÓN DE TECLA que se enciende
brevemente.
• Si se entra un código incorrecto durante la operación de habilitación, pulsar la tecla ON. Así, la cerradura pasará
a la posición básica y se podrá repetir la operación de habilitación.
• Después de tres códigos incorrectos consecutivos, comienza una penalización de 5 minutos durante la cual no
se permite ninguna operación. Cuando la penalización ha finalizado, la cerradura se bloqueará durante
20 minutos cada vez que se introduzca un código incorrecto (protección contra la manipulación). Durante este
periodo parpadea la señal roja PENALIZACIÓN y la cerradura no puede ser abierta, aun cuando se introduzca un
código válido.
• Por motivos de seguridad, tras una pausa de 30 segundos sin presionar ninguna tecla, la cerradura pasará
automáticamente al estado de cerrado. Para abrir la cerradura, se deberá volver a realizar la operación de
habilitar.
• Los datos memorizados (códigos, retardo) están almacenados en una memoria a prueba de fallos de
alimentación y no sufrirán variación.
B) MANEJO
Habilitación inmediata de la cerradura (programación de fábrica)
1. Introducir el código de 6 dígitos (programación de fábrica: código Master 1 2 3 4 5 6).
2. Si el código introducido es válido, se enciende la señal verde LISTA PARA ABRIR durante cinco segundos,
periodo en el que la cerradura puede ser desbloqueada. Si el código introducido no es válido, se enciende la
señal roja ENTRADA RECHAZADA durante cinco segundos.
o: Habilitación de la cerradura con retardo (programable hasta 99 minutos)
1. Introducir el código de 6 dígitos (programación de fábrica: código Master 1 2 3 4 5 6).
2. Si el código introducido es válido, la señal verde LISTA PARA ABRIR y la señal roja PENALIZACIÓN parpadean
alternativamente. Si el código introducido no es válido, se enciende la señal roja ENTRADA RECHAZADA durante
cinco segundos.
3. Esperar hasta que el retardo de apertura haya finalizado. La cerradura no puede ser desbloqueada durante este
periodo. Cuando el retardo ha finalizado, la señal CONFIRMACIÓN DE TECLA parpadea durante tres minutos.
4. Durante este intervalo, introducir nuevamente el mismo código como confirmación.
5. A continuación, se enciende la señal verde LISTA PARA ABRIR durante cinco segundos, periodo en el que la
cerradura puede ser desbloqueada.
1. Durante la ventana de apertura de cinco segundos la cerradura puede ser desbloqueada girando la botonera
redonda completa media vuelta desde el tope en el sentido de las agujas del reloj. Siempre es posible girar la
botonera un cuarto de vuelta. Sin embargo, un cuarto de vuelta no permite desbloquear la cerradura.
2. Cuando la ventana de apertura de cinco segundos ha finalizado y se gira la botonera hacia atrás hasta el tope
(en el sentido contrario al de las agujas del reloj), la cerradura anulará la operación de desbloqueo. Después,
se deberá repetir la introducción del código de apertura para habilitar de nuevo la cerradura.
Desbloqueo de la cerradura y su anulación
Activación del modo de programación para cambio de códigos REALIZAR CUALQUIER CAMBIO DE LA
PROGRAMACIÓN DE LA CERRADURA ÚNICAMENTE CON LA PUERTA ABIERTA Y EL PESTILLO CERRADO. NO
UTILIZAR COMBINACIONES DE DATOS PERSONALES COMO CÓDIGO DE APERTURA (p. ej. cumpleaños).
• Para iniciar el proceso de programación, llevar a cabo una de las dos operaciones de habilitación descritas en
la página 1. Cuando, tras habilitación de la cerradura, se enciende la señal verde LISTA PARA ABRIR durante
5 segundos, se pulsará, sin soltarla, la tecla ENTER por aprox. 5 segundos hasta que se encienda la señal
amarilla MODO DE PROGRAMACIÓN. Esto indica que se ha activado el modo de programación y que la
cerradura está en espera de ser programada. Si se desea cancelar la programación sin guardar el resultado,
pulsar la tecla ON para que la cerradura pase a la posición básica.
Cambio del código Master (programación de fábrica 1 2 3 4 5 6)
1. Activar el modo de programación introduciendo el código Master antiguo.
2. Introducir "0" para activar la posición de Master y pulsar después brevemente la tecla ENTER.
3. Introducir el nuevo código Master de 6 dígitos y confirmar pulsando brevemente la tecla ENTER.
4. Reintroducir el nuevo código Master de 6 dígitos y confirmar pulsando brevemente la tecla ENTER. Si se
enciende la señal verde LISTA PARA ABRIR durante 3 segundos, el nuevo código Master ha sido almacenado,
de modo que el código Master antiguo ha dejado de ser válido. Sin embargo, si se enciende la señal roja
ENTRADA RECHAZADA durante 3 segundos, el código Master no ha sido cambiado correctamente, de modo
que el código Master antiguo sigue siendo válido.
Programación o cambio de un código asignado a una de las posiciones de usuario 1 a 8
1. Activar el modo de programación introduciendo el código Master actual.
2. Introducir "1" ó "2" ó "3" ... u "8" para activar la posición de usuario 1 a 8 deseada y pulsar después
brevemente la tecla ENTER.
3. Introducir el nuevo código de usuario de 6 dígitos y confirmar pulsando brevemente la tecla ENTER.
4. Reintroducir el nuevo código de usuario de 6 dígitos y confirmar pulsando brevemente la tecla ENTER. Si se
enciende la señal verde LISTA PARA ABRIR durante 3 segundos, el nuevo código de usuario ha sido
almacenado, de modo que el código de usuario antiguo ha dejado de ser válido. Sin embargo, si se enciende
la señal roja ENTRADA RECHAZADA durante 3 segundos, el código de usuario no ha sido almacenado
correctamente, de modo que el código de usuario antiguo sigue siendo válido.
Borrado de un código asignado a una de las posiciones de usuario 1 a 8
1. Activar el modo de programación introduciendo el código Master actual.
2. Introducir "1" ó "2" ó "3" ...u "8" para activar la posición de usuario 1 a 8 deseada y pulsar después
brevemente la tecla ENTER.
3. Volver a pulsar brevemente la tecla ENTER.
4. Volver a pulsar brevemente la tecla ENTER. Si se enciende la señal verde LISTA PARA ABRIR durante 3
segundos, el código antiguo del usuario activado ha sido borrado. Sin embargo, si se enciende la señal roja
ENTRADA RECHAZADA durante 3 segundos, el código de usuario no ha sido borrado correctamente, de modo
que el código de usuario sigue siendo válido.
Cambio de un código existente desde una de las posiciones de usuario 1 a 8
1. Activar el modo de programación introduciendo el código de usuario actual que se desea cambiar.
2. Introducir "1" ó "2" ó "3" ... u "8" para activar la posición de # usuario que corresponde al código actual
(usuario 1 a 8) y pulsar después brevemente la tecla ENTER.
3. Introducir el nuevo código de usuario de 6 dígitos y confirmar pulsando brevemente la tecla ENTER.
4. Reintroducir el nuevo código de usuario de 6 dígitos y confirmar pulsando brevemente la tecla ENTER. Si se
enciende la señal verde LISTA PARA ABRIR durante 3 segundos, el nuevo código ha sido asignado a la posición
de usuario deseada, de modo que el código de usuario antiguo ha dejado de ser válido. Sin embargo, si se
enciende la señal roja ENTRADA RECHAZADA durante 3 segundos, el código de usuario no ha sido cambiado
correctamente, de modo que el código de usuario antiguo sigue siendo válido.
Programación o cambio del retardo de apertura
1. Activar el modo de programación introduciendo el código Master actual.
2. Introducir "9" para iniciar el proceso de cambio del retardo y pulsar después brevemente la tecla ENTER.
3. Introducir el retardo deseado con 2 dígitos, el retardo puede ser programado de "01" a "99" minutos. La
cerradura viene de fábrica con retardo desactivado, o sea "00" minutos.
4. Pulsar brevemente la tecla ENTER. Si se enciende la señal verde LISTA PARA ABRIR durante 3 segundos, el
nuevo retardo ha sido almacenado. Sin embargo, si se enciende la señal roja ENTRADA RECHAZADA durante
3 segundos, el retardo no ha sido cambiado correctamente, de modo que el retardo antiguo sigue siendo
válido.
¡ATENCIÓN! ¡ES IMPRESCINDIBLE REALIZAR EL SIGUIENTE CONTROL!
Por razones de seguridad, se deberá comprobar el cambio del código únicamente con la puerta abierta y el pestillo
cerrado. Cerrar la puerta únicamente después de haber comprobado que el código ha sido cambiado con éxito, o
sea que la cerradura puede ser habilitada eléctricamente y desbloqueada mecánicamente con el nuevo código.
C) PROGRAMACIÓN
LISTA PARA ABRIR
PENALIZACIÓN
CONFIRMACIÓN DE TECLA
MODO DE PROGRAMACIÓN
ENTRADA RECHAZADA
PILA BAJA
SERVICIO POSVENTA
D) SUSTITUCIÓN DE BATERÍAS
Cuando la señal roja PILA BAJA parpadea, recomendamos sustituir
las baterías cuanto antes. En caso contrario, la cerradura sólo podrá
deshabilitarse aprox. 50 veces. En este estado, no se puede cambiar
ningún código. Para sustituir las baterías, abrir el compartimento de
baterías mediante un destornillador. Se utilizan tres baterías alcalinas
a prueba de derrame (tipo Mignon LR 6, AA). Asegúrese de la correcta
polaridad. ¡Depositar las baterías usadas en lugares destinados a este
fin!
E) PILAS
Deposite siempre las pilas usadas en los puntos indicados para recogida de las mismas. Nunca tire
las pilas usadas a la basura convencional. En algunos países existen tiendas o cadenas de grandes
superficies que aceptan recibir las pilas usadas, cubriendo ellos los gastos de envío.
Version 1/Nov 12/DPT


Praat mee over dit product
Laat hier weten wat jij vindt van de Phoenix HS1091KD Kluis. Als je een vraag hebt, lees dan eerst zorgvuldig de handleiding door. Een handleiding aanvragen kan via ons contactformulier.