
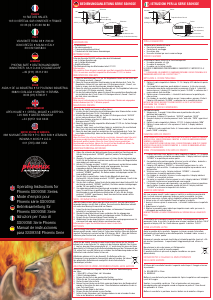
SYSTEM CODES
SS0935E safes have three operating systems
• A personal 4 digit code
• A Managers Code ***
• A credit card facility code
THE MANAGERS CODE FOR THESE SAFES ARE SET TO 6 DIGITS AND
*** WE STRONGLY RECOMMEND THAT YOU CHANGE BOTH THE PERSONAL
AND MANAGERS CODES FROM THE FACTORY SETTING ***.
CHANGING THE MANAGERS CODE
With the door in the open position.
1. Turn off for 5 seconds, the red power switch located on the back edge of the
door.
2. Turn power back on. The LCD display will indicate “SECURE” then “GOOD”
3. When the display has cleared press the * key twice, “PRPG” will appear in
the display.
4. Enter the default factory code 011223 the display will indicate “NEW”
5. Enter a new six digit code followed by the # key the display will indicate “AGAIN”.
6. Re-enter the code again followed by the # key, the new code will be confirmed
with “DONE” indicated in the display.
If you lock your safe with a credit card you cannot open the safe with a
personal code. But the emergency override code will always open your safe.
If you lock your safe with your personal code, you cannot open the safe with
the credit card. But the emergency override code will always open your safe.
CREDIT CARD FACILITY
HOW TO PROGRAM A CREDIT CARD
1. For the first time of use, enter either the factory default code 1 2 3 4 or a
previously selected personal code. The display will indicate “OPENED”
and the door can be opened.
2. With door in the open position and unlocked, slide the card through the
card reader slot, from right to left with the magnetic strip facing down.
3. The LCD display will indicate “CLOSED” and the bolts will be extended. The
magnetic card has now been accepted. The previously entered digital code is
now inoperative.
4. Slide the card again through card slot, the display will indicate “OPENED” the
bolts will retract and the door can be closed.
5. To lock the safe, slide the magnetic card through the card slot. The display will
indicate “CLOSED” and the safe is locked.
6. To unlock the safe, slide the card again through card slot, the display will
indicate “OPENED” the bolts will retract and the door can be opened.
7. To change back to personal code operation, with the door and lock in the open
position, enter the personal code followed by the # key. The display will indicate
“CLOSED” and the lock will have reverted to keypad operation.
BATTERIES
Your safe will arrive with transit batteries installed and they can be tested by
pressing the # key once. If in good condition “BA-HI”will appear in the LCD display.
If in poor condition “BA-LO” will appear.
INSTALLER VOTRE CODE PERSONNEL
1. Entrez le code usine 1 2 3 4, l’ecran LCD affichera “OPENED””
2. Avec la porte dans la positon ouverte, entrez les 4 chiffres que vous avez choisie
comme VOTRE CODE PERSONNEL ET APPUYEZ SUR LA TOUCHE #. LES BOULONS
SOTIRONT DE LEUR ANCRAGE ET L’ECRAN LCD AFFICHERA « CLOSED » pour
confirmer que le nouveau code a été accepté.
3. Entrez le nouveau code une fois de plus, les boulons se rétracteront, la porte
pourra alors être fermée..
4. Pour fermer le coffre, entrez encore une fois votre nouveau code et appuyez sur
la touche # .Lécran LCD confirmera « CLOSED » et le coffre est maintenant
fermé.
NOTEZ: SI UN CODE INCORRECT EST ENTRE 4 FOIS DE SUITE LE CLAVIER
ENTRERA EN HIBERNATION PENDANT 15 MINUTES.
CHANGER LE CODE D’URGENCE
Avec la porte dans la position ouverte.
1. Éteignez le coffre pendant 5secondes en appuyant sur le bouton rouge qui se
trouve à l’arrière de la porte.
2. Appuyez sur le bouton rouge pour rallumer le coffre. L’écran LCD indiquera «
SECURE » puis « GOOD »
3. Quand plus rien ne s’affichera sur l’écran, appuyez deux fois sur la touche*,
l’écran affichera alors « PRPG ».
4. Entrez le code usine 011223, l’écran indiquera “NEW”.
5. Entrez un nouveau code à six chiffres puis appuyez sur la touche #, l’écran LCD
indiquera « AGAIN ».
6. Entrez une nouvelle fois votre code puis appuyez sur la touché #, votre nouveau
code sera confirmé sur l’écran LCD qui indiquera « DONE ».
Si vous fermez votre coffre avec une carte de credit vous ne pouvez pas ouvrir votre
coffre avec un code personnel. Mais le code maitre d’urgence ouvrira toujours votre
coffre. Si vous fermez votre coffre avec votre code personnel, vous ne pouvez pas
ouvrir le coffre avec la carte de credit. Mais le code maitre d’urgence ouvrira
toujours votre coffre.
SYSTEME CARTE DE CREDIT
CLEFS D’URGENCE
En cas de perte des codes ou de piles épuisées, la clef d’urgence peut être utilisée
pour ouvrir le coffre. La serrure mécanique d’urgence est située sous la plaque en
cuivre au nom de Phoenix.
1. Dévissez les deux vis qui maintiennent la plaque en utilisant la clef à six pans.
2. Insérez la clef et tournez la dans le sens d’une aiguille d’une montre, les
boulons se rétracteront et la porte s’ouvrira..
3. Remettez la plaque en cuivre..
4. Répétez les procédures mentionnées ci-dessus pour installer de nouveaux
codes ou le mode carte de crédit ou remplacer les piles.
NE JAMAIS METTRE LES CLEFS D’URGENCE A L’INTERIEUR DE VOTRE COFFRE
CON SU CAJA DE SEGURIDAD SE SUMINISTRAN:
• 2 LLAVES DE EMERGENCIA
• 2 PERNOS DE FIJACIÓN
• 1 LLAVE ALLEN
• 1 TARJETA DE INSTRUCCIONES DE USO
CAMBIO DEL CÓDIGO DE EMERGENCIA
Con la puerta abierta:
1. Desconecte la corriente durante 5 segundos (con el interruptor rojo situado en
el lateral interior de la puerta).
2. Vuelva a conectar la corriente. La pantalla (LCD) mostrará “SECURE” y
seguidamente “GOOD”.
3. Cuando la pantalla no muestre ninguna indicación pulse la tecla * dos veces y
mostrará “PRPG”.
4. Introduzca el código predeterminado de fábrica 011223, la pantalla mostrará
“NEW”.
5. Introduzca un nuevo código de seis dígitos seguido de la tecla #; la pantalla
mostrará “AGAIN”.
6. Vuelva a introducir el nuevo código seguido de la tecla #. El nuevo código
quedará confirmado y la pantalla mostrará “DONE”.
SISTEMA DE TARJETA DE CREDITO
SI CIERRA LA CAJA DE SEGURIDAD CON LA TARJETA DE CREDITO NO PODRÁ
ABRIRLA CON EL CÓDIGO PERSONAL.
SI CIERRA LA CAJA DE SEGURIDAD CON EL CÓDIGO PERSONAL NO PODRÁ ABRIRLA
CON LA TARJETA DE CREDITO.
EN AMBOS CASOS ÚNICAMENTE PODRÁ ABRIRLA CON EL CÓDIGO DE EMERGENCIA.
PROGRAMACIÓN CON TARJETA DE CREDITO
1. Cuando se programe por primera vez introduzca el código predeterminado de
fábrica 1234 o código personal anteriormente seleccionado. La pantalla mostrará
“OPENED” y la puerta se podrá abrir.
2. Con la puerta abierta, deslice la tarjeta por la ranura del lector, de derecha a
izquierda, con la banda magnética hacia abajo.
3. La pantalla (LCD) mostrará “CLOSED” y los pestillos se deslizarán. La tarjeta de
crédito ha sido aceptada. El código digital introducido anteriormente queda
inoperativo.
4. Vuelva a deslizar la tarjeta por la ranura, la pantalla mostrará “OPENED”, los
pestillos se retraerán y se podrá abrir la puerta.
5. Para cerrar la caja de seguridad, deslice la tarjeta por la ranura. La pantalla
mostrará “CLOSED” y la caja quedará bloqueada.
6. Para abrir la caja de seguridad, vuelva a deslizar la tarjeta por la ranura, la
pantalla mostrará “OPENED”, los pestillos se retraerán y se podrá abrir la puerta.
7. Para que el código personal vuelva a ser operativo, mantenga la puerta y
cerradura abiertas e introduzca el código personal seguido de la tecla #. La
pantalla mostrará “CLOSED” y la cerradura deberá abrirse con el teclado
numérico.
COMMENT PROGRAMMER UNE CARTE DE CREDIT
1. Pour la première utilisation, entrez soit le code usine 1 2 3 4, soit un code que
vous avez sélectionnez auparavant. L’écran LCD indiquera « OPENED » et la porte
peut être ouverte.
2. Avec la porte en position ouverte glissez la carte dans la fente à lecture de carte,
de droite à gauche avec la ligne magnétique face vers le bas.
3. L’écran LCD indiquera “CLOSED” et les boulons seront sortis de leur ancrage. La
carte magnétique a été accepté. Le code entré auparavant est maintenant non
opérationnel.
4. Glissez la carte une nouvelle fois dans la fente pour carte, l’écran LCD indiquera
“OPENED”, les boulons se rétracteront et la porte peut être fermée.
5. Pour fermer le coffre ,glissez la carte magnétique dans la fente. L’écran LCD
indiquera « CLOSED » et le coffre est maintenant fermé.
6. Pour ouvrir le coffre,, glissez la carte dans la fente, l’écran indiquera “OPENED”,
les boulons se rétracteront et la porte peut être ouverte.
7. Pour retourner au mode code personnel, avec la porte et la serrure en position
ouverte, entrez votre code personnel puis appuyez sur la touche #. L’écran LCD
indiquera « CLOSED » et la serrure sera revenue au mode clavier.
SETTING YOUR PERSONAL CODE
1. Enter the factory default code 1 2 3 4 the LCD display will indicate “OPENED”
2. With the door in the open position enter the 4 digit number you have selected as
your personal code and press the # key. The bolts will slide out and the LCD
display will show “CLOSED” to confirm that the new code has been accepted.
3. Enter the new code again, the bolts will retract and the door can then be closed.
4. To lock the safe, enter again the new code and press the # key.
The LCD display will confirm CLOSED” and the safe is locked.
NOTE: IF AN INCORRECT CODE IS ENTERED 4 TIMES THE KEYPAD WILL
HIBERNATE FOR 15 MINUTES.
INSTRUCCIONES PARA LA SERIE SS0935E
INSTRUCTIONS FOR SS0935E SERIES
INSTRUCTIONS POUR LA SERIE SS0935E
WITH YOUR SAFE
You will find in the transit packaging box
• Two emergency keys
• Two bolts
• One allen key
• One instruction card for hotel room applications
EMERGENCY KEYS
In the event of lost codes or battery failure, the override key can be used to open the
safe. The mechanical override lock is located under the brass Phoenix nameplate.
1. Unscrew the two screws using the allen key holding the brass Phoenix name
plate in position and remove the plate.
2. Insert the override key and turn clockwise, the bolts will be withdrawn and the
door will open.
3. Replace the brass name plate.
4. Repeat the above procedure to set new codes or card application or replace
batteries.
NEVER PUT THE EMERGENCY KEYS INSIDE YOUR SAFE
WALL/BASE FIXING INSTRUCTIONS FOR SS0935E SERIES
You will find inside your safe the following items for the wall or base fixing of
your safe:
2 x M10 x 42mm rawl bolts
2 x washers
Locate the safe into the required position. Open the door and mark the fixing holes.
Remove the safe and drill 2 holes where the floor or wall is marked using a
12mm masonry drill bit to a depth of 42mm. And insert the rawl bolts.
Locate the safe back into position, insert the bolts with washers fitted and
tighten to wall or floor.
CÓDIGOS DEL SISTEMA
La caja de seguridad serie SS0935E cuenta con tres sistemas de funcionamiento:
• Un código personal de 4 dígitos
• Un código de emergencia ***
• Un código para sistema de tarjeta de credito
EL CÓDIGO DE EMERGENCIA ES DE 6 DÍGITOS Y ***
ES MUY IMPORTANTE EL CAMBIO DE LOS CÓDIGOS PREDETERMINADOS DE
FABRICA, TANTO DEL PERSONAL COMO DEL DE EMERGENCIA
AJUSTE DE SU CÓDIGO PERSONAL
1. Introduzca el código predeterminado de fábrica 1234, la pantalla (LCD) mostrará
“OPENED”.
2. Con la puerta abierta introduzca el número de 4 dígitos seleccionado como su
código personal y pulse la tecla #. Los pestillos se deslizarán y la pantalla (LCD)
mostrará “CLOSED”, como confirmación de que se ha aceptado el nuevo
código.
3. Vuelva a introducir el nuevo código, los pestillos se retraerán y podrá cerrar la
puerta.
4. Para bloquear la caja de seguridad, vuelva a introducir el nuevo código y pulse
la tecla #. La pantalla confirmará "CLOSED” y la caja de seguridad quedará
bloqueada.
NOTA: SI SE INTRODUCE UN CÓDIGO INCORRECTO 4 VECES, EL TECLADO QUEDA
BLOQUEADO DURANTE 15 MINUTOS.
LLAVES DE EMERGENCIA - UTILIZACIÓN
En caso de pérdida de los códigos o carga baja de las baterías, se puede usar la
llave de emergencia. La cerradura de emergencia está situada bajo la tapa de latón,
con el nombre PHOENIX grabado en ella.
1. Afloje los dos tornillos Allen que fijan la tapa y retírela.
2. Inserte la llave y gírela en el sentido de las agujas del reloj, los pestillos se
retraerán y se abrirá la puerta.
3. Vuelva a colocar la tapa.
4. Repita los pasos antes indicados para ajustar nuevamente los códigos, el sistema
de tarjeta de crédito y el cambio de baterías.
NUNCA DEJE LAS LLAVES DE EMERGENCIA DENTRO DE LA CAJA DE SEGURIDAD
BATERIAS
Su caja de seguridad se suministra con las baterias de tránsito instaladas. Su carga
se podrá comprobar pulsando la tecla #. Si la carga es correcta la pantalla (LCD)
mostrará “BA-HI”. En caso contrario la pantalla mostrará “BA-LO”.
CAMBIO DE BATERIAS
Abra la puerta de la caja y desconécte la corriente. El interruptor está situado en el
lateral interior de la puerta. ( “I” = encendido), ( “O” = apagado).
Retirar la tapa situada en la parte interior de la puerta. Insertar 4 pilas AA alcalinas,
colocar la tapa y conectar la cerradura de nuevo.
Deposite siempre las pilas usadas en los puntos indicados para recogida
de las mismas. Nunca tire las pilas usadas a la basura convencional.
En algunos países existen tiendas o cadenas de grandes superficies que
aceptan recibir las pilas usadas, cubriendo ellos los gastos de envío.
INSTRUCCIONES DE FIJACIÓN AL SUELO O PARED
Su caja de seguridad se suministra con:
• 2 pernos rawl m10 x 42 mm
• 2 arandelas
Situe la caja de seguridad en el lugar elegido y, con la puerta abierta, marque los
puntos de fijación.
Retire la caja y taladre en los puntos marcados con una broca adecuada de 12 mm,
hasta una profundidad de 42 mm, e inserte los pernos rawl.
Coloque la caja y, con las arandelas ya posicionadas, inserte los pernos y apriételos.
AVEC VOTRE COFFRE
Vous trouverez dans la boîte d'emballage de transit
• Deux clefs d’urgence
• Deux boulons a fixer
• Une clef a six pans
• Une carte d’instruction pour chambre d’hotel applications
SYSTEME DES CODES
SS0935E coffres-forts ont trois systemes d’operation
• Un code personnel a 4 chiffres
• Un code d’urgence ***
• La possibilite d’un code carte de credit
Le code d’urgence pour les deux coffres-forts est un code d’usine a 6
chiffres et *** nous vous conseillons fortement de changer le code
personnel et le code d’urgence issue par l’usine ***
PILES
Votre coffre arrivera avec des piles de transit installees, et elles peuvent être
vérifiées en appuyant une fois sur la touche #.Si les piles sont pleines l’écran
LCD indiquera « BA-HI », si les piles sont vides l’écran lcd indiquera « BA-LO ».
POUR CHANGER LES PILES
Ouvrir la porte du coffre .Eteindre le courant de la serrure. Le bouton se situe sur la
charnière à l’arrière de la porte. Le symbole « i » signifie coffre allume et le symbole
« o » signifie coffre éteint. Enlevez les deux vis de cuivre entre les boulons
coulissants sur le devant de la porte et les charnières à l'arrière de la porte.
Retirez le panneau coulissant situé à l'arrière de la porte. Insérez 4 piles AA
alcalines, remettez en place le couvercle des batteries, puis activez l’alimentation
de la serrure.
Les piles usagées ne doivent pas être jetés avec les ordures ménagères.
Celles-ci doivent être emmenées dans des points de collecte agréé.
Vous pouvez également retourner les piles usagées à votre détaillant à
ses frais (le cas échéant).
INSTRUCTIONS FIXATION AU MUR/SOL POUR LA SÉRIE SS0935E
Vous trouverez à l’intérieur de votre coffre-fort les éléments suivant pour la
fixation au mur ou au sol de votre coffre :
2 x M10 x 42mm Cheville d’ancrage en métal
2 x Rondelles
Choisissez l’emplacement de votre coffre-fort. Ouvrez la porte et tracez des repères
pour le perçage. Mettez le coffre-fort de côté et percez 2 trous où se trouve les
repères soit sur le mur soit sur le sol en utilisant une mèche de maçonnerie de 12
mm jusqu’à une profondeur de 42mm et insérez les chevilles d’ancrage en métal.
Remettez le coffre-fort à sa place, insérez les rondelles avec les chevilles et serrez
soit au mur soit au sol.
1 2 3
4 5 6
7 8 9
*
0 #
Coffre
Panneau de
configuration
Porte
Clavier
Plaque Phoenix en cuivre
1 2 3
4 5 6
7 8 9
*
0 #
Affichage
Numéro des touches
Fente pour la carte
Indique la direction de la carte magnétique
Touche (clear)
*
# Touche (fermé)
1 2 3
4 5 6
7 8 9
*
0 #
Safe
Control Panel
Door
Keypad
Phoenix Brass nameplate
1 2 3
4 5 6
7 8 9
*
0 #
Display
Keypad
Card Slot
Card swipe direction indicator
Key (lock)
*
# Key (clear)
1 2 3
4 5 6
7 8 9
*
0 #
Safe
Panel de
control
Puerta
Teclado
Tapa de latón de la llave de emergencia
1 2 3
4 5 6
7 8 9
*
0 #
Pantalla
Teclado
Ranura
Indicador de dirección de desplazamiento de la tarjeta
Tecla (borrar)
*
Tecla # (bloquear)
TO REPLACE THE BATTERIES
Open the safe door. Turn off the power to the lock. The switch is located on the
hinge side of the door. The sign “I” is for power on and the sign “O” is for power off.
Remove the slide off panel located on the back of the door. Insert 4 x AA alkaline
batteries, replace the battery pack cover and turn on the power to the lock.
Used batteries should not be disposed of with normal domestic waste.
These should be disposed of at approved collection points.
You may also return used batteries to your Retailer at their expense
(where applicable)
Version 2/JPT/Oct 12

Praat mee over dit product
Laat hier weten wat jij vindt van de Phoenix SS0935E Kluis. Als je een vraag hebt, lees dan eerst zorgvuldig de handleiding door. Een handleiding aanvragen kan via ons contactformulier.