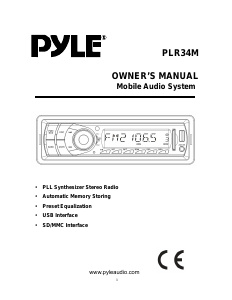
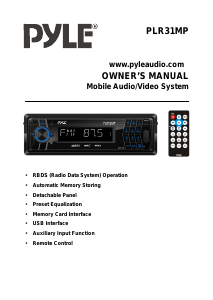
Handleiding Pyle PLR31MP Autoradio

Handleiding voor je Pyle PLR31MP Autoradio nodig? Hieronder kun je de handleiding gratis bekijken en downloaden als PDF in het Nederlands en/of Engels. Dit product heeft 4 veelgestelde vragen, 0 comments en heeft 0 stemmen. Is dit niet de handleiding die je zoekt, neem dan contact met ons op.

Is je product kapot en biedt de handleiding geen oplossing meer? Dan kun je voor reparatie gratis terecht bij Repair Café.

Handleiding

Loading…

2
INSTALLATION
Notes:
y Choose the mounting location where the unit
will not interfere with the normal driving
function of the driver.
mounting location where the unit
will not interfere with the normal driving
function of the driver.
y Before installing the unit, connect the wiring
temporarily and make sure it is all connected
up properly and the unit and the system work
properly.
y Before installing the unit, connect the wiring
temporarily and make sure it is all connected
up properly and the unit and the system work
properly.
y Use only the parts included with the unit to
ensure proper installation. The use of
unauthorized parts can cause malfunctions.
y Use only the parts included with the unit to
ensure proper installation. The use of
unauthorized parts can cause malfunctions.
y Consult with your nearest dealer if
installation requires the drilling of holes or
other modifications of the vehicle.
y Consult with your nearest dealer if
installation requires the drilling of holes or
other modifications of the vehicle.
y Install the unit where it does not get in the
driver’s way and cannot injure the passenger
if there is a sudden stop, like an emergency
stop.
y Install the unit where it does not get in the
driver’s way and cannot injure the passenger
if there is a sudden stop, like an emergency
stop.
y Avoid installing the unit where it would be
subject to high temperature, such as from
direct sunlight, hot air, from the heater, or
where it would be subject to dust, dirt or
excessive vibration.
y Avoid installing the unit where it would be
subject to high temperature, such as from
direct sunlight, hot air, from the heater, or
where it would be subject to dust, dirt or
excessive vibration.
DIN FRONT-MOUNT (Method A) DIN FRONT-MOUNT (Method A)
Installing the unit Installing the unit
(1) Metal Strap (1) Metal Strap
Be sure to use the strap to secure the back of
the unit of the place. The strap can be bent by
hand to the desired angle.
Be sure to use the strap to secure the back of
the unit of the place. The strap can be bent by
hand to the desired angle.
(2) Mounting Bolt (2) Mounting Bolt
(3) Hex Nut (3) Hex Nut
(4) Spring Washer (4) Spring Washer
(5) Tapping Screw (5) Tapping Screw
(6) Plain Washer (6) Plain Washer
(a) Dashboard (a) Dashboard
(b) Holder (b) Holder
After inserting the holder into the dashboard,
select the appropriate tab according to the
thickness of the dashboard material and bend
them inwards to secure the holder in place.
After inserting the holder into the dashboard,
select the appropriate tab according to the
thickness of the dashboard material and bend
them inwards to secure the holder in place.
Removing the unit Removing the unit
Insert both of the supplied keys into the slots at
the middle left and right sides of the unit, then pull
the unit out of the dashboard.
Insert both of the supplied keys into the slots at
the middle left and right sides of the unit, then pull
the unit out of the dashboard.
DIN REAR-MOUNT (Method B) DIN REAR-MOUNT (Method B)
If your vehicle is a Nissan, Toyota, follow these
mounting instructions.
If your vehicle is a Nissan, Toyota, follow these
mounting instructions.
Use the screw holes marked T (Toyota), N
(Nissan) located on both sides of the unit to
fasten the unit to the factory radio mounting
brackets supplied with your vehicle.
Use the screw holes marked T (Toyota), N
(Nissan) located on both sides of the unit to
fasten the unit to the factory radio mounting
brackets supplied with your vehicle.
Factory Radio
Mounting Bracket
Dashboard or Console
Side View showing
Screw Holes marked
T, N or S
Screw
Screw
To fasten the unit to the factory radio mounting
brackets.
To fasten the unit to the factory radio mounting
brackets.
b
a
Align the screw holes on the bracket with the
screw holes on the unit, and then tighten the
screws (5x5mm) on each side.
Align the screw holes on the bracket with the
screw holes on the unit, and then tighten the
screws (5x5mm) on each side.
Note: the outer trim ring, sleeve and the metal
strap are not used for method B installation.
Note: the outer trim ring, sleeve and the metal
strap are not used for method B installation.
Download de handleiding in het Nederlands en/of Engels (PDF, 0.45 MB)
(Denk aan het milieu en print deze handleiding alleen als dat echt noodzakelijk is)

Loading…

Meer over deze handleiding

We begrijpen dat het prettig is om een papieren handleiding te hebben voor je Pyle PLR31MP Autoradio. Je kunt de handleiding bij ons altijd downloaden en daarna zelf printen. Indien je graag een originele handleiding wilt hebben, raden we je aan contact op te nemen met Pyle. Zij kunnen wellicht nog voorzien in een originele handleiding. Zoek je de handleiding van Pyle PLR31MP Autoradio in een andere taal? Kies op de homepage je taal naar keuze en zoek daarna op het modelnummer om te zien of we deze beschikbaar hebben.

Specificaties

Merk Pyle
Model PLR31MP
Categorie Autoradio's
Bestandstype PDF
Bestandsgrootte 0.45 MB

Alle handleidingen voor Pyle Autoradio's
Meer handleidingen voor Autoradio's

Veelgestelde vragen over Pyle PLR31MP Autoradio

Ons supportteam zoekt dagelijks naar nuttige productinformatie en antwoorden op veelgestelde vragen. Als er onverhoopt toch een onjuistheid tussen onze veelgestelde vragen staat, laat het ons dan weten via het contactformulier.

Wat is DAB+? Geverifieerd

DAB+ is de opvolger van het FM signaal en staat voor Digital Audio Broadcasting. Het is een digitaal signaal dat meer zenders mogelijk maakt op dezelfde golflengte en het makkelijker maakt van zender te wisselen.

Ik vind dit nuttig (512) Lees meer

Er zit een CD vast in mijn autoradio, wat moet ik doen? Geverifieerd

Sommige autoradio's hebbeneen functie om geblokkeerde CD's uit te werpen. Zet de auto uit en houd de 'aan' en 'eject' knop van autoradio gedurende 10 seconden tegelijk ingedrukt. Mocht dit niet werken, start dan de auto en probeer het nog eens.

Ik vind dit nuttig (291) Lees meer

Wat is het verschil tussen FM en AM? Geverifieerd

FM en AM zijn beide vormen van modulatie waarmee een signaal kan worden verzonden. FM staat daarbij voor Frequency Modulation en AM staat voor Amplitude Modulation. AM is de oudste vorm van modulatie. Het grootste verschil is dat het FM signaal vele malen beter is dan het AM signaal.

Ik vind dit nuttig (284) Lees meer

Welk formaat autoradio past bij mijn auto? Geverifieerd

Er zijn twee standaard formaten autoradio, 1-DIN en 2-DIN. 1-DIN is de standaard smalle variant en 2-DIN is twee keer zo hoog. Bij 2-DIN autoradio's is vaak ruimte voor een scherm waaro navigatie kan worden weergegeven of films kunnen worden afgespeeld.

Ik vind dit nuttig (249) Lees meer

Beoordeling

Laat ons weten wat je van de Pyle PLR31MP Autoradio vindt door een beoordeling achter te laten. Wil je je ervaringen met dit product delen of een vraag stellen? Laat dan een bericht achter onderaan de pagina.
Bent u tevreden over de Pyle PLR31MP Autoradio?
Ja Nee
Beoordeel dit product als eerste
0 stemmen

Praat mee over dit product

Laat hier weten wat jij vindt van de Pyle PLR31MP Autoradio. Als je een vraag hebt, lees dan eerst zorgvuldig de handleiding door. Een handleiding aanvragen kan via ons contactformulier.

Handleiding Pyle PLR31MP Autoradio

Gerelateerde producten

Gerelateerde categorieën