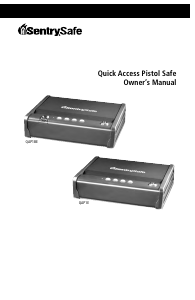
Handleiding SentrySafe MS0100 Kluis
Handleiding voor je SentrySafe MS0100 Kluis nodig? Hieronder kun je de handleiding gratis bekijken en downloaden als PDF in het Nederlands en/of Engels. Dit product heeft 3 veelgestelde vragen, 0 comments en heeft 2 stemmen met een gemiddelde score van 0/100. Is dit niet de handleiding die je zoekt, neem dan contact met ons op.
Is je product kapot en biedt de handleiding geen oplossing meer? Dan kun je voor reparatie gratis terecht bij Repair Café.
Handleiding
Loading…

Loading…
Meer over deze handleiding
We begrijpen dat het prettig is om een papieren handleiding te hebben voor je SentrySafe MS0100 Kluis. Je kunt de handleiding bij ons altijd downloaden en daarna zelf printen. Indien je graag een originele handleiding wilt hebben, raden we je aan contact op te nemen met SentrySafe. Zij kunnen wellicht nog voorzien in een originele handleiding. Zoek je de handleiding van SentrySafe MS0100 Kluis in een andere taal? Kies op de homepage je taal naar keuze en zoek daarna op het modelnummer om te zien of we deze beschikbaar hebben.
Specificaties
| Merk | SentrySafe |
| Model | MS0100 |
| Categorie | Kluizen |
| Bestandstype | |
| Bestandsgrootte | 0.42 MB |
Alle handleidingen voor SentrySafe Kluizen
Meer handleidingen voor Kluizen
Veelgestelde vragen over SentrySafe MS0100 Kluis
Ons supportteam zoekt dagelijks naar nuttige productinformatie en antwoorden op veelgestelde vragen. Als er onverhoopt toch een onjuistheid tussen onze veelgestelde vragen staat, laat het ons dan weten via het contactformulier.
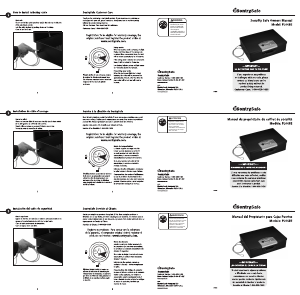
Het slot van mijn elektronische kluis opent niet, terwijl ik zeker weet dat mijn code juist is, wat kan ik doen? Geverifieerd
Dit kan komen doordat de batterijspanning te laag is. Dit komt voor bij goedkope batterijen of batterijen die bijna leeg zijn. Vervang de batterijen en probeer het opnieuw. Als dit het probleem niet oplost, neem dan contact op met de fabrikant.
Ik vind dit nuttig (1498) Lees meerIk ben de code van mijn kluis kwijt, wat kan ik doen? Geverifieerd
In het geval van een kluis met een elektronisch slot is er vaak een meegeleverde noodsleutel waarmee de kluis alsnog geopend kan worden. Als er geen noodsleutel of andere oplossing voorhanden is, dan zijn er gespecialiseerde bedrijven die kunnen helpen. In het geval een kleine kluis kunnen de kosten van een specialist echter hoger zijn dan die van een nieuwe kluis. In dat geval is de laatste optie om de kluis zelf open te breken.
Ik vind dit nuttig (723) Lees meerWanneer is het nuttig om mijn kluis te verankeren? Geverifieerd
Over het algemeen is het aan te raden een kluis van minder dan 1000 kilo te verankeren. Dit voorkomt dat een dief de kluis in zijn geheel meeneemt. Ook kan het zijn dat een verzekeraar eist dat een kluis verankerd is. Laat het verankeren altijd uitvoeren door een specialist.
Ik vind dit nuttig (204) Lees meerBeoordeling
Laat ons weten wat je van de SentrySafe MS0100 Kluis vindt door een beoordeling achter te laten. Wil je je ervaringen met dit product delen of een vraag stellen? Laat dan een bericht achter onderaan de pagina.

Praat mee over dit product
Laat hier weten wat jij vindt van de SentrySafe MS0100 Kluis. Als je een vraag hebt, lees dan eerst zorgvuldig de handleiding door. Een handleiding aanvragen kan via ons contactformulier.