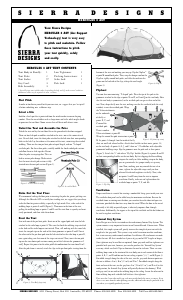
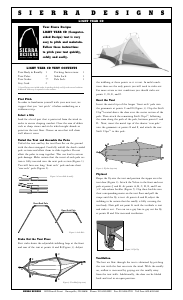
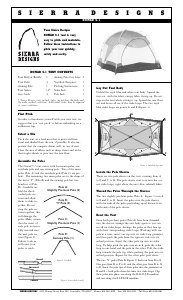
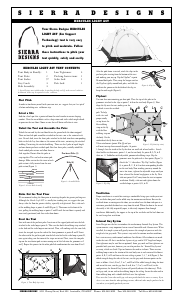
Handleiding Sierra Designs Nomad 4.2 Tent

Handleiding voor je Sierra Designs Nomad 4.2 Tent nodig? Hieronder kun je de handleiding gratis bekijken en downloaden als PDF in het Nederlands en/of Engels. Dit product heeft 7 veelgestelde vragen, 0 comments en heeft 0 stemmen. Is dit niet de handleiding die je zoekt, neem dan contact met ons op.

Is je product kapot en biedt de handleiding geen oplossing meer? Dan kun je voor reparatie gratis terecht bij Repair Café.

Handleiding

Loading…

S I E R R A D E S I G N S
SIERRA DESIGNS 2011 Cherry Street, Unit 202 Louisville, CO 80027 Phone: 303-262-3050 Fax: 303-262-3051 Toll Free: 800-635-0461
insert
incorrect
correct
A
B
C
D
E
F
I
J
K
L
M
N
O
G
H
A
B
C
D
E
F
NOMAD 4.2
Your Sierra Designs
NOMAD 4.2 tent is very
easy to pitch and maintain.
Follow these instructions to
pitch your tent quickly,
safely and easily.
First Pitch
In order to familiarize yourself with your new tent, we
suggest that you “test pitch” it before embarking on a
wilderness trip.
Select a Site
Look for a level spot that is protected from the wind in
order to ensure sleeping comfort. Clear the area of debris such as
sharp stones and sticks which might abrade or puncture the tent
floor. Choose an area that will drain well when it rains.
Unfurl the Tent and Assemble the Poles
Unfurl the tent and lay the tent floor flat on the ground with
the door unzipped. Carefully unfold the shock corded pole sec-
tions and allow them to slide together. Do not allow the poles
to snap together: This can lead to serious pole damage. Make
certain that the insert of each pole section is fully inserted into
the next pole section (Figure 1). You will have three poles of
equal length.
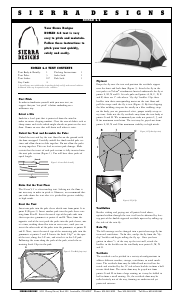
Figure 1: Correct Pole Assembly
Stake Out the Tent Floor
The Nomad 4.2 is a freestanding tent. Staking out the floor is
not necessary in order to pitch it. However, we recommend that
you stake down the tent after it is pitched for greater stability
in high winds.
Erect the Tent
Insert one pole into the pole sleeve which runs from point A to
point E (Figure 2). Insert another pole into the pole sleeve run-
ning from B to D. Insert the metal tips of the pole ends into
their respective grommets at points A and B. Then, from the
opposite end of the tent push the poles into the pole sleeves, one
at a time, making them flex into an even curve, until you can
insert the other ends of the poles into the grommets at points D
and E. Next, insert the metal tips of the remaining pole into the
grommets at points C and F. Locate the Swift Clip
at the apex
of the tent, along the C-F axis, and attach it to the C-F pole.
Following the seam along the path of the pole, attach the re-
maining Swift Clips to the pole.
Flysheet
Drape the fly over the tent and position the vestibule zippers
over the front and back door (Figure 3). Attach the fly to the
tent poles via Velcro
®
attachments located underneath the fly at
points L, M, N and O. At each pole end (points A, B, C, D, E
and F) there are 1" side-release “fly clip” buckles. Clip these
buckles into their corresponding mates on the tent floor and
pull the straps until the fly is taut (Figure 4). By first clipping
the blue webbing strap on the rainfly to a blue webbing strap
on the body, you are guaranteed a fast, proper rainfly setup ev-
ery time. Stake out the fly vestibule away from the tent body at
points G and H. We recommend you stake out points I, J, and
K for maximum ventilation. The tent may be guyed out from
points L, M, N and O for maximum stability in high winds.
Ventilation
Besides staking and guying out all points listed above,
optimal airflow through the tent itself can be obtained by leav-
ing part of the double-zippered vestibule open or by rolling up
the sides of the rain fly.
Rain Fly
The full-coverage can be changed into a partial-coverage fly for
increased ventilation. To do this, unclip the fly from the "fly-
clip" buckles and begin rolling the fly up. Once you have
gotten to about
1
/
3
of the way up the tent wall, attach the
buckles to the buckles on the tend body near points L, M, N
and O.
Vestibule
The vestibule can be pitched in a variety of configurations to
address different weather, storage, ventilation, or wind condi-
tions. The vestibule door may be folded back on itself on the
inside and attached by the ¾" side release buckles to form a half
or one third door. The entire door may be guyed out from
points G and H to form a large awning, or it may be folded in
half to form a small awning. Or, the vestibule door may be
rolled entirely out of the way, forming an unobstructed yet
protected entrance.
Figure 2: Tent Body (top view)
NOMAD 4.2 TENT CONTENTS
Tent Body & Rainfly: 1 Pitching Instructions: 1
Tent Poles: 3 Stake Sack: 1
Tent Stakes: 10* Pole Sack: 1
Guy Cords: 4
* Sierra Designs tents include stakes for pitching the body and fly under normal conditions.
Additional stakes may be required in severe conditIons.
Figure 3: Flysheet (top view)
Figure 4: Fly Clip
Download de handleiding in het Nederlands en/of Engels (PDF, 0.38 MB)
(Denk aan het milieu en print deze handleiding alleen als dat echt noodzakelijk is)

Loading…

Meer over deze handleiding

We begrijpen dat het prettig is om een papieren handleiding te hebben voor je Sierra Designs Nomad 4.2 Tent. Je kunt de handleiding bij ons altijd downloaden en daarna zelf printen. Indien je graag een originele handleiding wilt hebben, raden we je aan contact op te nemen met Sierra Designs. Zij kunnen wellicht nog voorzien in een originele handleiding. Zoek je de handleiding van Sierra Designs Nomad 4.2 Tent in een andere taal? Kies op de homepage je taal naar keuze en zoek daarna op het modelnummer om te zien of we deze beschikbaar hebben.

Specificaties

Merk Sierra Designs
Model Nomad 4.2
Categorie Tenten
Bestandstype PDF
Bestandsgrootte 0.38 MB

Alle handleidingen voor Sierra Designs Tenten
Meer handleidingen voor Tenten

Veelgestelde vragen over Sierra Designs Nomad 4.2 Tent

Ons supportteam zoekt dagelijks naar nuttige productinformatie en antwoorden op veelgestelde vragen. Als er onverhoopt toch een onjuistheid tussen onze veelgestelde vragen staat, laat het ons dan weten via het contactformulier.

Kan ik mijn tent ook nat opbergen? Geverifieerd

Alleen voor zeer korte periodes. Wanneer een tent een week of langer nat wordt opgeborgen, kan deze gaan schimmelen. Dit is zeer schadelijk voor de tent en eventueel uw gezondheid.

Ik vind dit nuttig (425) Lees meer

Hoe kan ik een tent impregneren? Geverifieerd

Zet de tent op, reinig het doek en laat het drogen. Breng het impregneermiddel aan op het doek met een plantenspuit of andere spray. Het is ook mogelijk een nieuwe verfroller of kwast te gebruiken. Het doek dient helemaal verzadigd te worden met het impregneermiddel. Behandel ook de binnenkant van het doek. Veeg de ramen en andere onderdelen dan het tentdoek goed schoon met een vochtige doek. Laat het impregneermiddel hier niet op drogen. Laat vervolgens het tentdoek goed drogen. Herhaal indien nodig de behandeling.

Ik vind dit nuttig (325) Lees meer

Kan ik een scheur of gat in mijn tentdoek zelf repareren? Geverifieerd

Voor synthetisch tentdoek zijn er speciale stukken zelfklevend reparatiedoek verkrijgbaar. Plak aan beide zijden van het doek een stuk zelfklevend tentdoek over het scheurtje of gaatje. Gebruik voor katoenen tentdoek of tentdoek van gemengd materiaal opstrijkbaar tentdoek. Hiervoor heb je een strijkijzer nodig.

Ik vind dit nuttig (240) Lees meer

De rits van mijn tent loopt stroef, wat kan ik doen? Geverifieerd

Gebruik bij stroeve ritsen een droge PTFE spray of siliconenspray. Spray niet op de stof en spuit de ritsen af en toe preventief in om problemen in de toekomst te voorkomen.

Ik vind dit nuttig (186) Lees meer

Er zitten waterdruppels aan de binnenkant van de tent, betekent dit dat de tent lekt? Geverifieerd

Nee, dit is waarschijnlijk conden. Zorg dat de tent goed geventileerd is om consens tot een minimum te beperken.

Ik vind dit nuttig (158) Lees meer

Welke soort tentharingen heb ik nodig? Geverifieerd

Op gras- en bosgrond gebruik je halfronde of kunststof tentharingen. Op steengronden gebruik je rotspennen. Op kleigrond gebruik je halfronde, kunststof of universele tentharingen. Op kiezelgrond gebruik je halfronde of universele tentharingen. Op fijne zandgronden zoals duinen gebruik je houten tentharingen.

Ik vind dit nuttig (128) Lees meer

Het impregneermiddel laat witte vlekken of een witte waas achter op het doek, wat kan ik hier aan doen? Geverifieerd

Indien er een witte waas achterblijft of u witte vlekken ziet op uw tentdoek na het impregneren heeft u op die plekken meer impregneermiddel aangebracht dan elders. Dit is niet erg en de vlekken en waas verdwijnen vaak vanzelf. Het is niet verstandig minder impregneermiddel te gebruiken om vlekken of een waas te voorkomen. Het doek moet goed nat zijn van het impregneermiddel om een goede impregnatie te garanderen.

Ik vind dit nuttig (117) Lees meer

Beoordeling

Laat ons weten wat je van de Sierra Designs Nomad 4.2 Tent vindt door een beoordeling achter te laten. Wil je je ervaringen met dit product delen of een vraag stellen? Laat dan een bericht achter onderaan de pagina.
Bent u tevreden over de Sierra Designs Nomad 4.2 Tent?
Ja Nee
Beoordeel dit product als eerste
0 stemmen

Praat mee over dit product

Laat hier weten wat jij vindt van de Sierra Designs Nomad 4.2 Tent. Als je een vraag hebt, lees dan eerst zorgvuldig de handleiding door. Een handleiding aanvragen kan via ons contactformulier.

Handleiding Sierra Designs Nomad 4.2 Tent

Gerelateerde producten

Gerelateerde categorieën