Handleiding Skandika Gamma Tent

Handleiding voor je Skandika Gamma Tent nodig? Hieronder kun je de handleiding gratis bekijken en downloaden als PDF in het Nederlands en/of Engels. Dit product heeft 8 veelgestelde vragen, 0 comments en heeft 0 stemmen. Is dit niet de handleiding die je zoekt, neem dan contact met ons op.

Is je product kapot en biedt de handleiding geen oplossing meer? Dan kun je voor reparatie gratis terecht bij Repair Café.

Handleiding

Loading…

Thank you for choosing your new tent from the Skandika range. It provides you with a lot of room and high level of comfort in the well-known superior quality of Skandika.
Before you go on holiday with the new tent, please built it once.
Assembly instructions
Please follow these instructions point by point in the given order.
Poles and components: Remove all contents from tent bag
Extent all tent poles carefully. Each fibreglass pole is colour coded to match the part of the tent that it belongs to.
Unfold inner tent and rain fly and lay on ground
Rain Fly
Insert each fibreglass pole through each pole sleeves along the outside of the rain fly
To assemble the main door entrance, assemble the 3 shortest fibreglass poles and insert through the poles sleeves around the door
Insert the top end of the vertical door pole into the black plastic elbow and the closest end of the horizontal door pole into the other end of the black plastic elbow – repeat for the door poles on
the other side of the door
At the bottom ends of each fibreglass pole, insert the corresponding pins (located at the bottom edges of the rain fly) into the ends of each fibreglass pole
Stake down the rain fly through the appropriate PP webbing loops to secure it
Stake down the guy ropes which are attached to the tabs on the outside of the rain fly – this will keep it more stable in strong winds
There is a removable tub style water proof floor for the rain fly – simply lay it out on the inside of the tent and stake it down at the corners
The rain fly is now assembled
Inner tent
Take each inner tent to the appropriate area on the inside of the rain fly
Hook the inner tents, 1 by 1, into the inside of the rain fly by staking down the bottom rear corners and working your way forward to the top using the plastic rings and toggles – do this for the
desired number of inner tents – by leaving inner tents out, you can increase the storage or living capacity of the tent as well as shed weight
Attention
Skandika tents are very easy to pitch. If one step of the assembly seems difficult, don‘t use force, but locate the error.
Care
When packing the tent make sure that it is completely dry, otherwise there is a danger of mildew and rotting.
Always pack poles and tent pegs separately from inner and outer tent.
Prior to folding, clean the basement of the inner tent.
Use a soft sponge and clear water only to clean the outer tent canvas. Don‘t use any cleaning agent, for they may be harmful to the impregnation.
Never pull tent pegs out by means of rings or tensioning ropes.
Thank you for choosing your new tent from the Skandika range. It provides you with a lot of room and high level of comfort in the well-known superior quality of Skandika.
Nous nous réjouissons que vous ayez choisi une tente SKANDIKA. Ces tentes offrent beaucoup d’espace et de confort et ceci en qualité superieure marqué Skandika.
Pour ne pas courir de risque nous vous conseillons de faire un essai de montage de la tente avant de partir en vacances.
Montage
Veuillez procéder point par point, car l’ordre des differentes étapes est important.
Tiges et accessoires : éliminez le contenu complet du sac de tente
bouchez prudemment toutes les barres de tente. Chaque barre de tente est de couleur marquée conformément aux canaux de tige correspondants à la tente extérieure.
ètalez le tapis de sol de tente et le tapis de l’extérieur sur un sol lisse autant que possible propre.
Tentes extérieures
conduisez chaque barre de tente par les canaux de tige de la tente extérieure
Pour construire l'entrée , conduisez les 3 plus courtes barres de tente dans les canaux de tige se trouvant prés de la porte
conduisez la fin supérieure de la barre de porte verticale dans le coude de plastique noir et la fin de l’autre barre de porte horizontale dans l'autre fin du coude de plastique noir. - répéter cela la
pour les barres de la porte se trouvant dans l’autre sens de la porte
Introduisez Sur le côté inférieur des barres de tente, goupilles les correspondants (se trouvant en bordure de la tente extérieure).
Afin d’être rassuré placez la tente extérieure par les circuits fermés convenables
assurez la tente avec les lignes d'élimination qui sont attachées aux circuits fermés de la tente extérieure - cela donne une stabilité plus élevée si le vent souffle fort
Il y a un tapis de sol imperméable à l'eau assorti pour la tente extérieure - étalez le simplement à l'intérieur de la tente et l’ attacher sur les côtés
La tente extérieure est maintenant établie ou constuite
Tentes intérieures
apportez chaque partie de la tente à l’intérieur à la place convenable dans la tente extérieure
accrochez la tente à l'intérieur en dessous de la tente extérieure commençant du dos inférieur et travaillez de L’avant vers l’arriére sous l'utilisation des Clips se trouvant sur la paroi externe de
la tente à l'intérieur ce qui est l'équivalent avant au dessous de la tente extérieure – faites cela pour le nombre nécessaire de tentes à l'intérieur - si vous omettez ou annuler la tente à l'intérieur,
ceci vous permettra d’ augmenter la surface de logement ou de magasin et ainsi le poids sera moins élévé.
Attention
Les tentes Skandika sont très faciles à monter. En cas de difficulté ne forcez pas mais cherchez la raison possible et la solution à la difficulté avant de continuer.
Entretien
Lors du démontage et pliage, prendre le temps de sécher chaque élément afin d’éviter toute moisissure et décomposition.
Toujours ranger les pointes et sardines séparément des toiles intérieures et extérieures.
Nettoyer le fond de la tente intérieure avant de la plier.
Nettoyer d’éventuelles salissures sur la tente à l’aide d’un linge doux et de l’eau claire. Ne pas utiliser de détergent car ceci pourrait détériorer l’enduction protectrice.
Ne pas tirer sur les cordes d’ancrage pour extraire les sardines et pointes du sol.
Download de handleiding in het Nederlands en/of Engels (PDF, 0.16 MB)
(Denk aan het milieu en print deze handleiding alleen als dat echt noodzakelijk is)

Loading…

Beoordeling

Laat ons weten wat je van de Skandika Gamma Tent vindt door een beoordeling achter te laten. Wil je je ervaringen met dit product delen of een vraag stellen? Laat dan een bericht achter onderaan de pagina.
Bent u tevreden over de Skandika Gamma Tent?
Ja Nee
Beoordeel dit product als eerste
0 stemmen

Praat mee over dit product

Laat hier weten wat jij vindt van de Skandika Gamma Tent. Als je een vraag hebt, lees dan eerst zorgvuldig de handleiding door. Een handleiding aanvragen kan via ons contactformulier.

Meer over deze handleiding

We begrijpen dat het prettig is om een papieren handleiding te hebben voor je Skandika Gamma Tent. Je kunt de handleiding bij ons altijd downloaden en daarna zelf printen. Indien je graag een originele handleiding wilt hebben, raden we je aan contact op te nemen met Skandika. Zij kunnen wellicht nog voorzien in een originele handleiding. Zoek je de handleiding van Skandika Gamma Tent in een andere taal? Kies op de homepage je taal naar keuze en zoek daarna op het modelnummer om te zien of we deze beschikbaar hebben.

Specificaties

Merk Skandika
Model Gamma
Categorie Tenten
Bestandstype PDF
Bestandsgrootte 0.16 MB

Alle handleidingen voor Skandika Tenten
Meer handleidingen voor Tenten

Veelgestelde vragen over Skandika Gamma Tent

Ons supportteam zoekt dagelijks naar nuttige productinformatie en antwoorden op veelgestelde vragen. Als er onverhoopt toch een onjuistheid tussen onze veelgestelde vragen staat, laat het ons dan weten via het contactformulier.

Kan ik mijn tent ook nat opbergen? Geverifieerd

Alleen voor zeer korte periodes. Wanneer een tent een week of langer nat wordt opgeborgen, kan deze gaan schimmelen. Dit is zeer schadelijk voor de tent en eventueel uw gezondheid.

Ik vind dit nuttig (384) Lees meer

Hoe kan ik een tent impregneren? Geverifieerd

Zet de tent op, reinig het doek en laat het drogen. Breng het impregneermiddel aan op het doek met een plantenspuit of andere spray. Het is ook mogelijk een nieuwe verfroller of kwast te gebruiken. Het doek dient helemaal verzadigd te worden met het impregneermiddel. Behandel ook de binnenkant van het doek. Veeg de ramen en andere onderdelen dan het tentdoek goed schoon met een vochtige doek. Laat het impregneermiddel hier niet op drogen. Laat vervolgens het tentdoek goed drogen. Herhaal indien nodig de behandeling.

Ik vind dit nuttig (285) Lees meer

Kan ik een scheur of gat in mijn tentdoek zelf repareren? Geverifieerd

Voor synthetisch tentdoek zijn er speciale stukken zelfklevend reparatiedoek verkrijgbaar. Plak aan beide zijden van het doek een stuk zelfklevend tentdoek over het scheurtje of gaatje. Gebruik voor katoenen tentdoek of tentdoek van gemengd materiaal opstrijkbaar tentdoek. Hiervoor heb je een strijkijzer nodig.

Ik vind dit nuttig (218) Lees meer

De rits van mijn tent loopt stroef, wat kan ik doen? Geverifieerd

Gebruik bij stroeve ritsen een droge PTFE spray of siliconenspray. Spray niet op de stof en spuit de ritsen af en toe preventief in om problemen in de toekomst te voorkomen.

Ik vind dit nuttig (156) Lees meer

Er zitten waterdruppels aan de binnenkant van de tent, betekent dit dat de tent lekt? Geverifieerd

Nee, dit is waarschijnlijk conden. Zorg dat de tent goed geventileerd is om consens tot een minimum te beperken.

Ik vind dit nuttig (129) Lees meer

Welke soort tentharingen heb ik nodig? Geverifieerd

Op gras- en bosgrond gebruik je halfronde of kunststof tentharingen. Op steengronden gebruik je rotspennen. Op kleigrond gebruik je halfronde, kunststof of universele tentharingen. Op kiezelgrond gebruik je halfronde of universele tentharingen. Op fijne zandgronden zoals duinen gebruik je houten tentharingen.

Ik vind dit nuttig (105) Lees meer

Het impregneermiddel laat witte vlekken of een witte waas achter op het doek, wat kan ik hier aan doen? Geverifieerd

Indien er een witte waas achterblijft of u witte vlekken ziet op uw tentdoek na het impregneren heeft u op die plekken meer impregneermiddel aangebracht dan elders. Dit is niet erg en de vlekken en waas verdwijnen vaak vanzelf. Het is niet verstandig minder impregneermiddel te gebruiken om vlekken of een waas te voorkomen. Het doek moet goed nat zijn van het impregneermiddel om een goede impregnatie te garanderen.

Ik vind dit nuttig (97) Lees meer

Moet ik mijn nieuwe Skandika tent impregneren? Geverifieerd

Nee, dit is niet nodig. Alle nieuwe Skandika tenten zijn al voorzien van een beschermende laag.

Ik vind dit nuttig (10) Lees meer
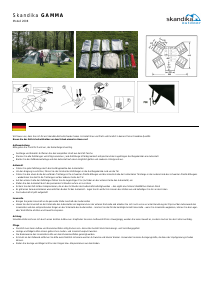
Handleiding Skandika Gamma Tent

Gerelateerde producten

Gerelateerde categorieën