Handleiding Skandika Simo 5 Tent

Handleiding voor je Skandika Simo 5 Tent nodig? Hieronder kun je de handleiding gratis bekijken en downloaden als PDF in het Nederlands en/of Engels. Dit product heeft 8 veelgestelde vragen, 0 comments en heeft 0 stemmen. Is dit niet de handleiding die je zoekt, neem dan contact met ons op.

Is je product kapot en biedt de handleiding geen oplossing meer? Dan kun je voor reparatie gratis terecht bij Repair Café.

Handleiding

Loading…

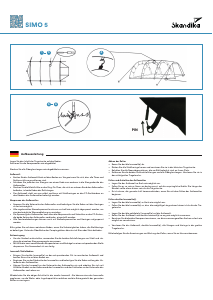
SIMO 5
Lay down the contents from the carry bag on the ground. Sort the components as shown.
Assemble all the berglass poles as shown.
Flysheet/Outer Tent
Spread the ysheet at on the ground. Make sure all the doors are closed and zipped up.
Insert each of the four poles into the sleeves on the ysheet from one end to the other.
Insert the metal pin-ring components located at the bottom edge of the ysheet into both
ends of each tent pole.
The ysheet is now standing by itself, which can be secured by anchoring down with steel
pegs at the PP webbings, located at the edges of the ysheet.
Stretching the ysheet
Stretch and peg down the bottom of the ysheet edges with the steel pegs as tight as possi-
ble.
All the attached neon guy ropes must be pegged down as tightly as possible to achieve the
best possible water shedding.
Tension of the ysheet can be adjusted by the guy ropes and buckles on the PP webbings
joining both sides of the y.
All the window covers can also be stretched open with neon guy ropes and pegs.
Please move to softer ground whenever you nd it dicult to peg down the steel pegs. There
might be gravel or rock beneath the surface of the campsite.
Side entrance
Use the two steel door poles to pitch the entrance as a canopy.
With the help of two neon guy ropes and steel anchors, peg down at appropriate spots. The
sun canopy is now completed.
Inner tent(s)/sleeping cabin(s)
Take the inner tent(s) inside the assembled ysheet to its appropriate location and spread it
out on the ground.
Starting from the rear of the inner tent, stake down the corners along the bottom edge of the
ysheet.
Hook the inner tent to the underside of the ysheet starting from the bottom rear and work
your way forward to the top using the toggles on the outer wall of the inner tent and loops
running along the underside of the ysheet.
Repeat the steps above for the second inner tent - you can leave one of the inner tents out to in-
crease the living or storage capacity and to reduce the travel weight of the whole tent.
Dismantling the tent
Dismantle the inner tent.
Pull out all the steel pegs and store them in the smallest carry bag.
Keep all the neon guy ropes that are attached on the tent in place.
Remove the steel upright poles and all berglass poles. Store them in the mid-size carry bay
bag.
Folding and rolling the ysheet
Lay down the ysheet as at as possible.
Fold it in any way that you are comfortable with to the original size. The length of the bundle
should be slightly shorter than the carry bag.
It is advisable to press all the air out as you start folding of the ysheet.
Folding the inner tent(s)
Lay down the inner tent(s) as at as possible.
Fold the inner tent(s) so the nal length is slightly shorter than the carry bag.
Lay the folded inner tent(s) on top of the ysheet.
Roll the ysheet and the inner tent(s) as tight as possible.
Use the two compression straps to tie the rolled things as tight as possible.
Stu the ysheet, inner tent(s), all poles, and stakes/pegs into the large carry bag.
Please follow the maintenance procedure of the tent when you arrive home.
Tent set up instructions Instructions de montage
Placez le contenu du sac de transport sur le sol. Classez les éléments comme indiqué.
Assemblez tous les arceaux en bre de verre comme illustré.
Tente extérieure
Étendez la tente extérieure à plat sur le sol. Assurez-vous que toutes les portes et fermetures
éclair sont fermées.
Insérez chacun des quatre arceaux d‘une extrémité à l‘autre dans les fourreaux d‘armature de
la tente extérieure.
Introduisez les goupilles dans les œillets Ring-Pin qui se trouvent au bas de la tente extérieu-
re, dans les deux extrémités des arceaux de la tente.
La tente extérieure tient maintenant debout toute seule et peut être xée avec des piquets/
sardines en acier aux sangles en PP sur les bords de la tente extérieure.
Tendre la tente extérieure
Tendez la partie inférieure de la tente et xez-la le plus fermement possible à l‘aide des pi-
quets/sardines en acier.
Tous les haubans en néon installés doivent être tendus aussi fermement que possible an
d‘obtenir la meilleure évacuation possible de l‘eau.
La tension de la tente extérieure peut être réglée à l‘aide des haubans et des boucles sur les
sangles en PP qui relient les deux côtés de la tente extérieure.
Tous les caches-fenêtres peuvent également être tendus avec des haubans en néon et des
piquets/sardines
Essayez de vous installer sur un sol plus friable si vous rencontrez des dicultés à xer les pi-
quets en acier. Il pourrait y avoir du gravier ou de la roche sous la surface du camping.
Entrée latérale
Pour monter l‘auvent, utilisez les deux barres en acier et assemblez les diérents segments
de la barre.
Tendre à un endroit approprié à l‘aide des deux cordes d’haubanage de couleur uo et des
piquets de terre. Lauvent est maintenant érigé.
Tente intérieure/cabine de couchage
Placez la/les tente(s) intérieure(s) à l‘endroit correspondant dans la tente extérieure montée
et étalez-la sur le sol.
Commencez par l‘arrière de la tente intérieure et xez les coins le long du bord inférieur de la
tente extérieure.
Accrochez la tente intérieure au bas de la tente extérieure et montez vers le haut à l‘aide des
attaches due sur les boucles de la paroi extérieure.
Répétez les étapes ci-dessus pour la deuxième tente intérieure - vous pouvez omettre l‘une des
tentes intérieures pour augmenter la capacité de vie ou de stockage et réduire le poids de trans-
port de l‘ensemble de la tente.
Démontage de la tente
Démontez la/les tente(s) intérieure(s).
Enlevez la bâche de sol.
Retirez tous les piquets/sardines en acier et rangez-les dans le plus petit sac de transport.
Gardez toutes les cordes d’haubanage en néon xées à la tente à leur place.
Retirez les deux barres d’acier et tous les arceaux en bre de verre. Rangez-les dans le sac de
transport de taille moyenne.
Pliage et enroulement de la tente extérieure
Étalez la tente extérieure aussi à plat que possible.
Pliez-la de la manière qui vous convient le mieux, à sa taille initiale. La longueur du paquet
doit être légèrement plus courte que celle du sac de transport.
Il est conseillé d‘expulser tout l‘air lorsque vous commencez à plier la tente extérieure.
Pliage de la tente intérieure
Posez la tente intérieure aussi à plat que possible.
Pliez la tente intérieure de manière que la longueur nale soit légèrement plus courte que
celle du sac de transport.
Posez la tente intérieure pliée ou les tentes intérieures pliées sur la tente extérieure.
Enroulez aussi bien la tente extérieure que la/les tente(s) intérieure(s) le plus étroitement pos-
sible.
Utilisez les deux sangles de compression pour attacher le plus fermement possible les aaires
enroulées.
Rangez la tente extérieure, la ou les tentes intérieures, tous les arceaux et les sardines dans le
grand sac de transport.
Veuillez suivre les instructions d‘entretien de la tente lorsque vous rentrerez chez vous.
Download de handleiding in het Nederlands en/of Engels (PDF, 0.9 MB)
(Denk aan het milieu en print deze handleiding alleen als dat echt noodzakelijk is)

Loading…

Beoordeling

Laat ons weten wat je van de Skandika Simo 5 Tent vindt door een beoordeling achter te laten. Wil je je ervaringen met dit product delen of een vraag stellen? Laat dan een bericht achter onderaan de pagina.
Bent u tevreden over de Skandika Simo 5 Tent?
Ja Nee
Beoordeel dit product als eerste
0 stemmen

Praat mee over dit product

Laat hier weten wat jij vindt van de Skandika Simo 5 Tent. Als je een vraag hebt, lees dan eerst zorgvuldig de handleiding door. Een handleiding aanvragen kan via ons contactformulier.

Meer over deze handleiding

We begrijpen dat het prettig is om een papieren handleiding te hebben voor je Skandika Simo 5 Tent. Je kunt de handleiding bij ons altijd downloaden en daarna zelf printen. Indien je graag een originele handleiding wilt hebben, raden we je aan contact op te nemen met Skandika. Zij kunnen wellicht nog voorzien in een originele handleiding. Zoek je de handleiding van Skandika Simo 5 Tent in een andere taal? Kies op de homepage je taal naar keuze en zoek daarna op het modelnummer om te zien of we deze beschikbaar hebben.

Specificaties

Merk Skandika
Model Simo 5
Categorie Tenten
Bestandstype PDF
Bestandsgrootte 0.9 MB

Alle handleidingen voor Skandika Tenten
Meer handleidingen voor Tenten

Veelgestelde vragen over Skandika Simo 5 Tent

Ons supportteam zoekt dagelijks naar nuttige productinformatie en antwoorden op veelgestelde vragen. Als er onverhoopt toch een onjuistheid tussen onze veelgestelde vragen staat, laat het ons dan weten via het contactformulier.

Kan ik mijn tent ook nat opbergen? Geverifieerd

Alleen voor zeer korte periodes. Wanneer een tent een week of langer nat wordt opgeborgen, kan deze gaan schimmelen. Dit is zeer schadelijk voor de tent en eventueel uw gezondheid.

Ik vind dit nuttig (384) Lees meer

Hoe kan ik een tent impregneren? Geverifieerd

Zet de tent op, reinig het doek en laat het drogen. Breng het impregneermiddel aan op het doek met een plantenspuit of andere spray. Het is ook mogelijk een nieuwe verfroller of kwast te gebruiken. Het doek dient helemaal verzadigd te worden met het impregneermiddel. Behandel ook de binnenkant van het doek. Veeg de ramen en andere onderdelen dan het tentdoek goed schoon met een vochtige doek. Laat het impregneermiddel hier niet op drogen. Laat vervolgens het tentdoek goed drogen. Herhaal indien nodig de behandeling.

Ik vind dit nuttig (285) Lees meer

Kan ik een scheur of gat in mijn tentdoek zelf repareren? Geverifieerd

Voor synthetisch tentdoek zijn er speciale stukken zelfklevend reparatiedoek verkrijgbaar. Plak aan beide zijden van het doek een stuk zelfklevend tentdoek over het scheurtje of gaatje. Gebruik voor katoenen tentdoek of tentdoek van gemengd materiaal opstrijkbaar tentdoek. Hiervoor heb je een strijkijzer nodig.

Ik vind dit nuttig (218) Lees meer

De rits van mijn tent loopt stroef, wat kan ik doen? Geverifieerd

Gebruik bij stroeve ritsen een droge PTFE spray of siliconenspray. Spray niet op de stof en spuit de ritsen af en toe preventief in om problemen in de toekomst te voorkomen.

Ik vind dit nuttig (156) Lees meer

Er zitten waterdruppels aan de binnenkant van de tent, betekent dit dat de tent lekt? Geverifieerd

Nee, dit is waarschijnlijk conden. Zorg dat de tent goed geventileerd is om consens tot een minimum te beperken.

Ik vind dit nuttig (129) Lees meer

Welke soort tentharingen heb ik nodig? Geverifieerd

Op gras- en bosgrond gebruik je halfronde of kunststof tentharingen. Op steengronden gebruik je rotspennen. Op kleigrond gebruik je halfronde, kunststof of universele tentharingen. Op kiezelgrond gebruik je halfronde of universele tentharingen. Op fijne zandgronden zoals duinen gebruik je houten tentharingen.

Ik vind dit nuttig (105) Lees meer

Het impregneermiddel laat witte vlekken of een witte waas achter op het doek, wat kan ik hier aan doen? Geverifieerd

Indien er een witte waas achterblijft of u witte vlekken ziet op uw tentdoek na het impregneren heeft u op die plekken meer impregneermiddel aangebracht dan elders. Dit is niet erg en de vlekken en waas verdwijnen vaak vanzelf. Het is niet verstandig minder impregneermiddel te gebruiken om vlekken of een waas te voorkomen. Het doek moet goed nat zijn van het impregneermiddel om een goede impregnatie te garanderen.

Ik vind dit nuttig (97) Lees meer

Moet ik mijn nieuwe Skandika tent impregneren? Geverifieerd

Nee, dit is niet nodig. Alle nieuwe Skandika tenten zijn al voorzien van een beschermende laag.

Ik vind dit nuttig (10) Lees meer
Handleiding Skandika Simo 5 Tent

Gerelateerde producten

Gerelateerde categorieën